Lashing a Basket with Waxed Linen
I lash a lot of baskets with waxed linen; I weave tight, I weave small, I weave with stakes close together – waxed linen works for me. And I like the way it looks. Lashing a basket with waxed linen is much like lashing with a length of reed, but there are some key differences.
What you need:
Waxed linen – I typically use 4-ply for regular sized baskets.
Tapestry Needle – use a size that is easy to thread and not to large or to small for the basket you are lashing.
Starting the lasher:
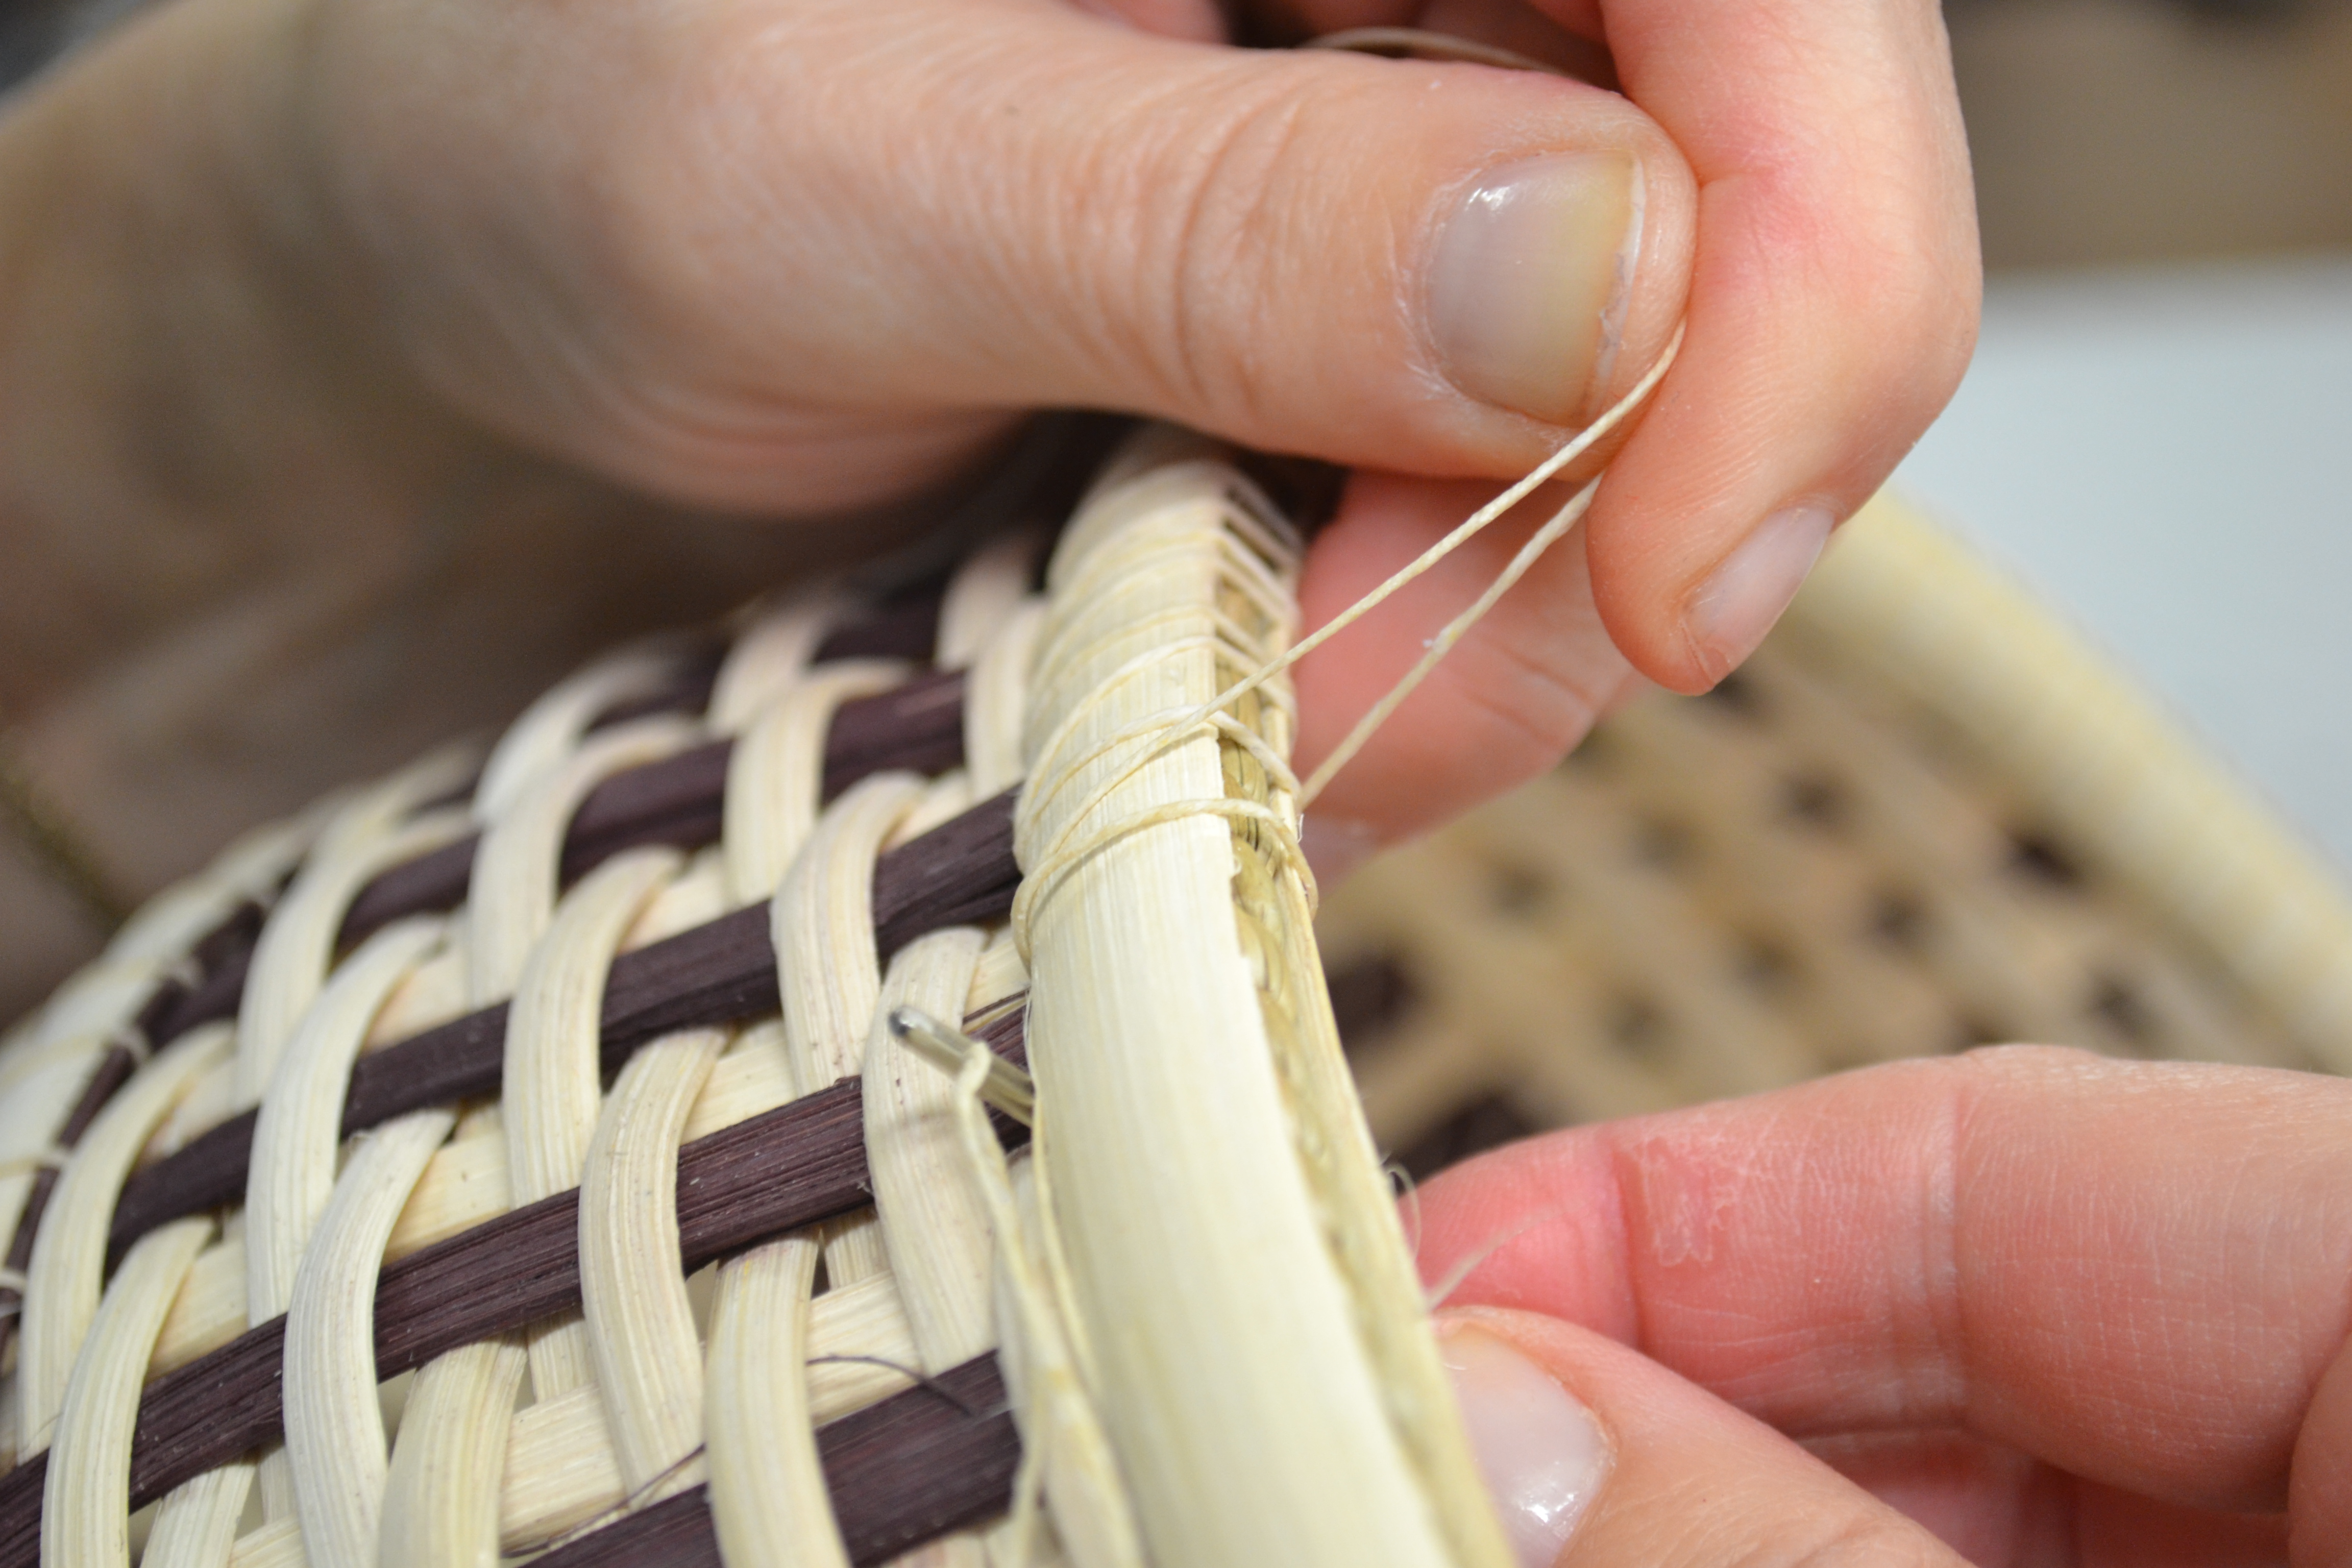
Cut a three – four foot length of waxed linen, thread your needle and, going from outside to inside, insert it into a space just to the left of your rim overlap (to the right if you are left handed and will be lashing from left to right). Pull the needle and waxed linen through until you have a tail of about four (4) inches on the outside of your basket.
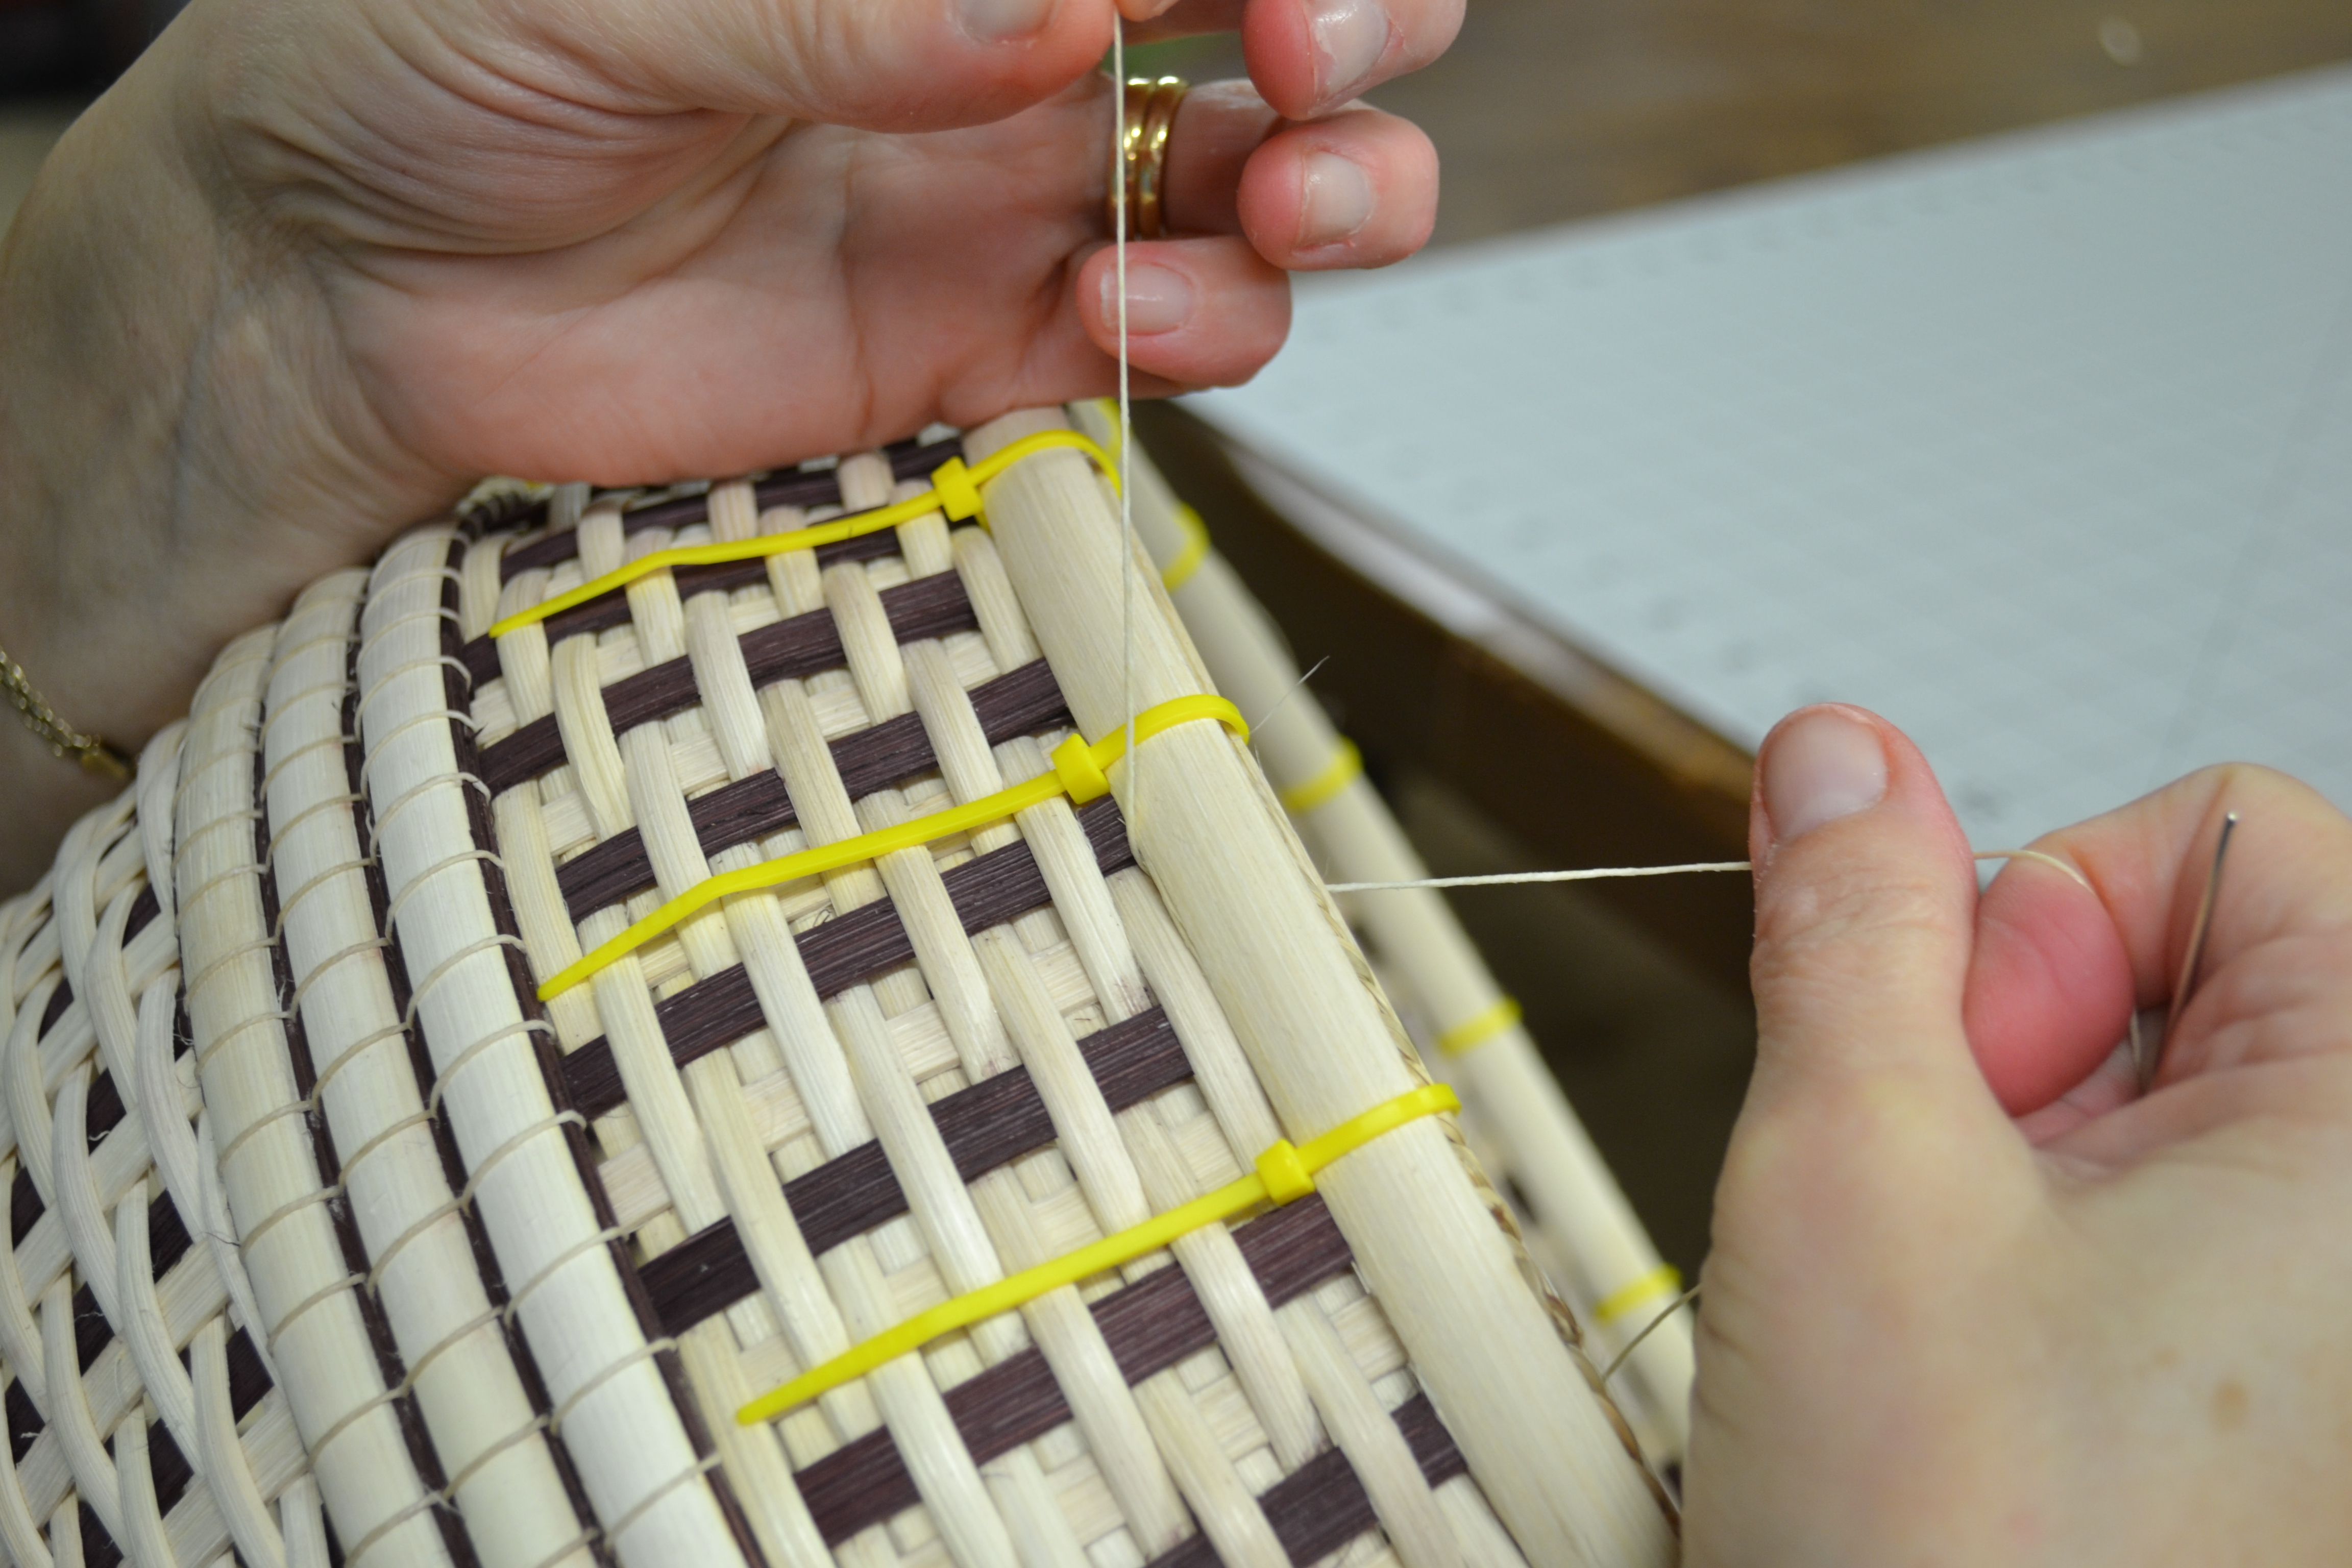
Take the tail and secure it somehow. I like to wrap it around a cable tie, clip, or clothespin – basically what ever I am using to hold the rim in place while I lash a basket.
Once the waxed linen is secured, start lashing. The needle acts as a lashing tool, opening up the space and giving you something to pull. I am using a V-lash on this basket; its is a double lash technique. The V-lash is created by stitching into each space twice before moving on to the next space. I like the lines this basket lashing technique adds to a basket, however, I especially like how tightly I can attach a rim with this technique.
I have added a short video clip of me lashing this basket, click HERE to view. You will notice in the lashing video, I maintain a constant tension on the lasher by keeping a firm grip on the waxed linen at all times.
Adding on to the lasher:
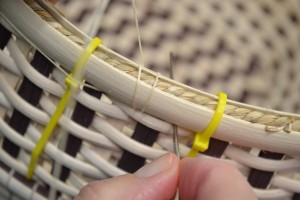
When you have about four (4) inches of waxed linen lasher left (it will be on the inside of the basket),
remove the needle and thread it with a new length of waxed linen. Insert the needle (from the outside to the inside) into the space where you would have gone next, pull the needle and waxed linen through until you have a tail of about four (4) inches on the outside of your basket. Either secure both tails to a clip or hang on to them (tightly),
continue to lash with your new piece until you have several stitches.
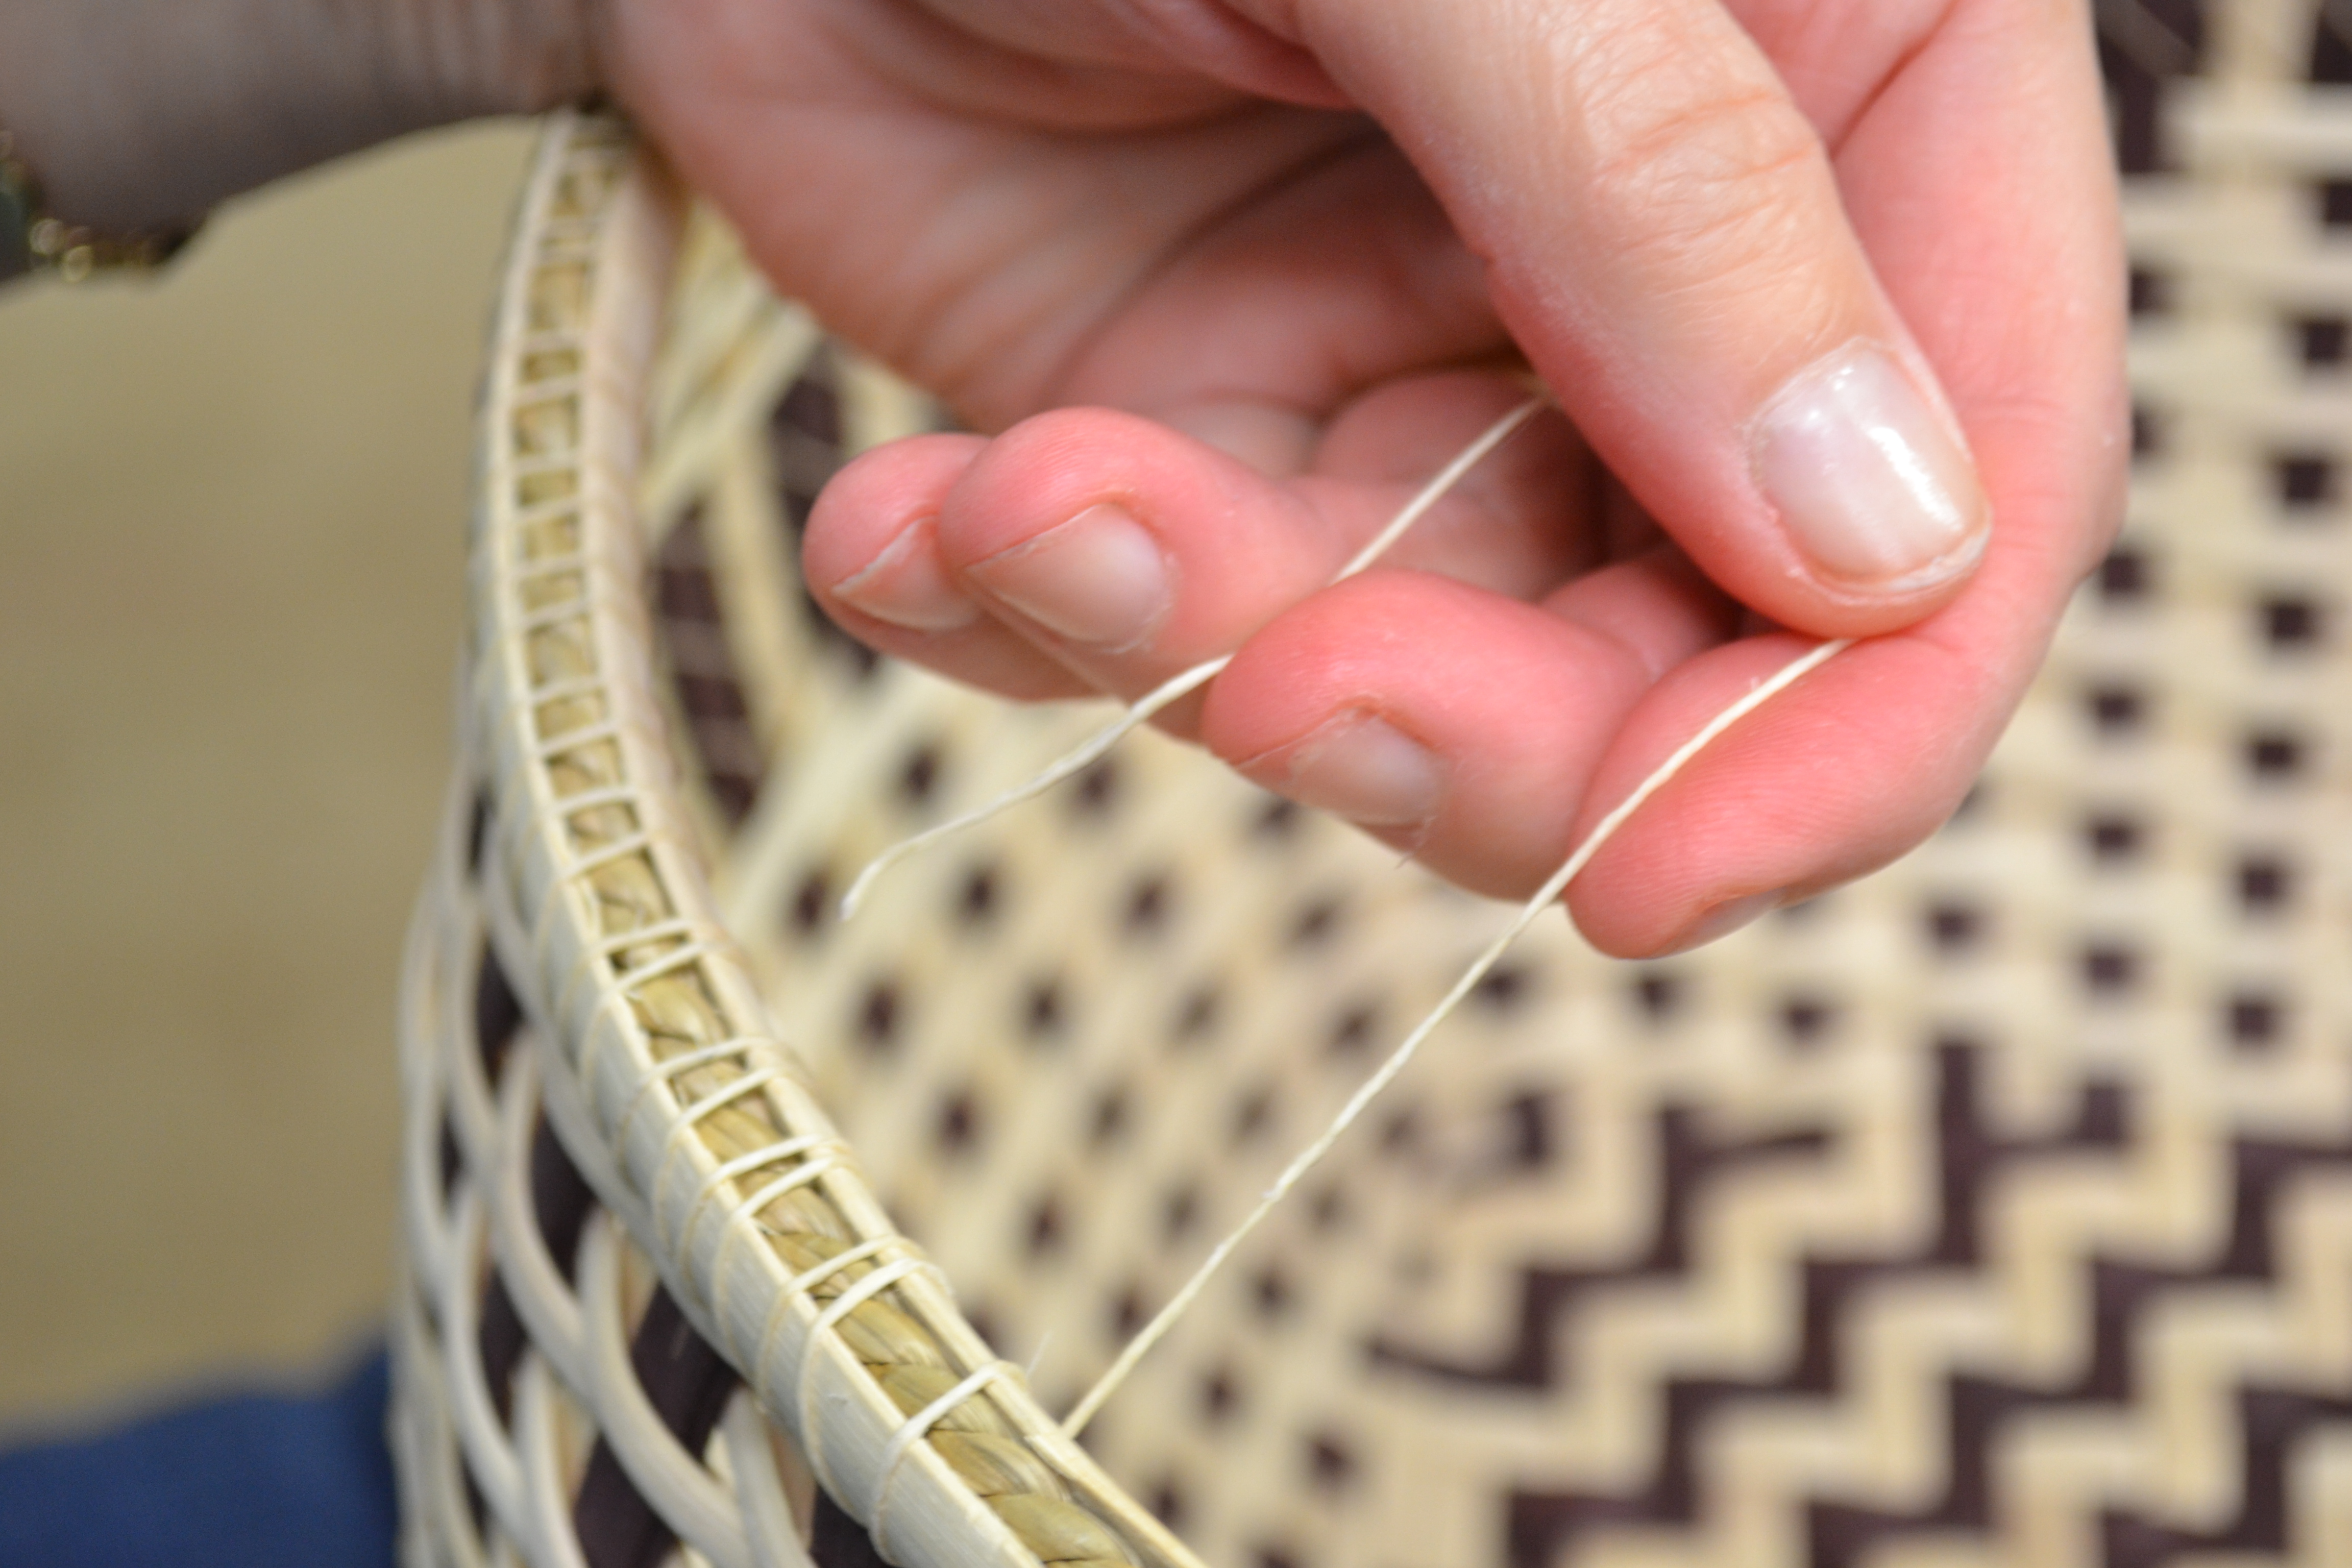
Now, go back to the two ends, bring the outside tail over the top and to the inside
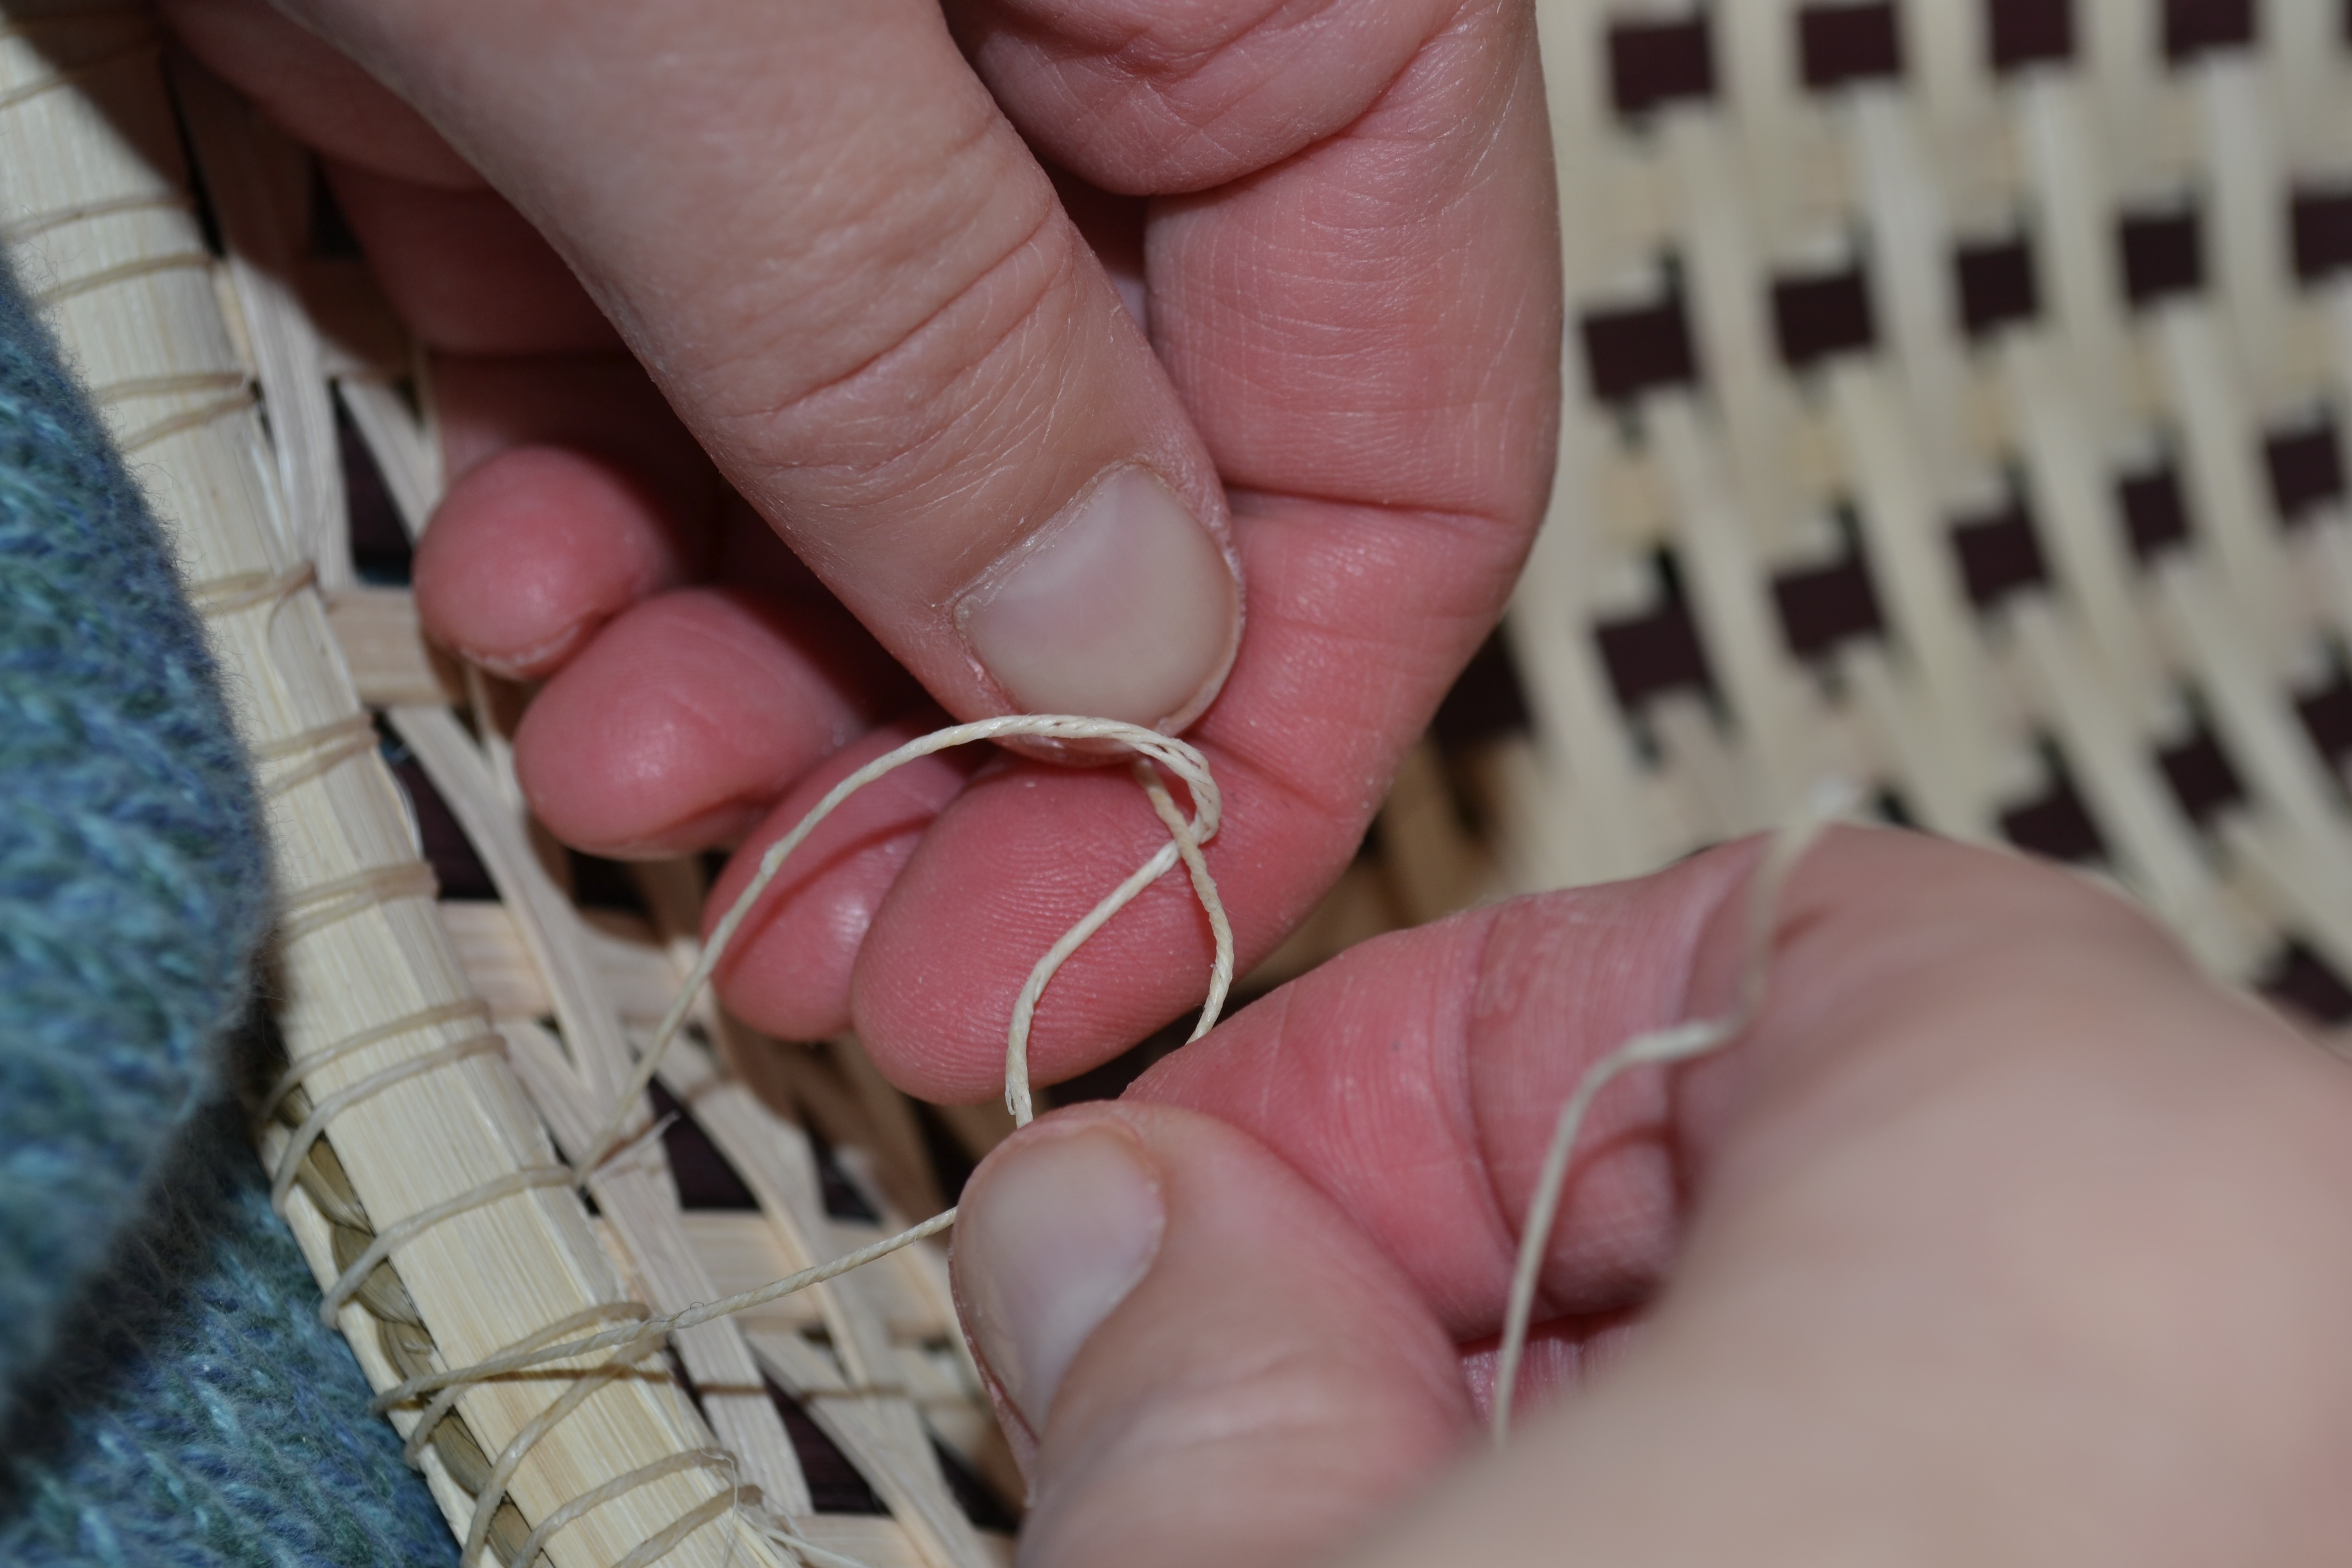
Using both tails, tie a double knot down at the bottom edge of the rim.
When the knot is firmly in place, leave it – do not cut the tails (we will come back to it).
Continue lashing around your basket, adding on and tying off when needed. When lashing is complete and you are back to the beginning tail, take the two tails and tie them the same way you tied off whenever you added a lasher.
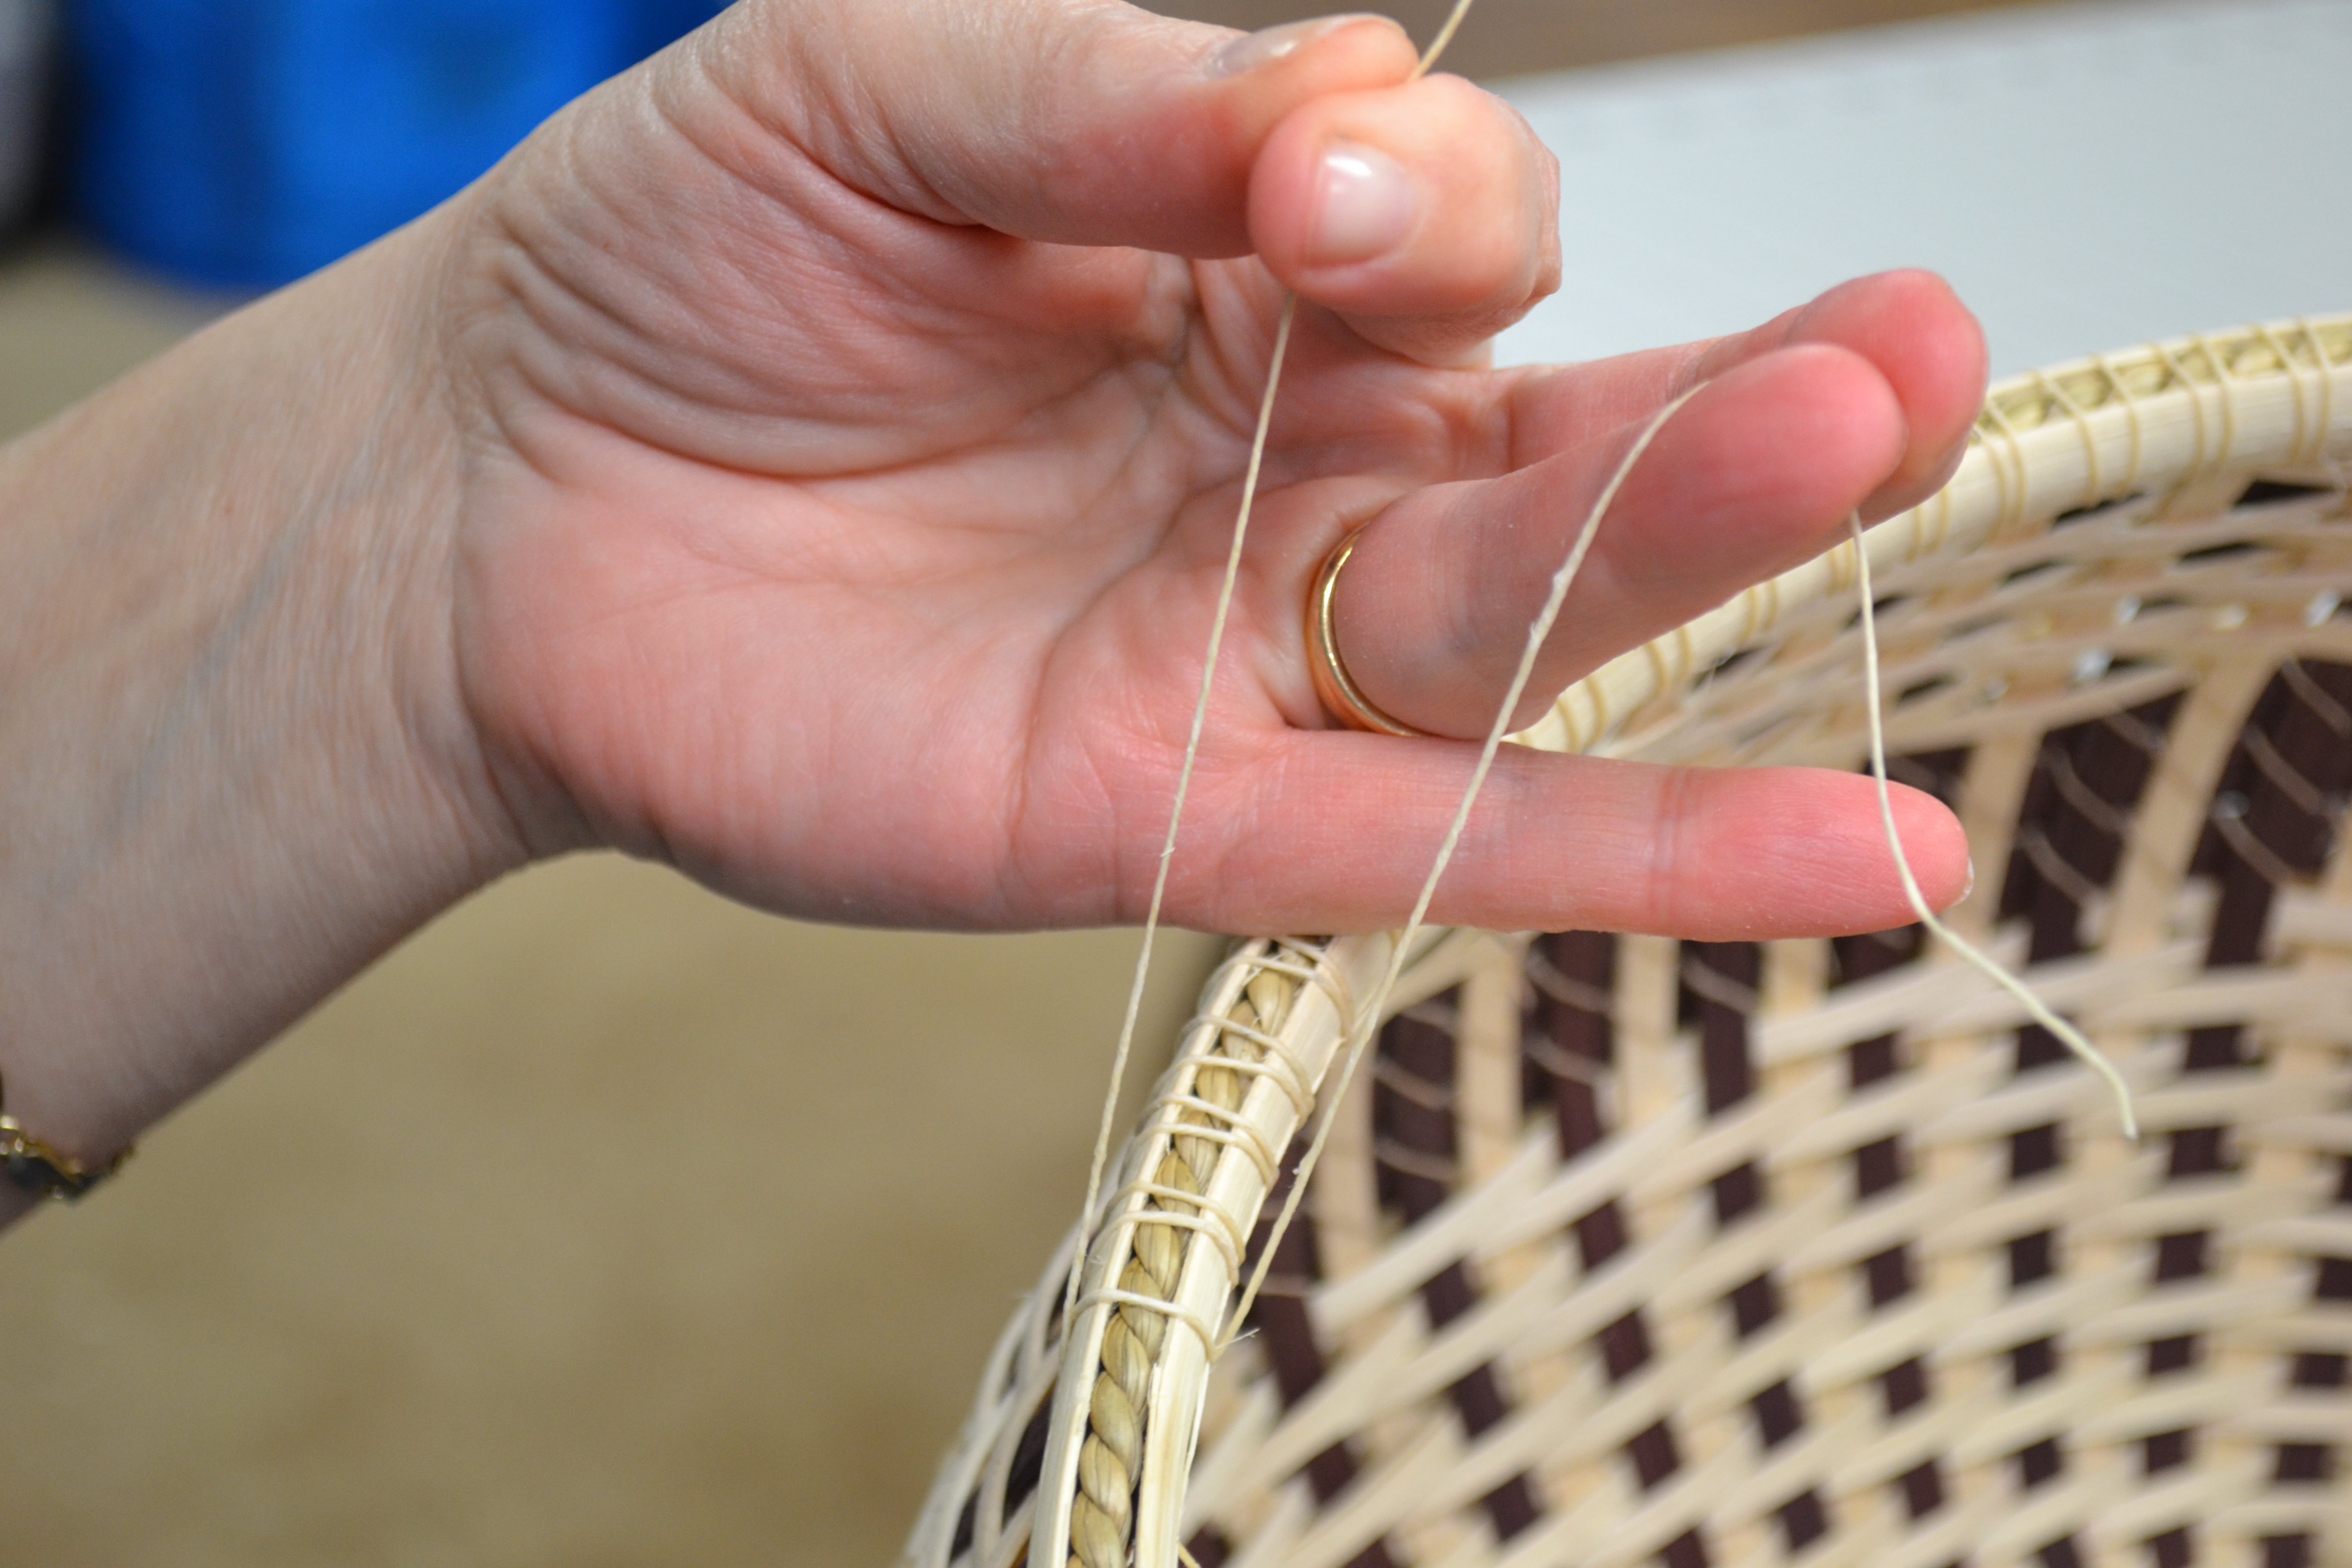
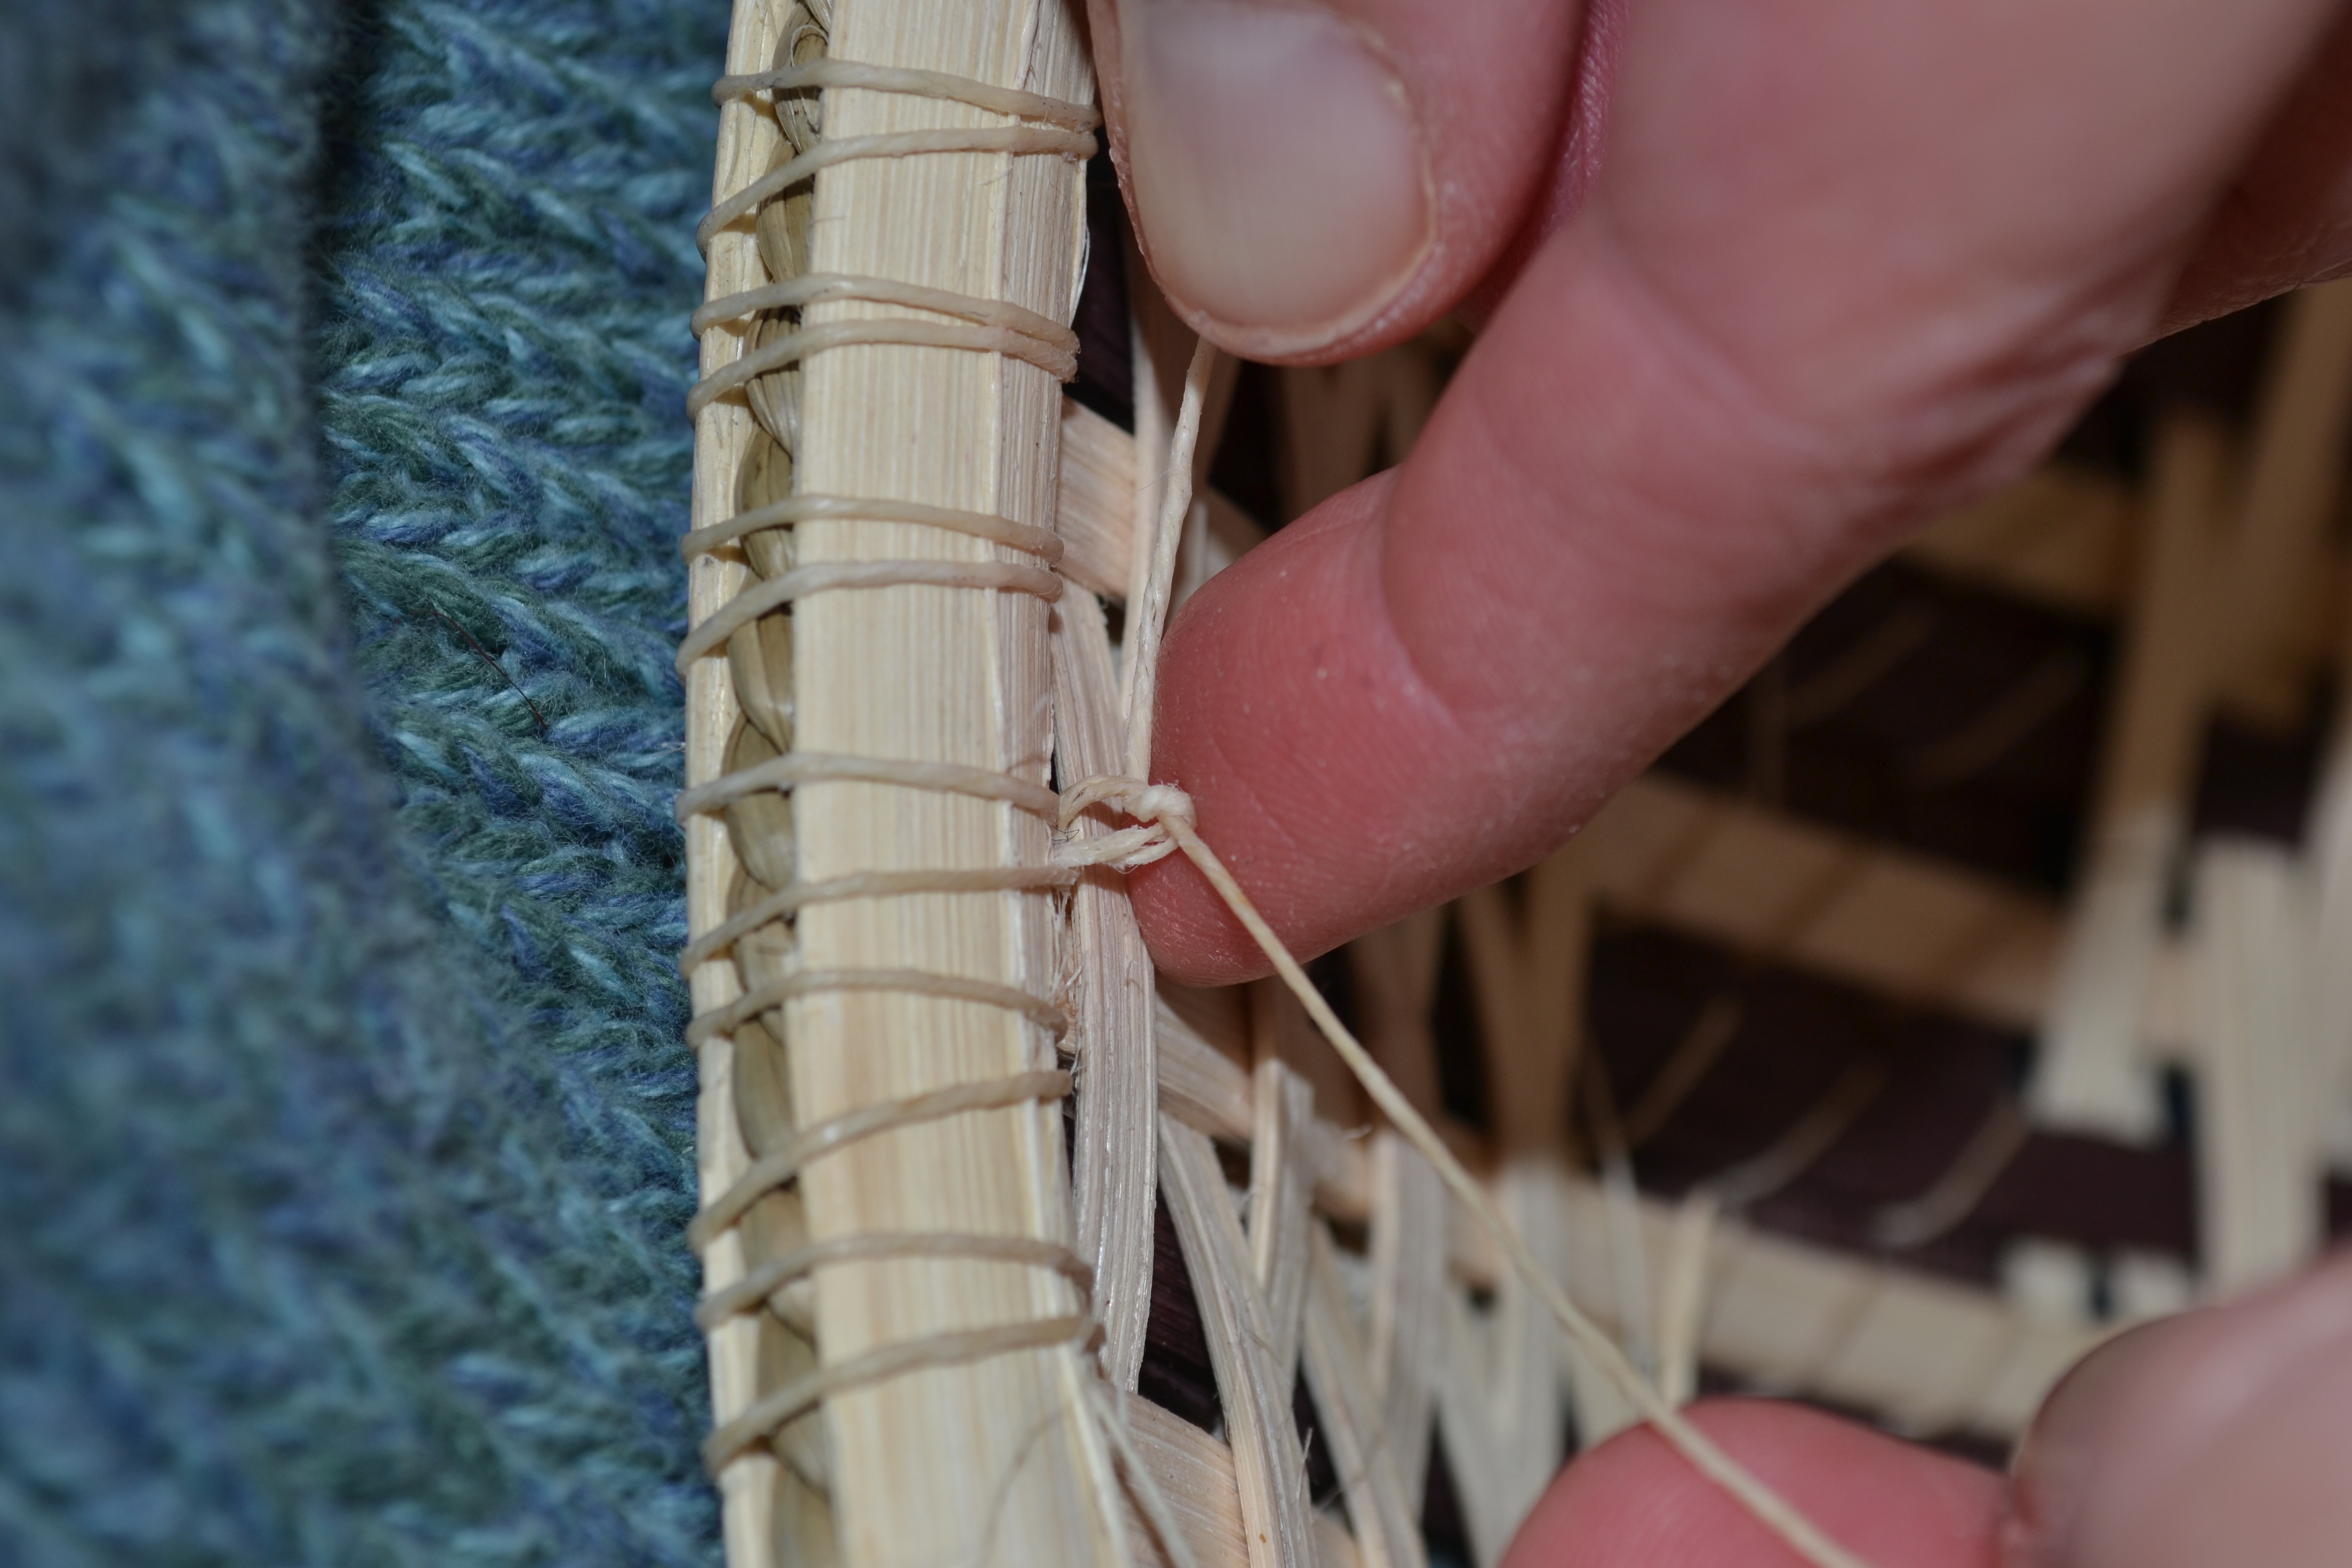
Hiding the knots and trimming the tails:
Do this for each set of tails.
Thread both ends onto your needle.
Push the needle up into the rim (between the two rim pieces).
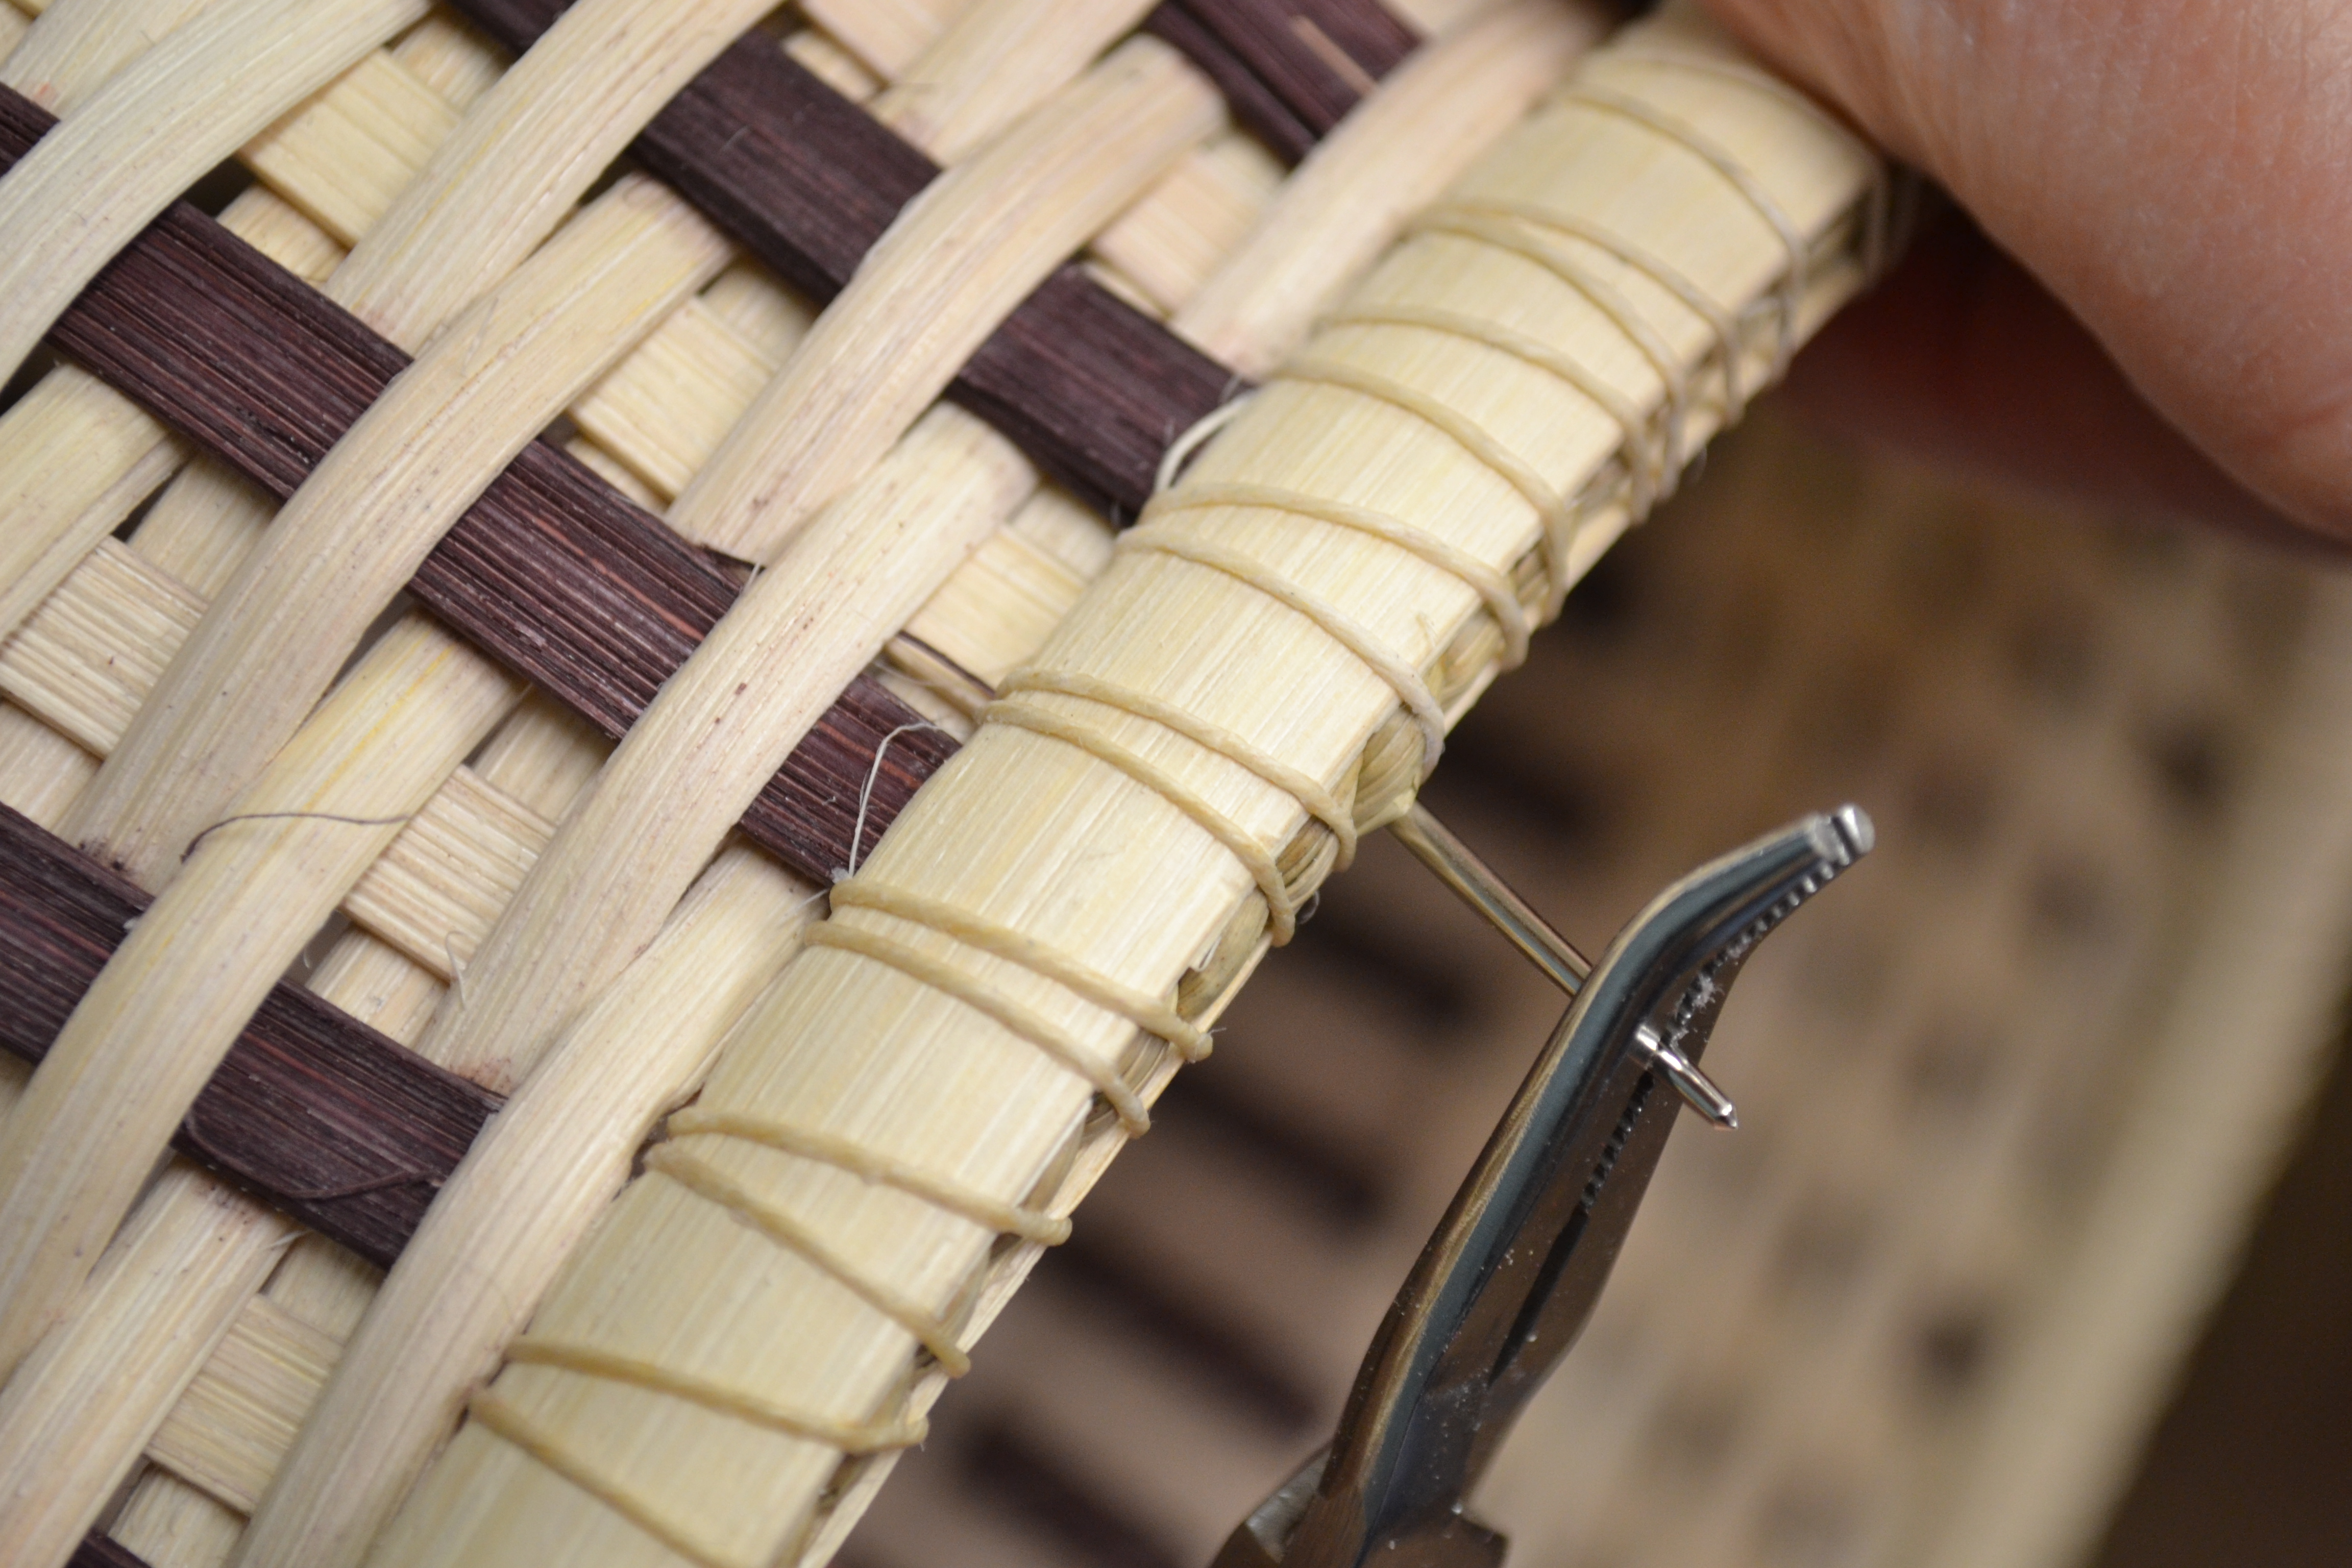
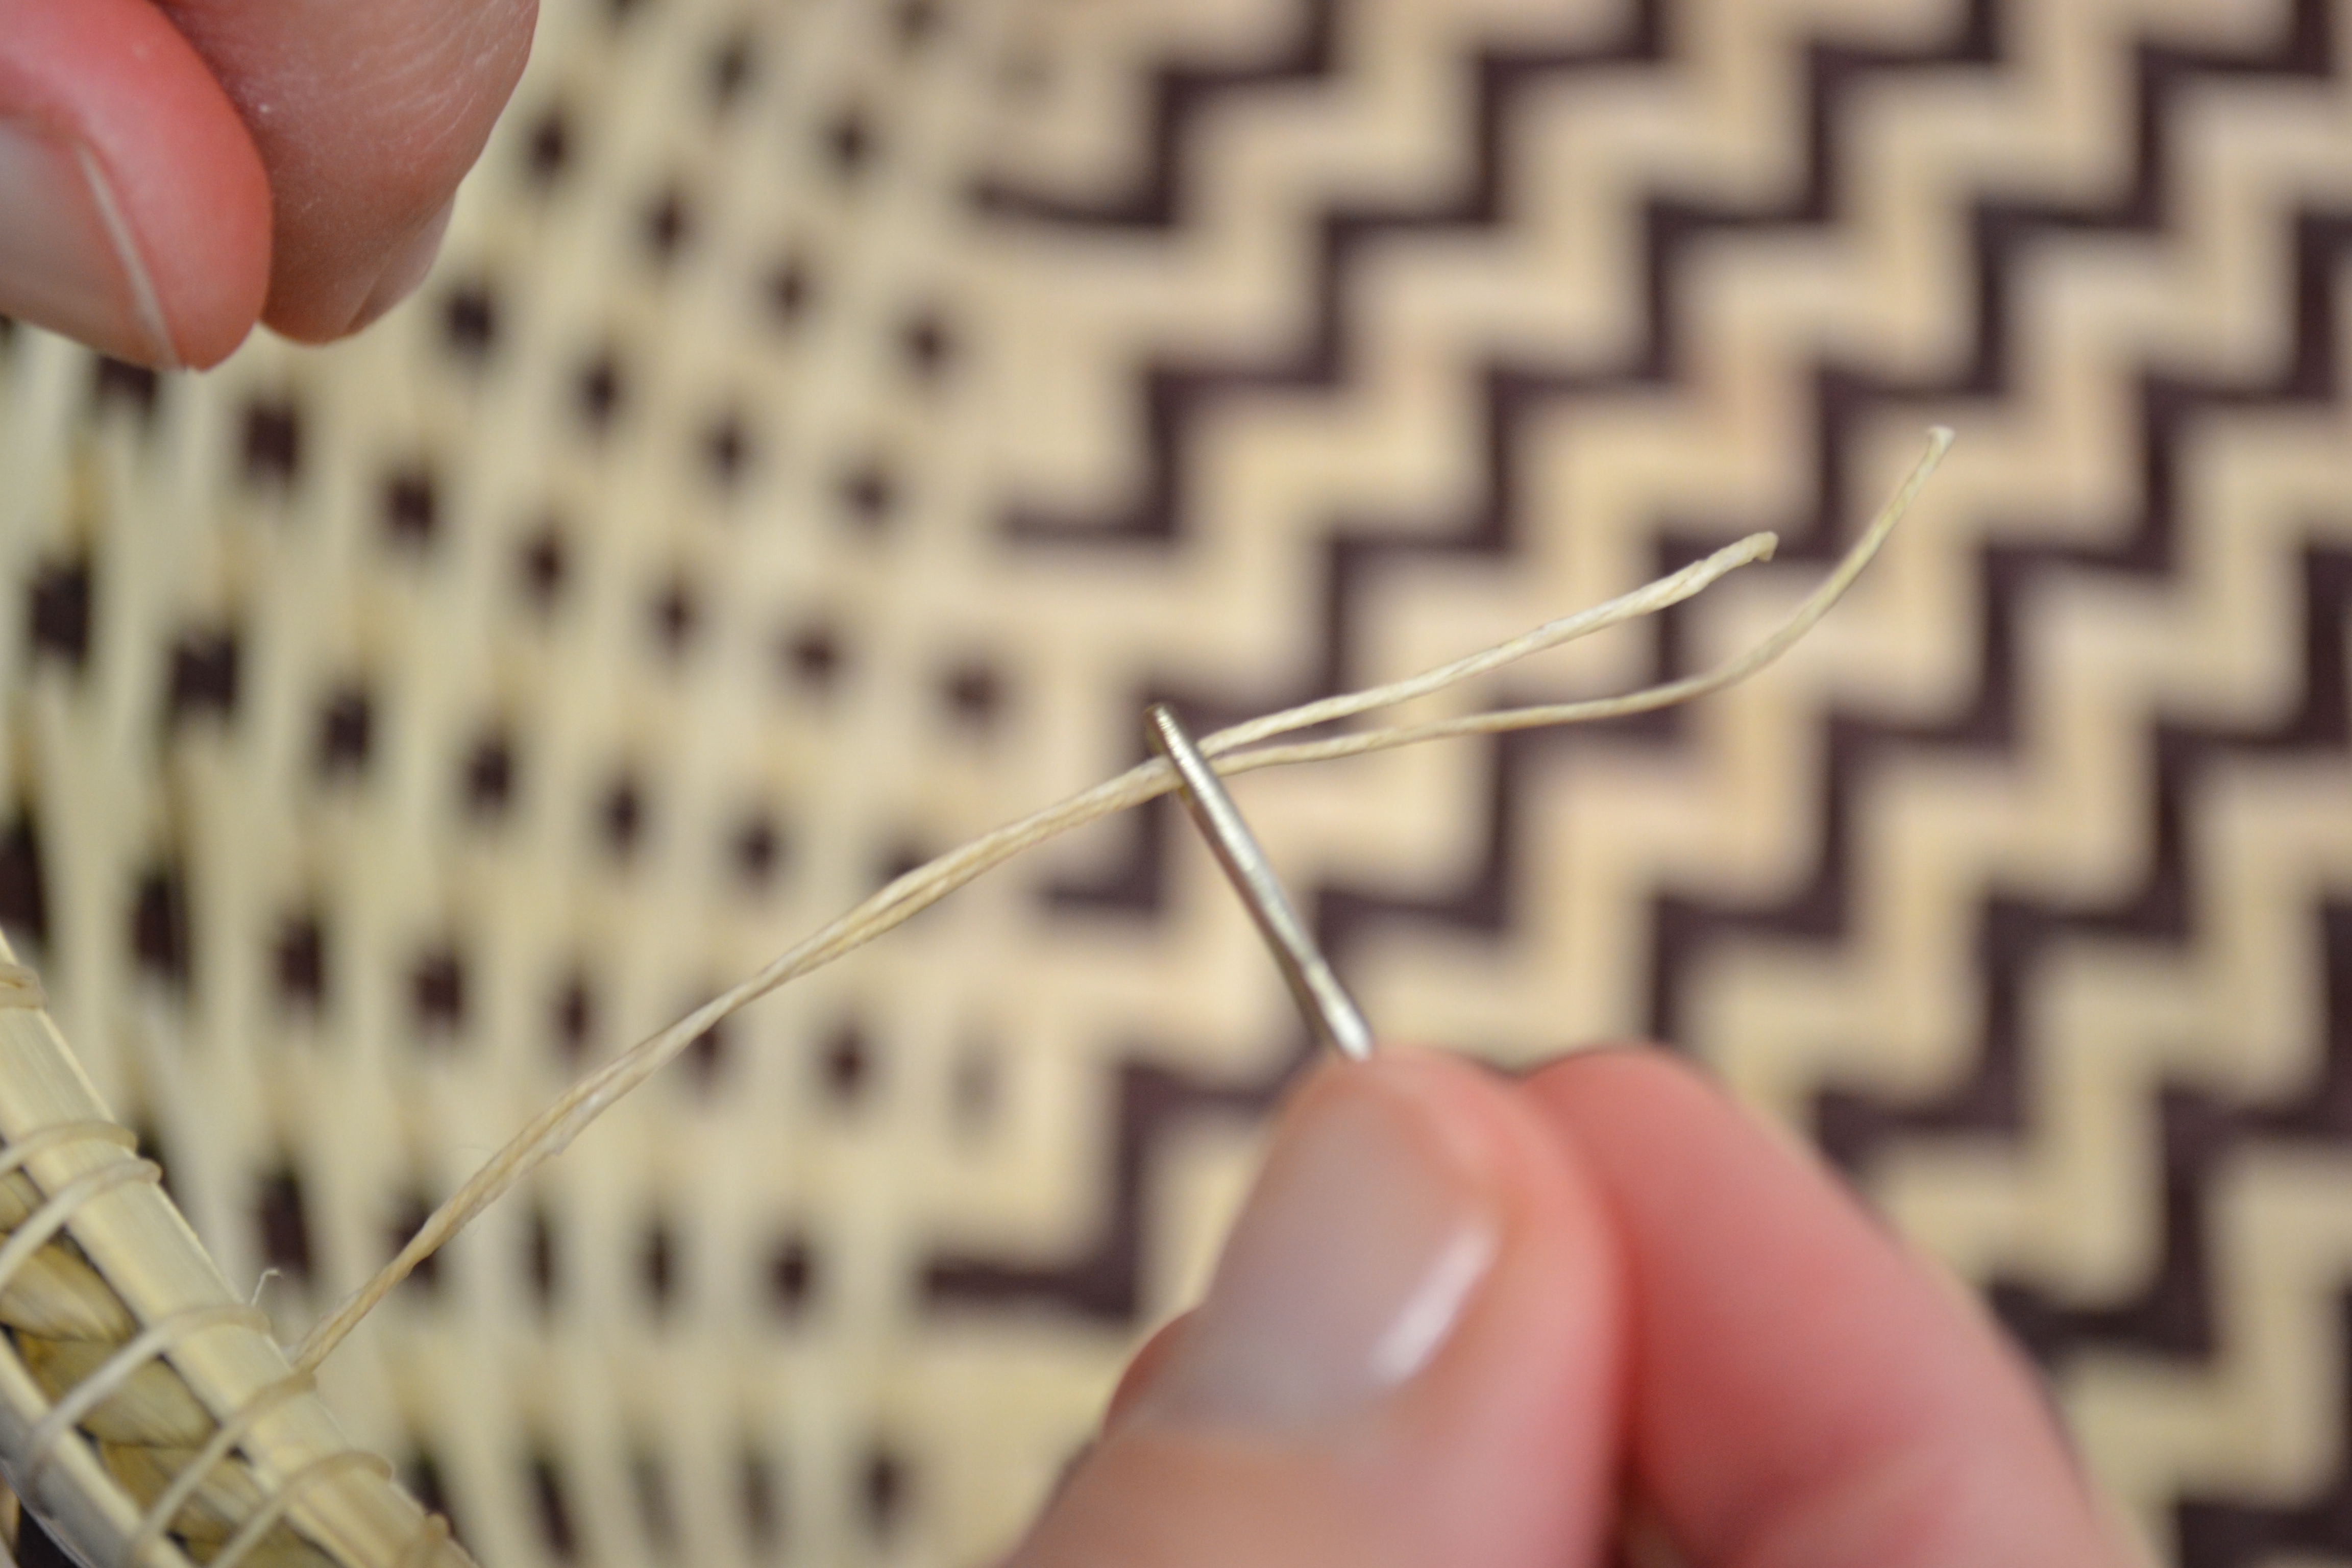
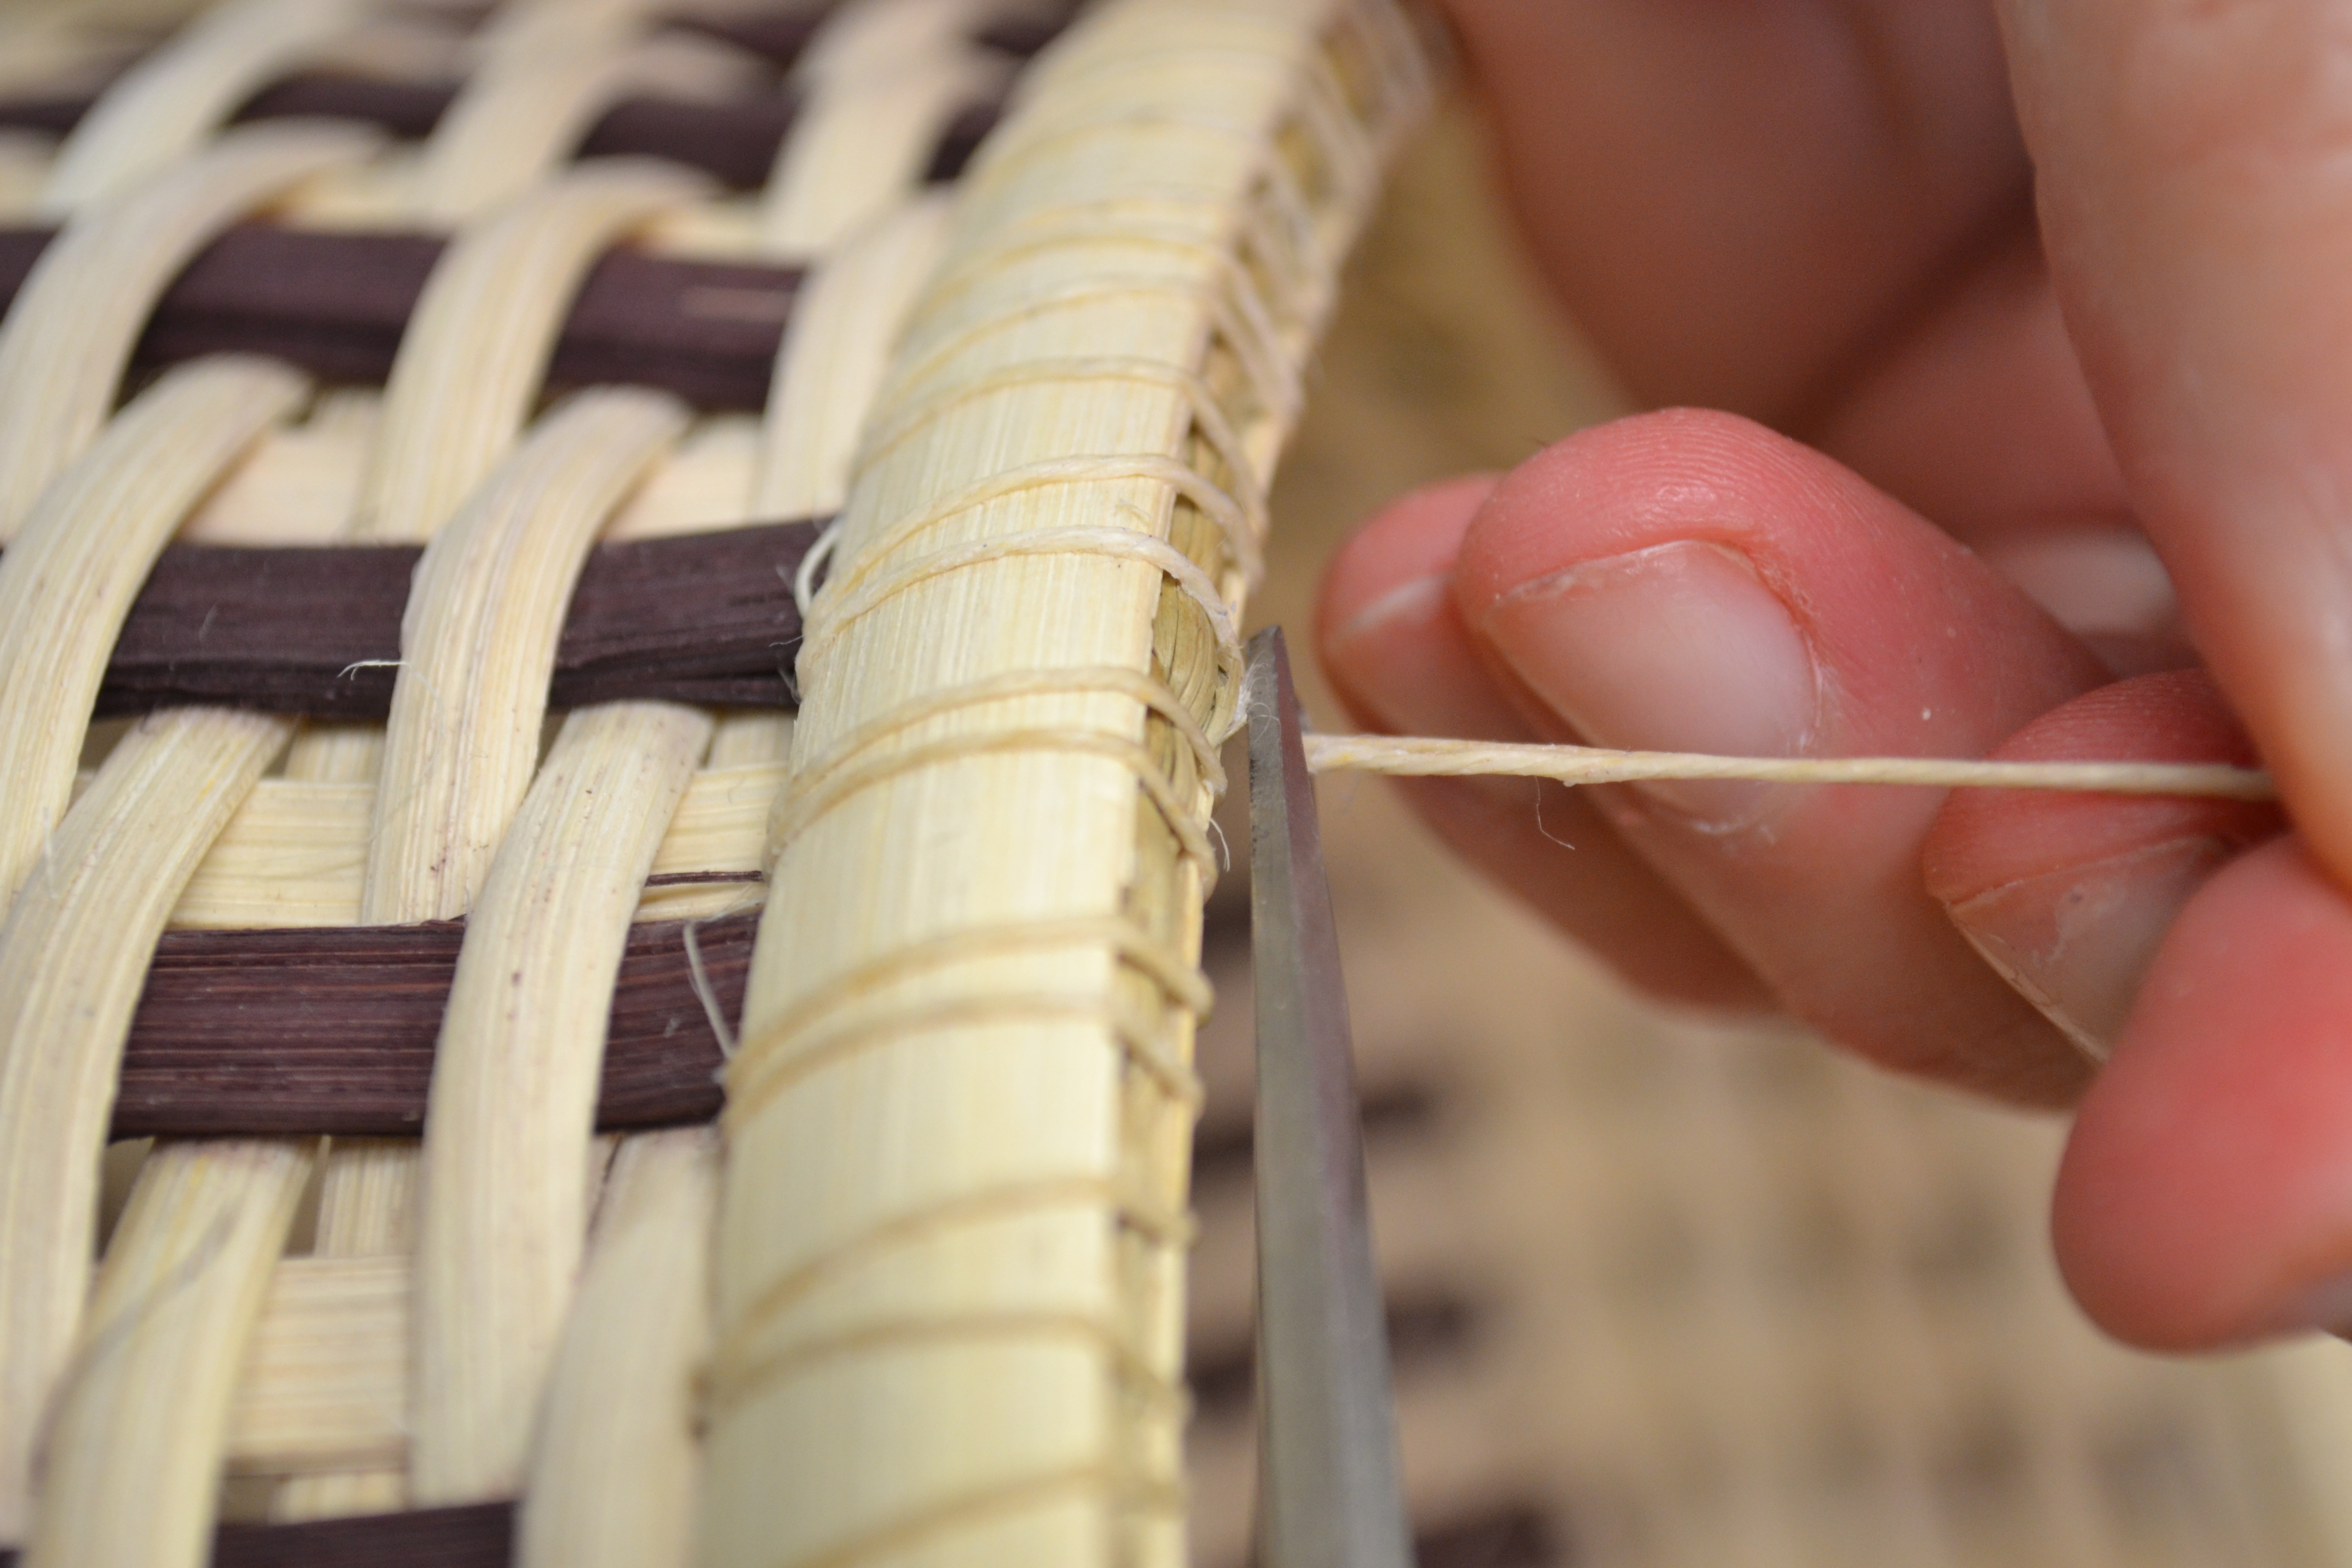
Use a pair of pliers to pull it up and through.
Give the tails a good tug and trim them flush to the rim.
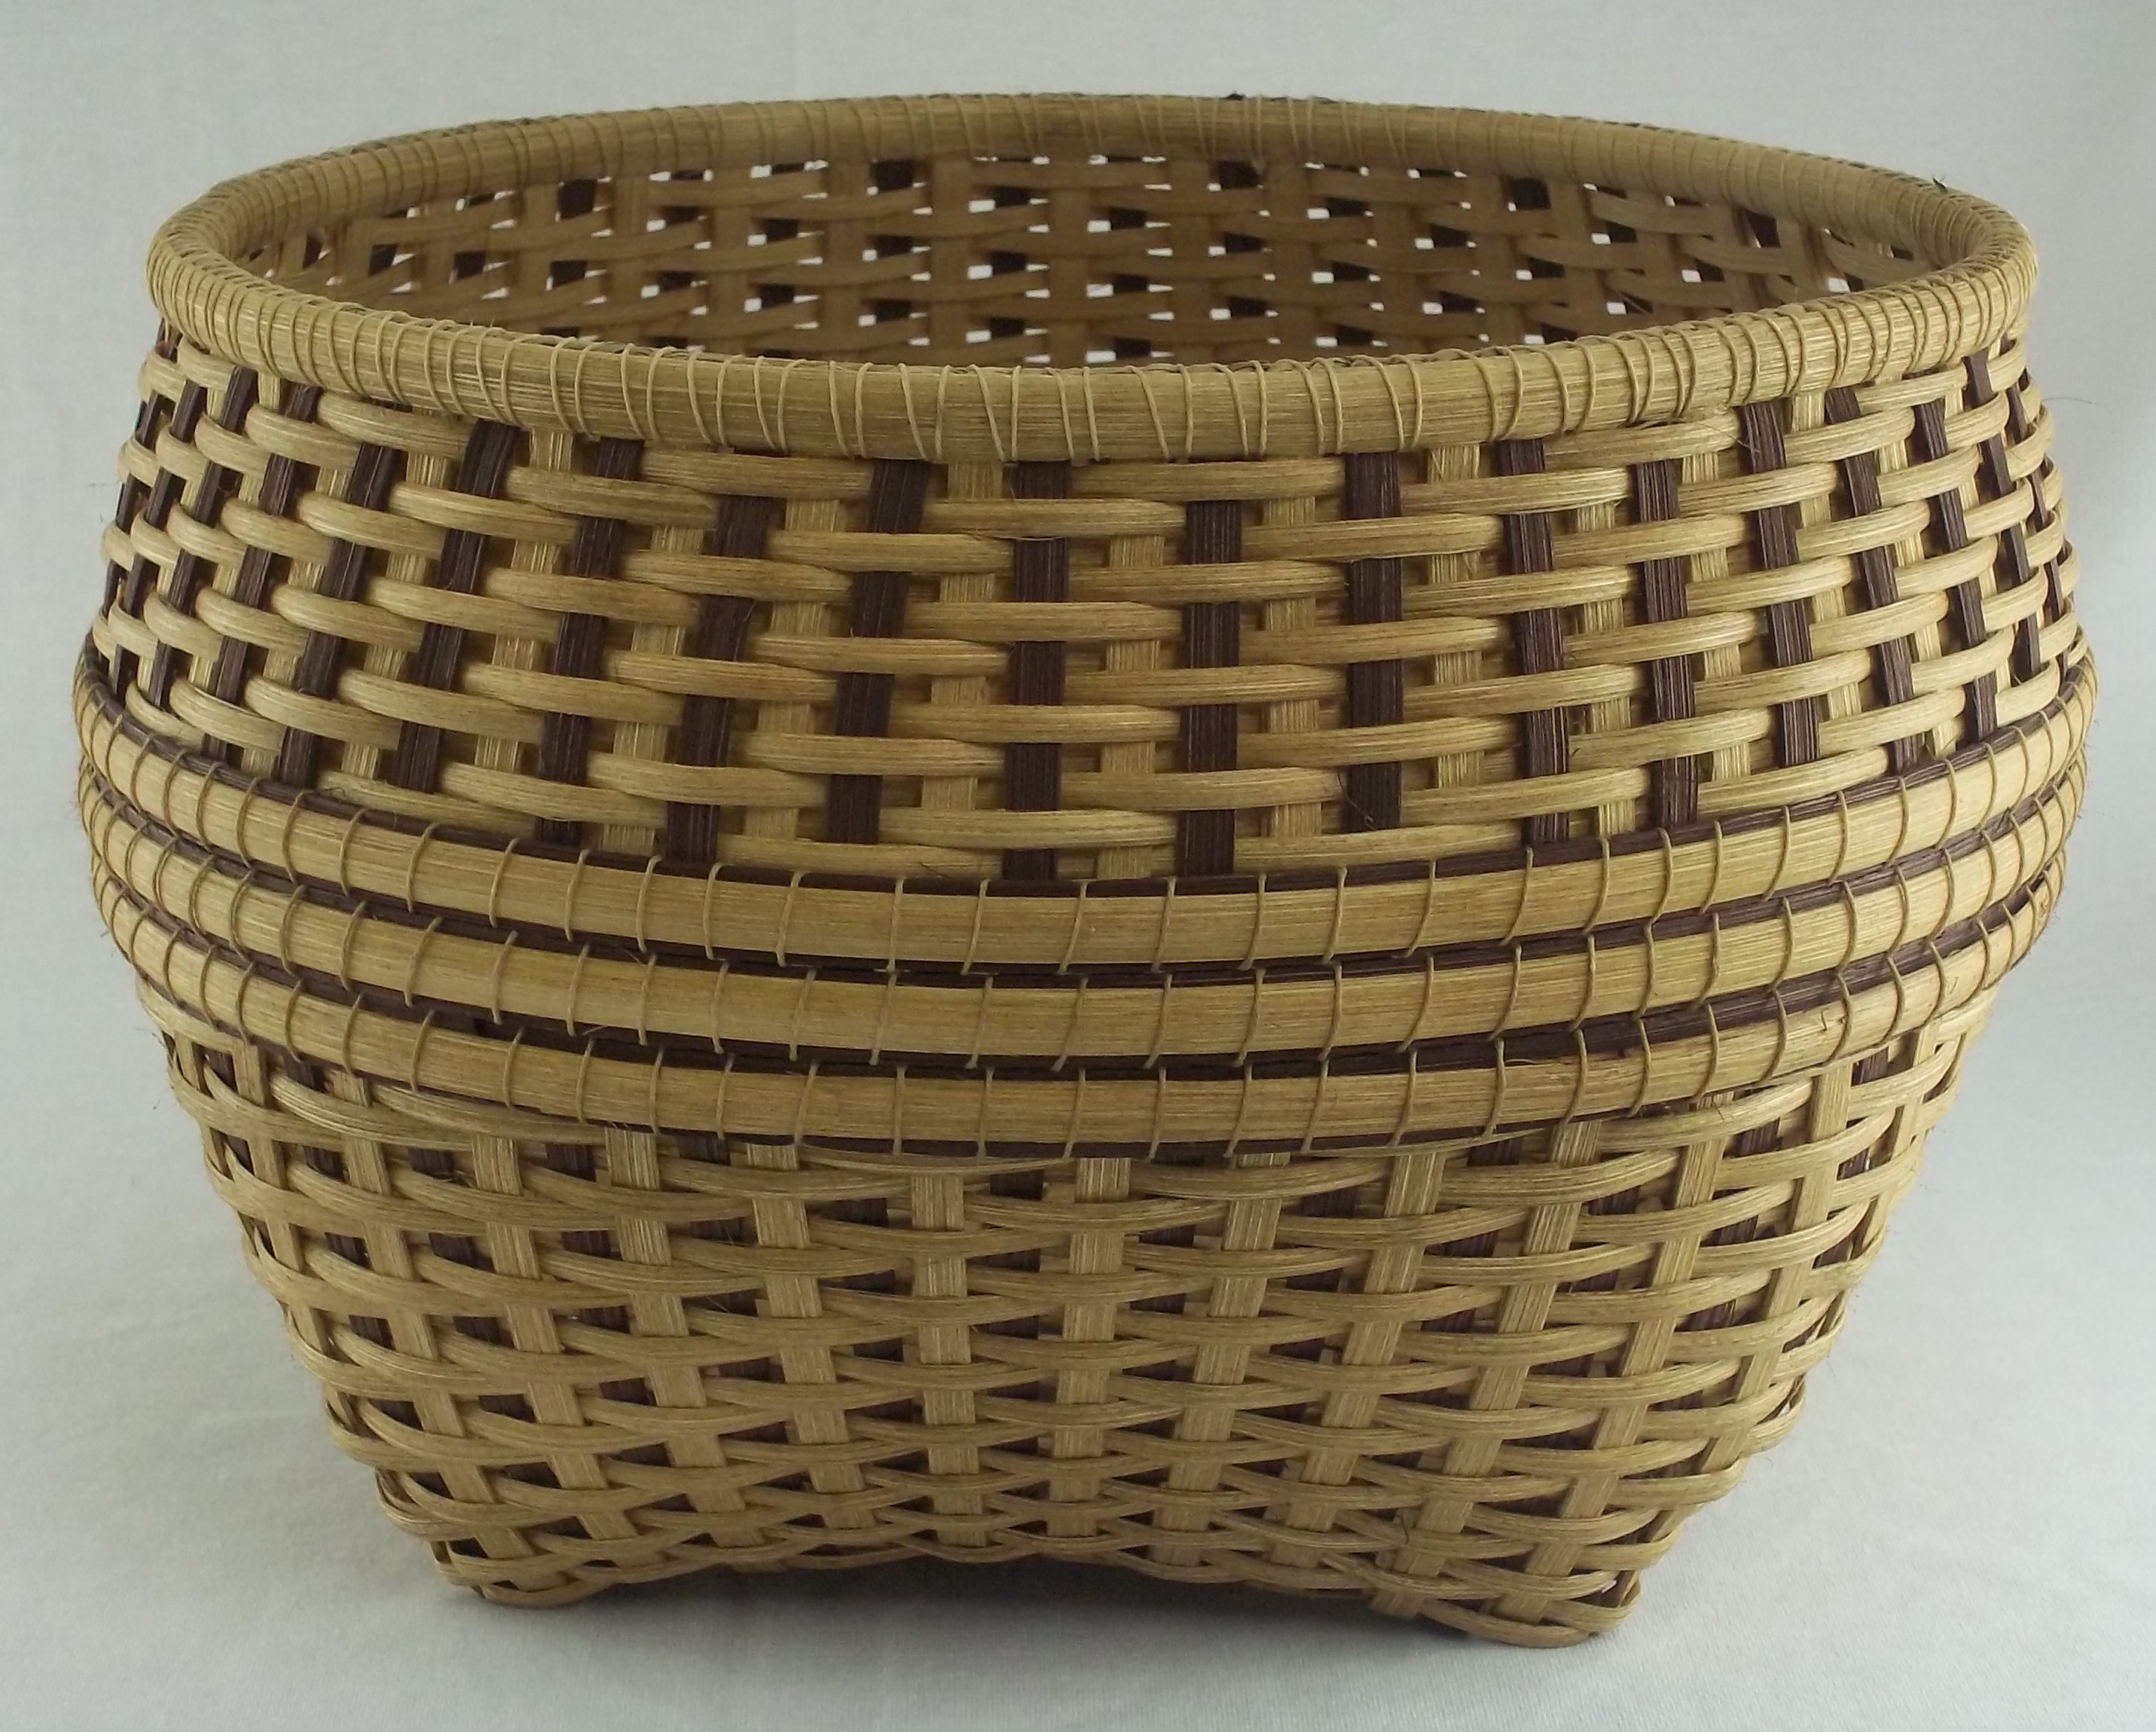
Finished … Three Squared

Great photos!
I’ve been weaving for years and learned from this post how to end, hide, and secure my waxed linen. Thanks so much!
I found this video so helpful,easy to follow, thank you
🙂
Thank you for excellent instructions. So straight forward it gave me confidence to complete my project?
thank you! good luck!