Three Rod Arrow Tutorial
Finally – home and time to finish this basket weaving tutorial for the
Three Rod Arrow.
The three rod arrow looks nice in one color or in three colors. If you want your arrows to stack like in the sample below (a bargello pattern), you will need a number of spokes that is divisible by 3 (i.e. 18 spokes, 36 spokes, 48 spokes)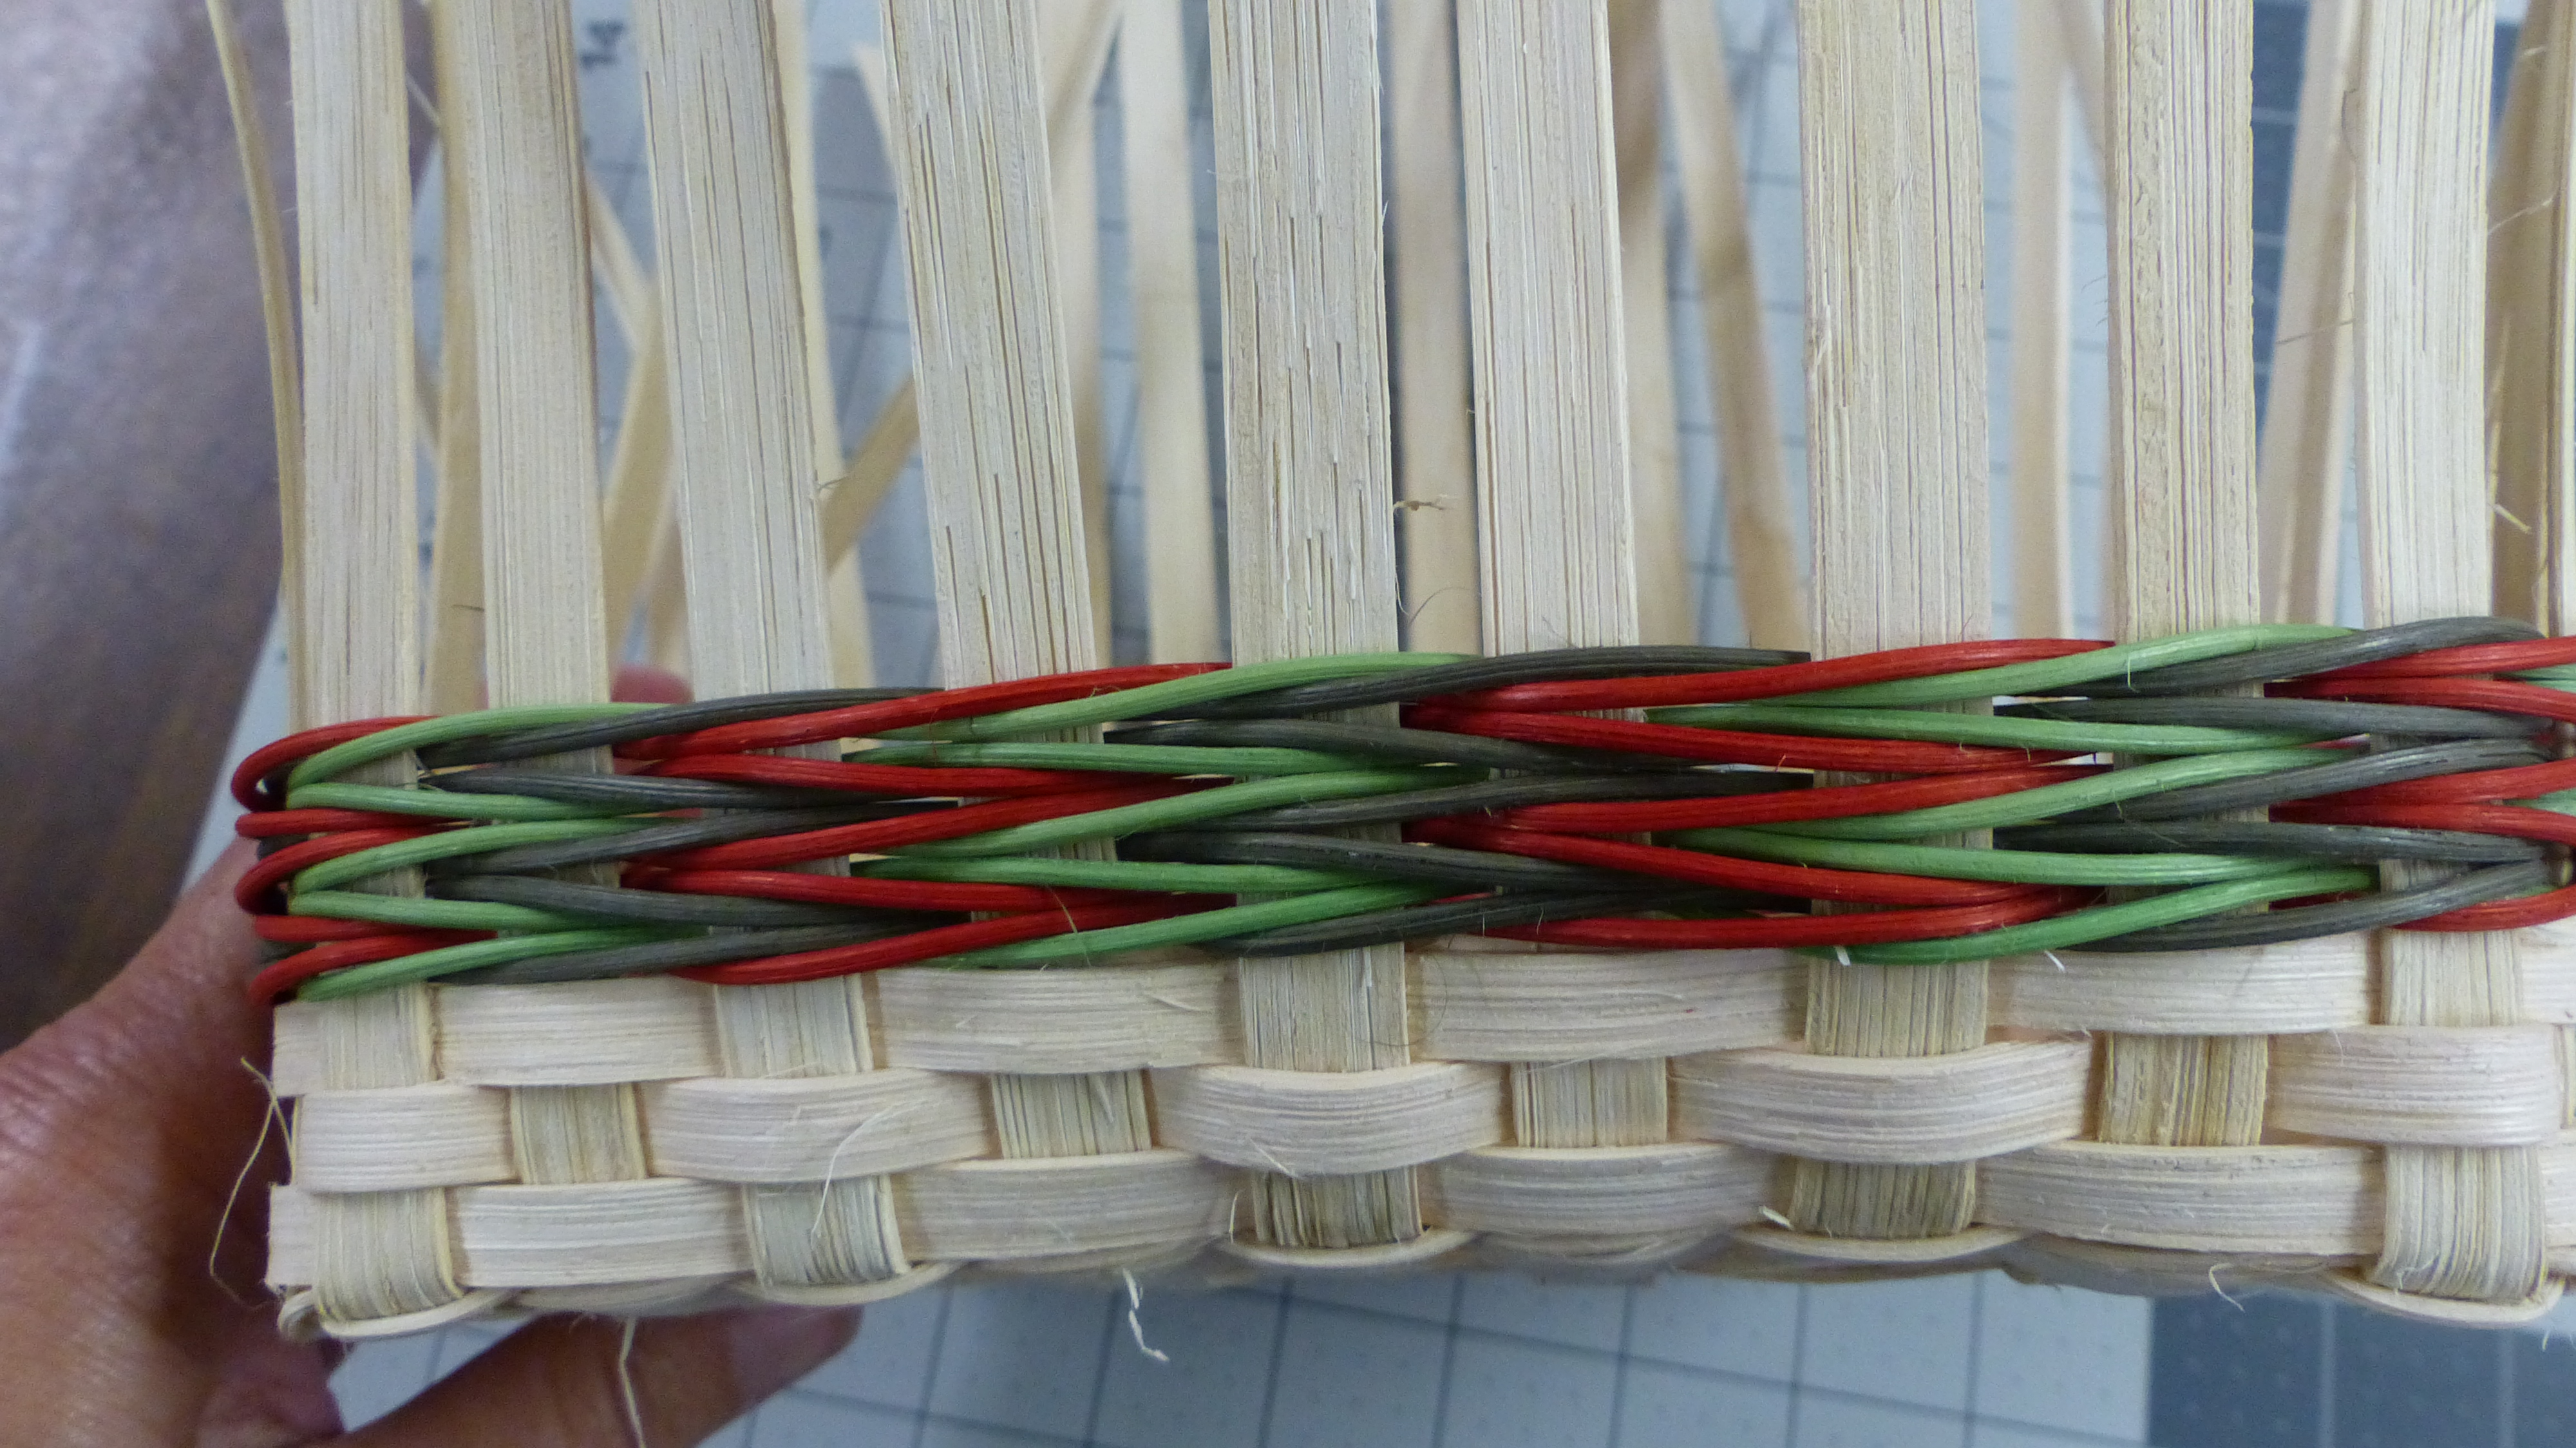
The Three Rod Arrow is made up of two rows –
- ROW ONE – three rod (triple twining) with a step up
- ROW TWO – reverse three rod with a step up.
These two rows alone make a nice accent. Or you can do several rows. The sample above has two and a half arrows – so it is made up of five rows:
- row one – three rod row
- row two – reverse three rod row
- row three – three rod row
- row four – reverse three rod row
- row five – three rod row
Now for the tutorial: weaving the three rod arrow.
Let’s start at the beginning –
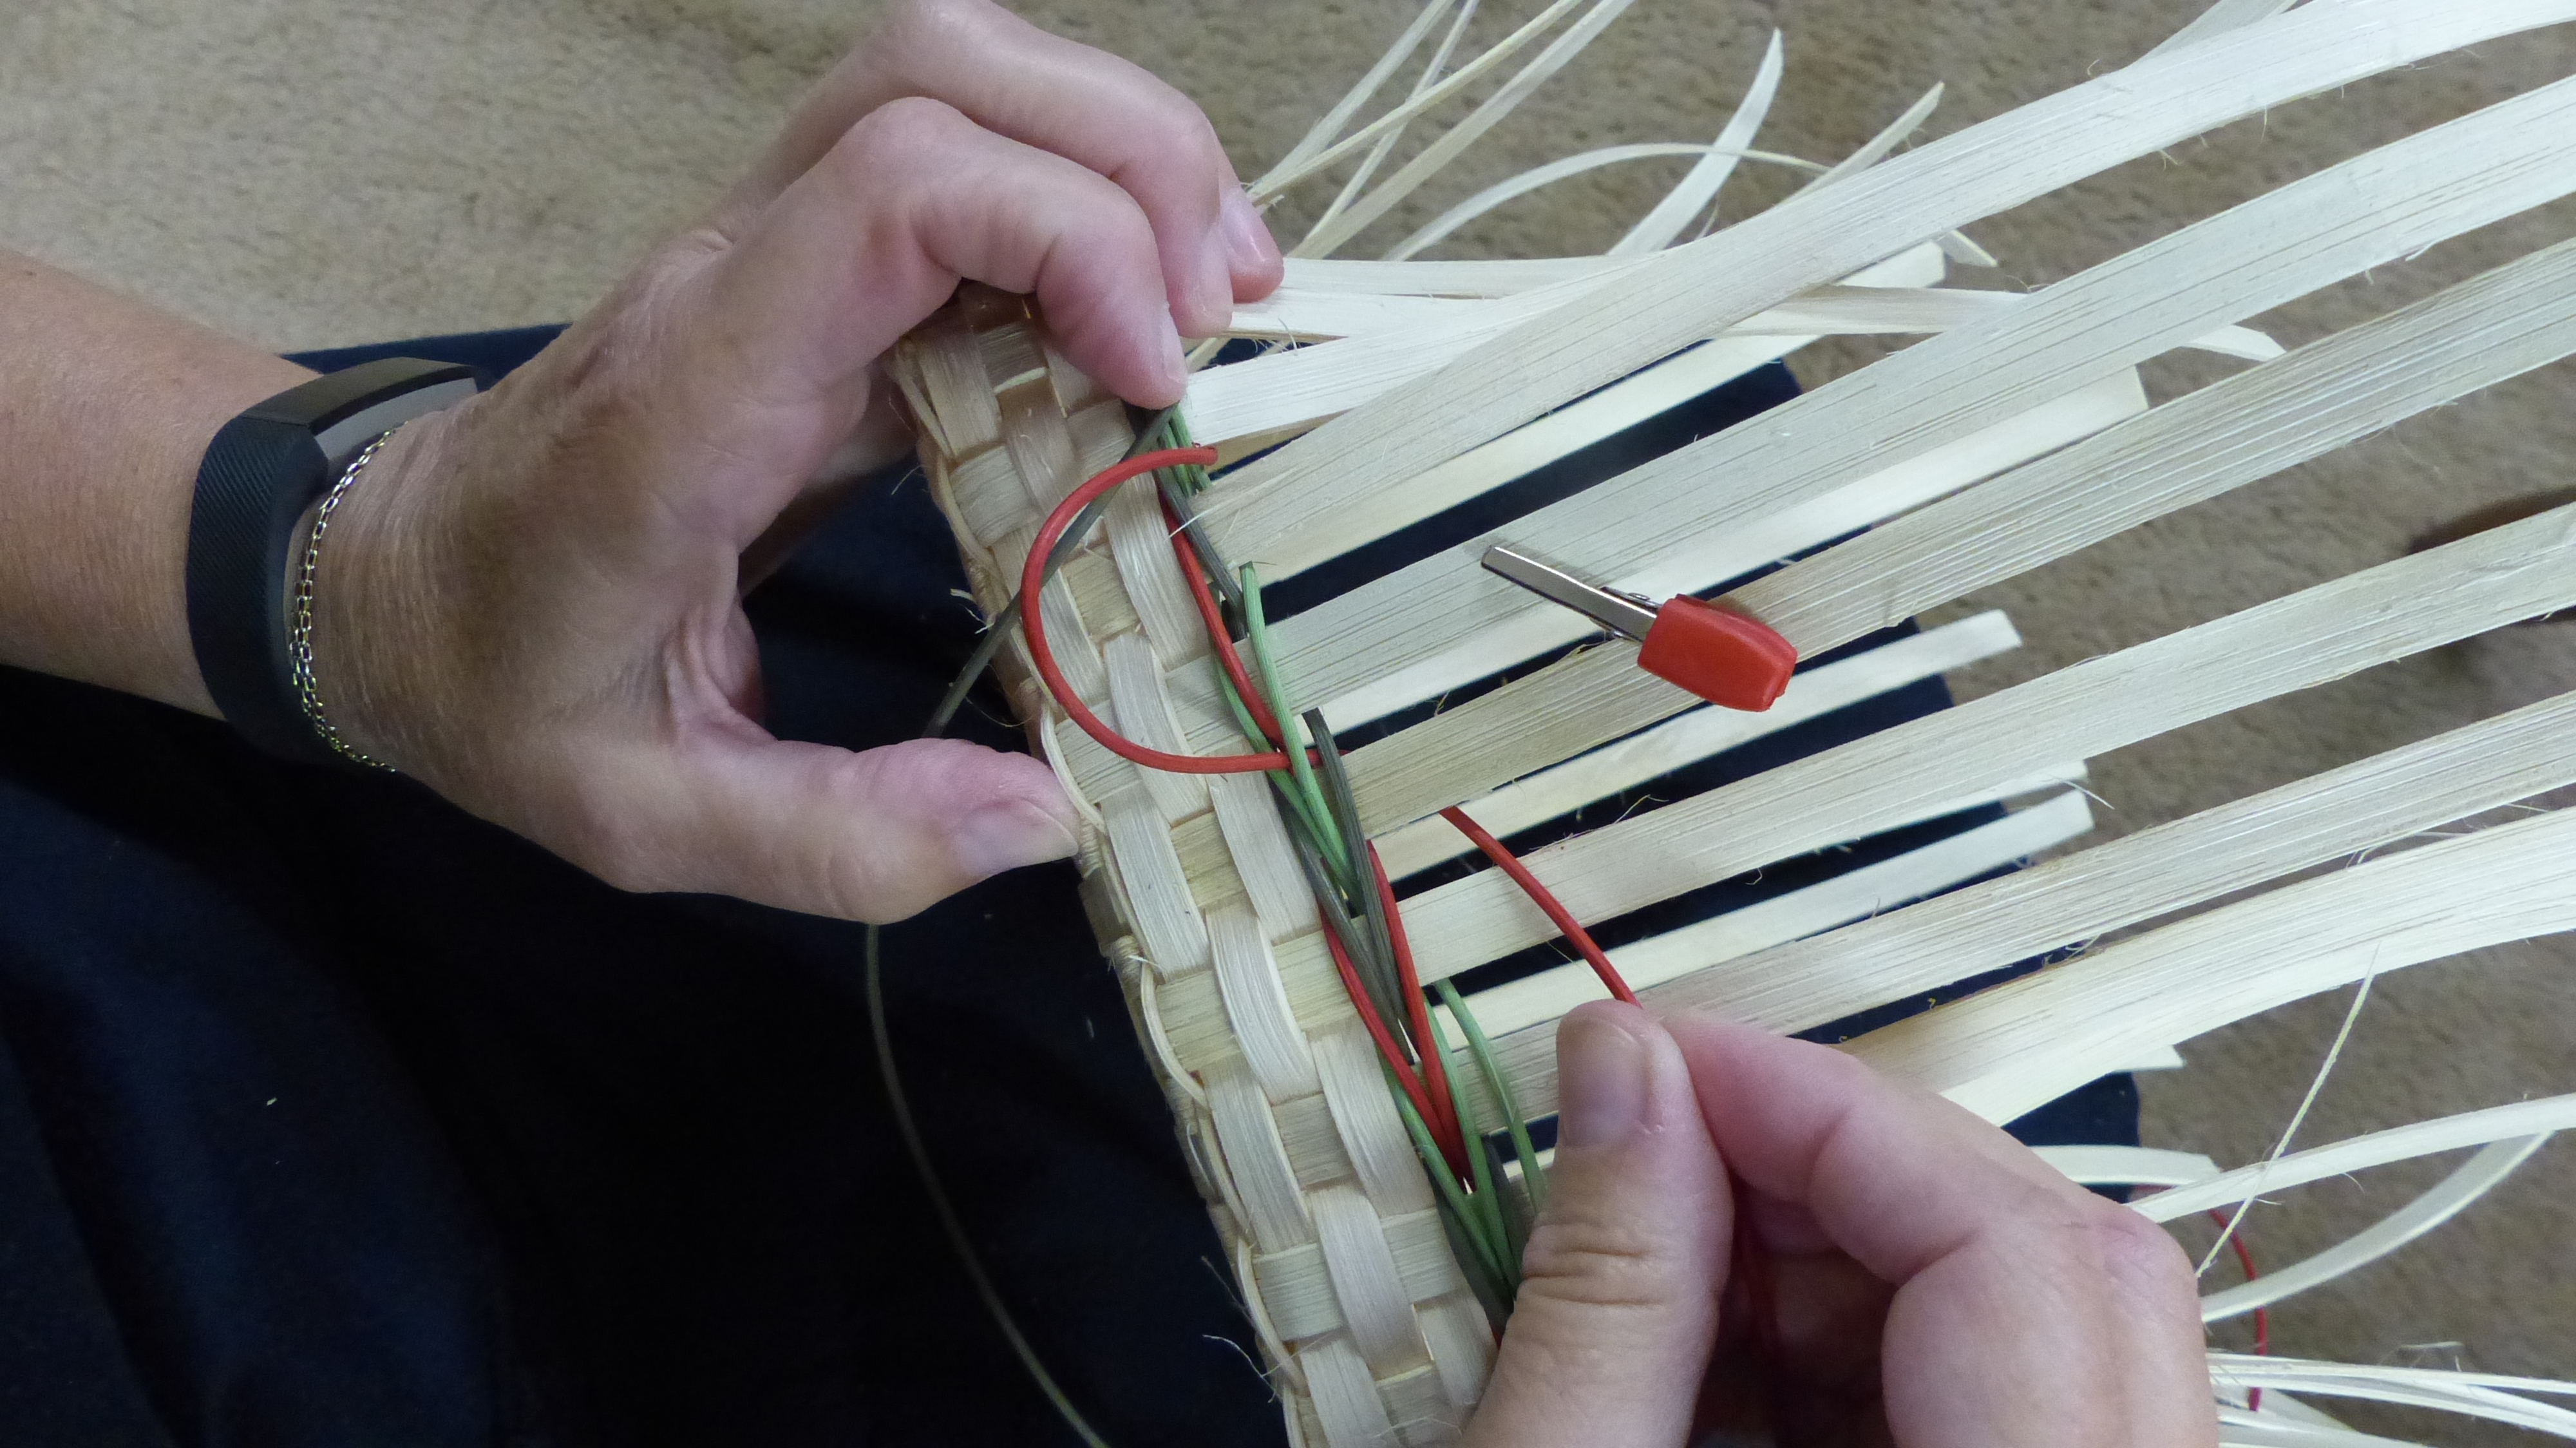
**ROW ONE three rod (triple twine) with a step up.

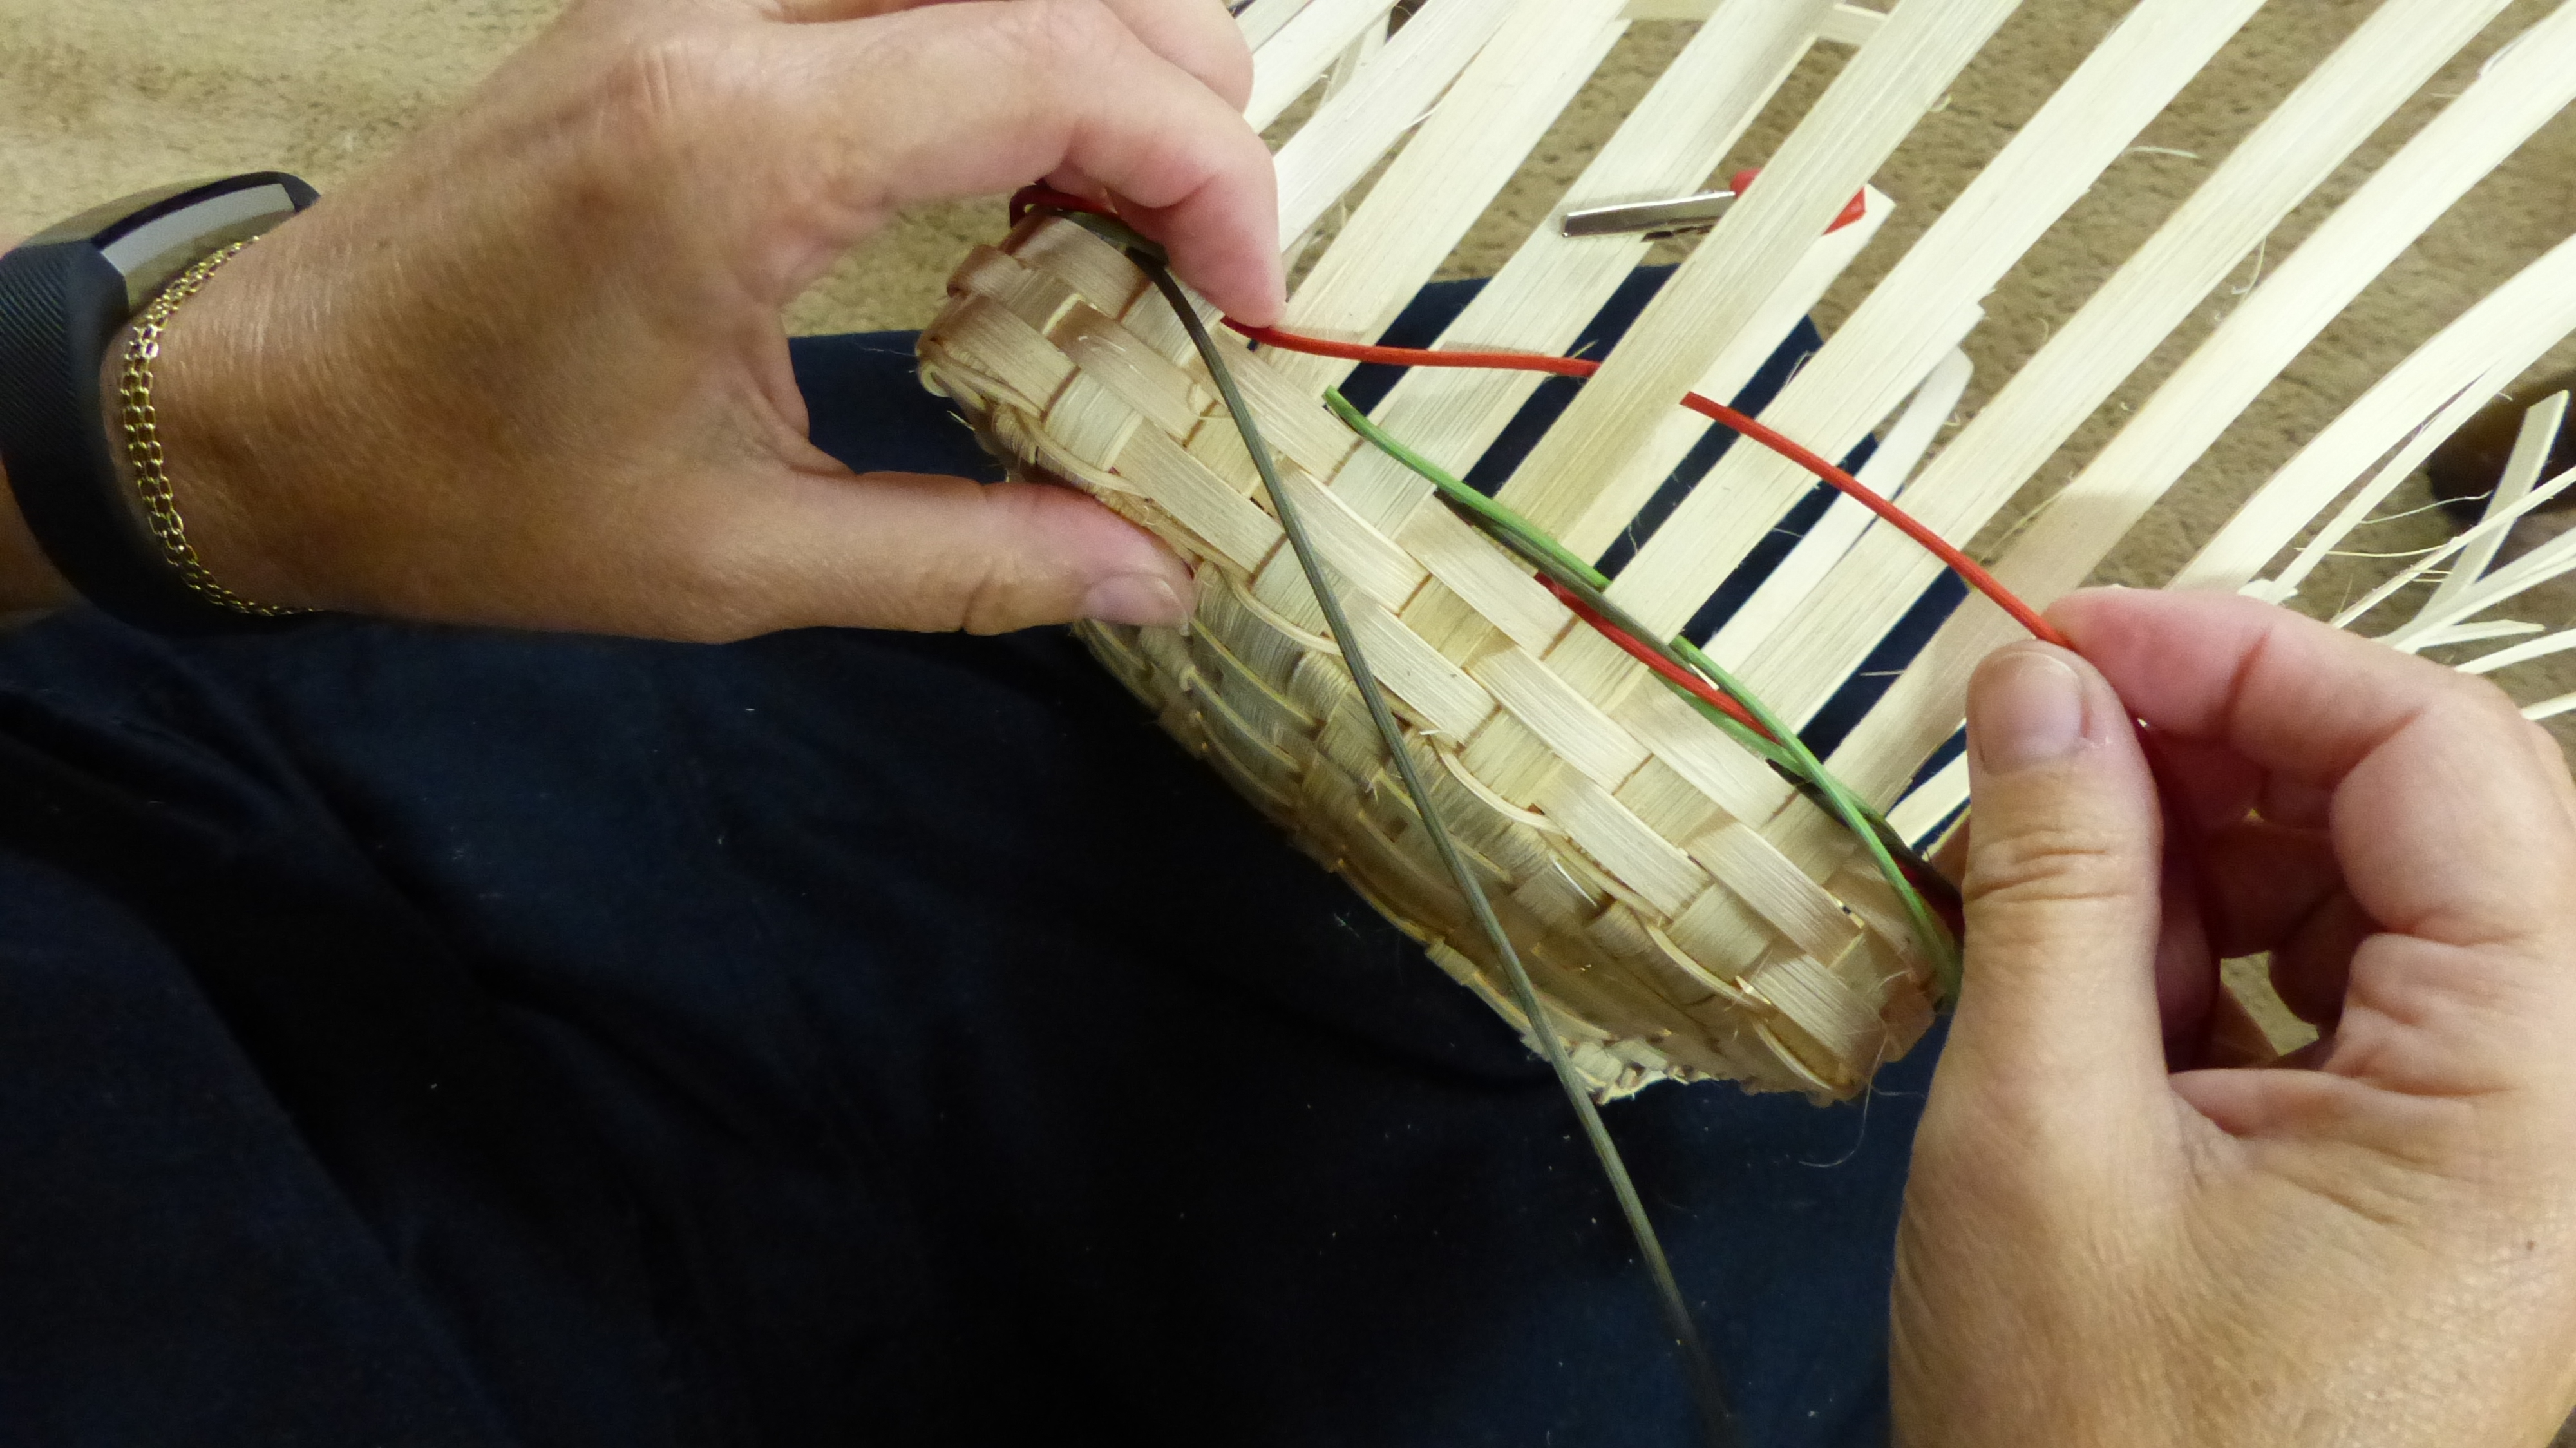
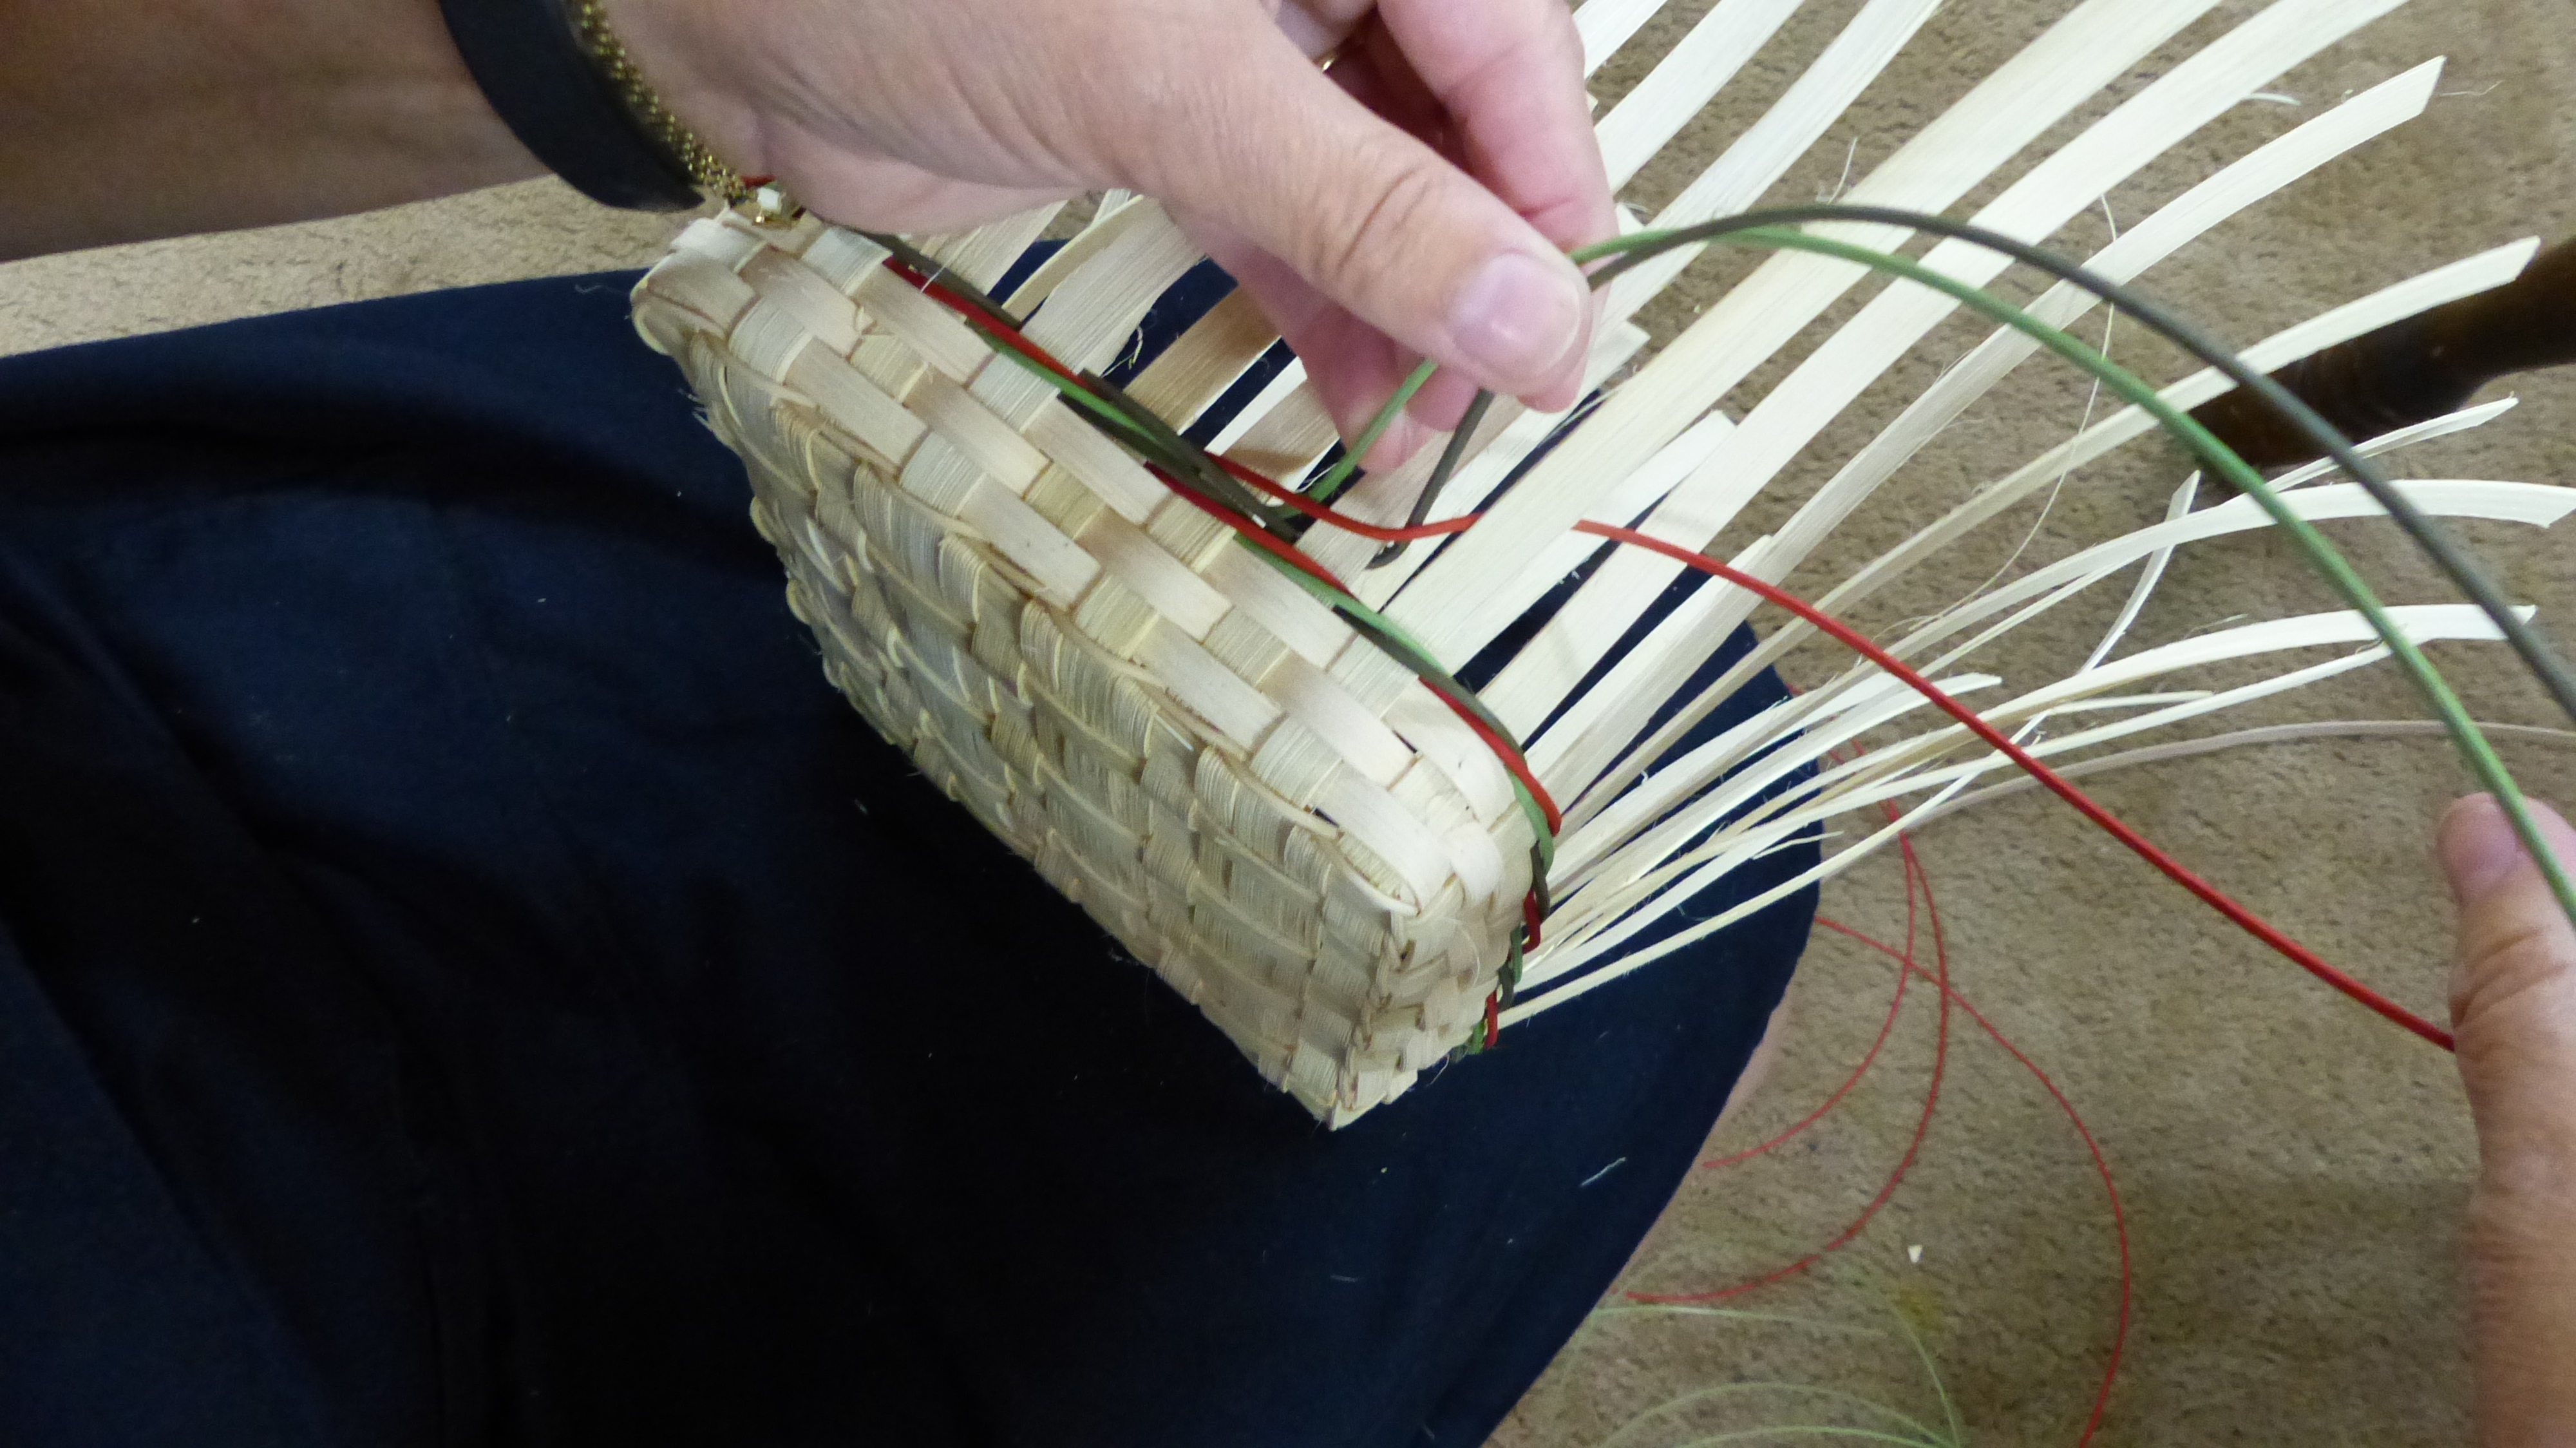
Start the weavers by tucking them into three consecutive spaces and behind the spokes to the left of their space. Mark the spoke that the furthest left weaver (Weaver #1) started behind. I have marked mine with a small red clip. Now pick up the weaver on the left and weave it over (or in front of) two spokes, behind one and then back to the outside.
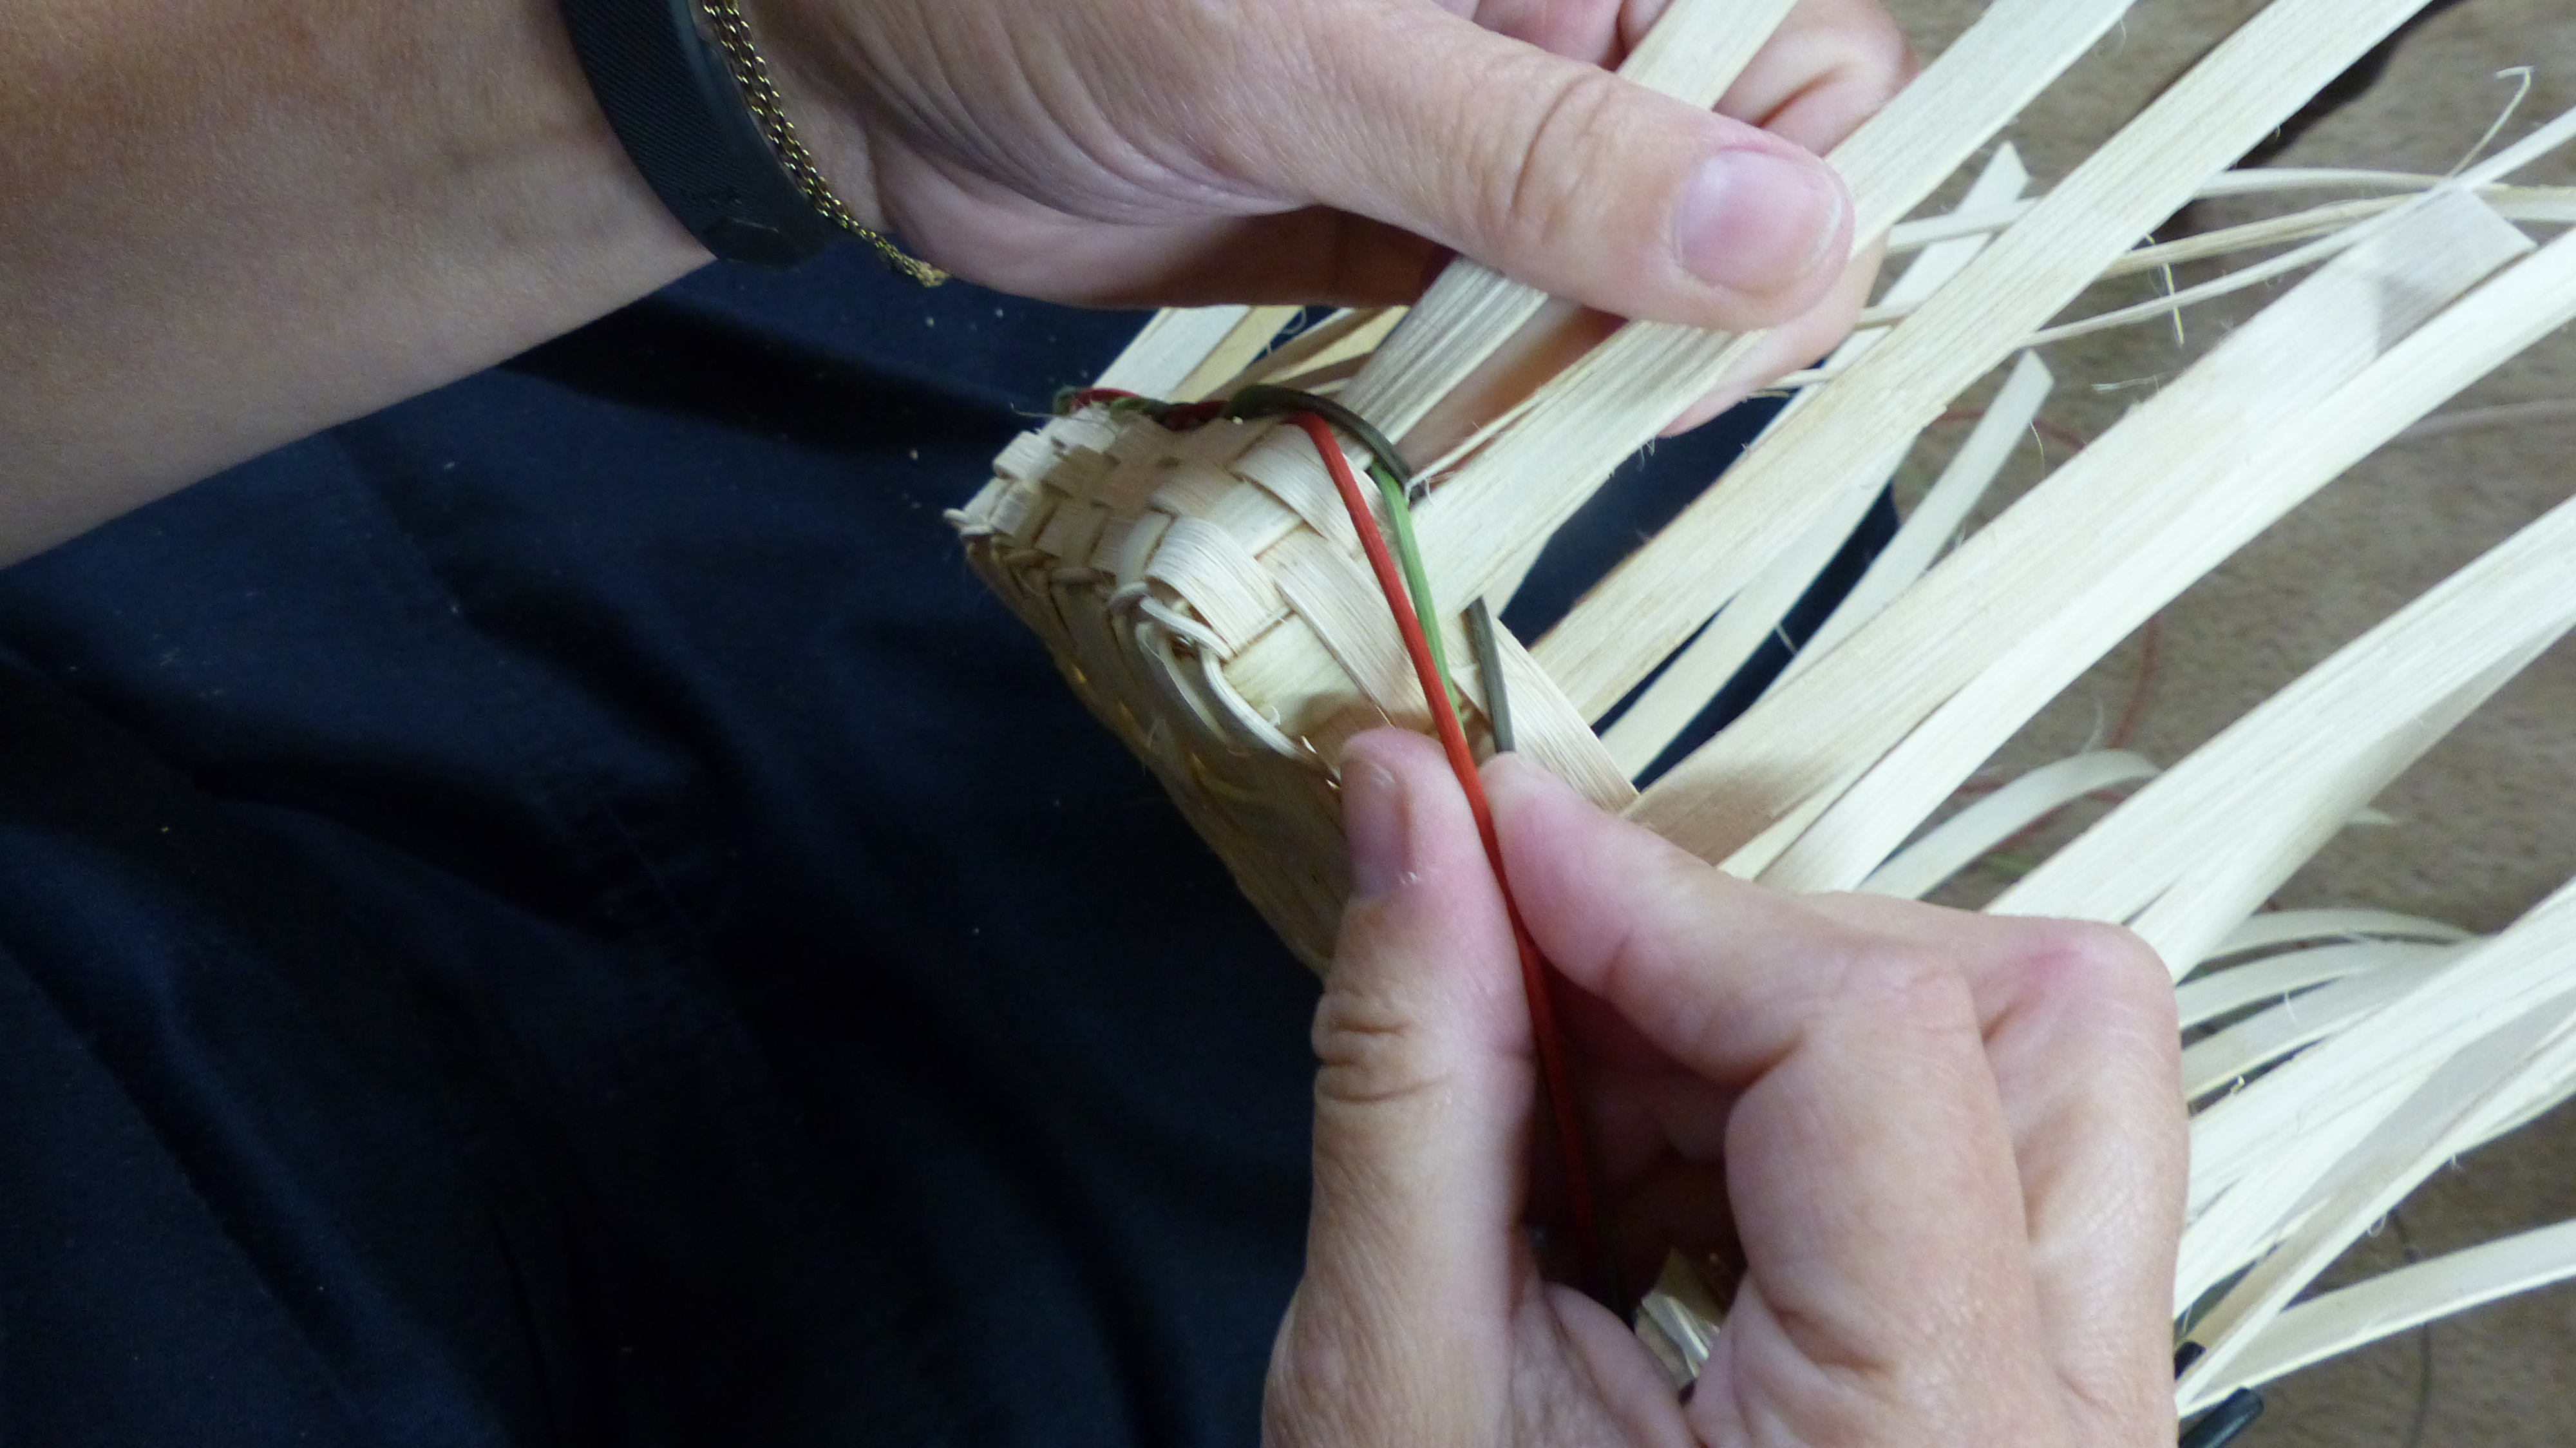
Repeat, always weaving with the weaver on the left of the set. The weavers will always be coming out of consecutive spaces .
Weaving the Step Up
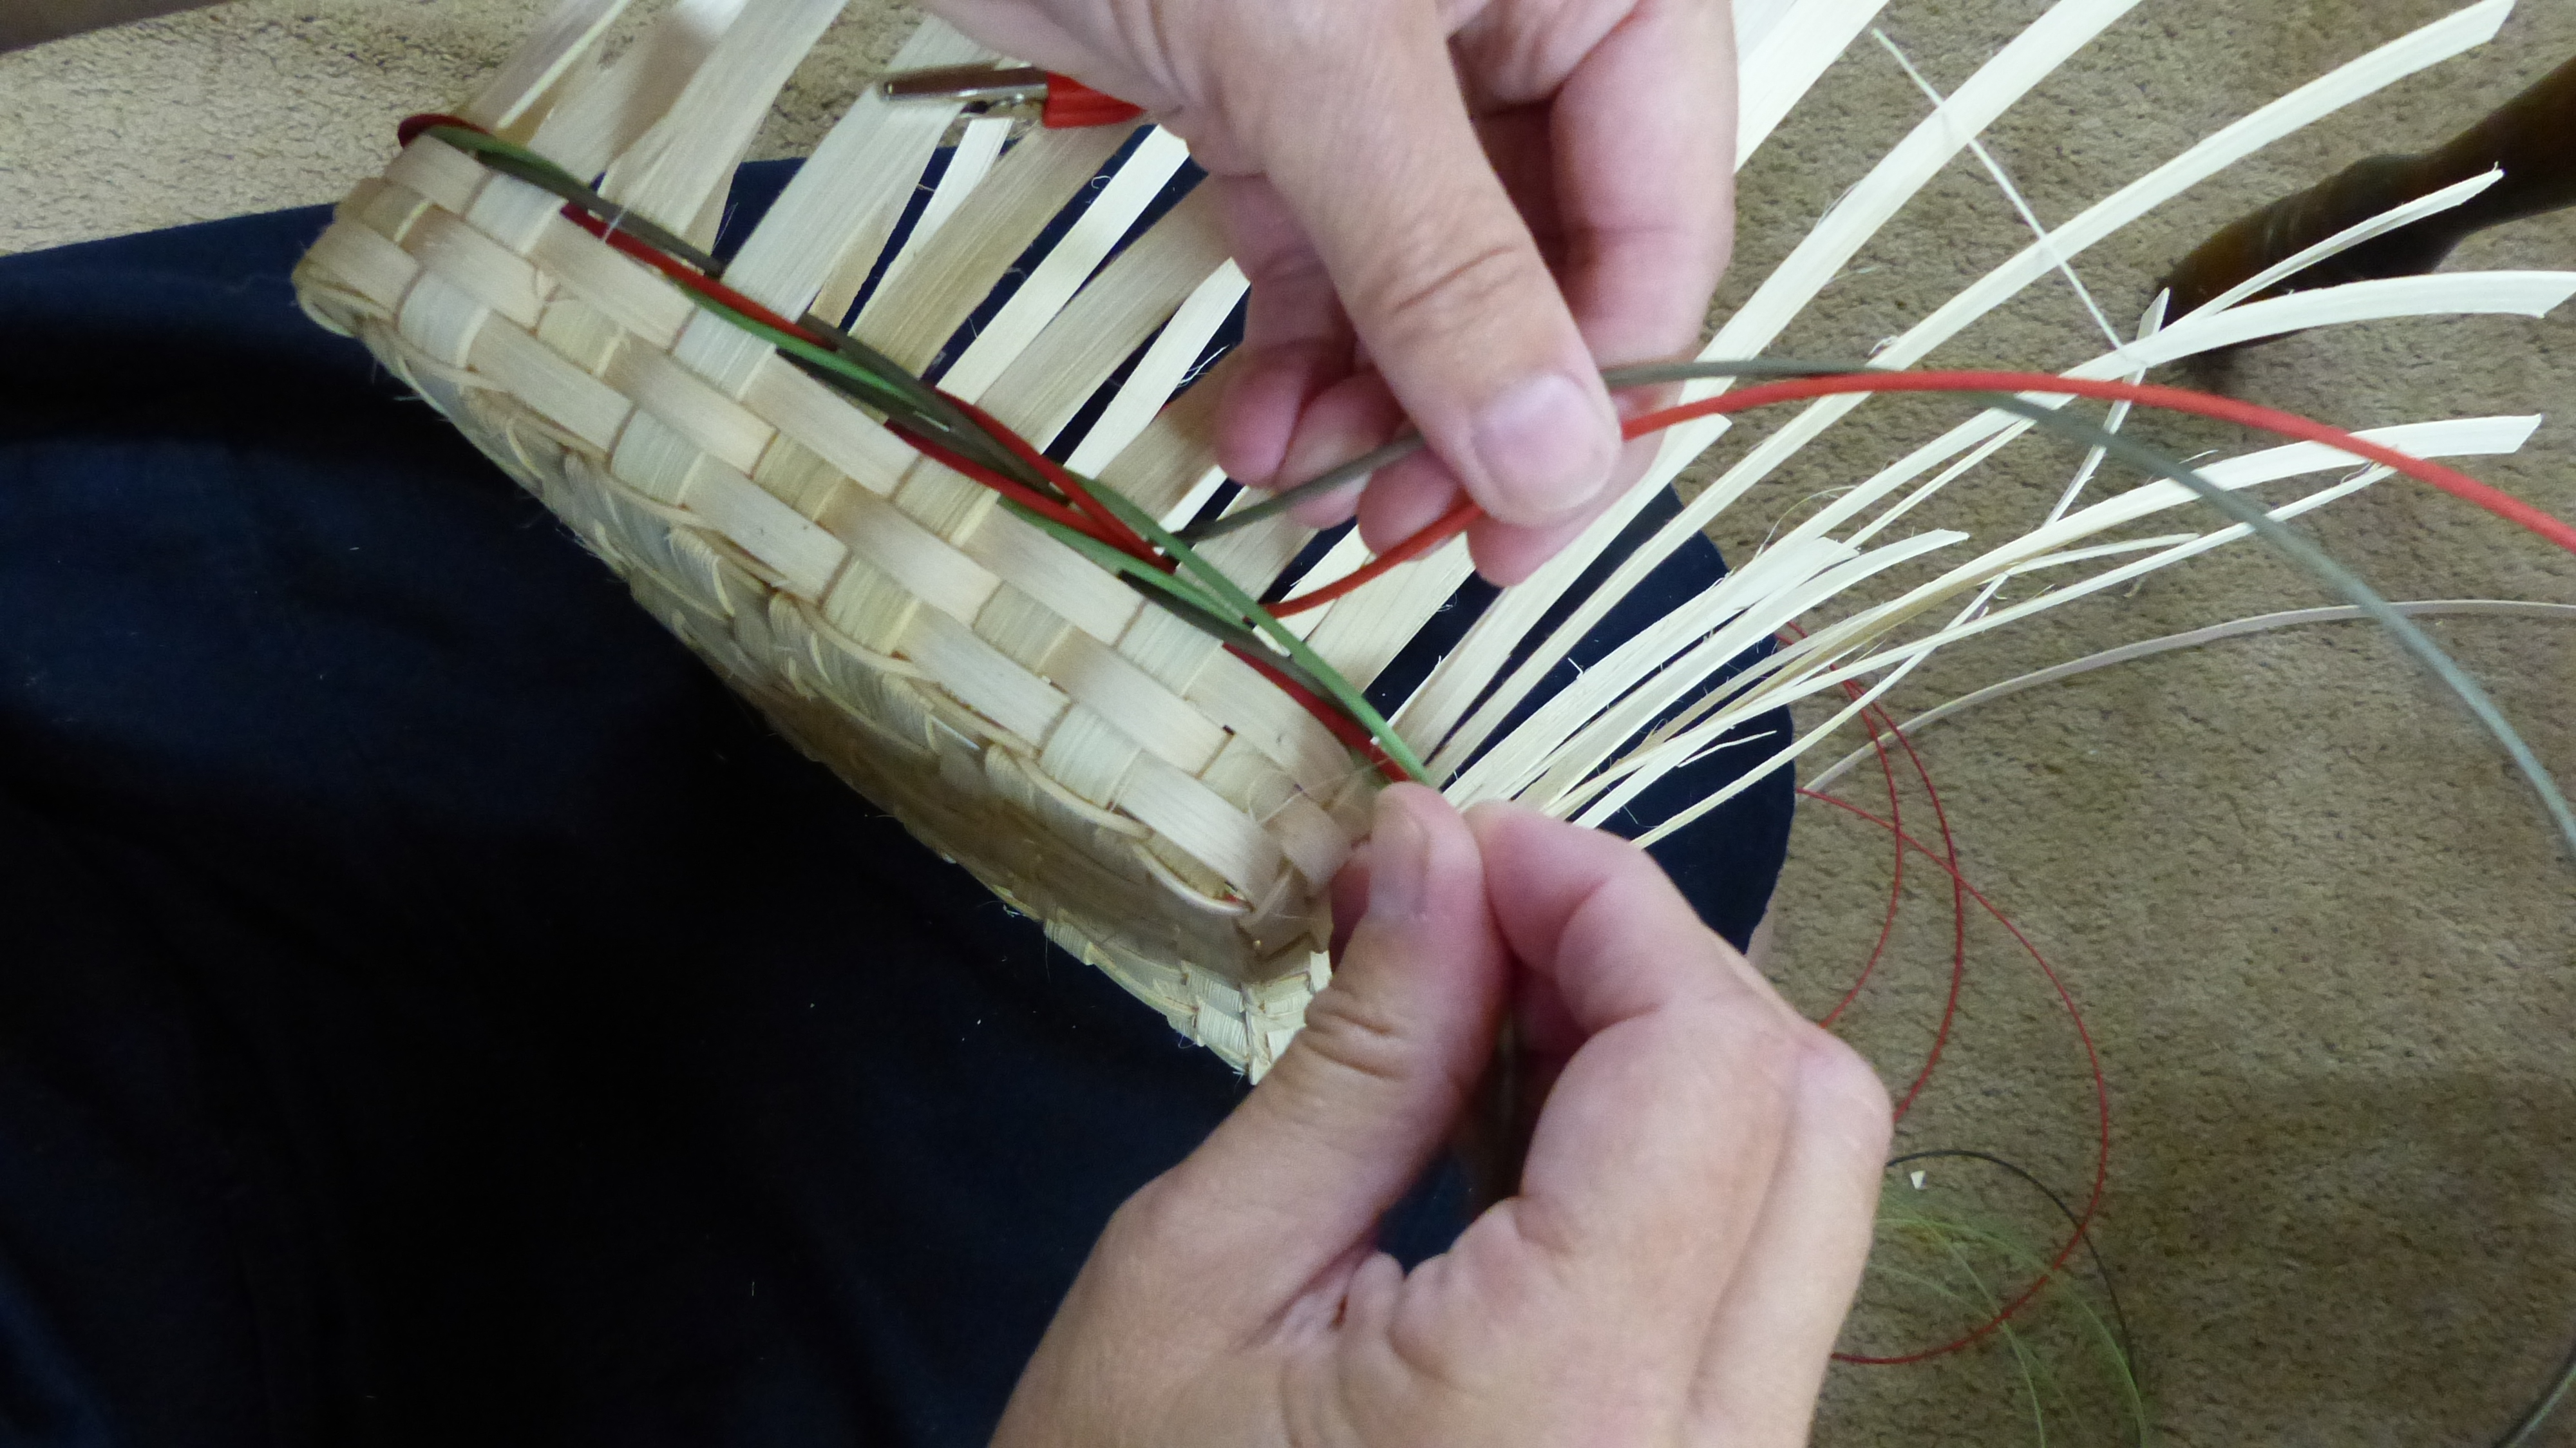
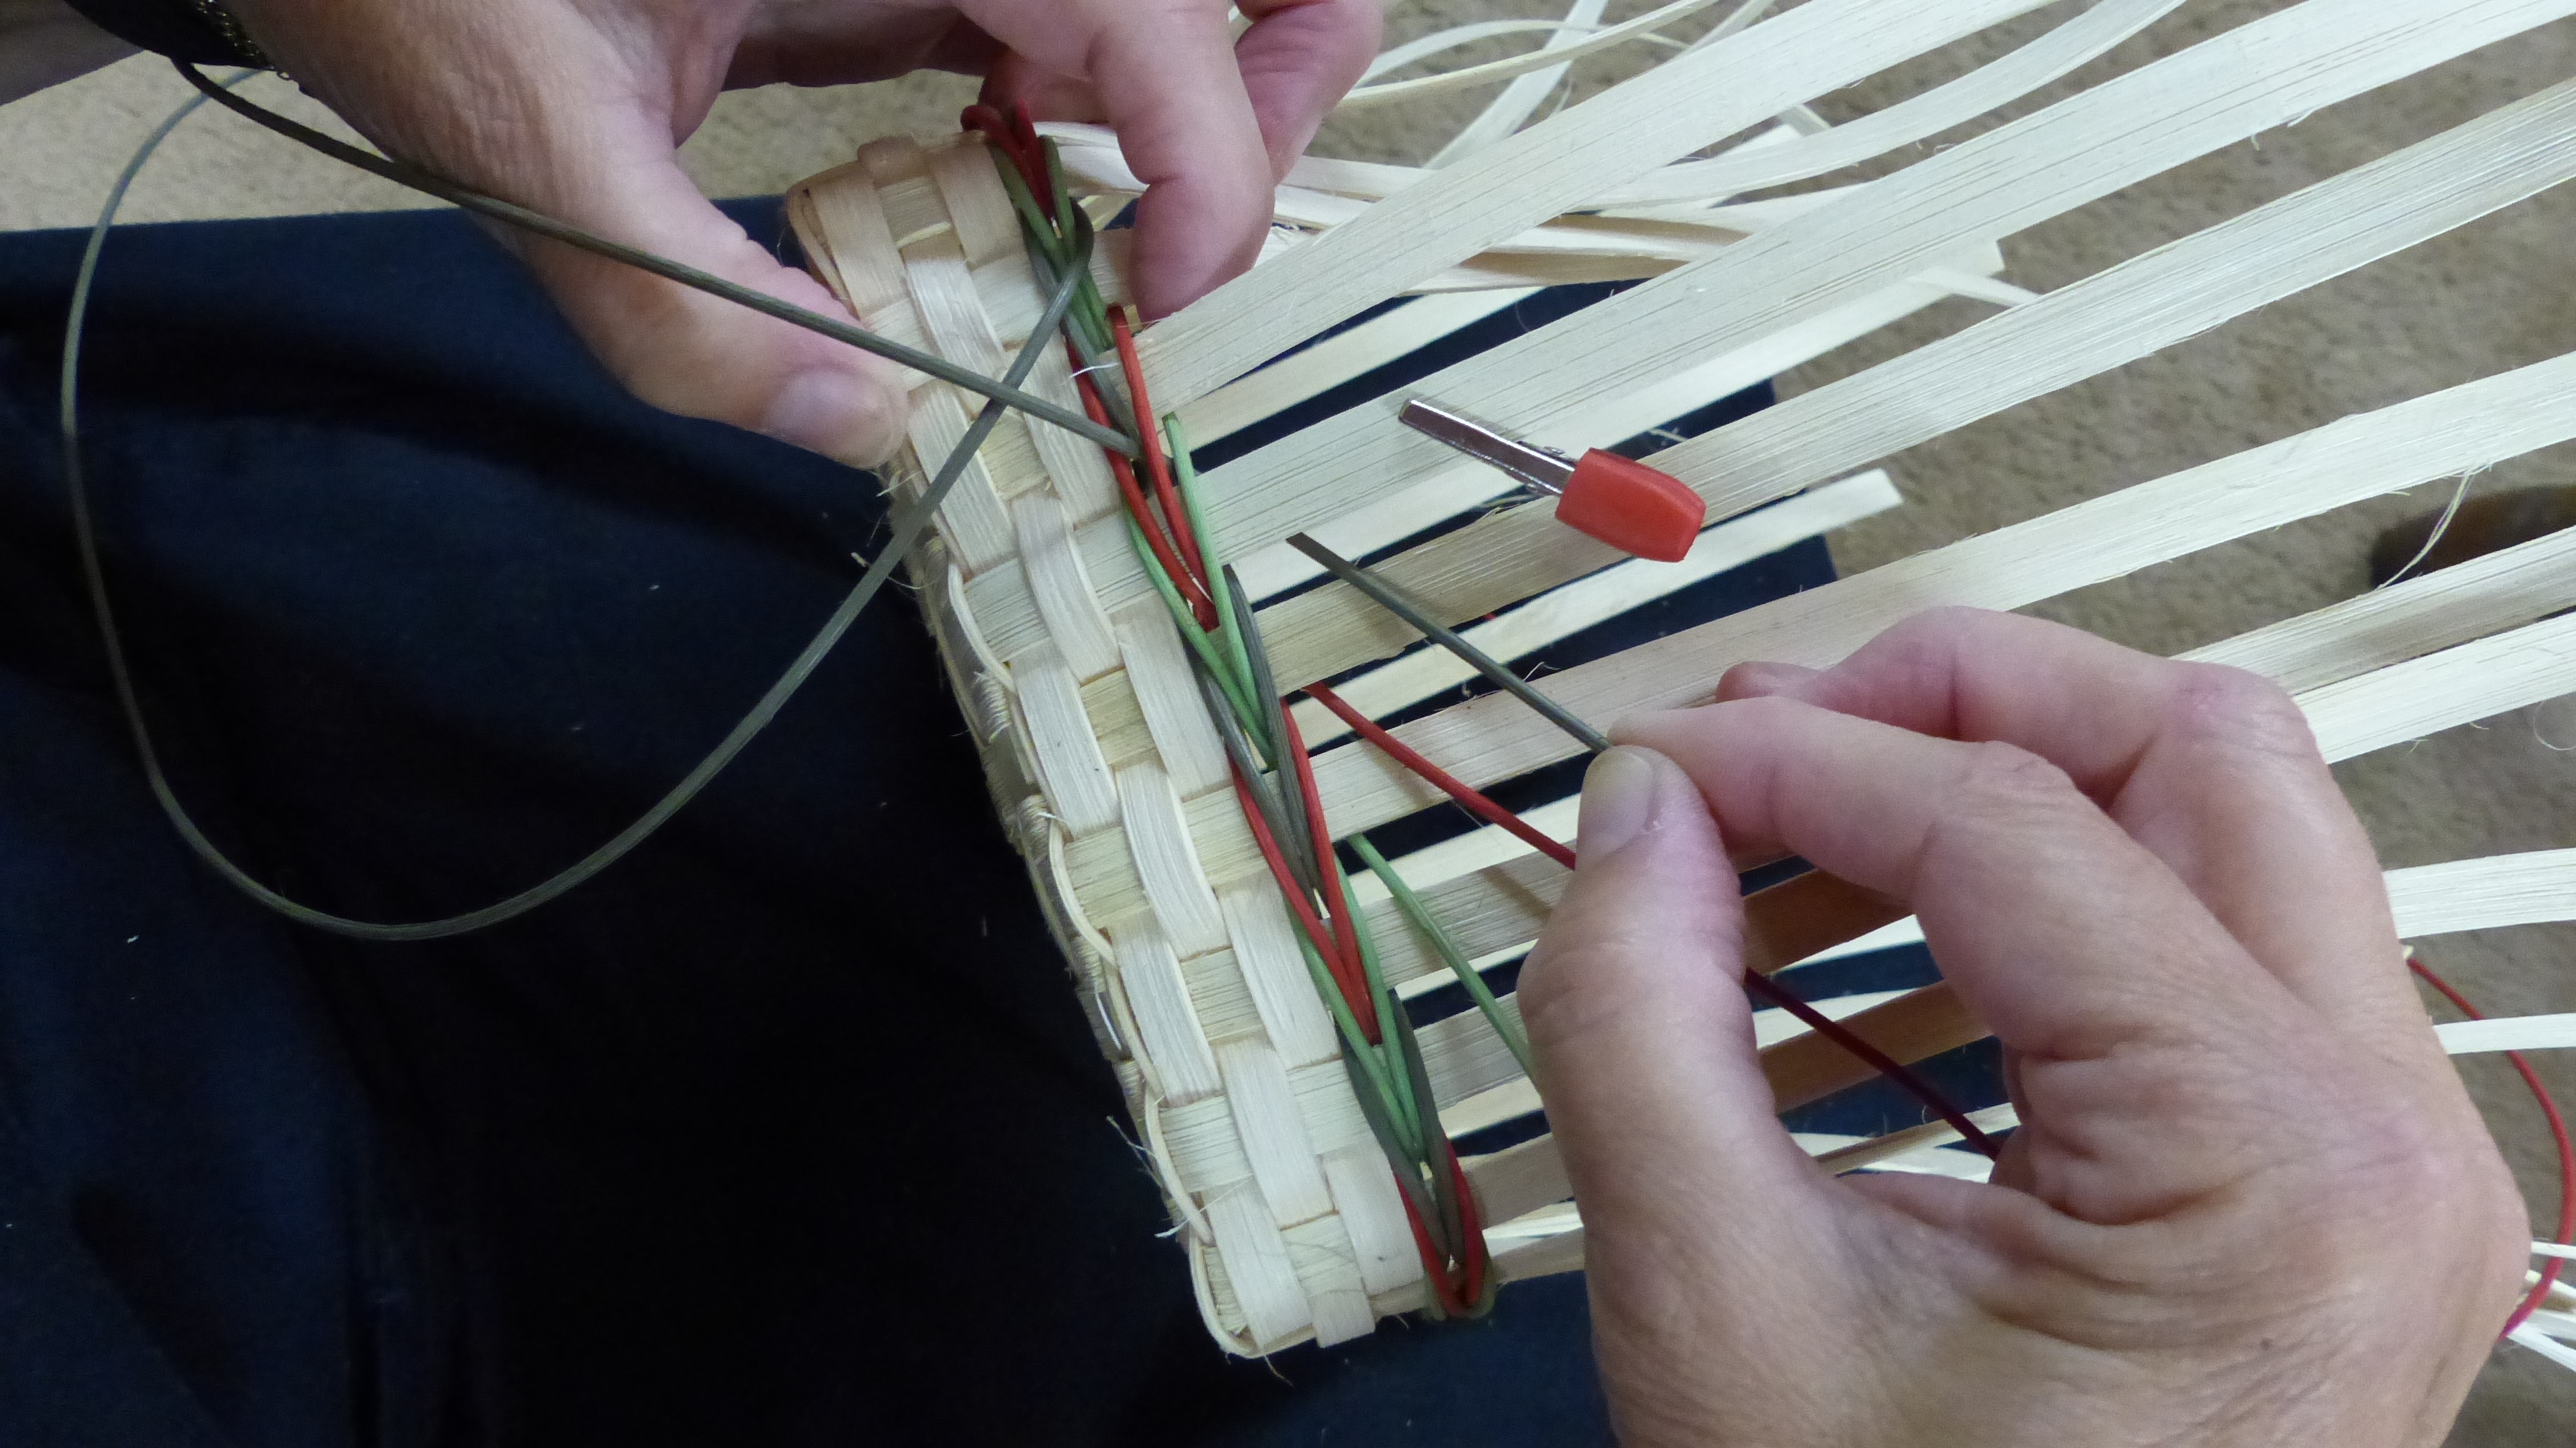
Weave all the away around the basket, stopping at the stake you marked. You will always know where to stop if you think of it this way: “Weave TO the spoke you started behind, NOT passed it”.
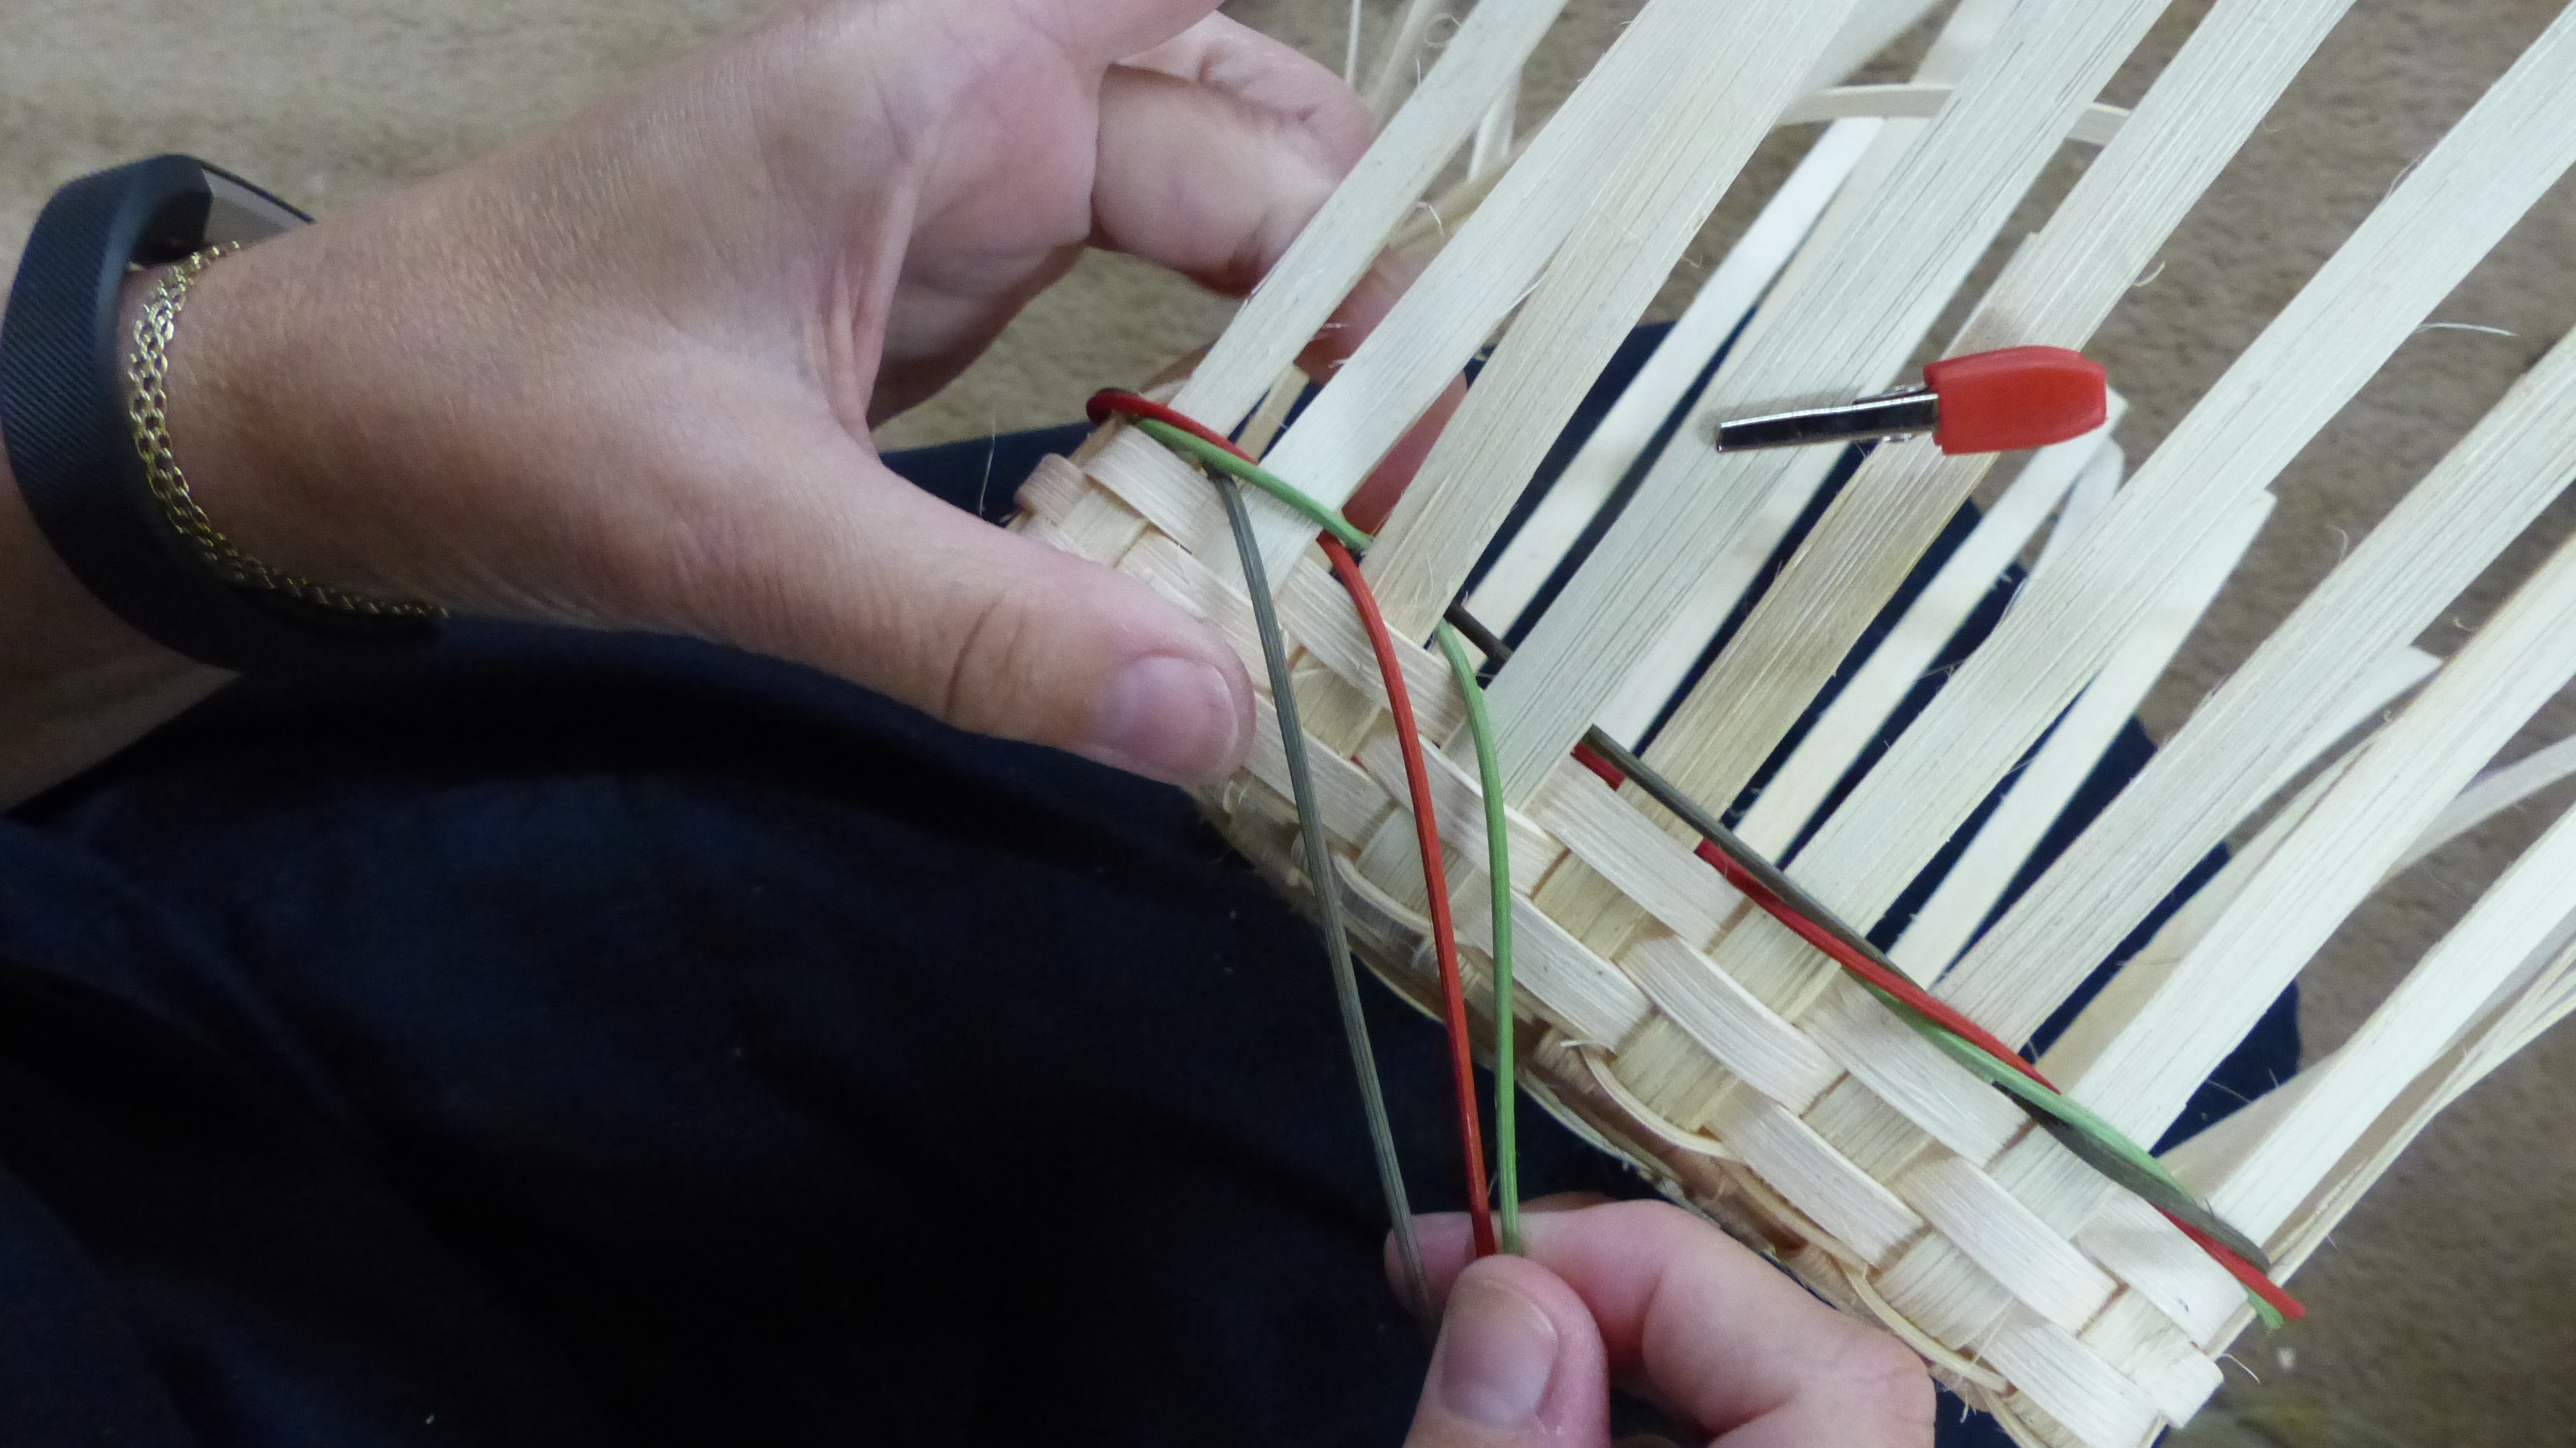
Now pick up weaver that is furthest to the right and weave it over (or in front of ) two spokes, behind one and back to the front. Notice the weave did not change, just which weaver is used.
Now there are spaces between the weavers – so we need to catch the remaining weavers up. Pick up the next weaver (the middle weaver) and weave it in (over two and behind one).
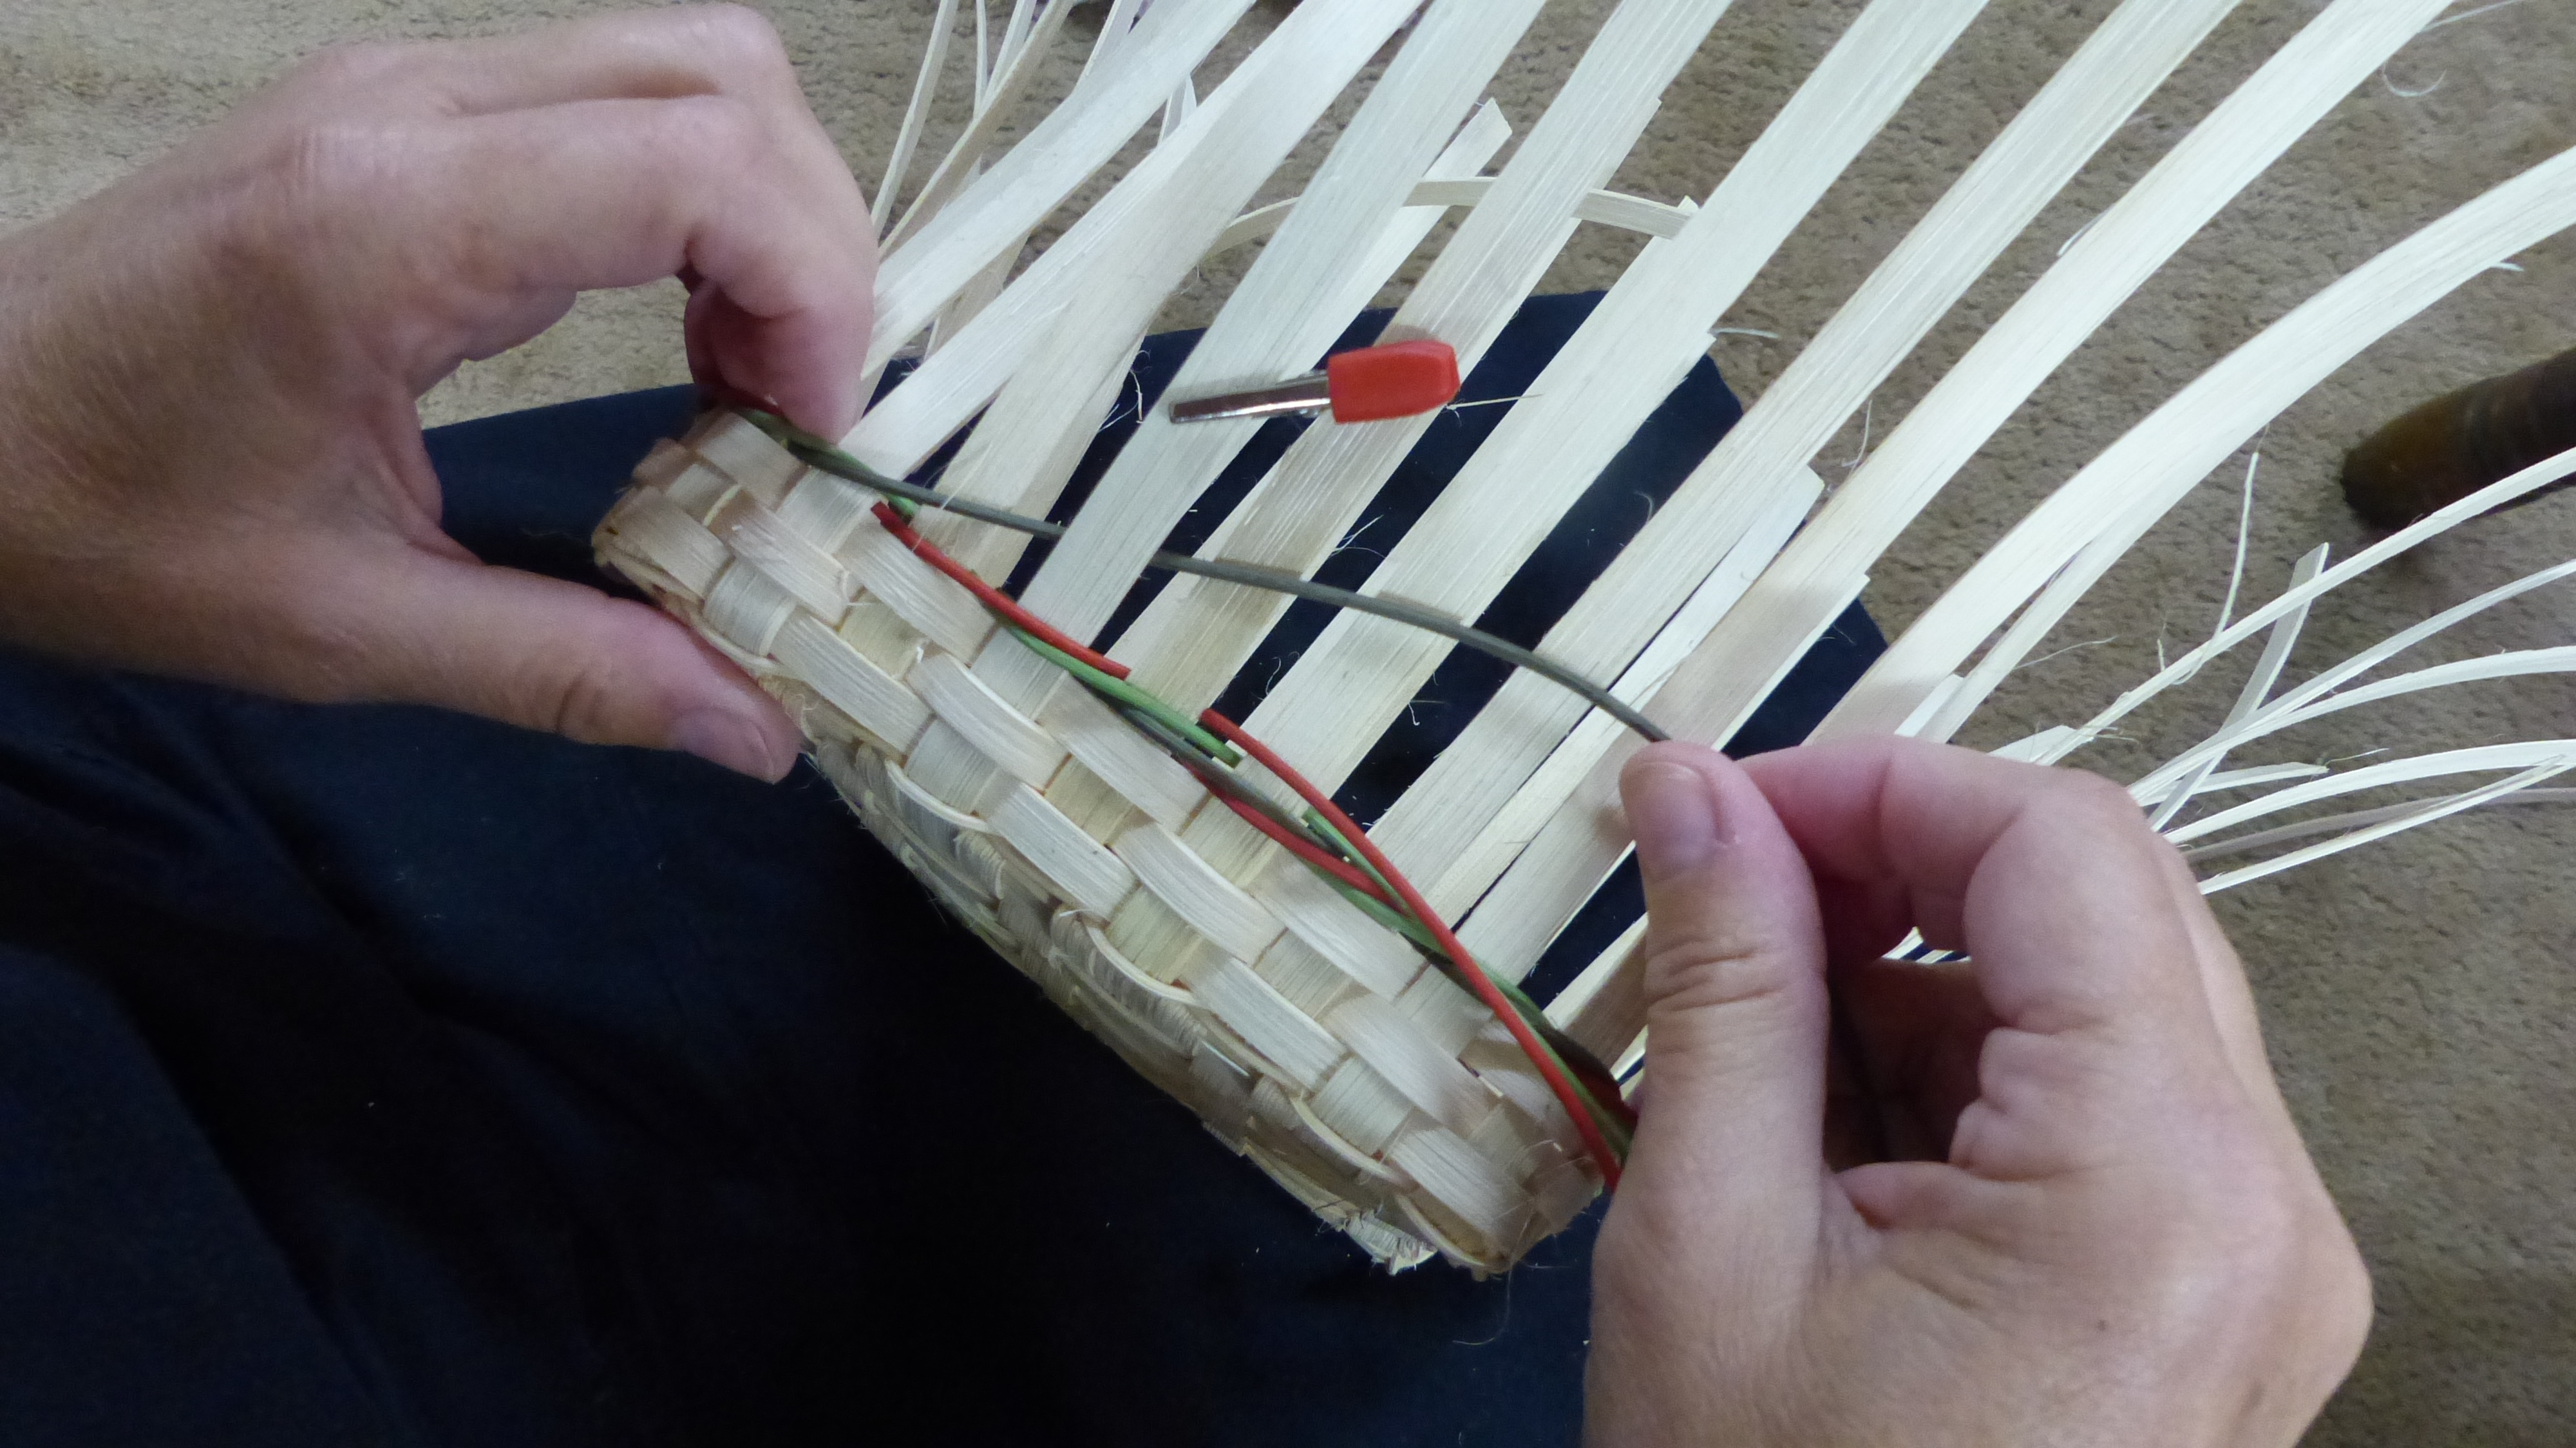
One weaver left – weave it over two spokes, behind one and back to the front.
Now Row One of the Three Rod Arrow is done and you have Stepped Up to Row Two.
Row Two of the Three Rod Arrow is a reverse three rod weave. This can be a confusing term because you are not weaving in reverse or backwards. Think of it as weaving regular three rod upside down. It’s not as hard as it sounds … here’s what you do
ROW TWO reverse three rod (reverse triple twine) with a step up.
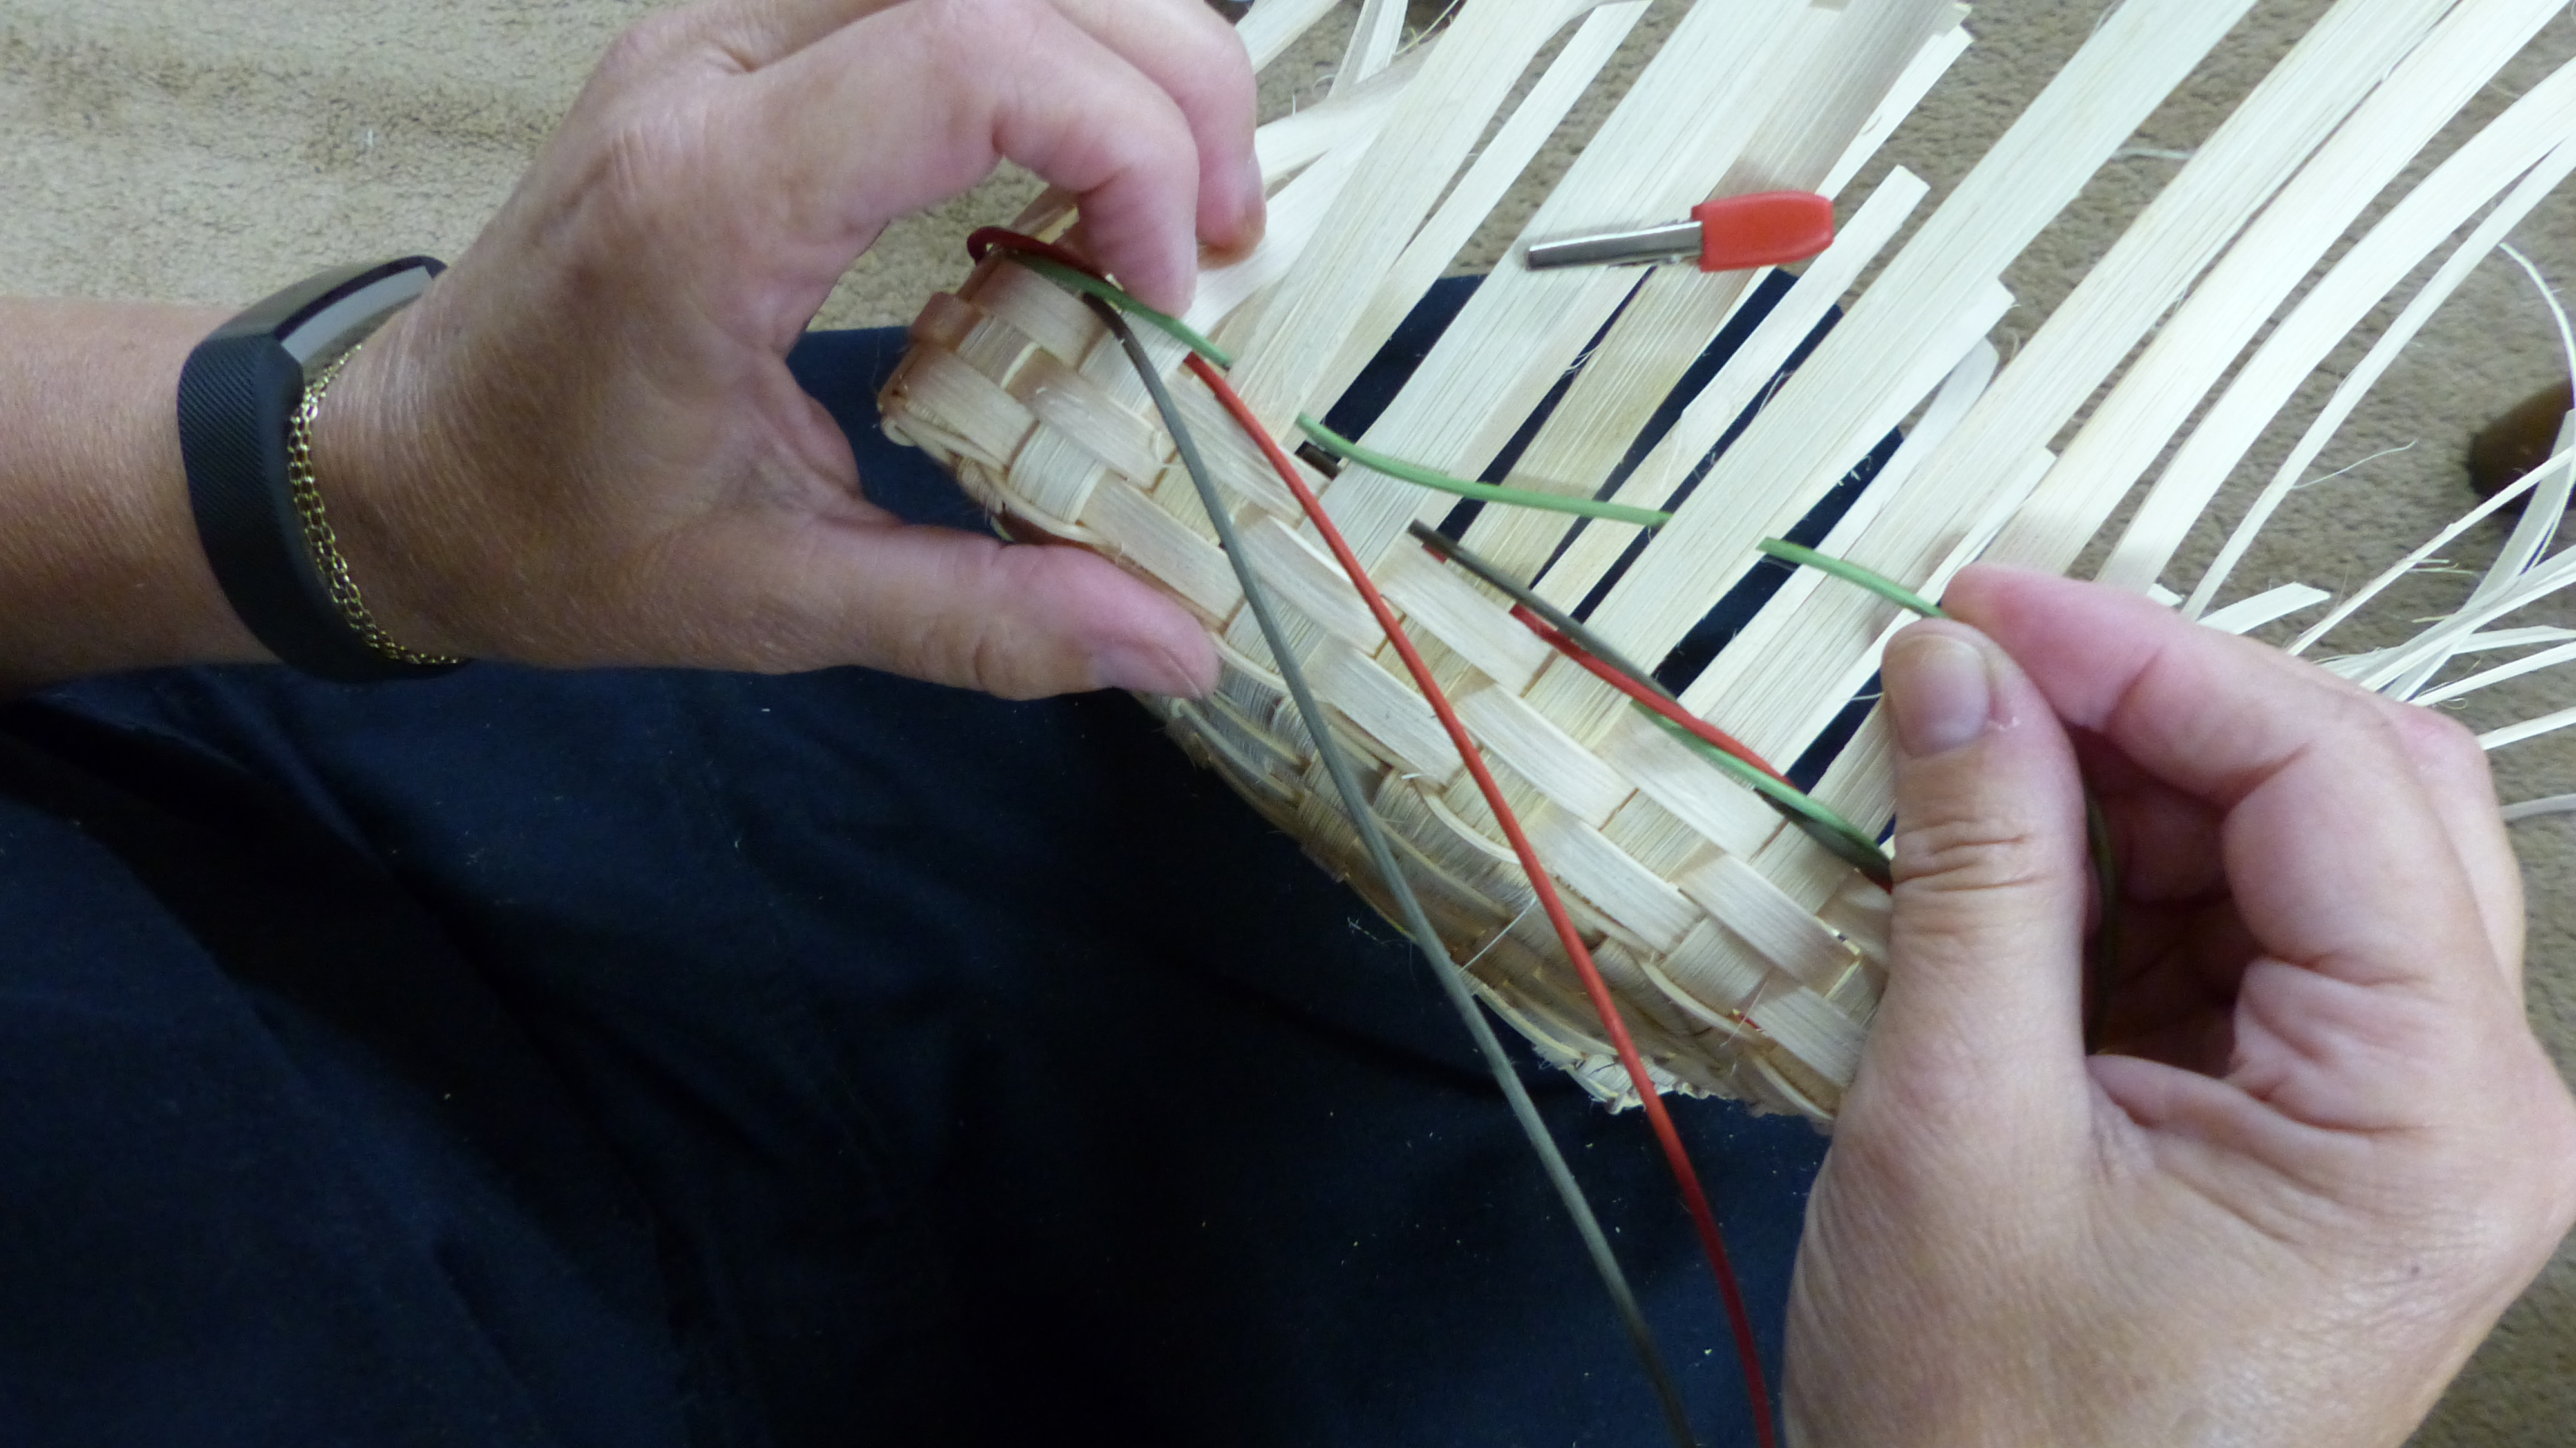
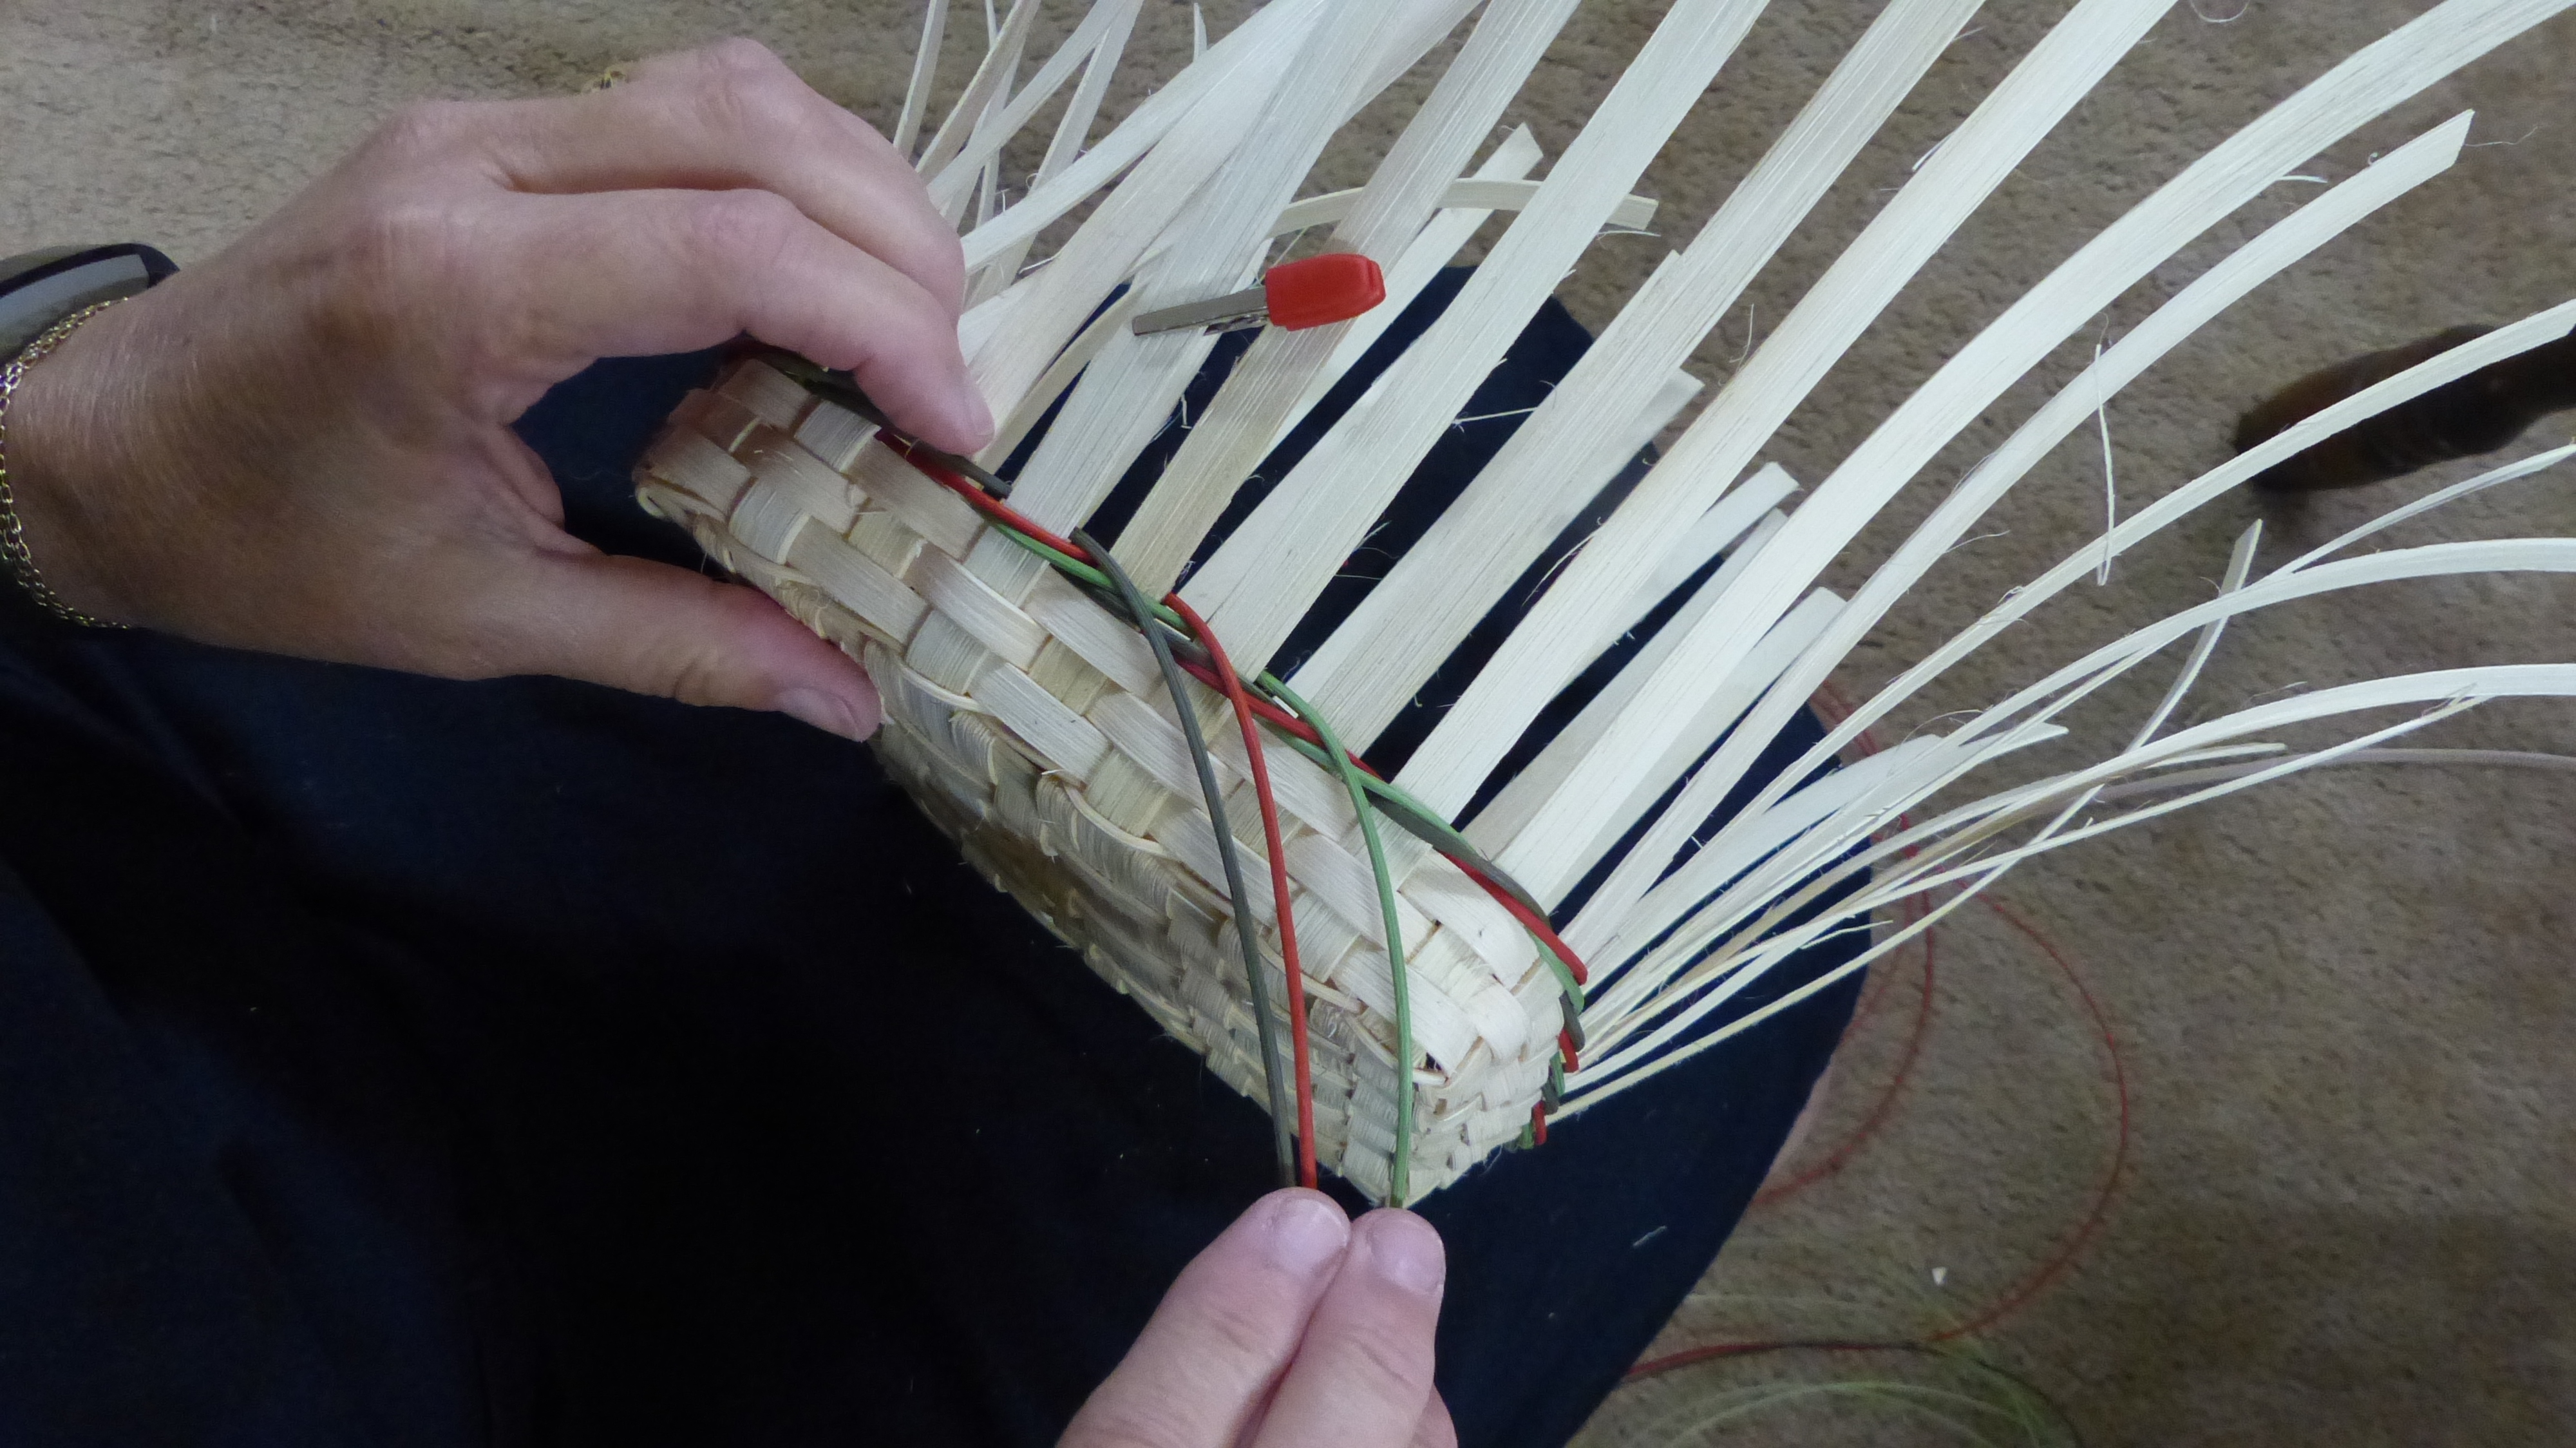
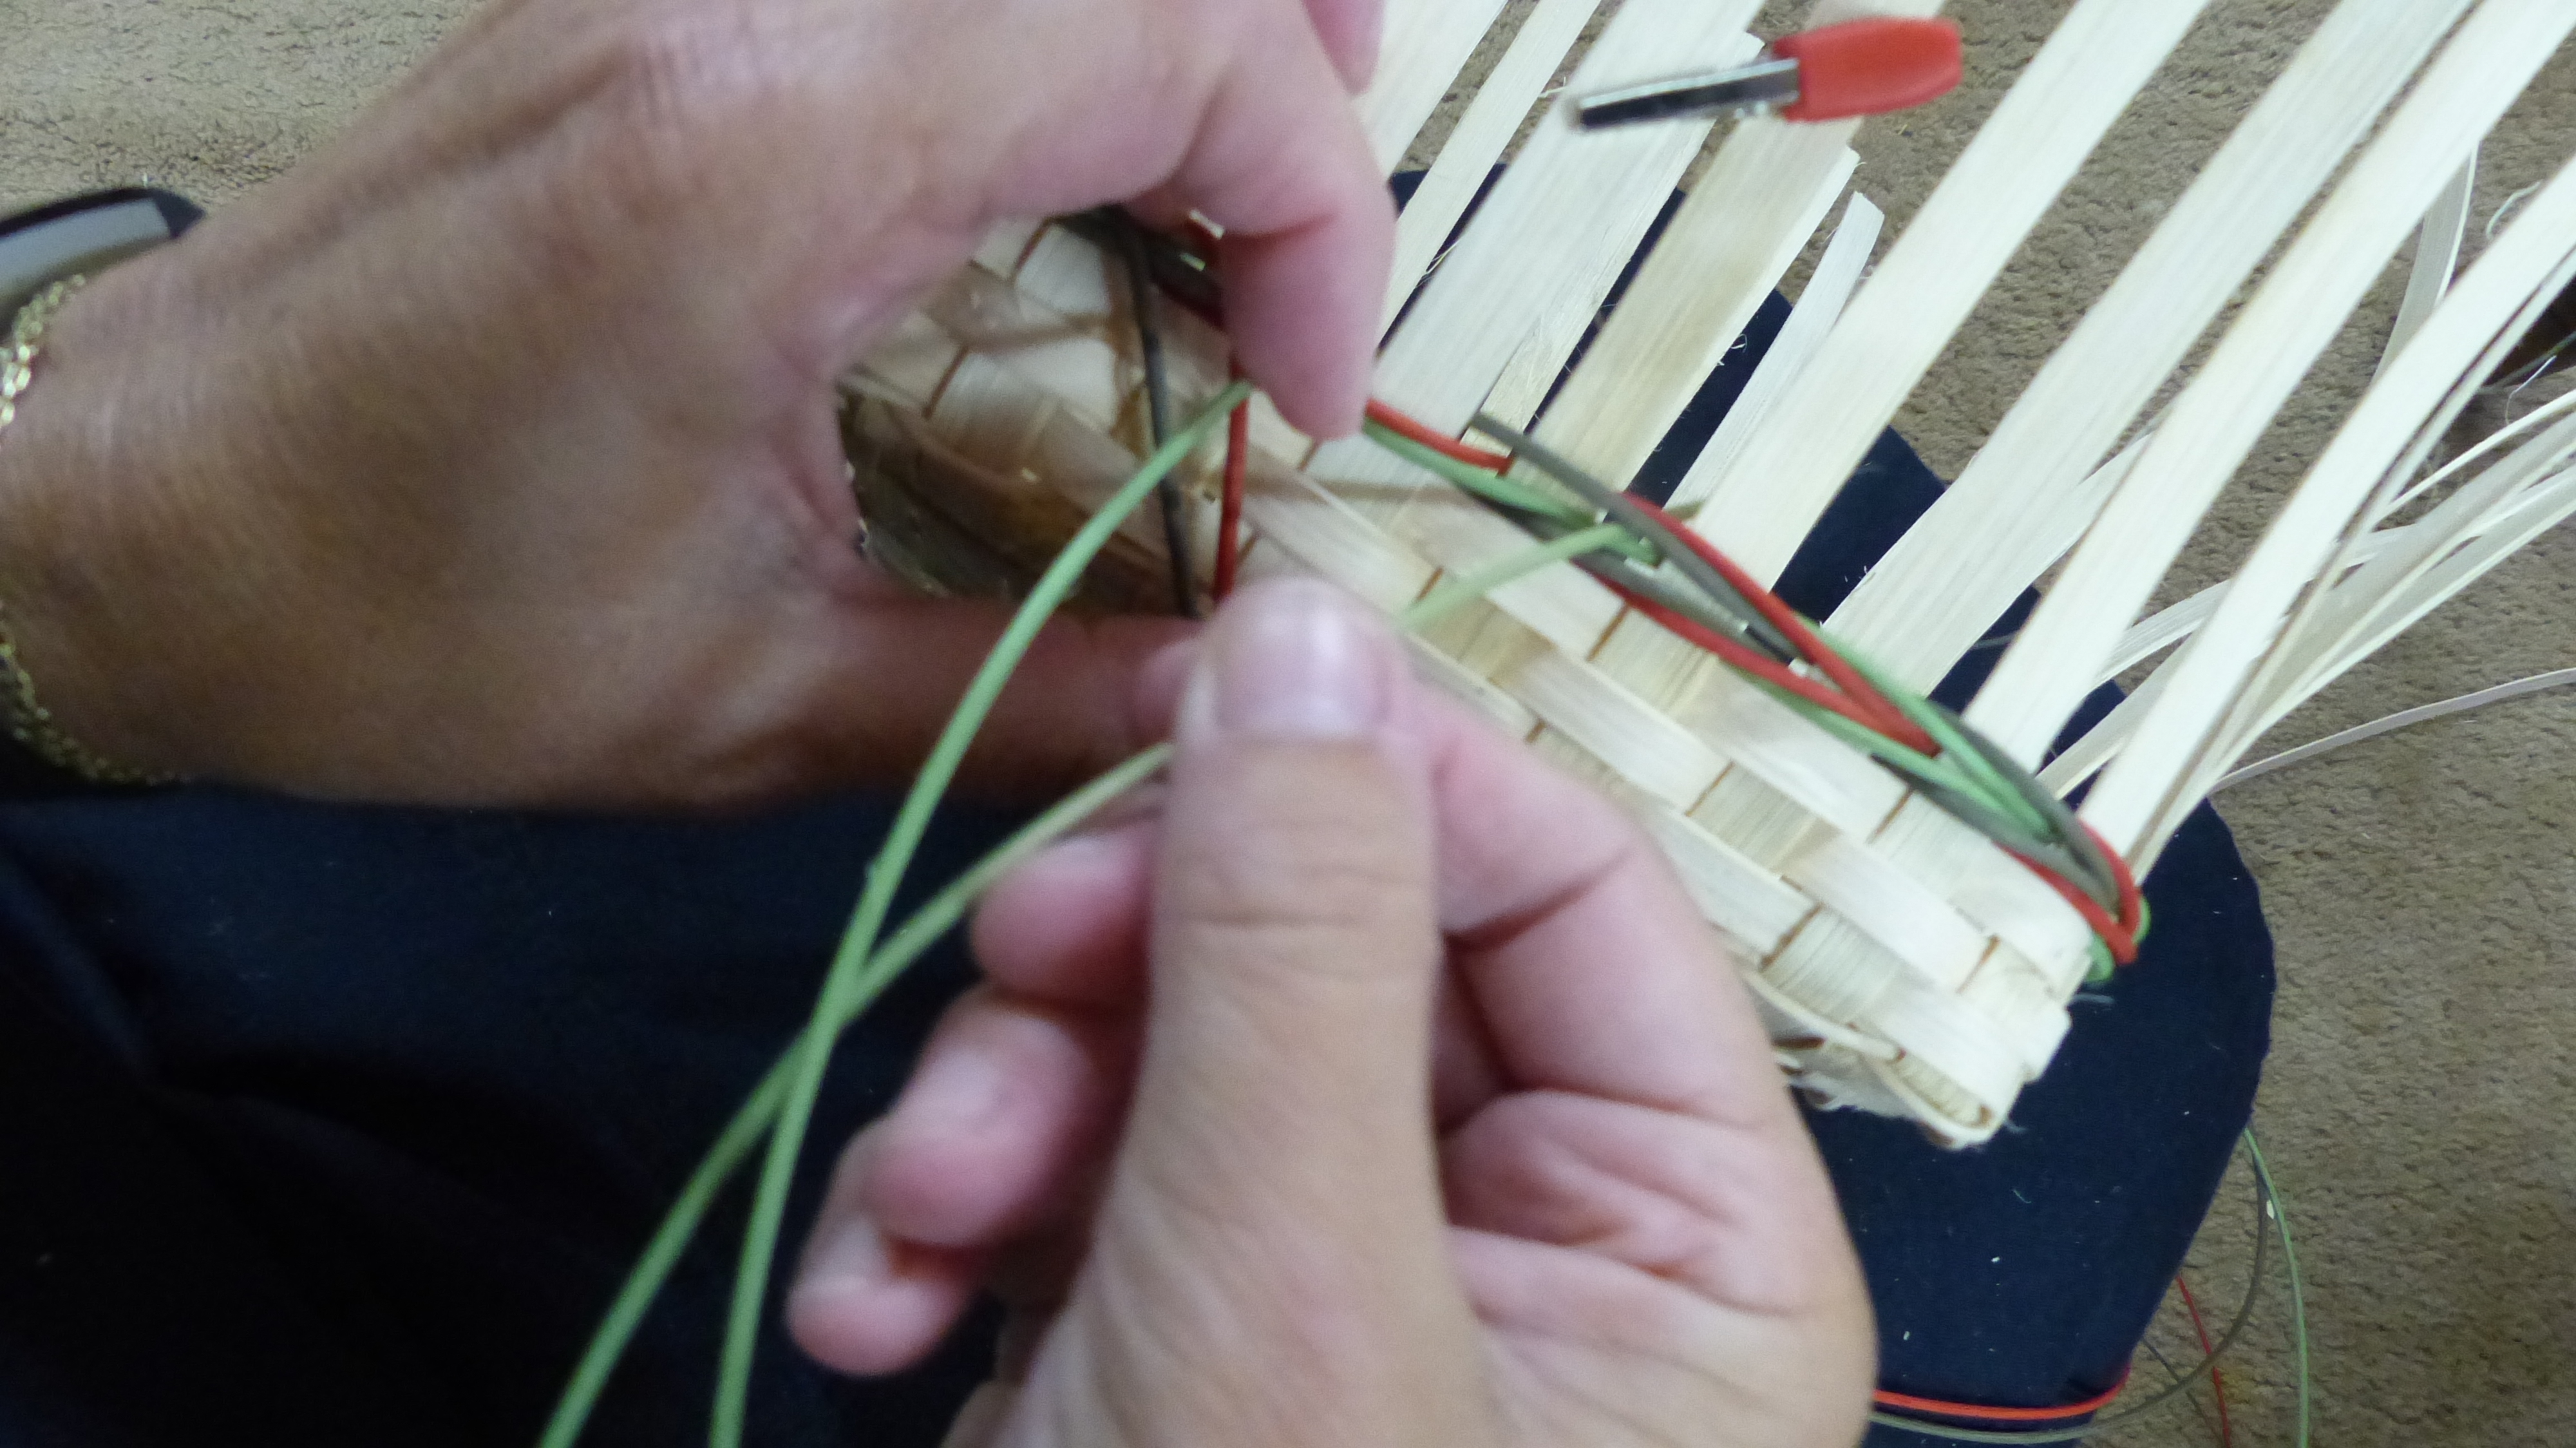
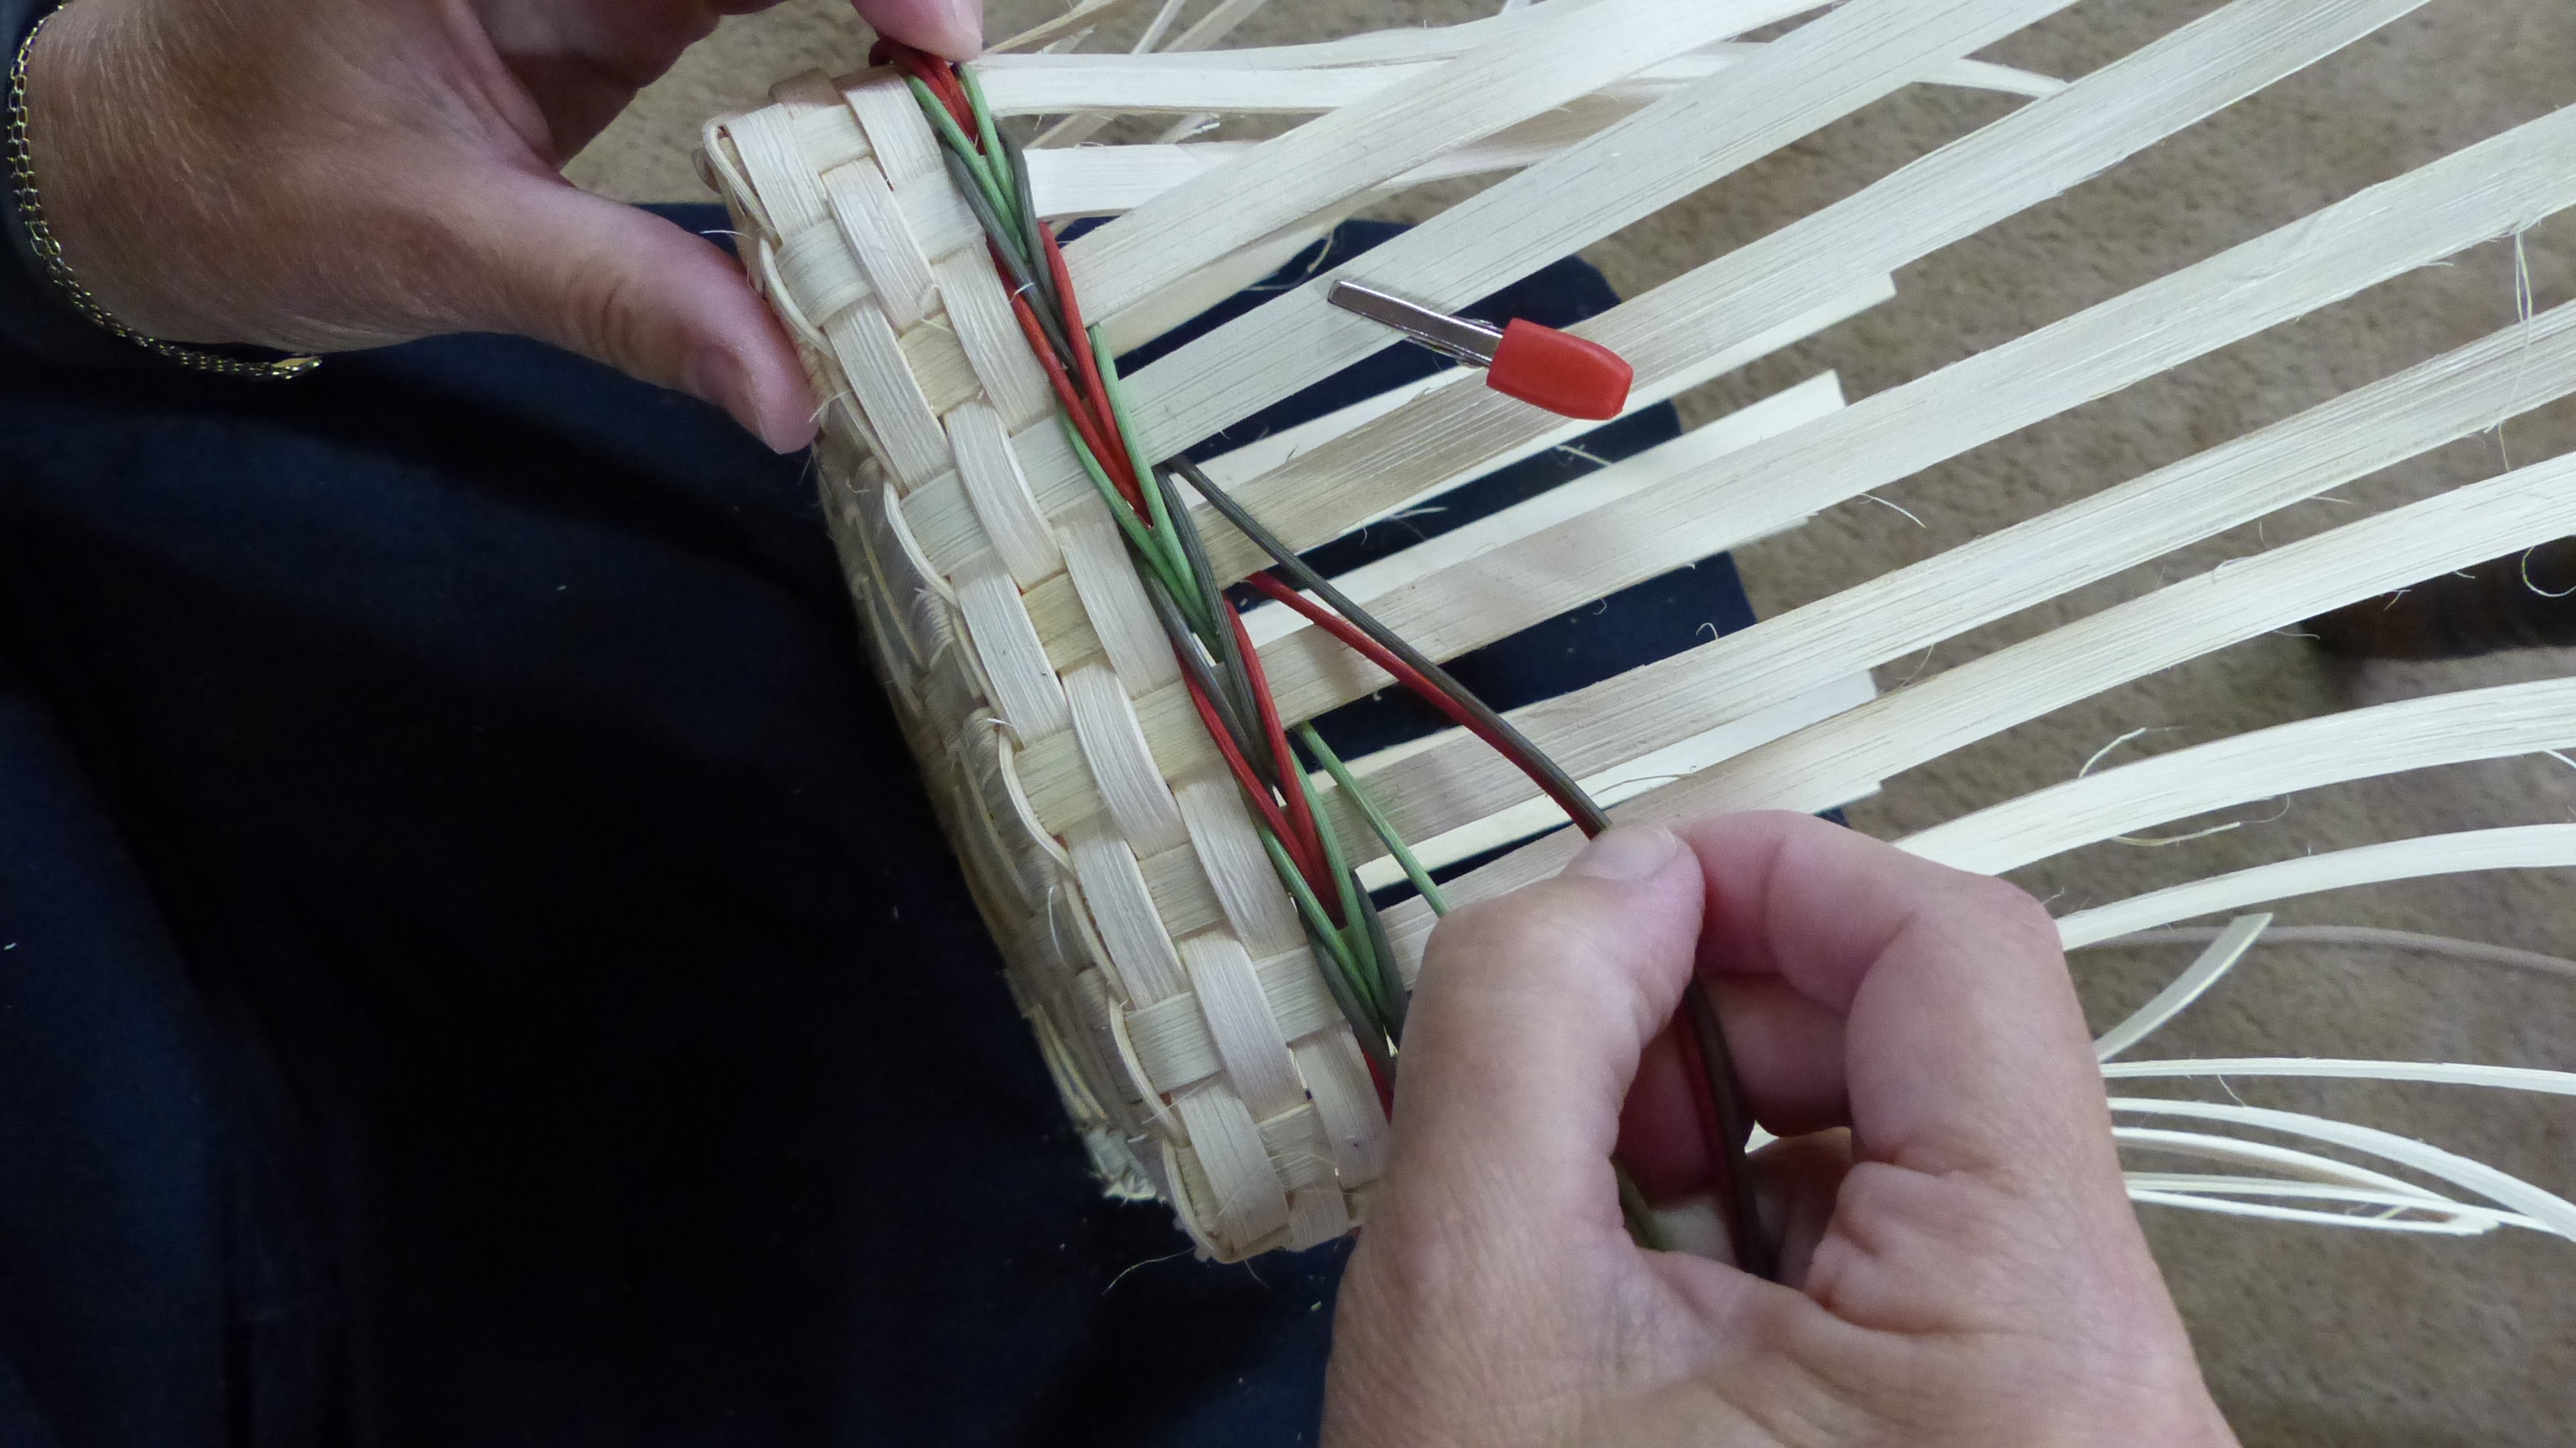
As with regular three rod (triple twining), you pick up the weaver on the far left and weave with it, however lift the other two weavers and place the weaver under them as you weave over two spokes, then behind one and back to the front.
You will notice the first arrow immediately. Now do it again – pick up the weaver on the left, place it under the other two weavers. Now weave it over two spokes, behind one and back to the front.
See how you can see the arrow as you place the weaver under the other weavers. Continue weaving this way all around the basket – pick up the weaver on the left, place it under the other two weavers then weave it over two spokes, behind one and back to the front.

The nice thing about weaving the three rod arrow is that you can see the arrow right away. Instant affirmation 🙂
Now Weaving the Reverse Three Rod Step Up

Same as before – weave all the away around the basket, stopping at the stake you marked. You will always know where to stop if you think of it this way: “Weave TO the spoke you started behind NOT passed it”.
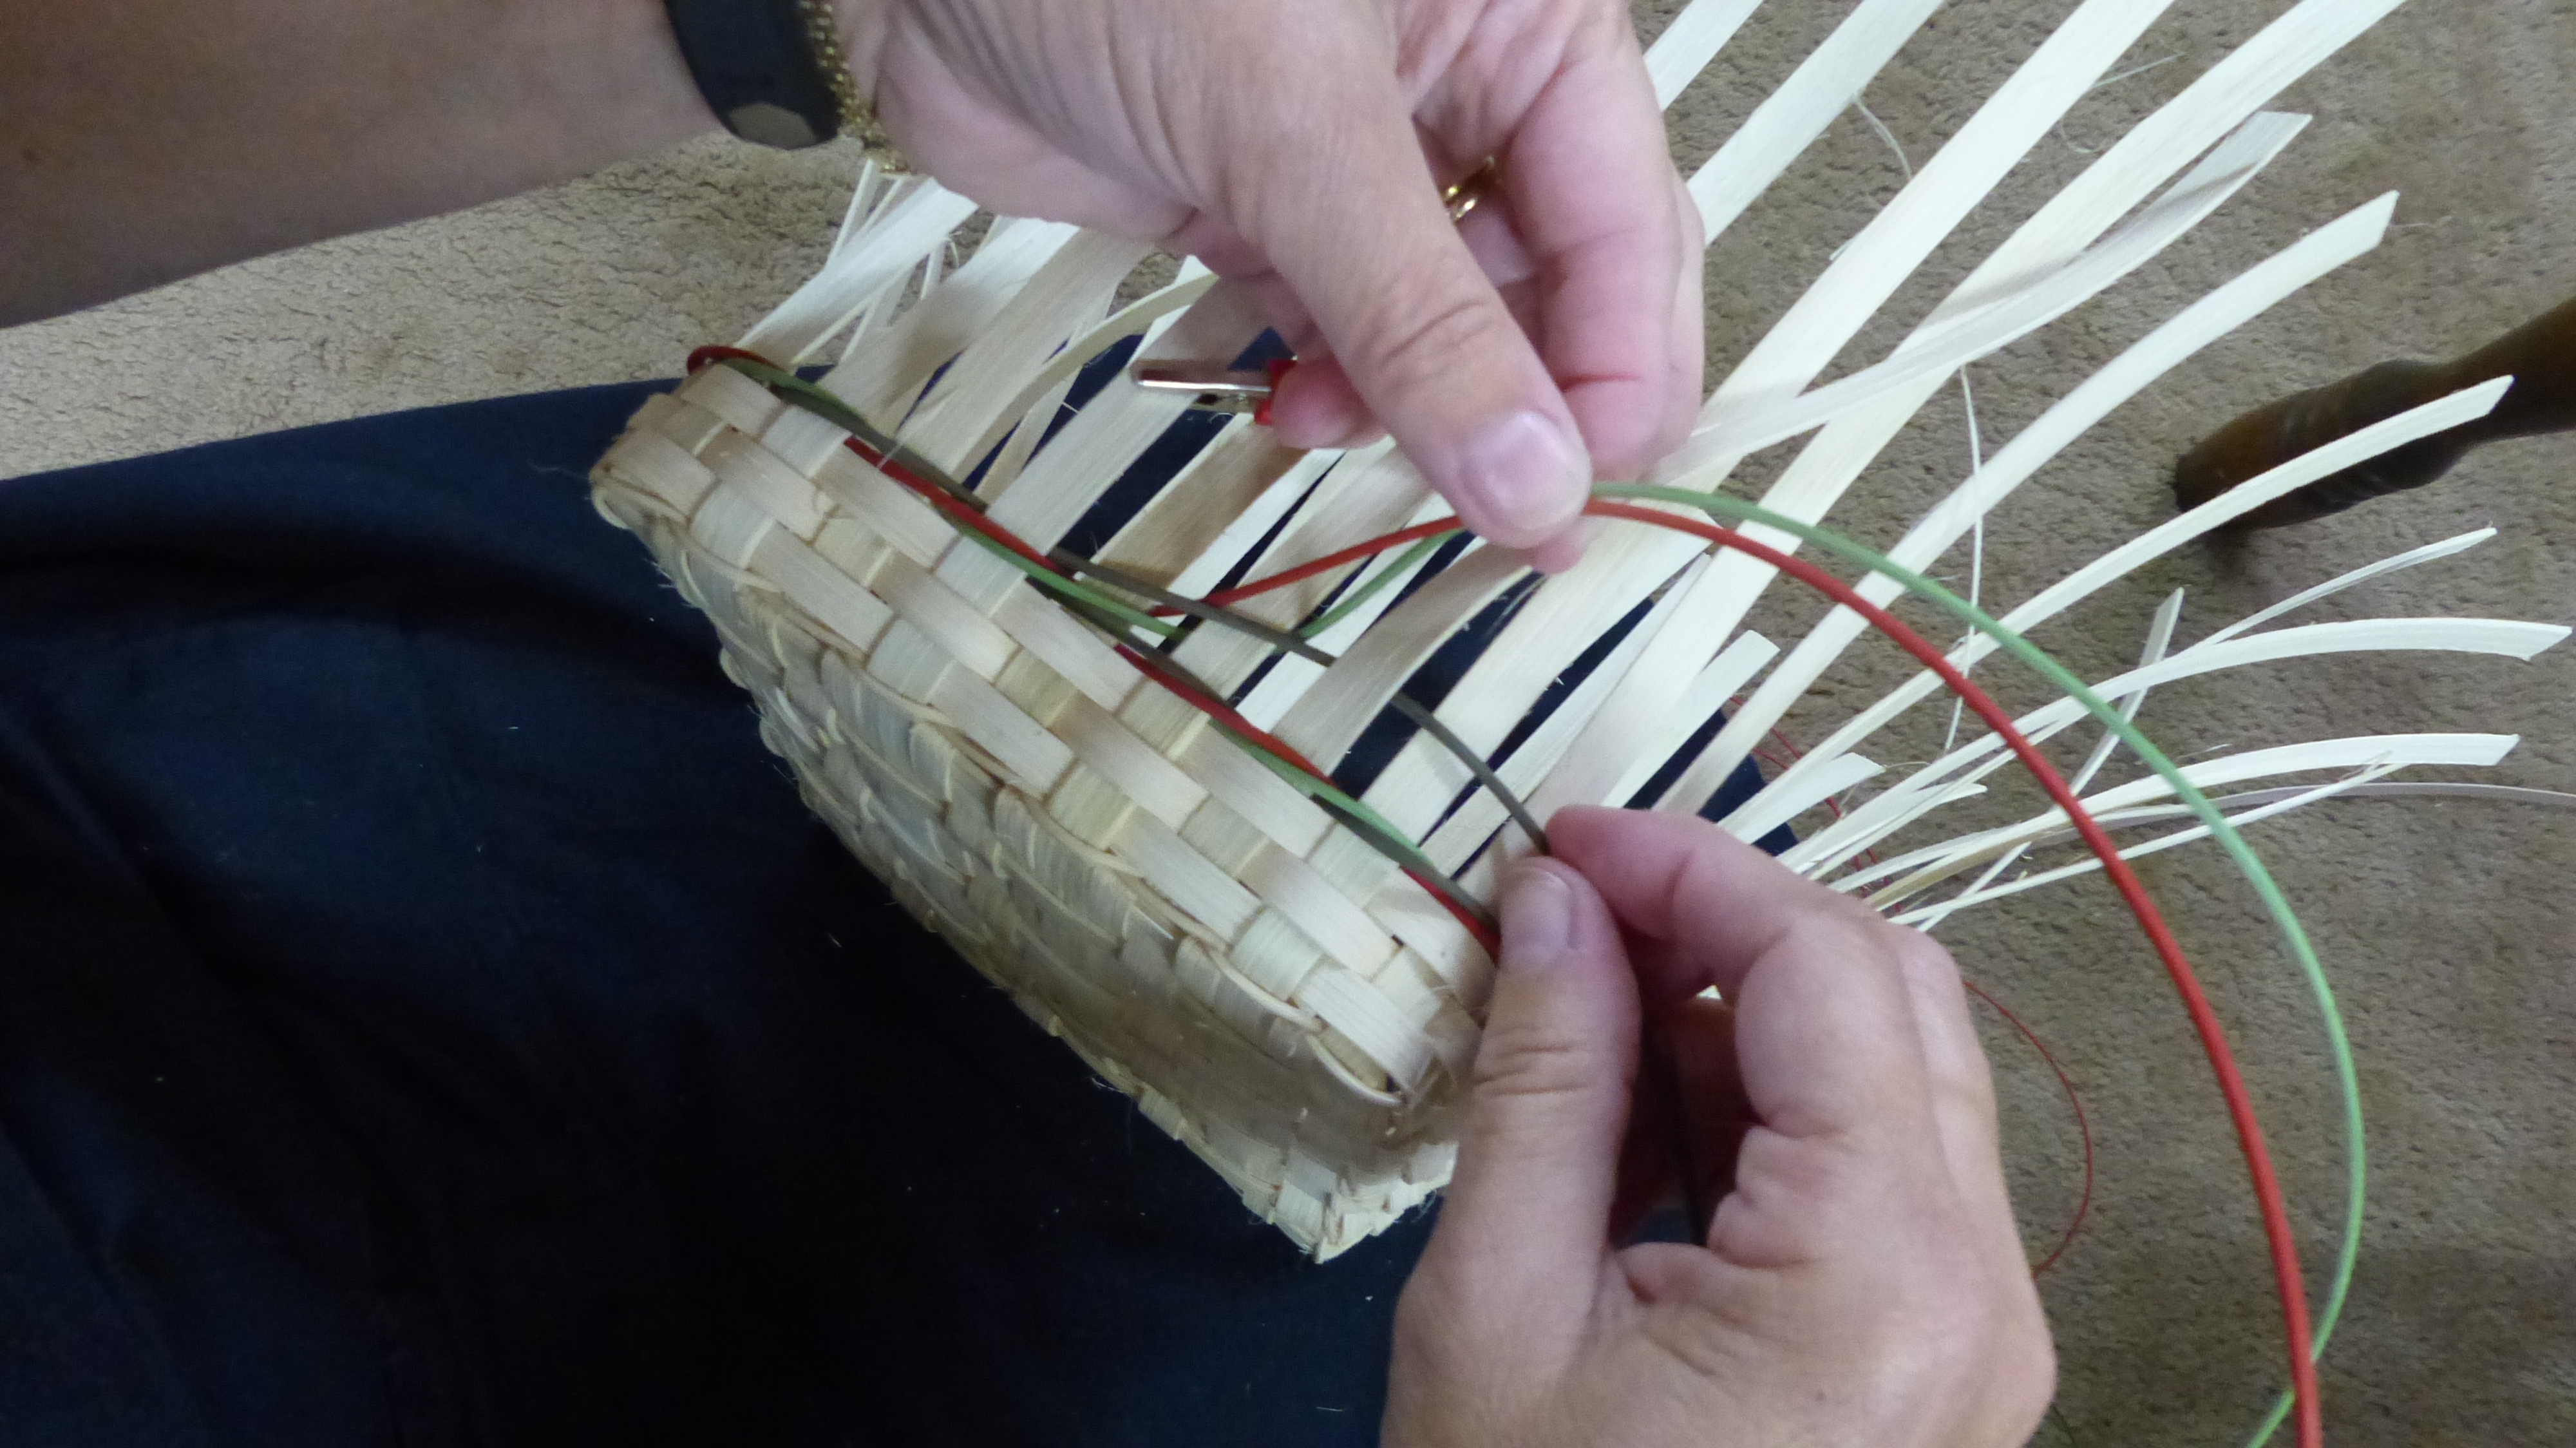
Now pick up weaver that is furthest to the right, it will be woven in front of two spokes, behind one spoke and back to the front, however it must also continue to lay under the other weavers. So it will be poked in under two weavers when it goes behind the one spoke as shown above. Notice that the weave is the same and so is the placement, only which weaver is used is different.
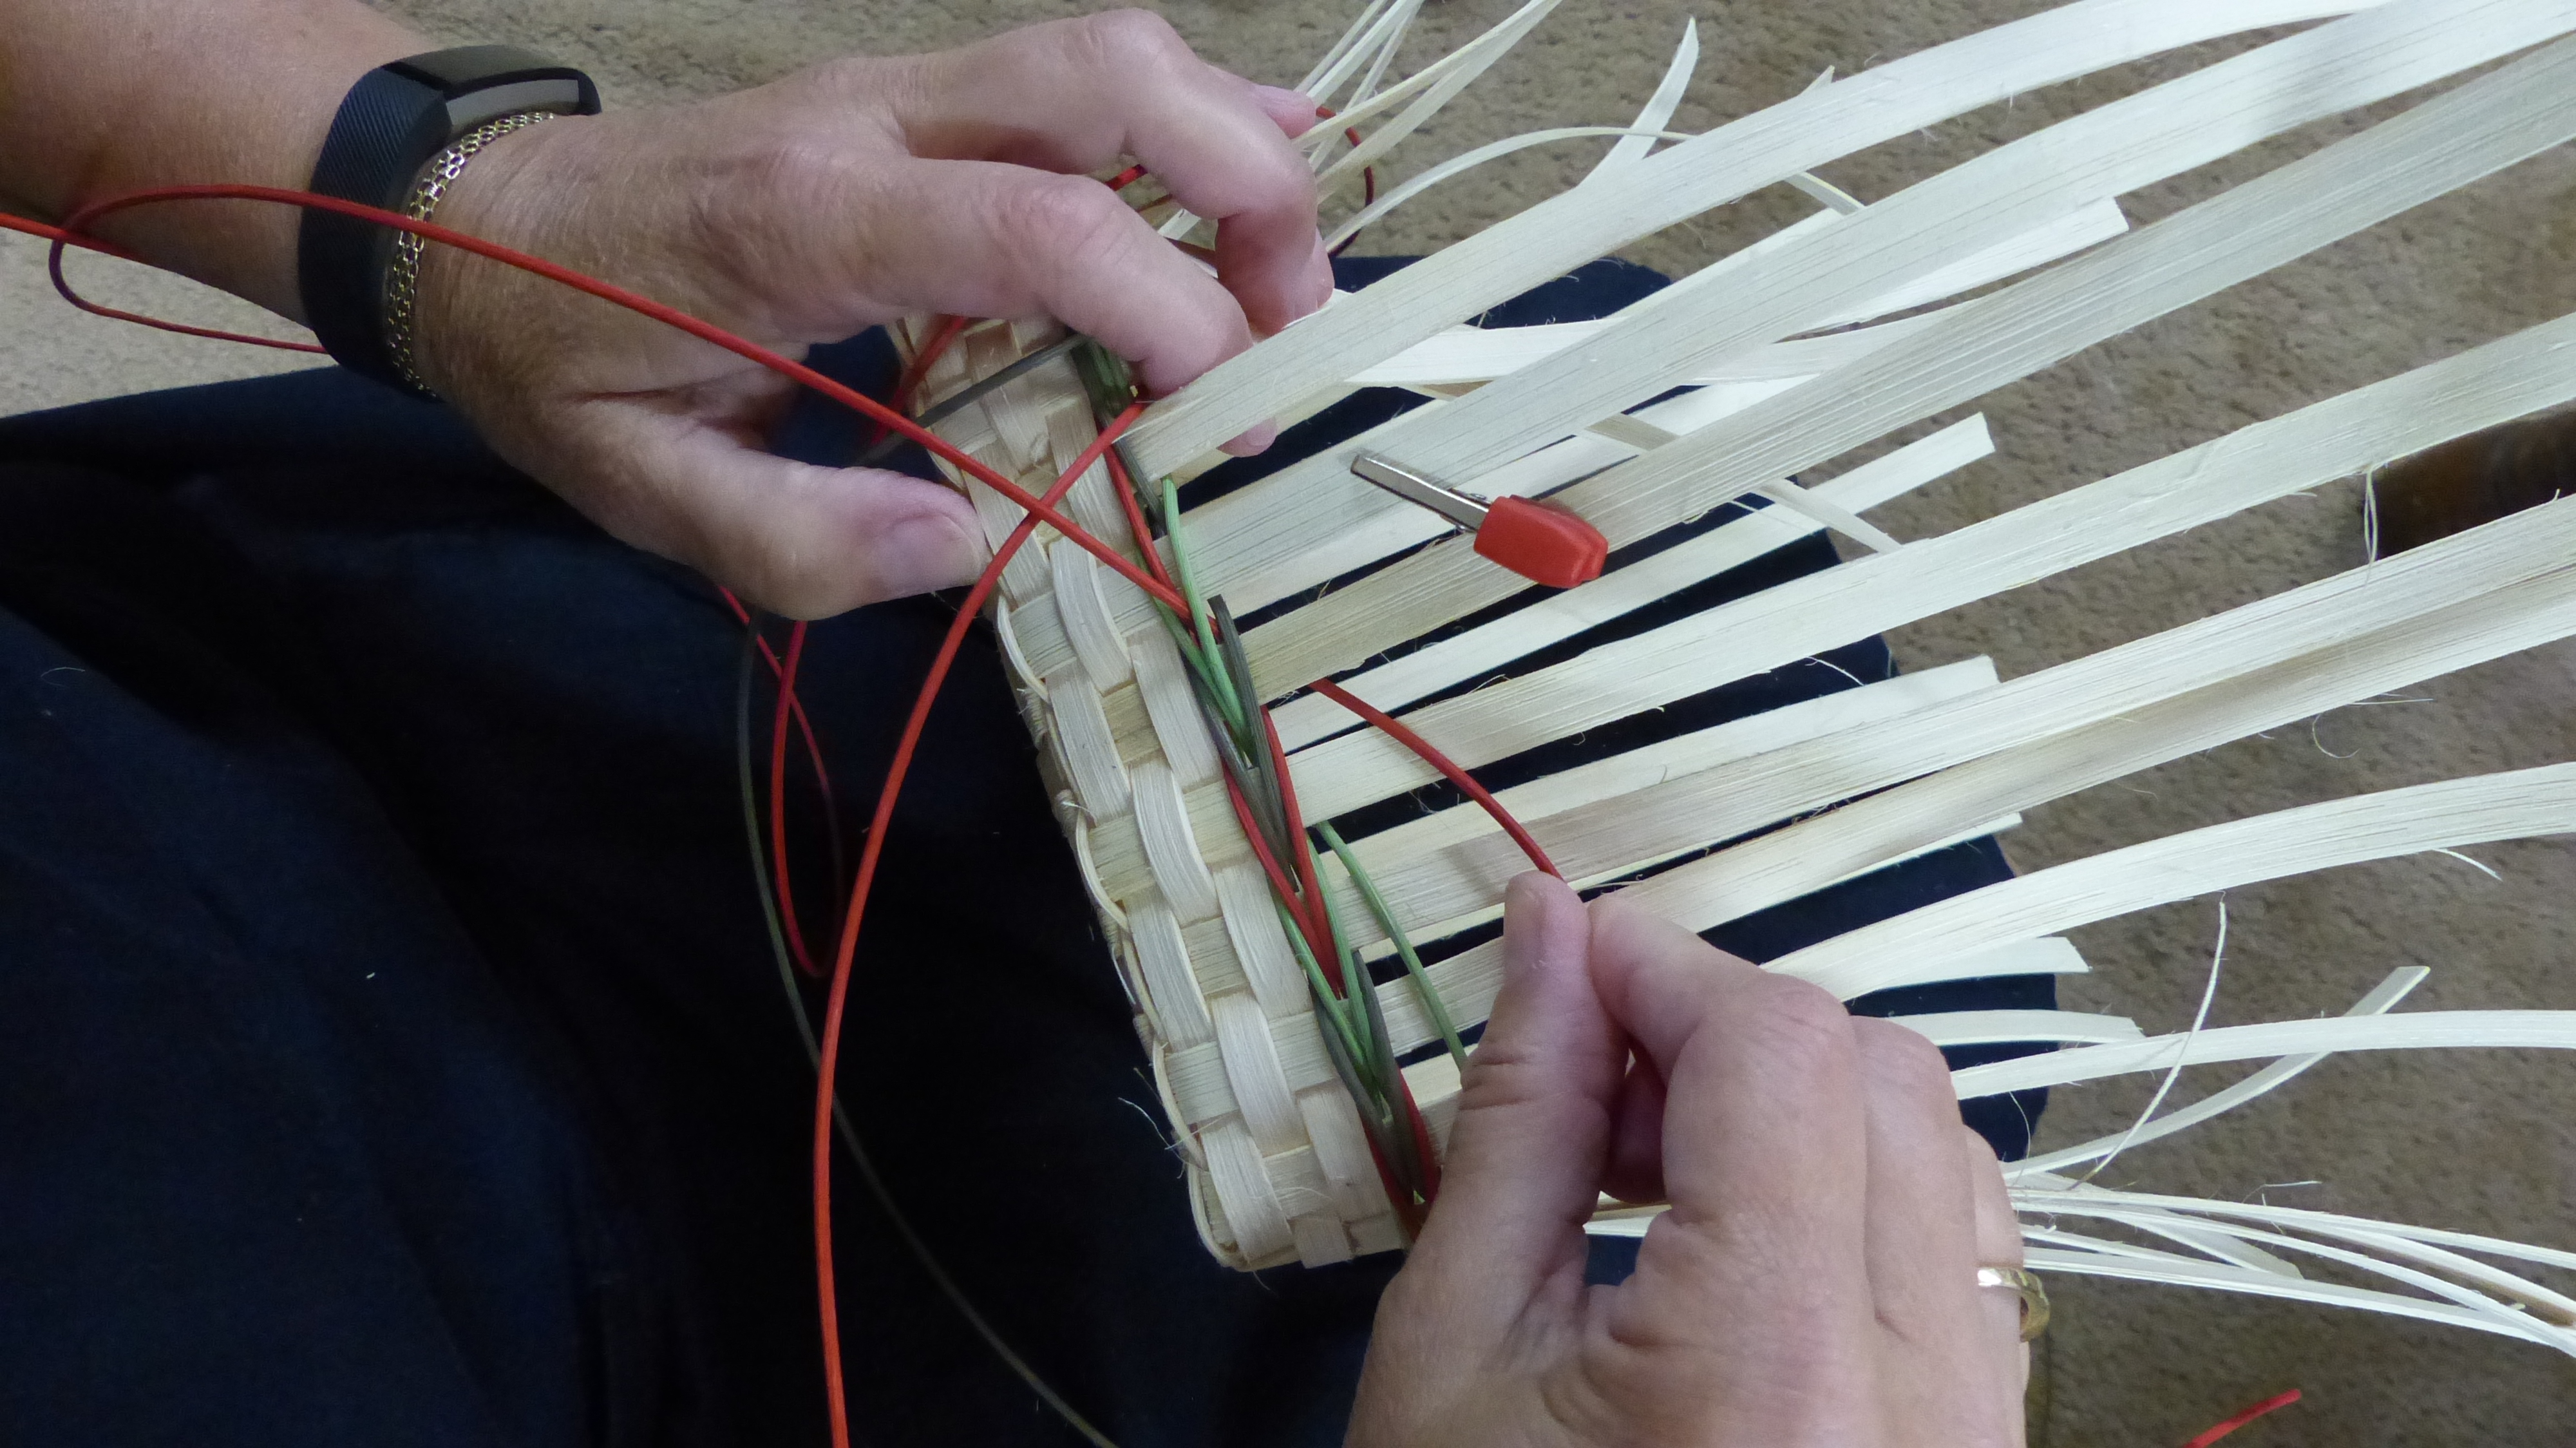
Now there are spaces between the weavers – so we need to catch the remaining weavers up. Again the weaver will be woven in front of two spokes, then poked in under two weavers as it goes inside the basket and behind one spoke and back to the front.
Notice how the end is pulled through and lays on top of the weaving.
One weaver left, weave it in the same way – in front of two spokes, then poked in under two weavers as it goes inside the basket and behind one spoke and back to the front.
Now Row Two of the Three Rod Arrow is done and you have Stepped Up to repeat Row One.**
You can stop here for a nice arrow accent or you can repeat the three rod and the reverse three rod rows until you have what you want (in this tutorial, repeat from ** to ** ).
If you are looking for a basket to weave check out my American Pie Dreams.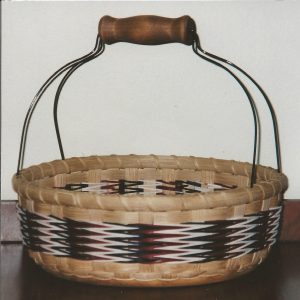
And there you have it — have fun!
thanks for reading the Basket teacher

Great tutorial. Very easily followed and I love the effect.
Wow that looks amazing
Love it thanks ..
Should make it look so easy! Good directions
Beautiful. Thank you for the wonderful tutorial !
Hi, I loved this used it with waxed thread in a cedar bottle wrap, thanks for sharing.
Thanks Annetta! This is a great refresher on how to do a three rod arrow!
Could you please video a demo for left-handed weavers? I’d love to be able to do this.
Hmmm. let me practice that
Thank you! Great tutorial and answered most of my questions. I have a remaining question. If the pattern call for just a 3 rod wale, step up, and a reverse 3 rod wale (so one full row of arrow weave, how do I end it? My best guess is to finish the last part of the reverse 3 rod wale by going in front and under the two weavers to the right and not come back out but I’m just not sure. Can you help? I hope my question is clear. Many thanks.
At the last step, where you bring the pieces back to the outside (stepped up to begin another row) slide the pieces down into position as if you were going to do another row. Then cut each weaver outright in front of the first stake it is outside of or lays against. NOw bring each stake back to the inside of the basket in the spot that they came to the outside through. This cuts them long enough so they won’t pop back out to the front.