How to use Clips – Weaving the First Rows of a Basket
Today I am going to talk about one of our favorite tools and using them effectively. Clips.
When I tell students to get out their clips, some pull out their old faithful wooden clothes pins and others pull out a wide array of clips and ask which ones are best. 🙂 Like many of you, I have a variety of clips, wooden clothes pins work for almost anything, but sometimes you need something smaller.
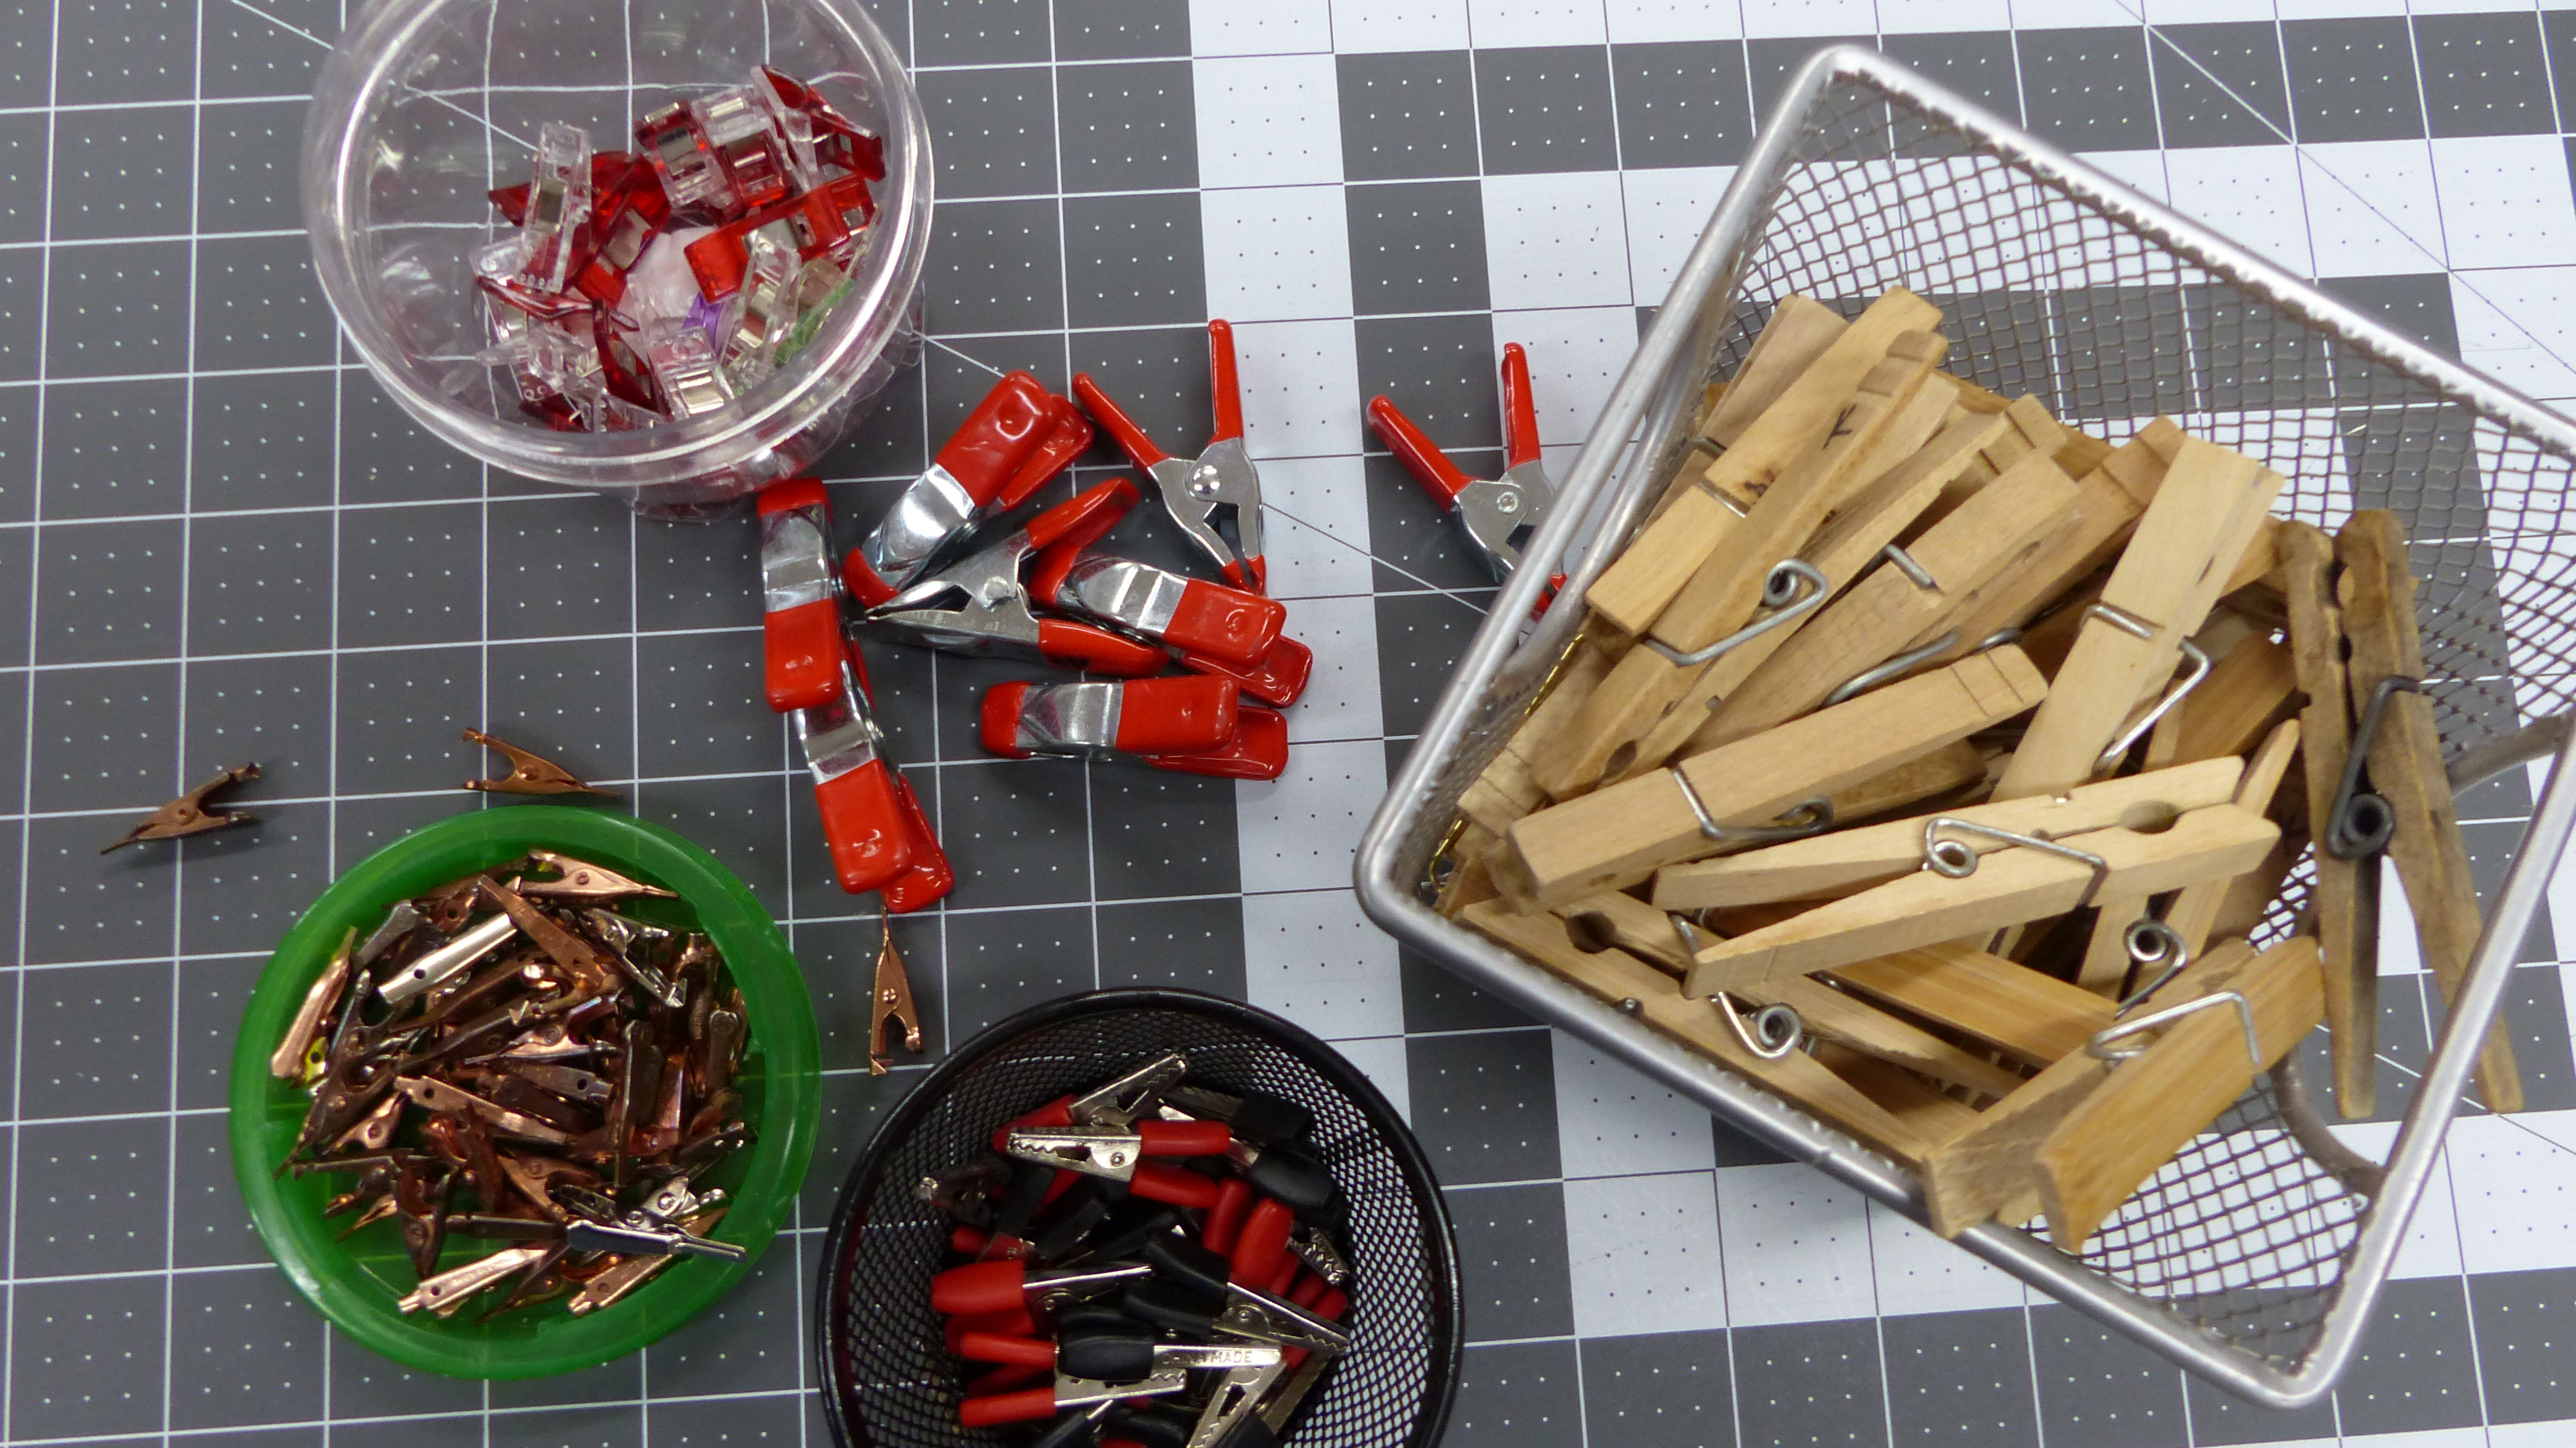 And when you are a basket teacher you accumulate all kinds of clips – this is what was on my weaving table today! The bottom line is, almost any clip can be used, the important thing is to learn to use them effectively.
Clips are most useful when you weave the first few rows of a basket and upset the sides of the basket. Using them correctly will make a big difference in shaping, using them incorrectly creates shaping hurdles.
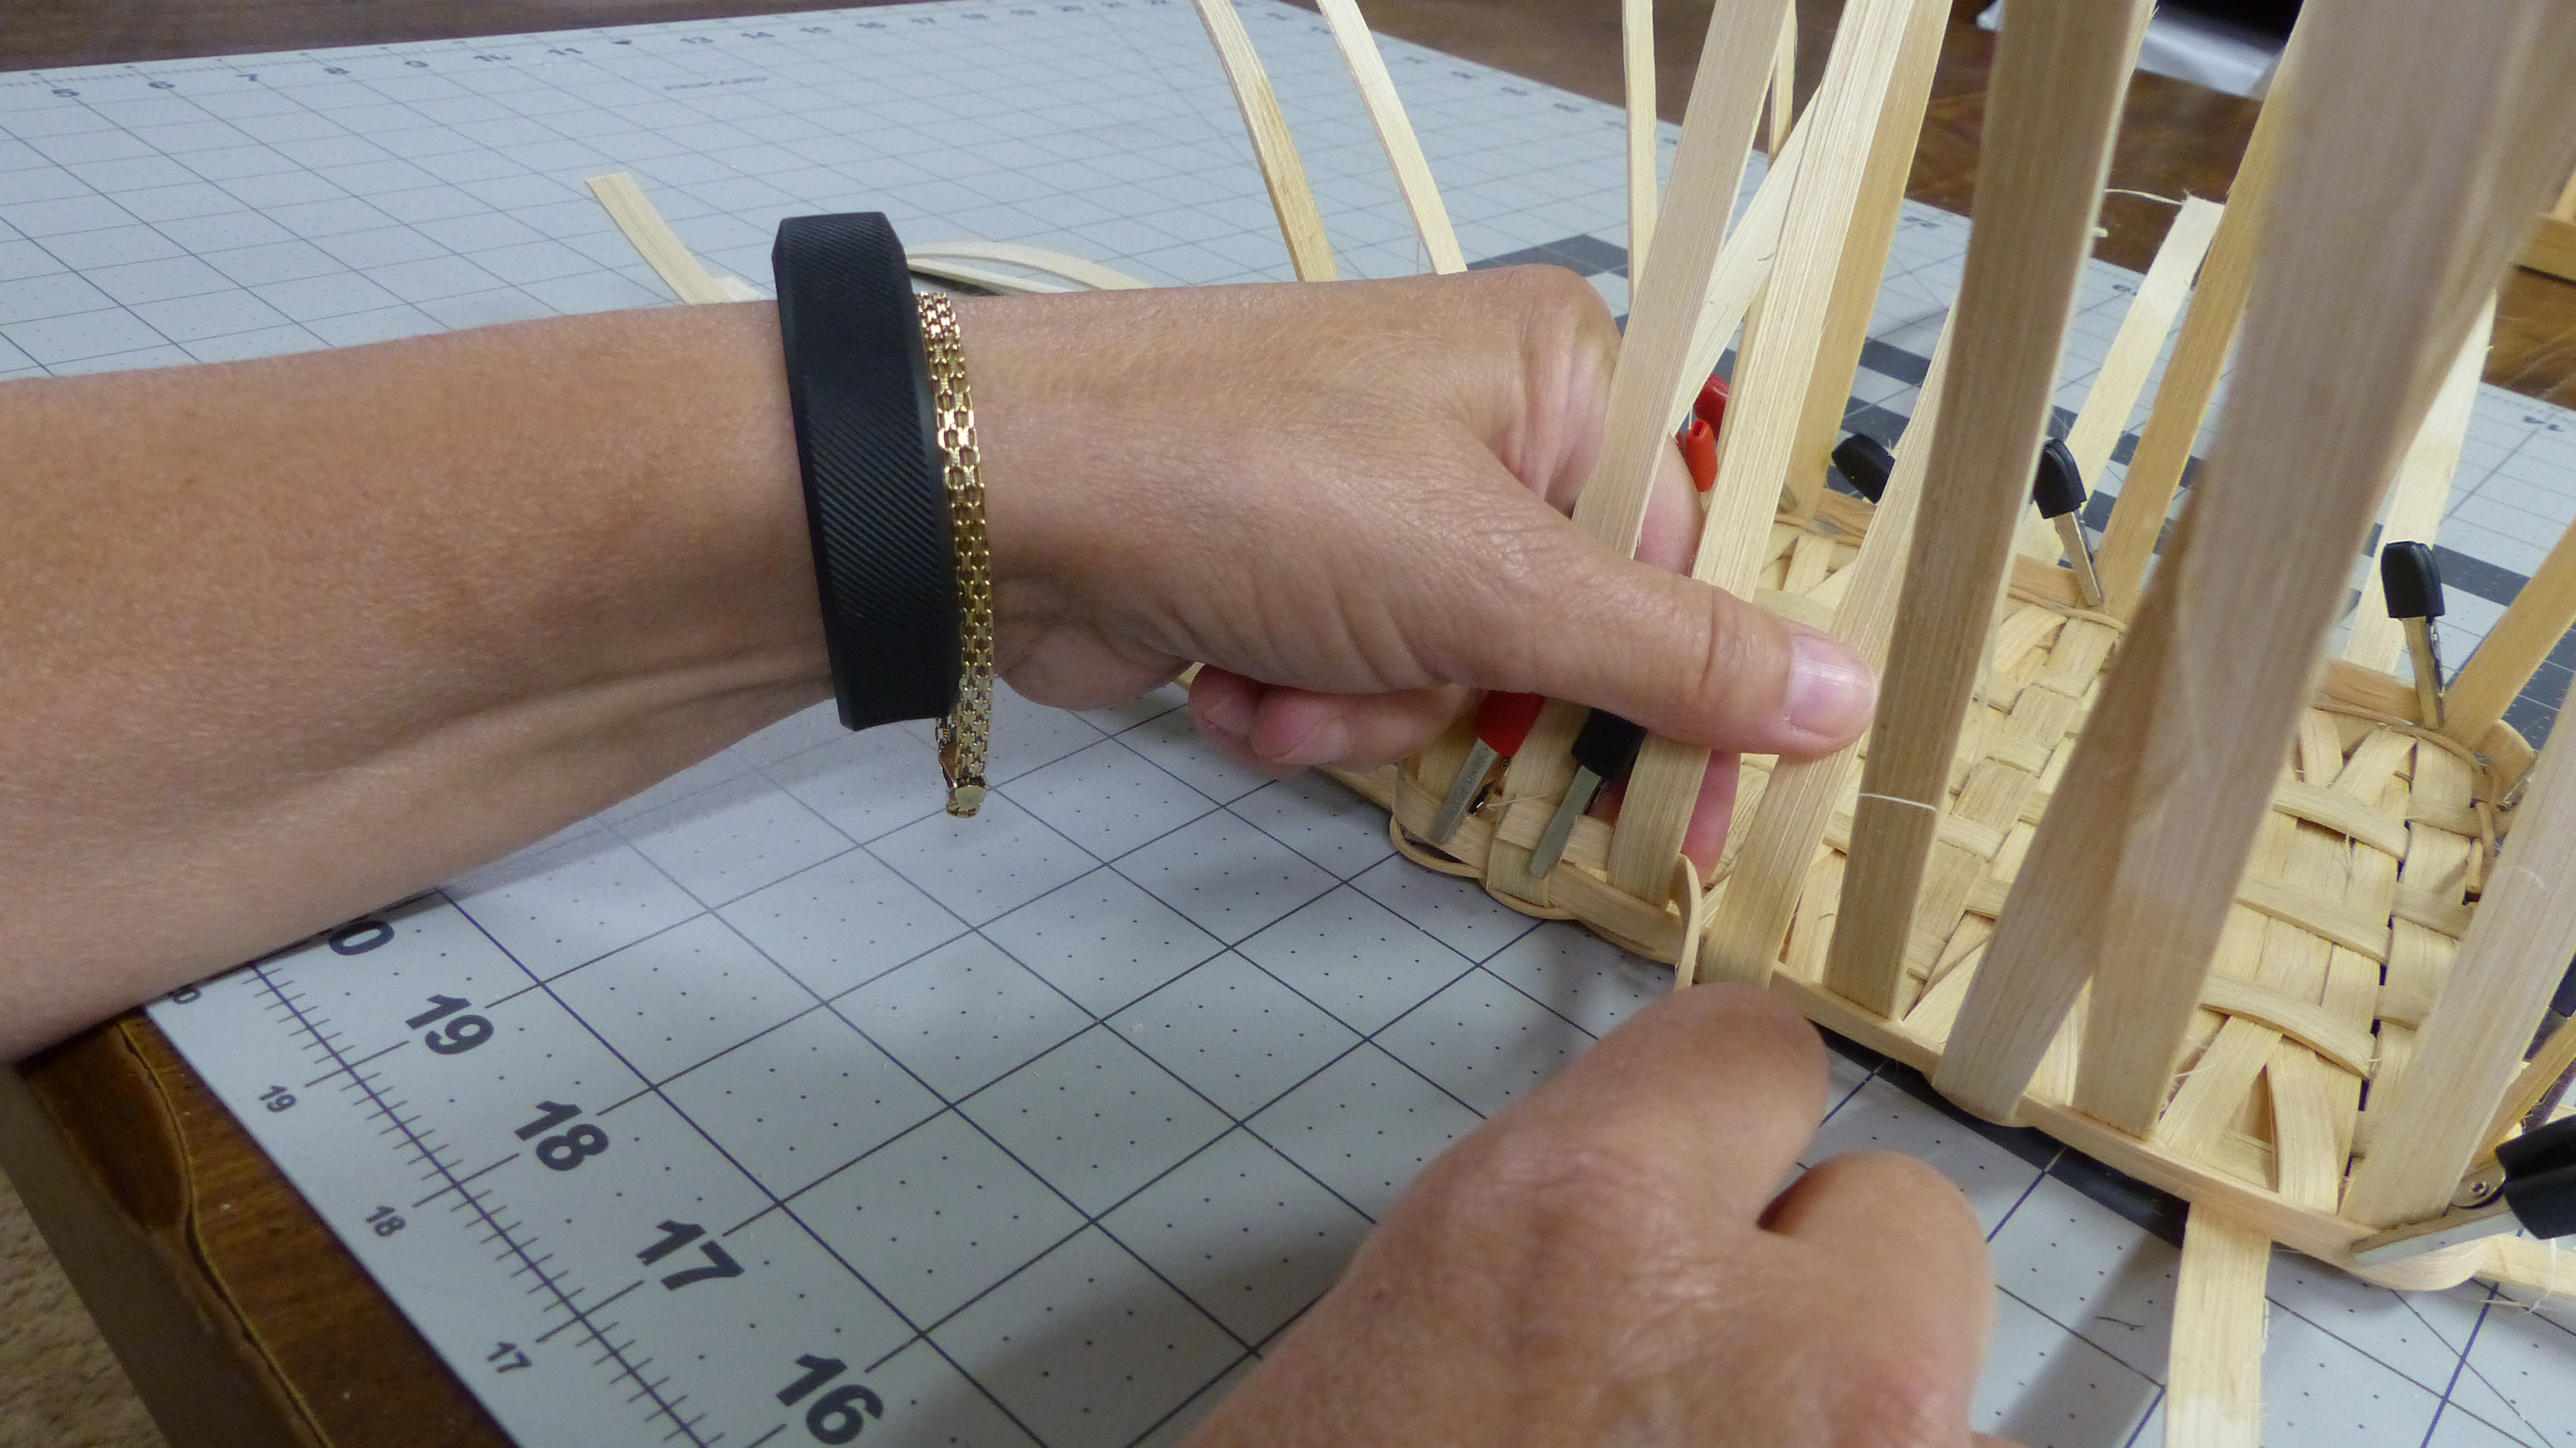
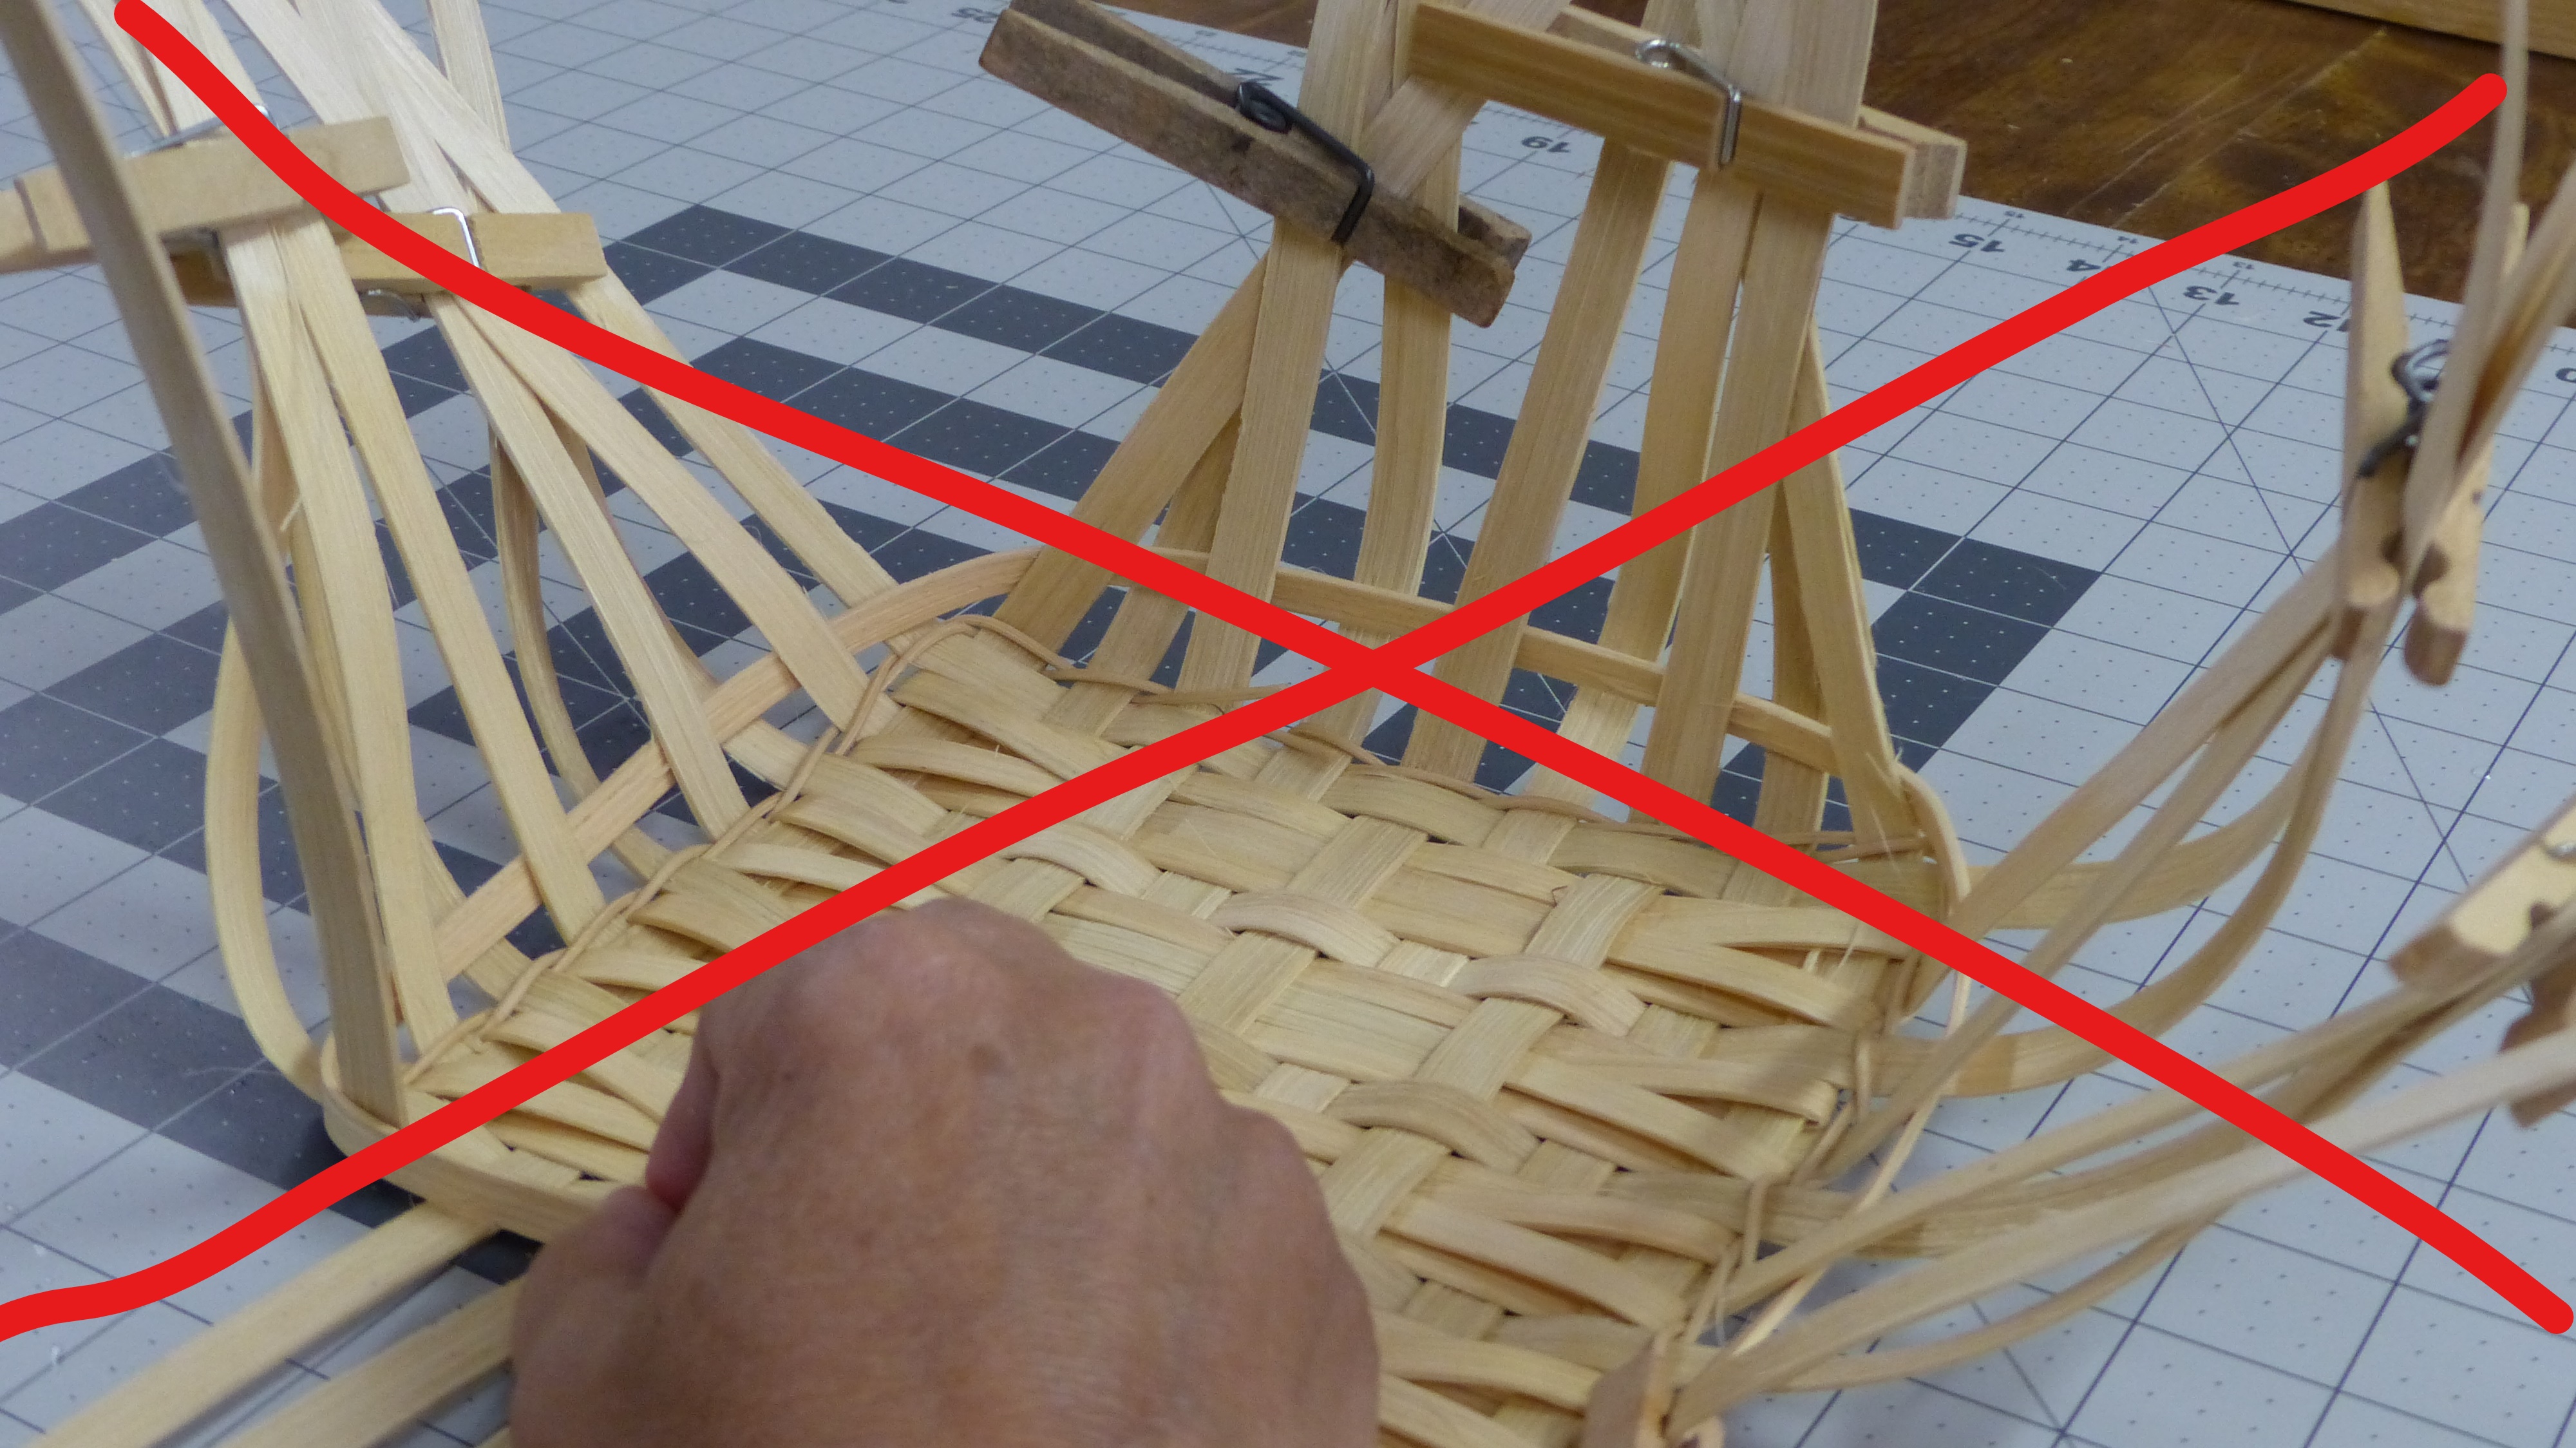 So first let’s talk about how NOT to use clips on the first rows of weaving a basket. As you can see the picture above has a big X across it.
- Don’t use your clips to bundle the stakes – this creates a shaping hurdle by giving your stakes an incorrect placement memory.
- Using clips to bundle or hold stakes, rather than hold the weaver in place, will create gaps that are difficult to control and create a wimpy start to your basket.
- Don’t use heavy clips on the ends of your stakes- this pulls the stakes down when you are trying to make them stand up.
NOW let’s talk about effective ways to use clips on the first rows of weaving a basket.
In this tutorial, I use a basket with start stop rows, but clips are especially useful for the first rows of a continuously woven basket.

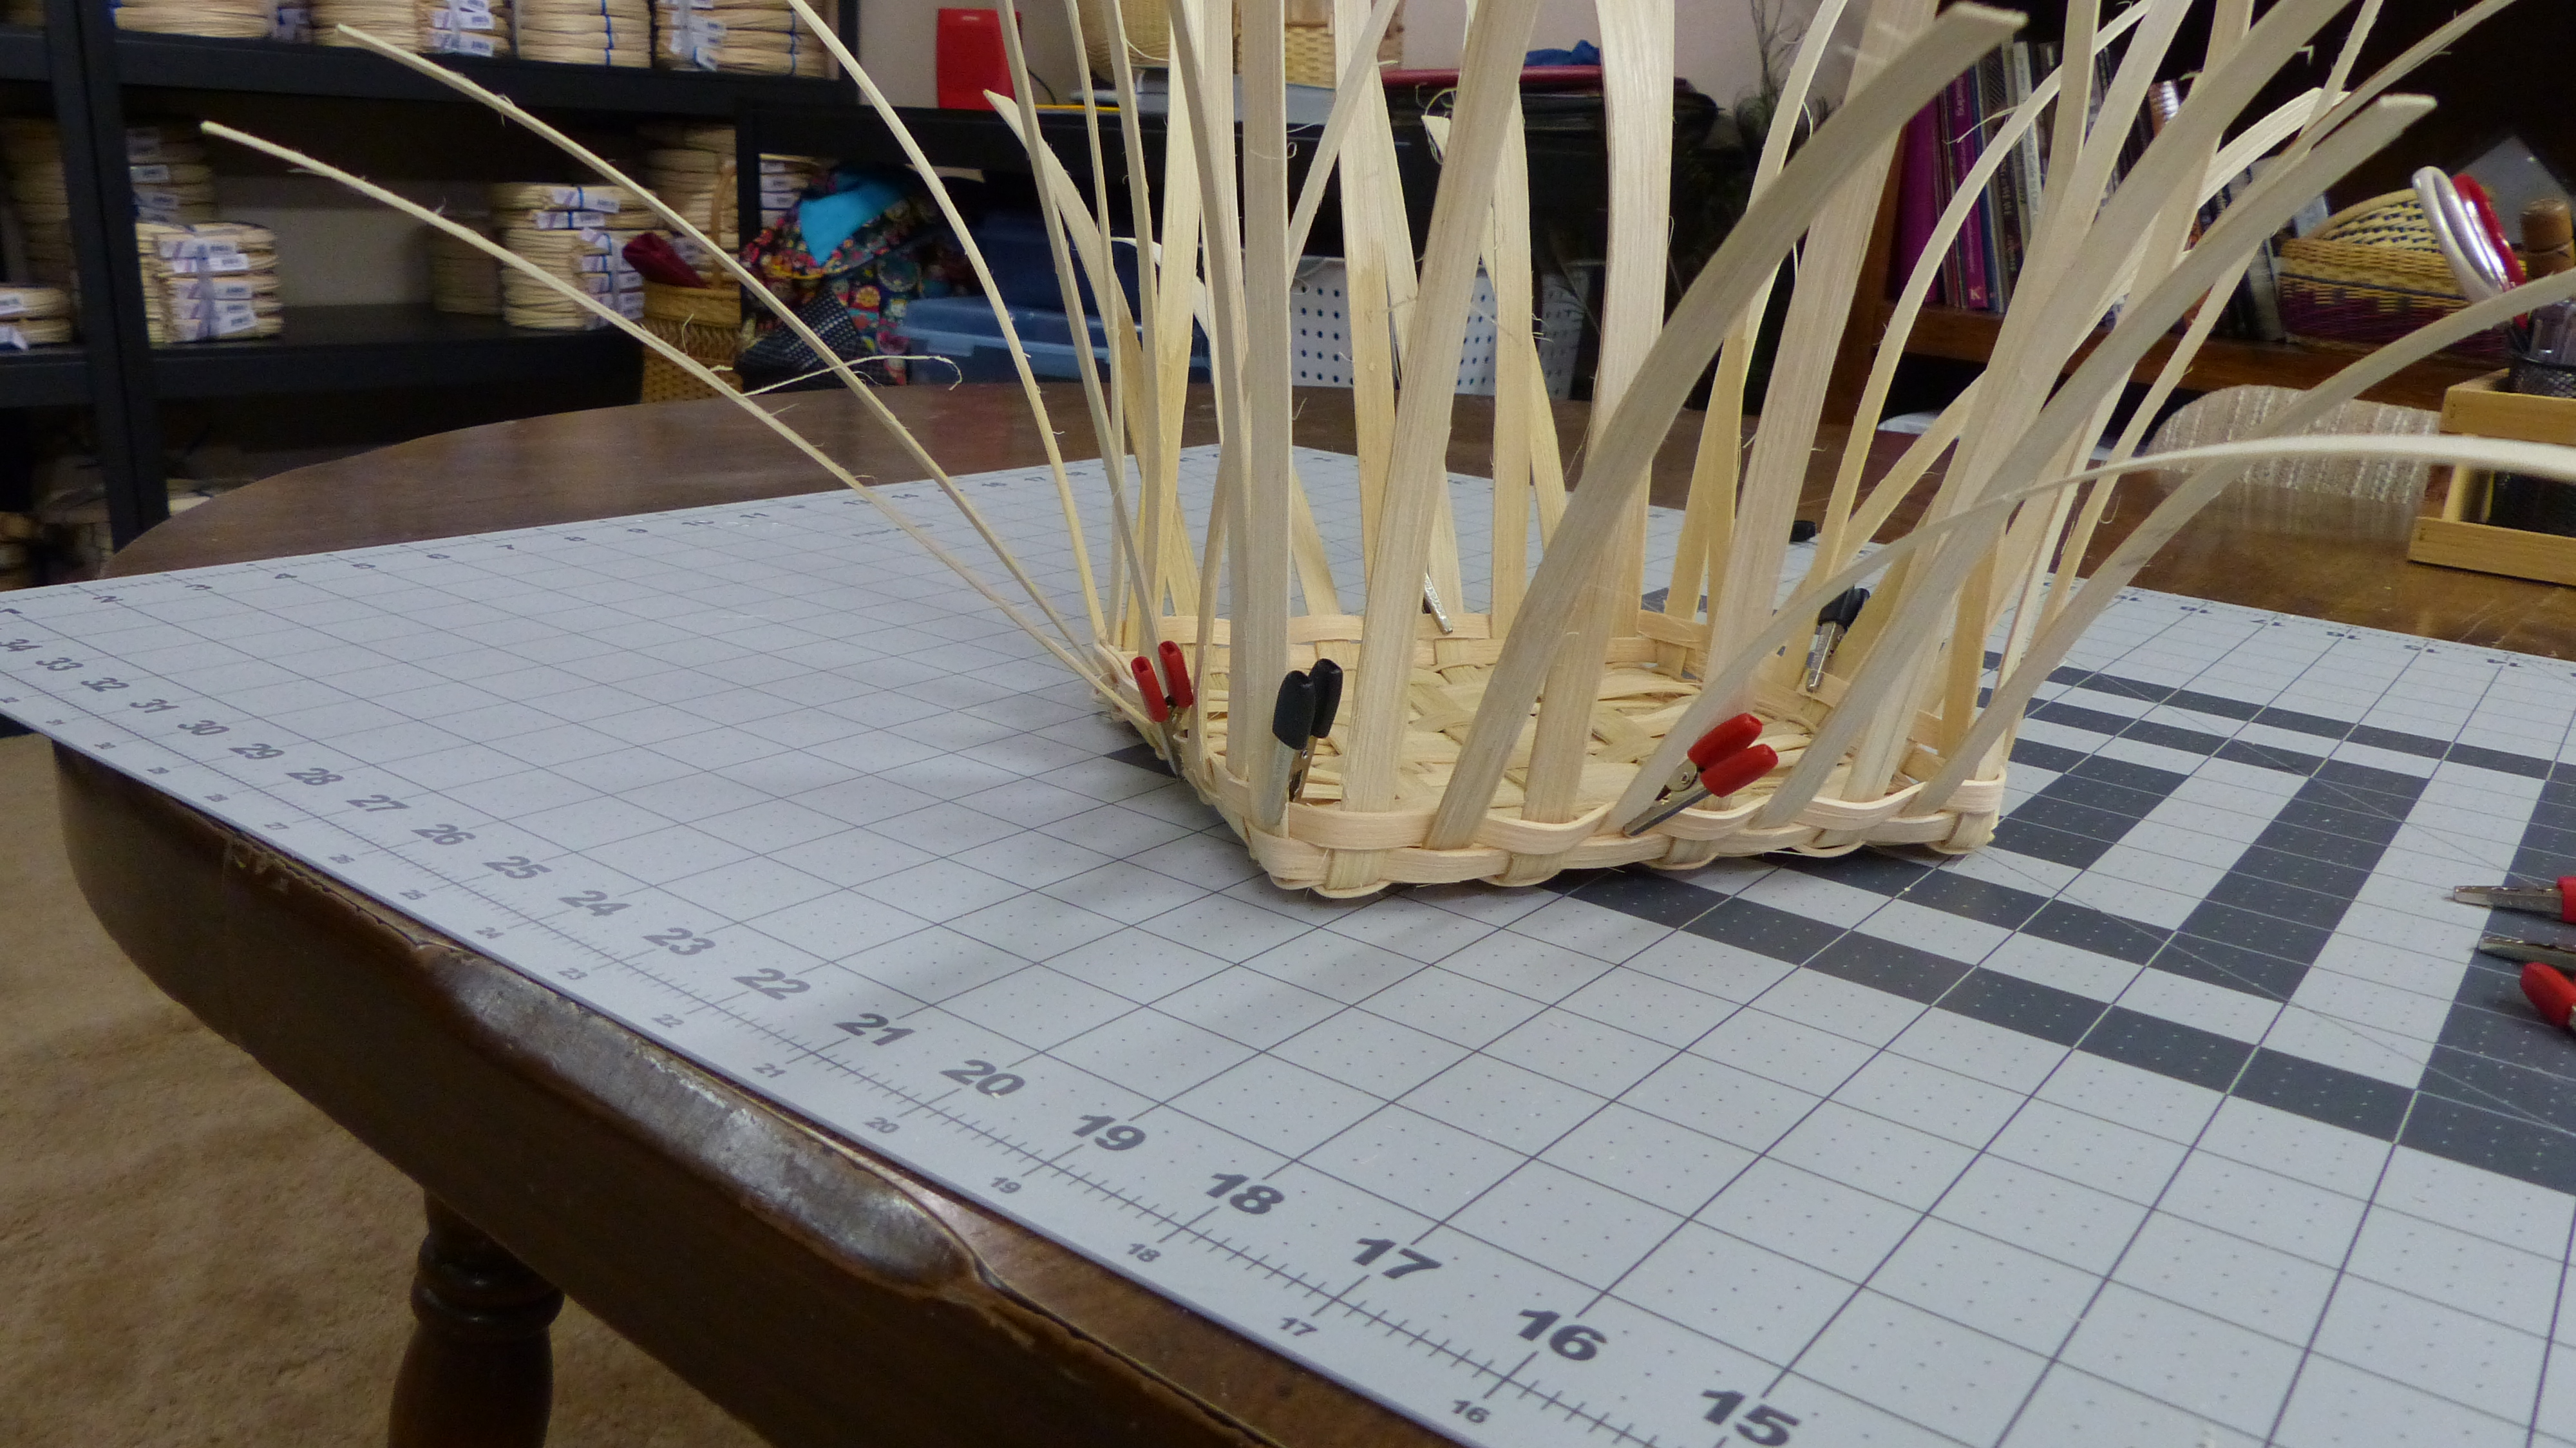
Use clips to hold the weaver to the stake it is weaving over. Keep your weaving tight to the base and weave corners smooth and tight. 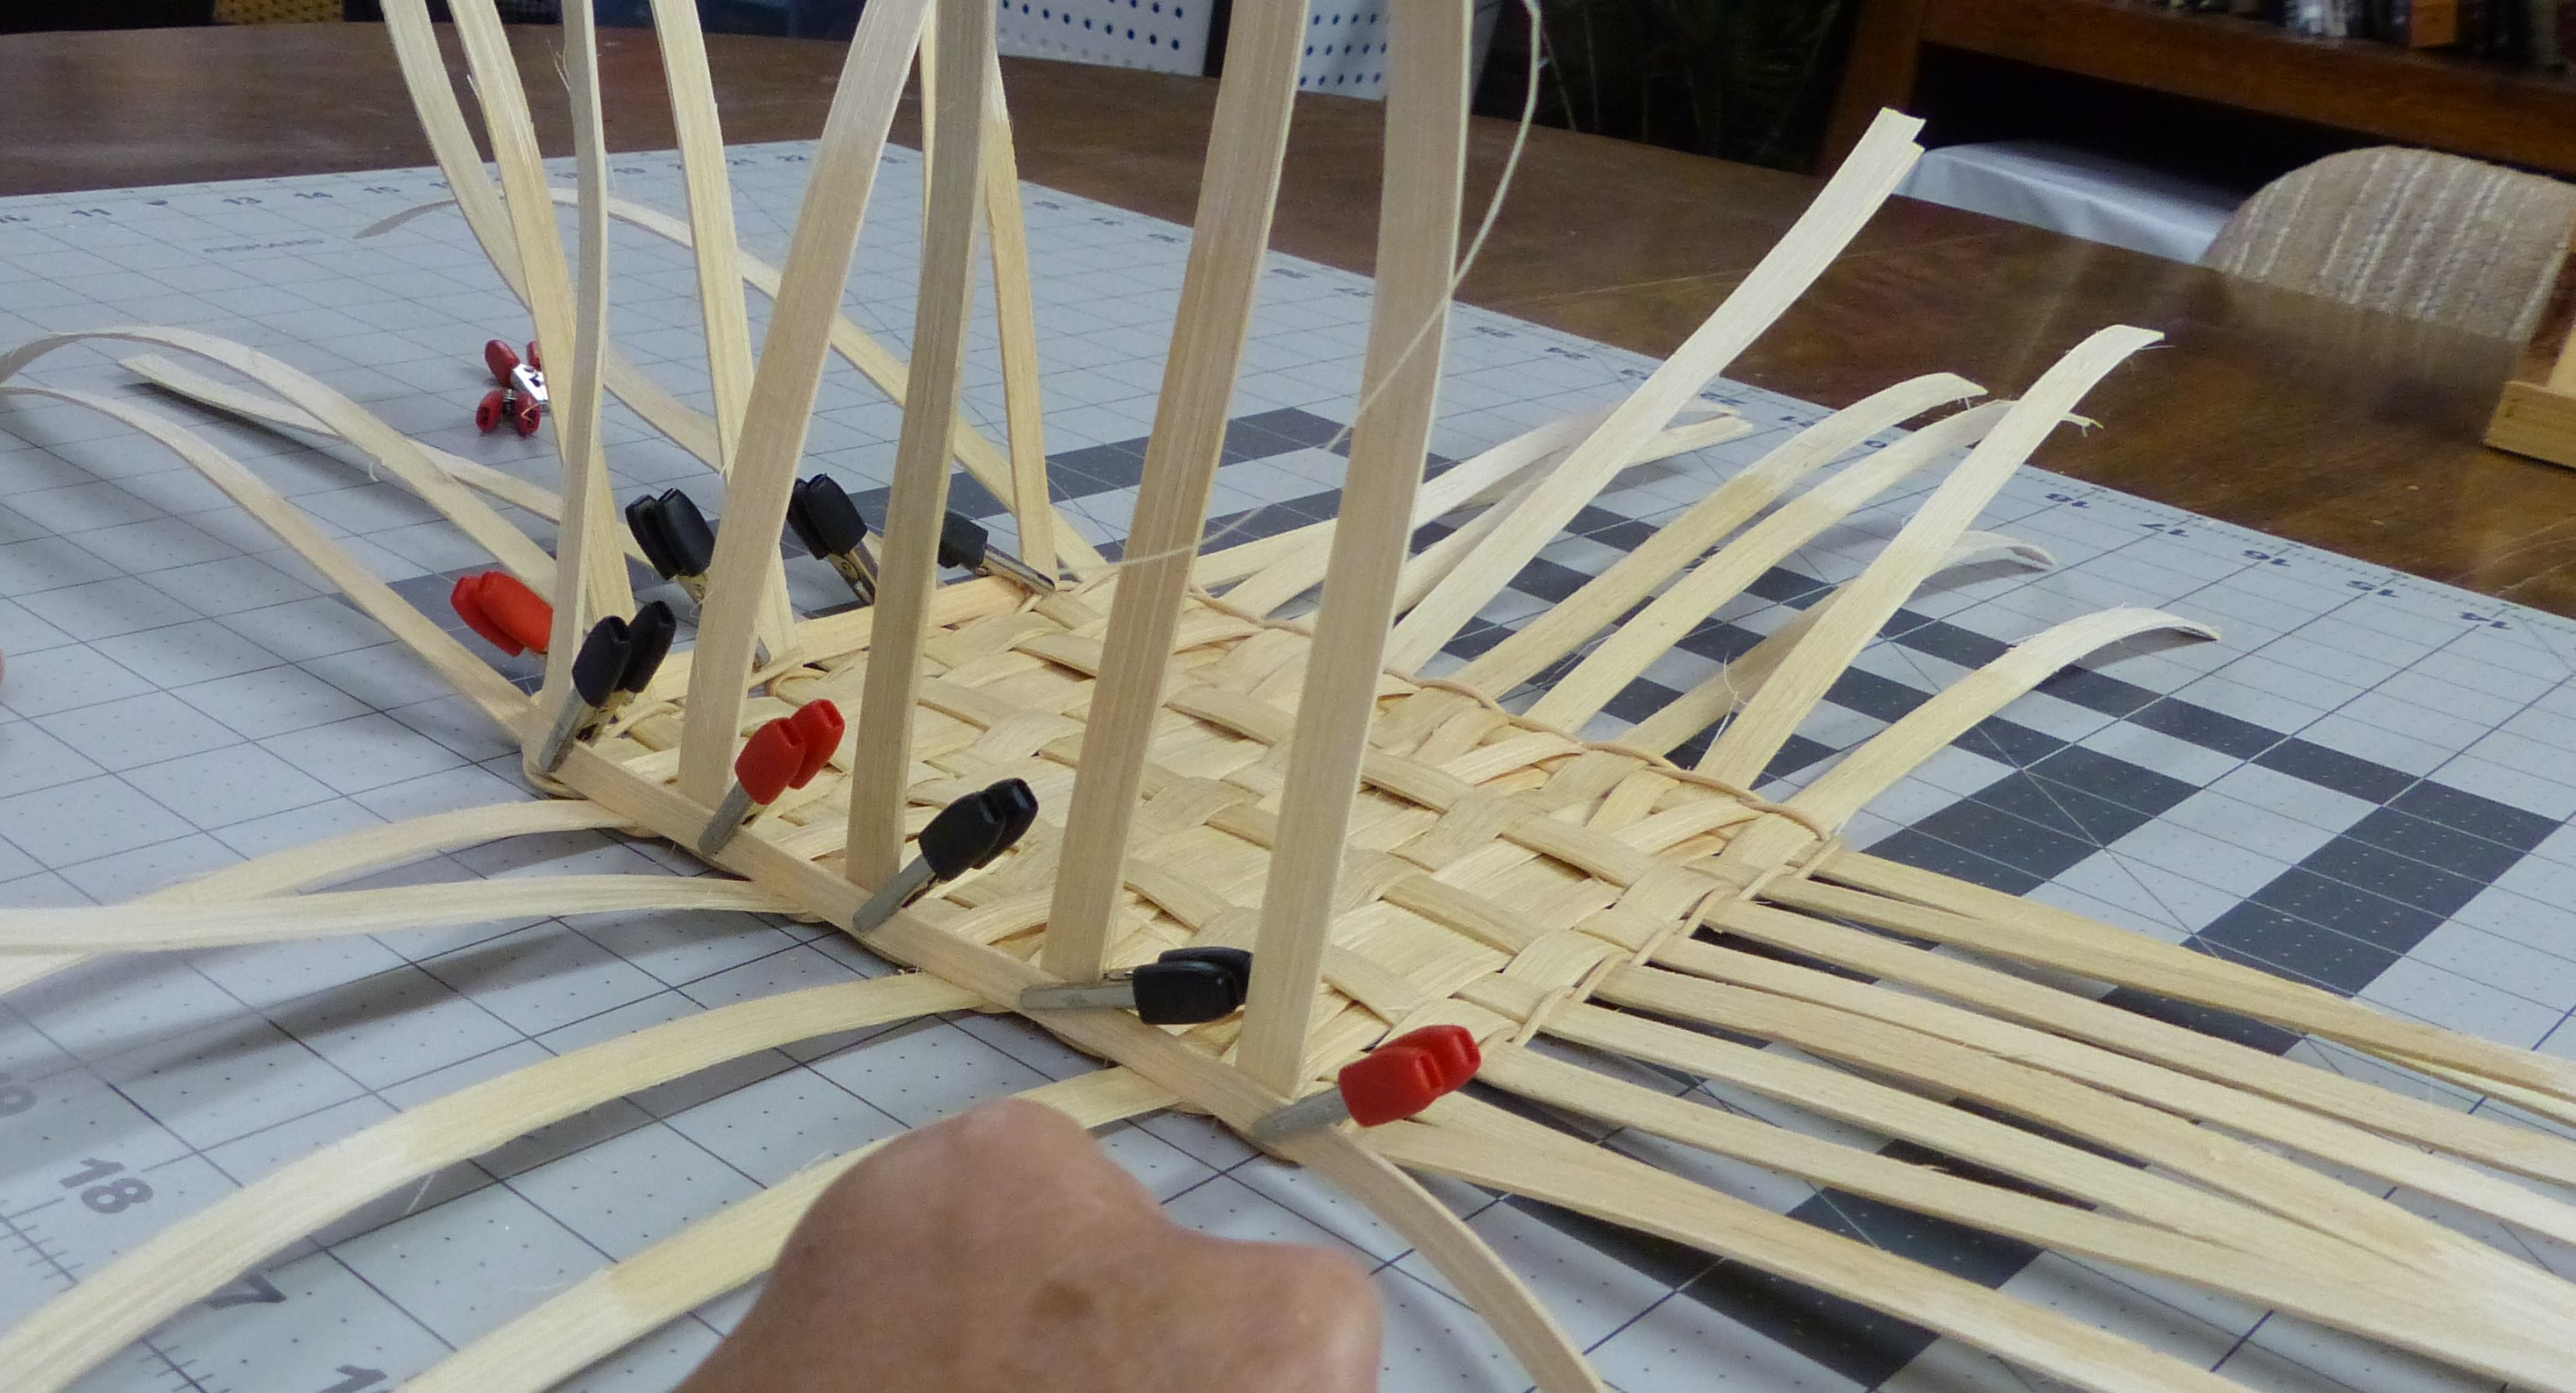 As you can see on this first row of weaving, I have placed a clip on every stake the weaver goes over.
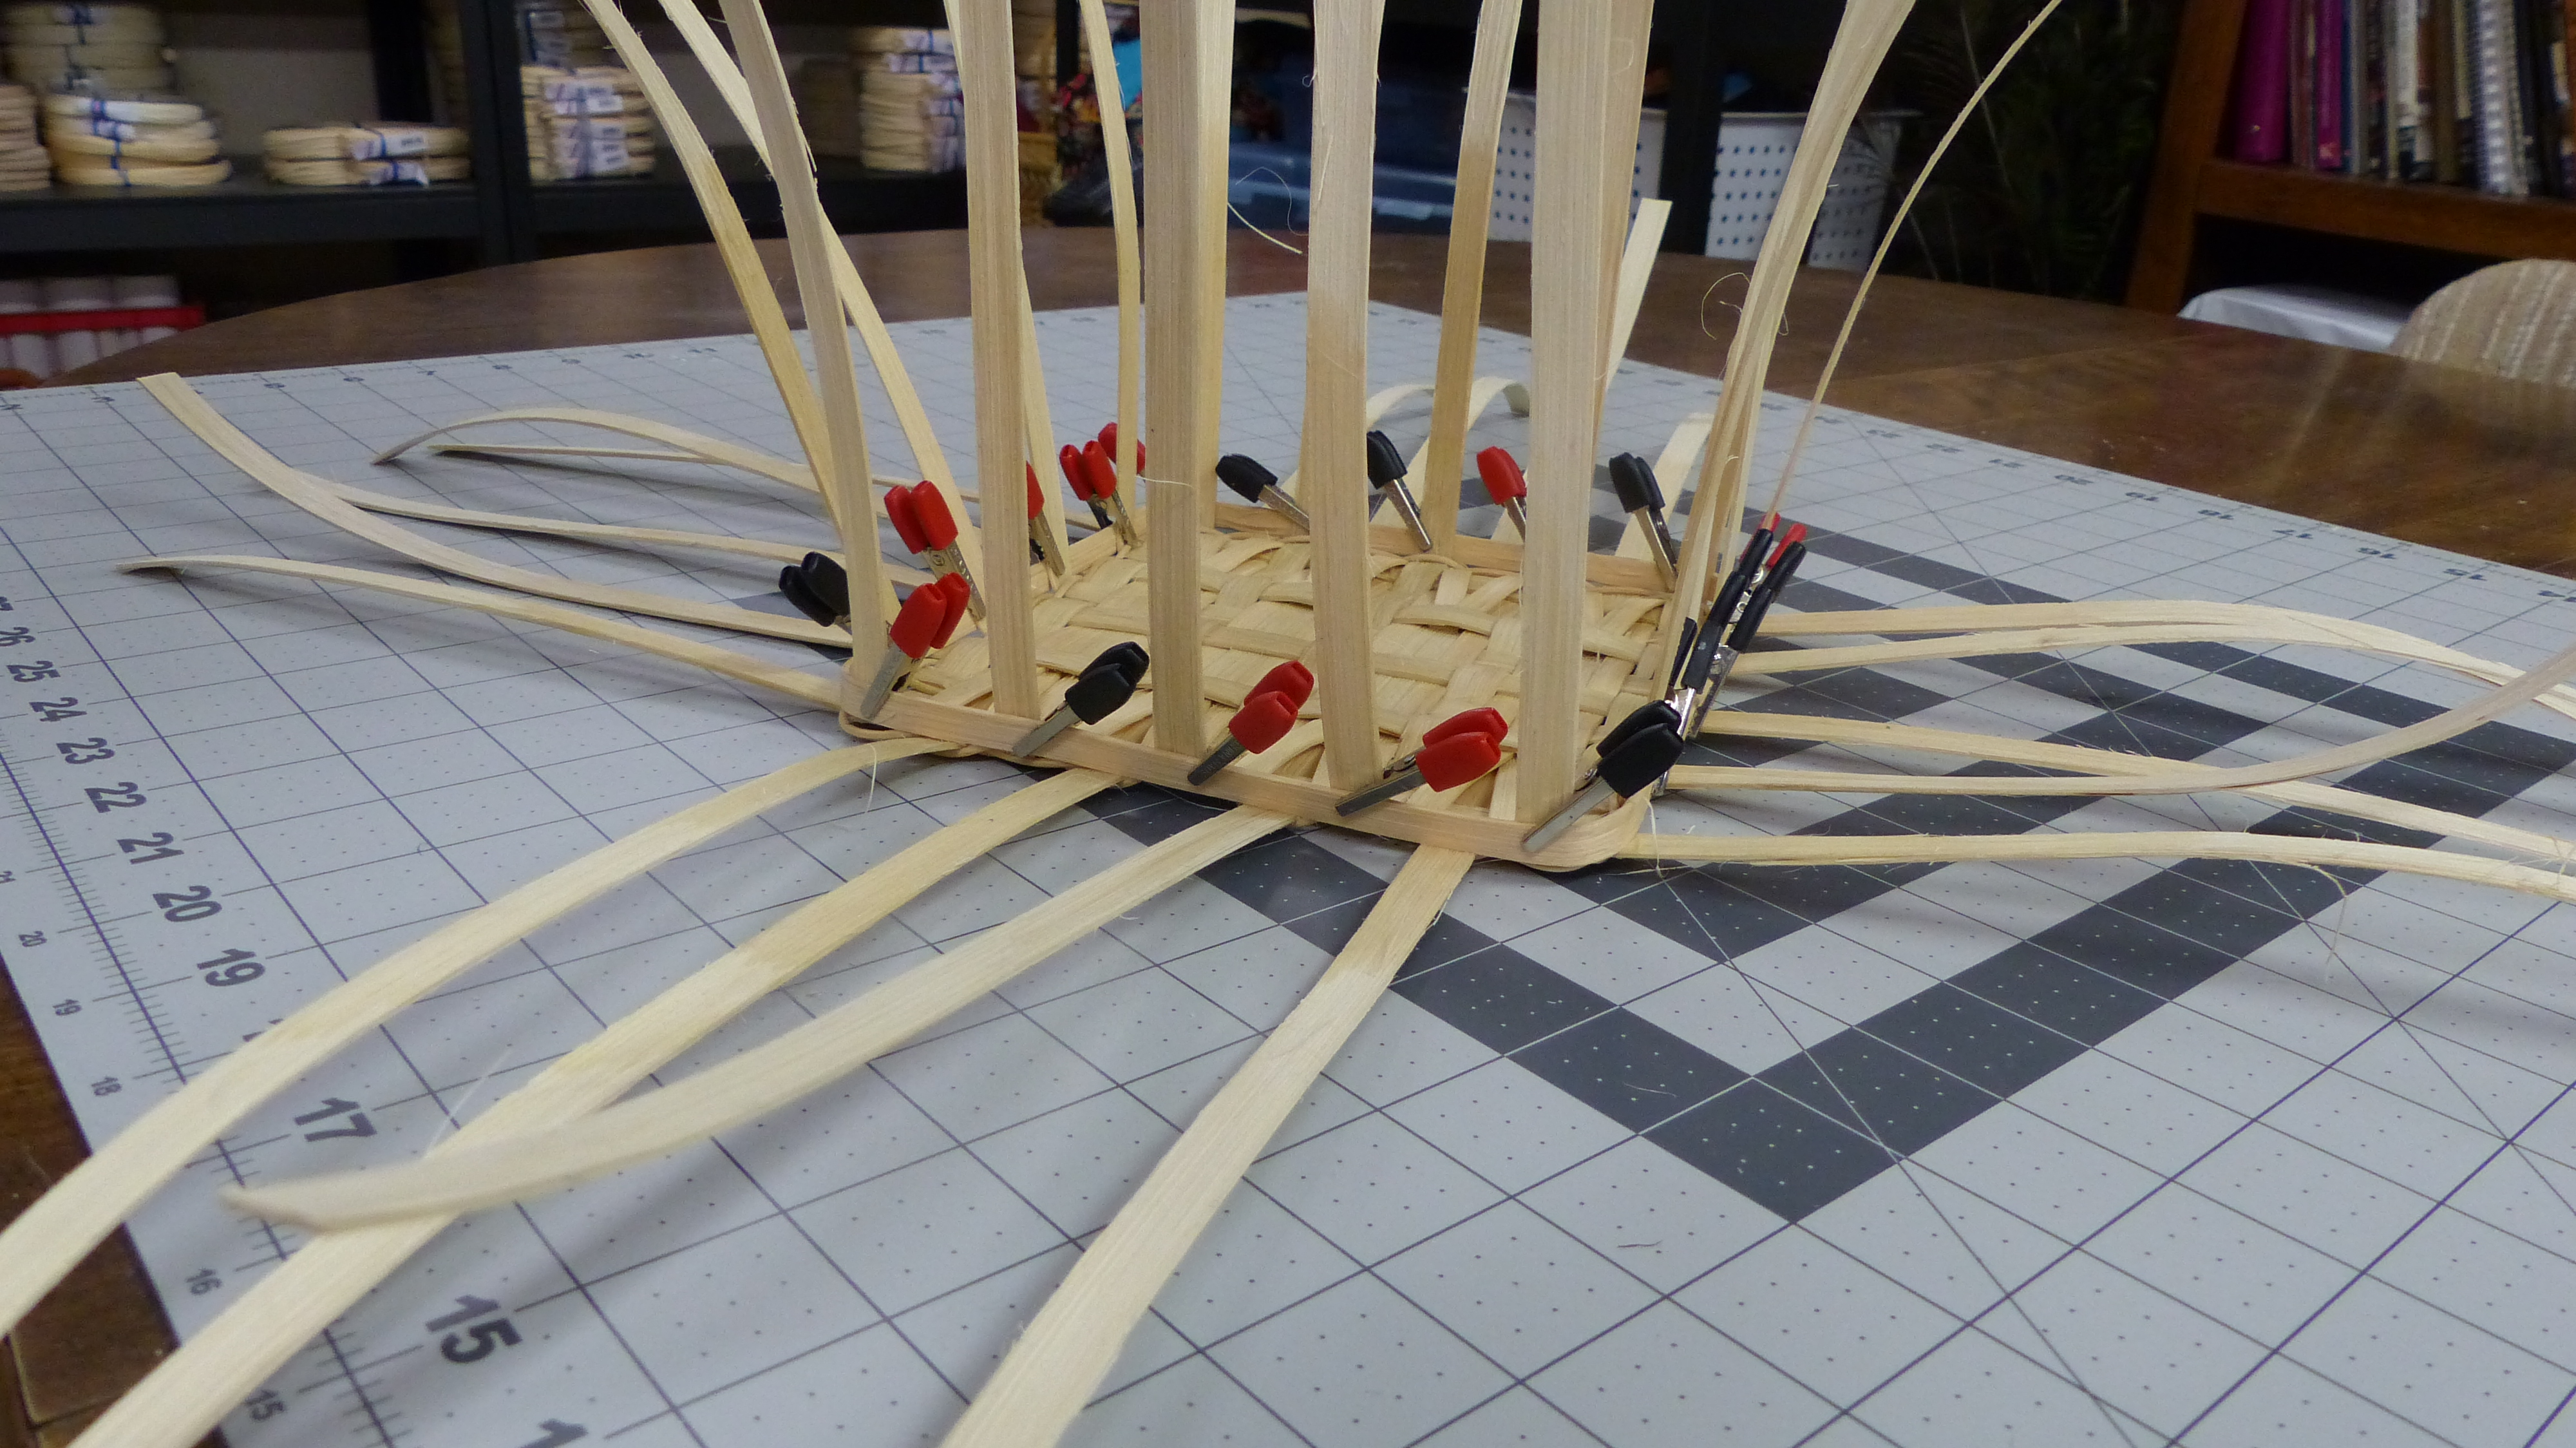 Row one done: Every other stake is in an upright position. There are no gaps between the base and row one.
Start the second row by clipping the weaver to the starting stake. Remove several of the clips on that side and weave keeping the weaver snug to the first row.
 Row two done. Fewer clips are needed on the second row.
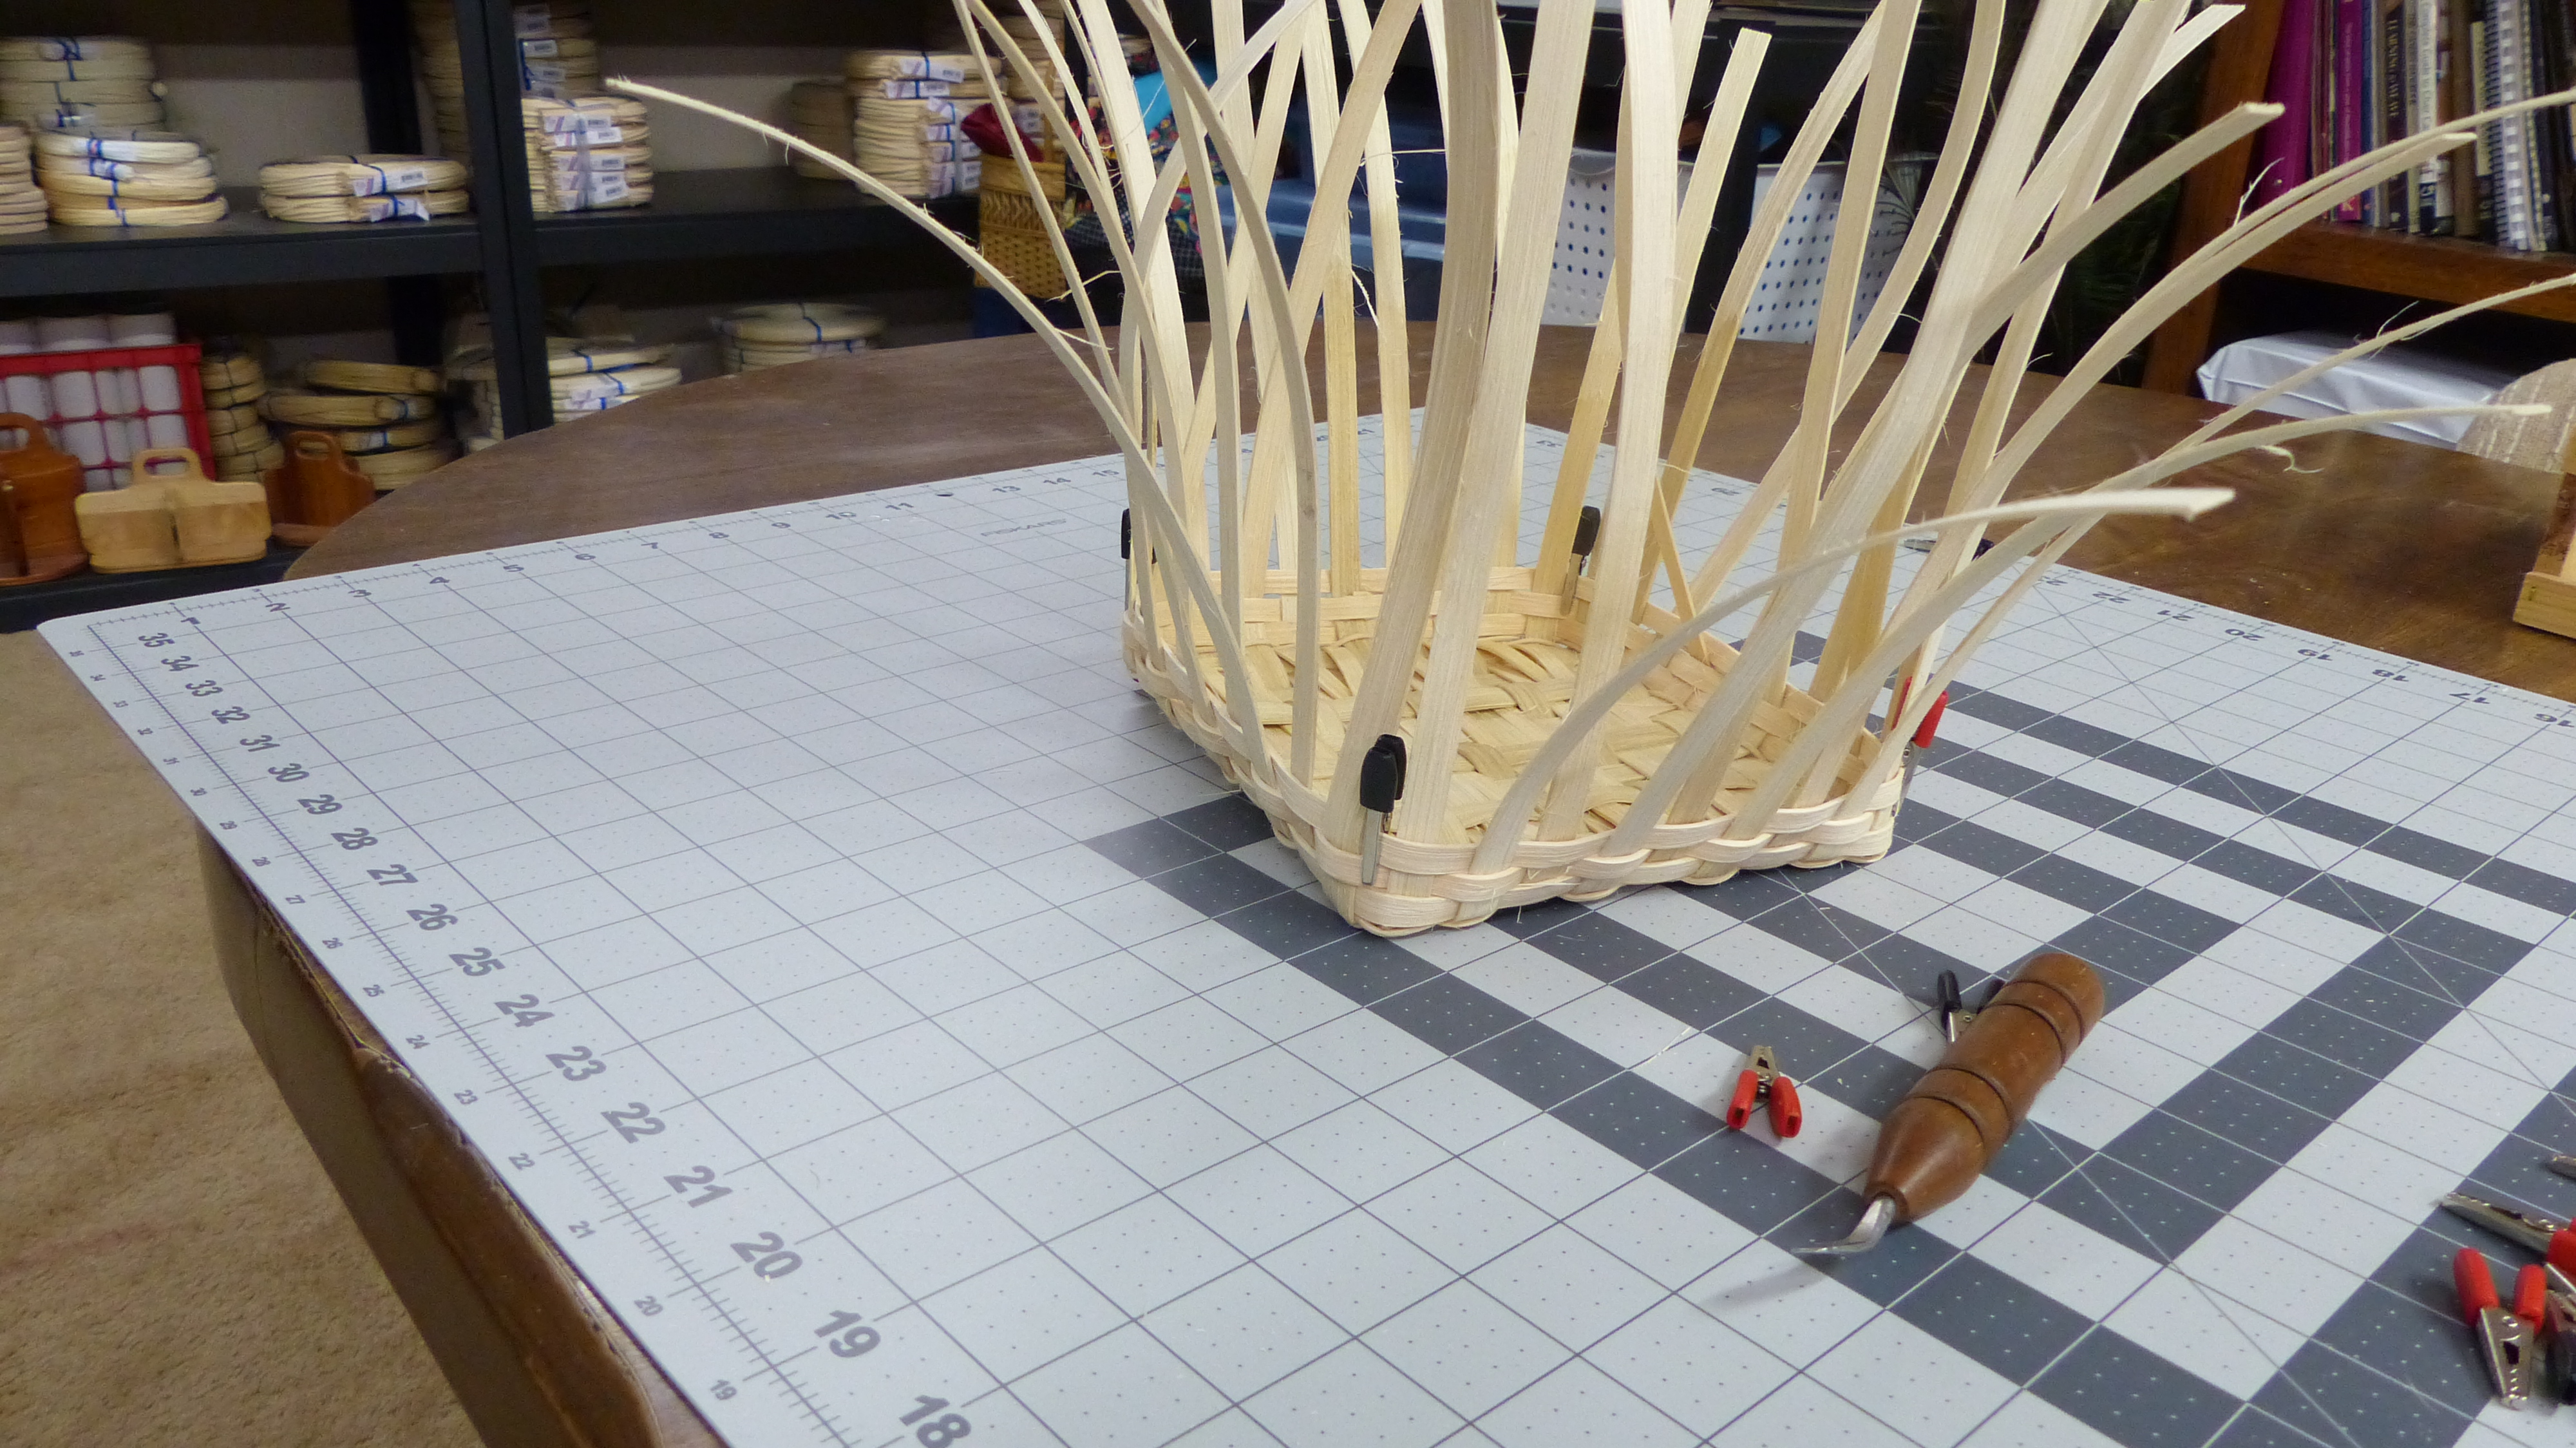
Row three done. Sides are locked, stakes are upright and the shape is good. Rows are tight to each other and will need minimal packing.
For the rest of the basket, clips may only be necessary at the beginning or end of a row. Clips can also be used to help control a problem area. If you walk away from your basket for a cup of coffee, clip the corners as shown above; this will keep things from shifting if you get side tracked.
 Sometimes its the little things we practice that make basket weaving successful, I hope that you have found this helpful.
Thanks for reading the Basket Teacher.

PS – There are a few ways to weave the first rows of a basket with out clips – but that’s another tutorial 🙂
Thanks for the great clip tips. But, hey, where did you get the cool mat with the squares marked off near the center?
I want to know too! Also love those small pointed clips. Where do I get both things?
I go the quilting mat at Jo-Ann Fabrics. And the clips are red and black alligator clips from Radio Shack. Sometimes I buy extra clips to have available for sale at events.
Great tutorial. Where did you get the clips with black tops? They look very small.
They are red and black alligator clips from radio shack.
Thanks for the tutorial! Where did you find the great clips with the red and black grips? I have only found alligator clips without any grips and they tend to twist away when you try to open them. The mat is great too.
I love learning new tips – thank you! This looks like a handy new way to start the awful first three rows!!
Thanks for the good advice. What clips are you using? They look longer than reg. Alligator clips.
They are red and black alligator clips from radio shack.
Thanks for the great tips. Sometimes it’s hard to teach an old dog new tricks. I also use the mat from Jo-Anns. I’ve always used the small clips on little baskets but now know a little more how to use on bigger baskets.
Great tutorial.