Twining around Corners
When you are twining the base of your basket, corners can be a little tricky. Sometimes the weaver lays perfectly and sometimes it sneaks under the stake, defeating the purpose of locking the base. Here’s how to have nice squared corners every time you twine a base.
We’ll start at the beginning…
Please note that these are right handed directions. If you are left handed, just exchange all the lefts for rights and all the rights for lefts.
First a Twining Refresher:

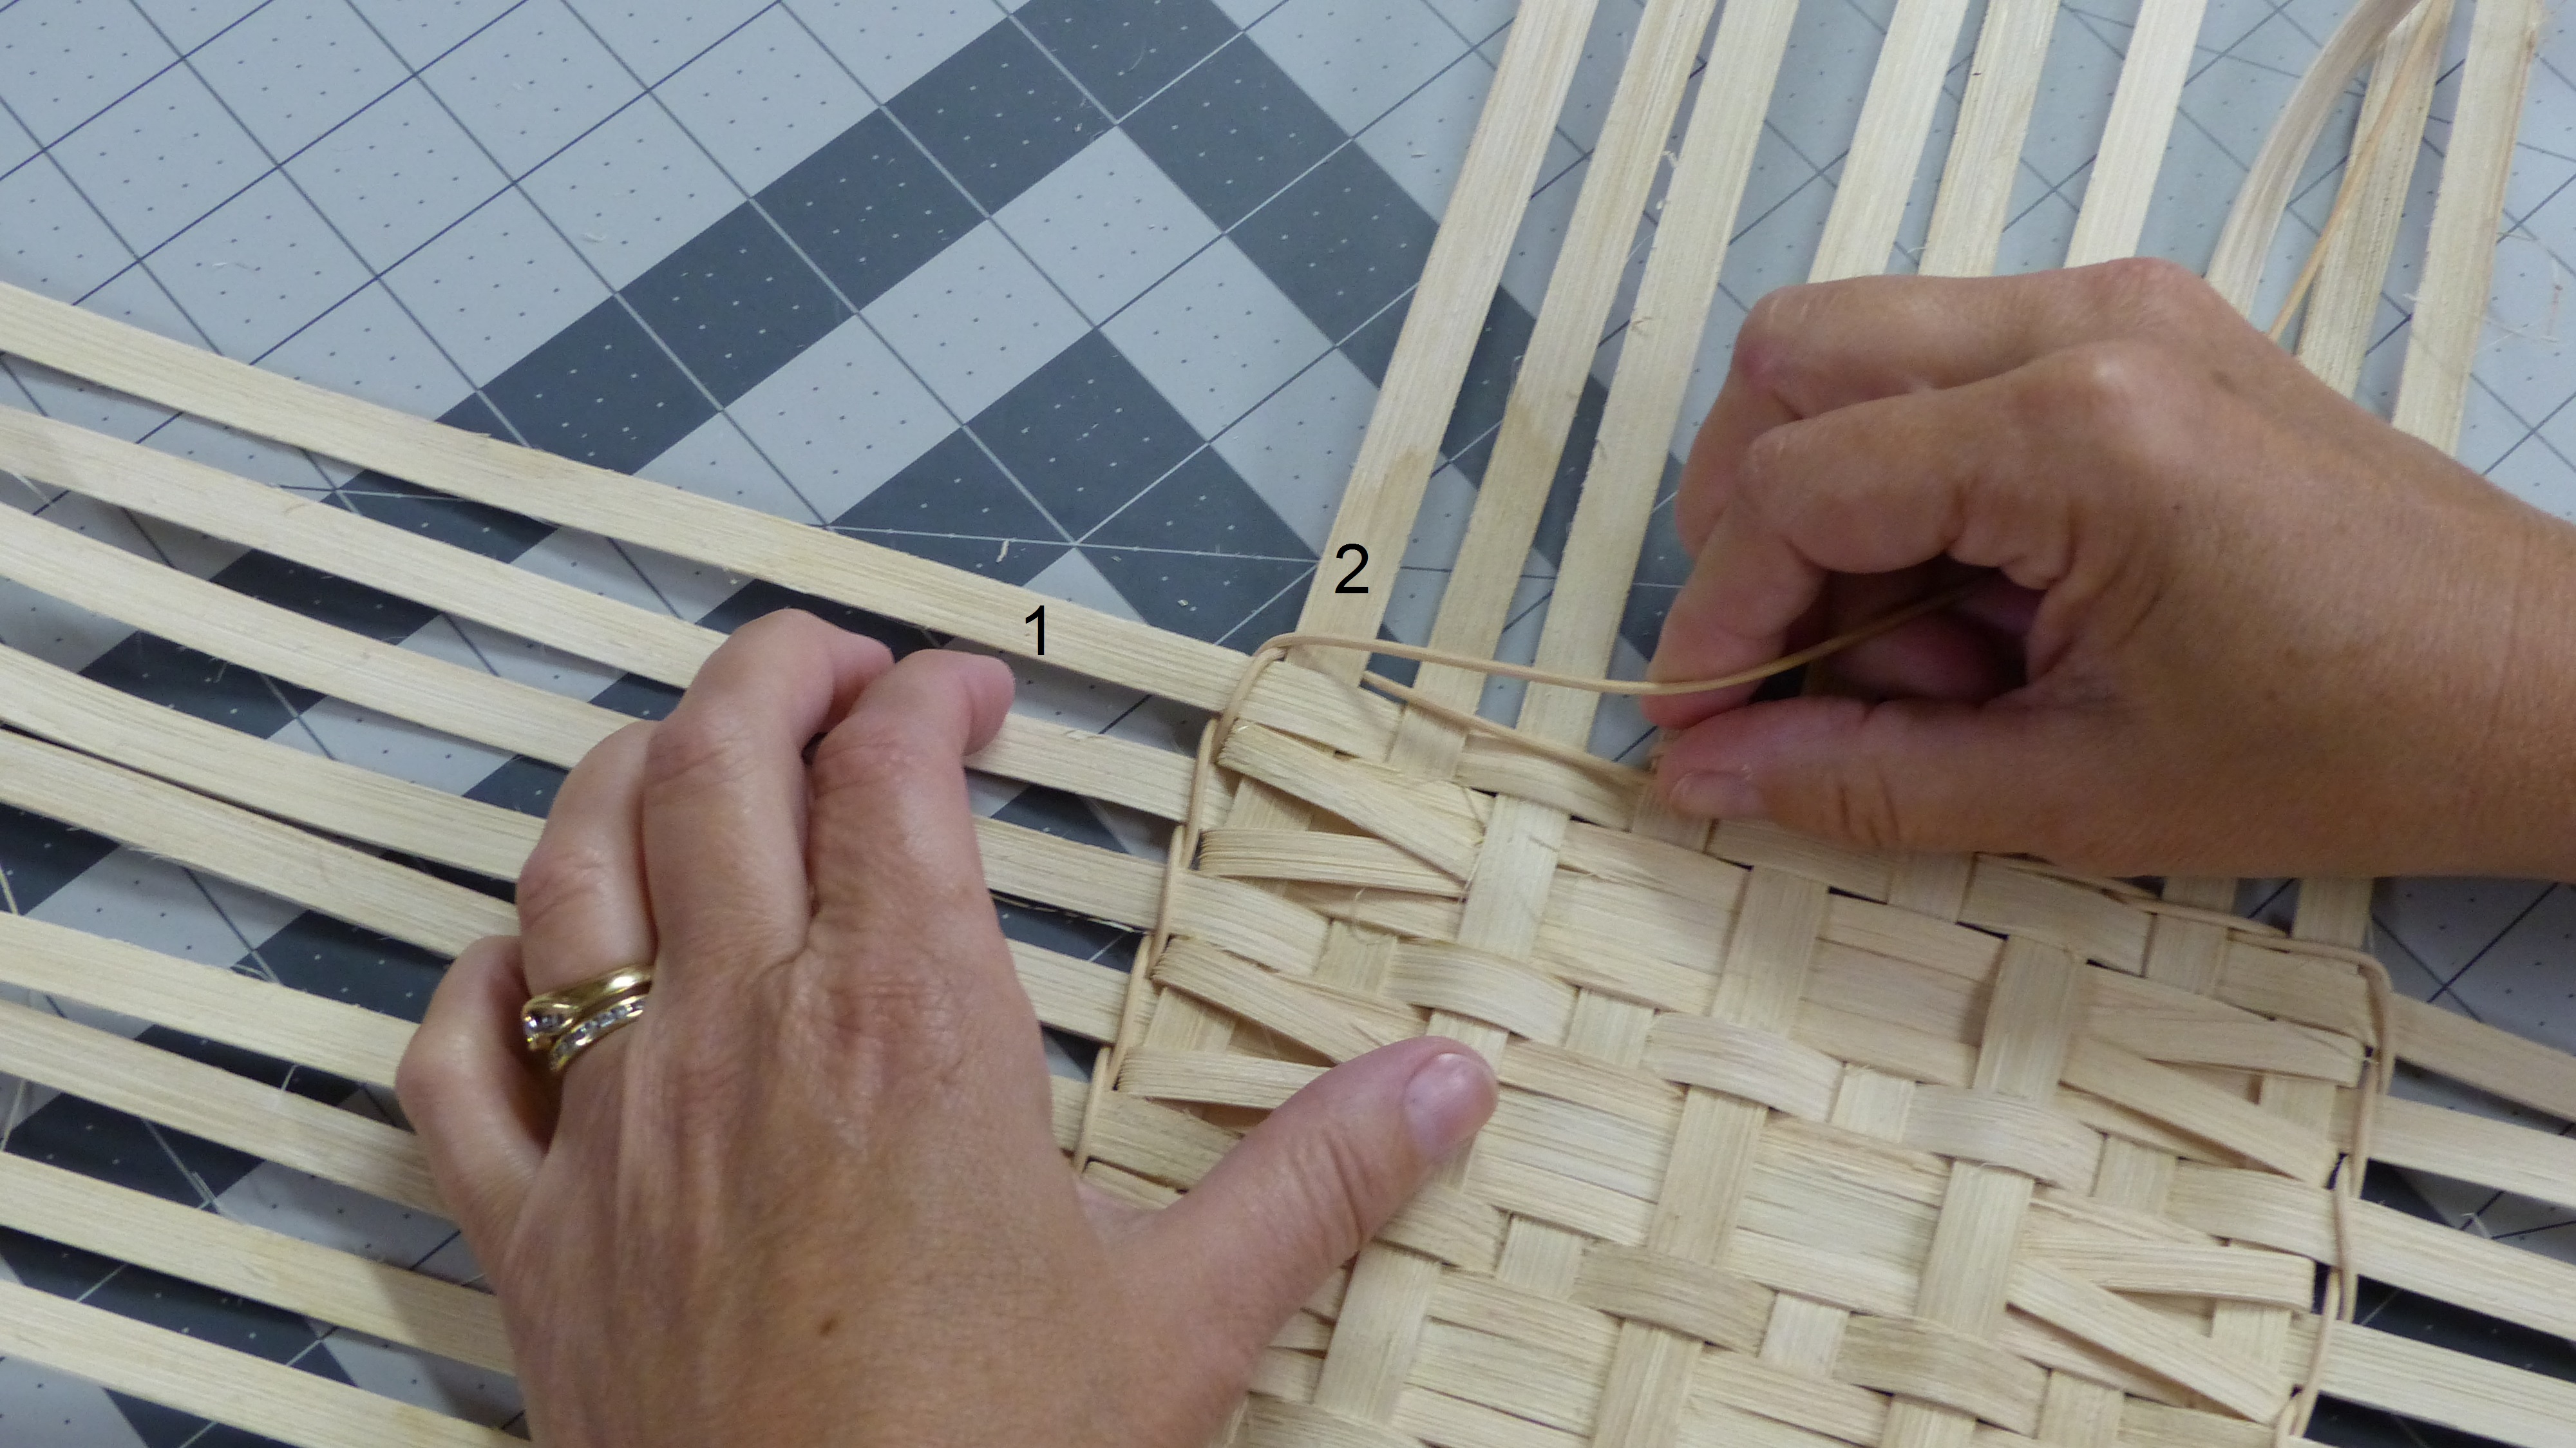
The weavers will start behind two consecutive stakes OR the weaver is looped around a stake this will give you a weaver coming out of two consecutive spaces. Bring the left weaver in front of the next stake to the right, behind the second stake and then out. The other weaver is now on the left. Pack down to last row of weaving and REPEAT.
Twining Around Corners:
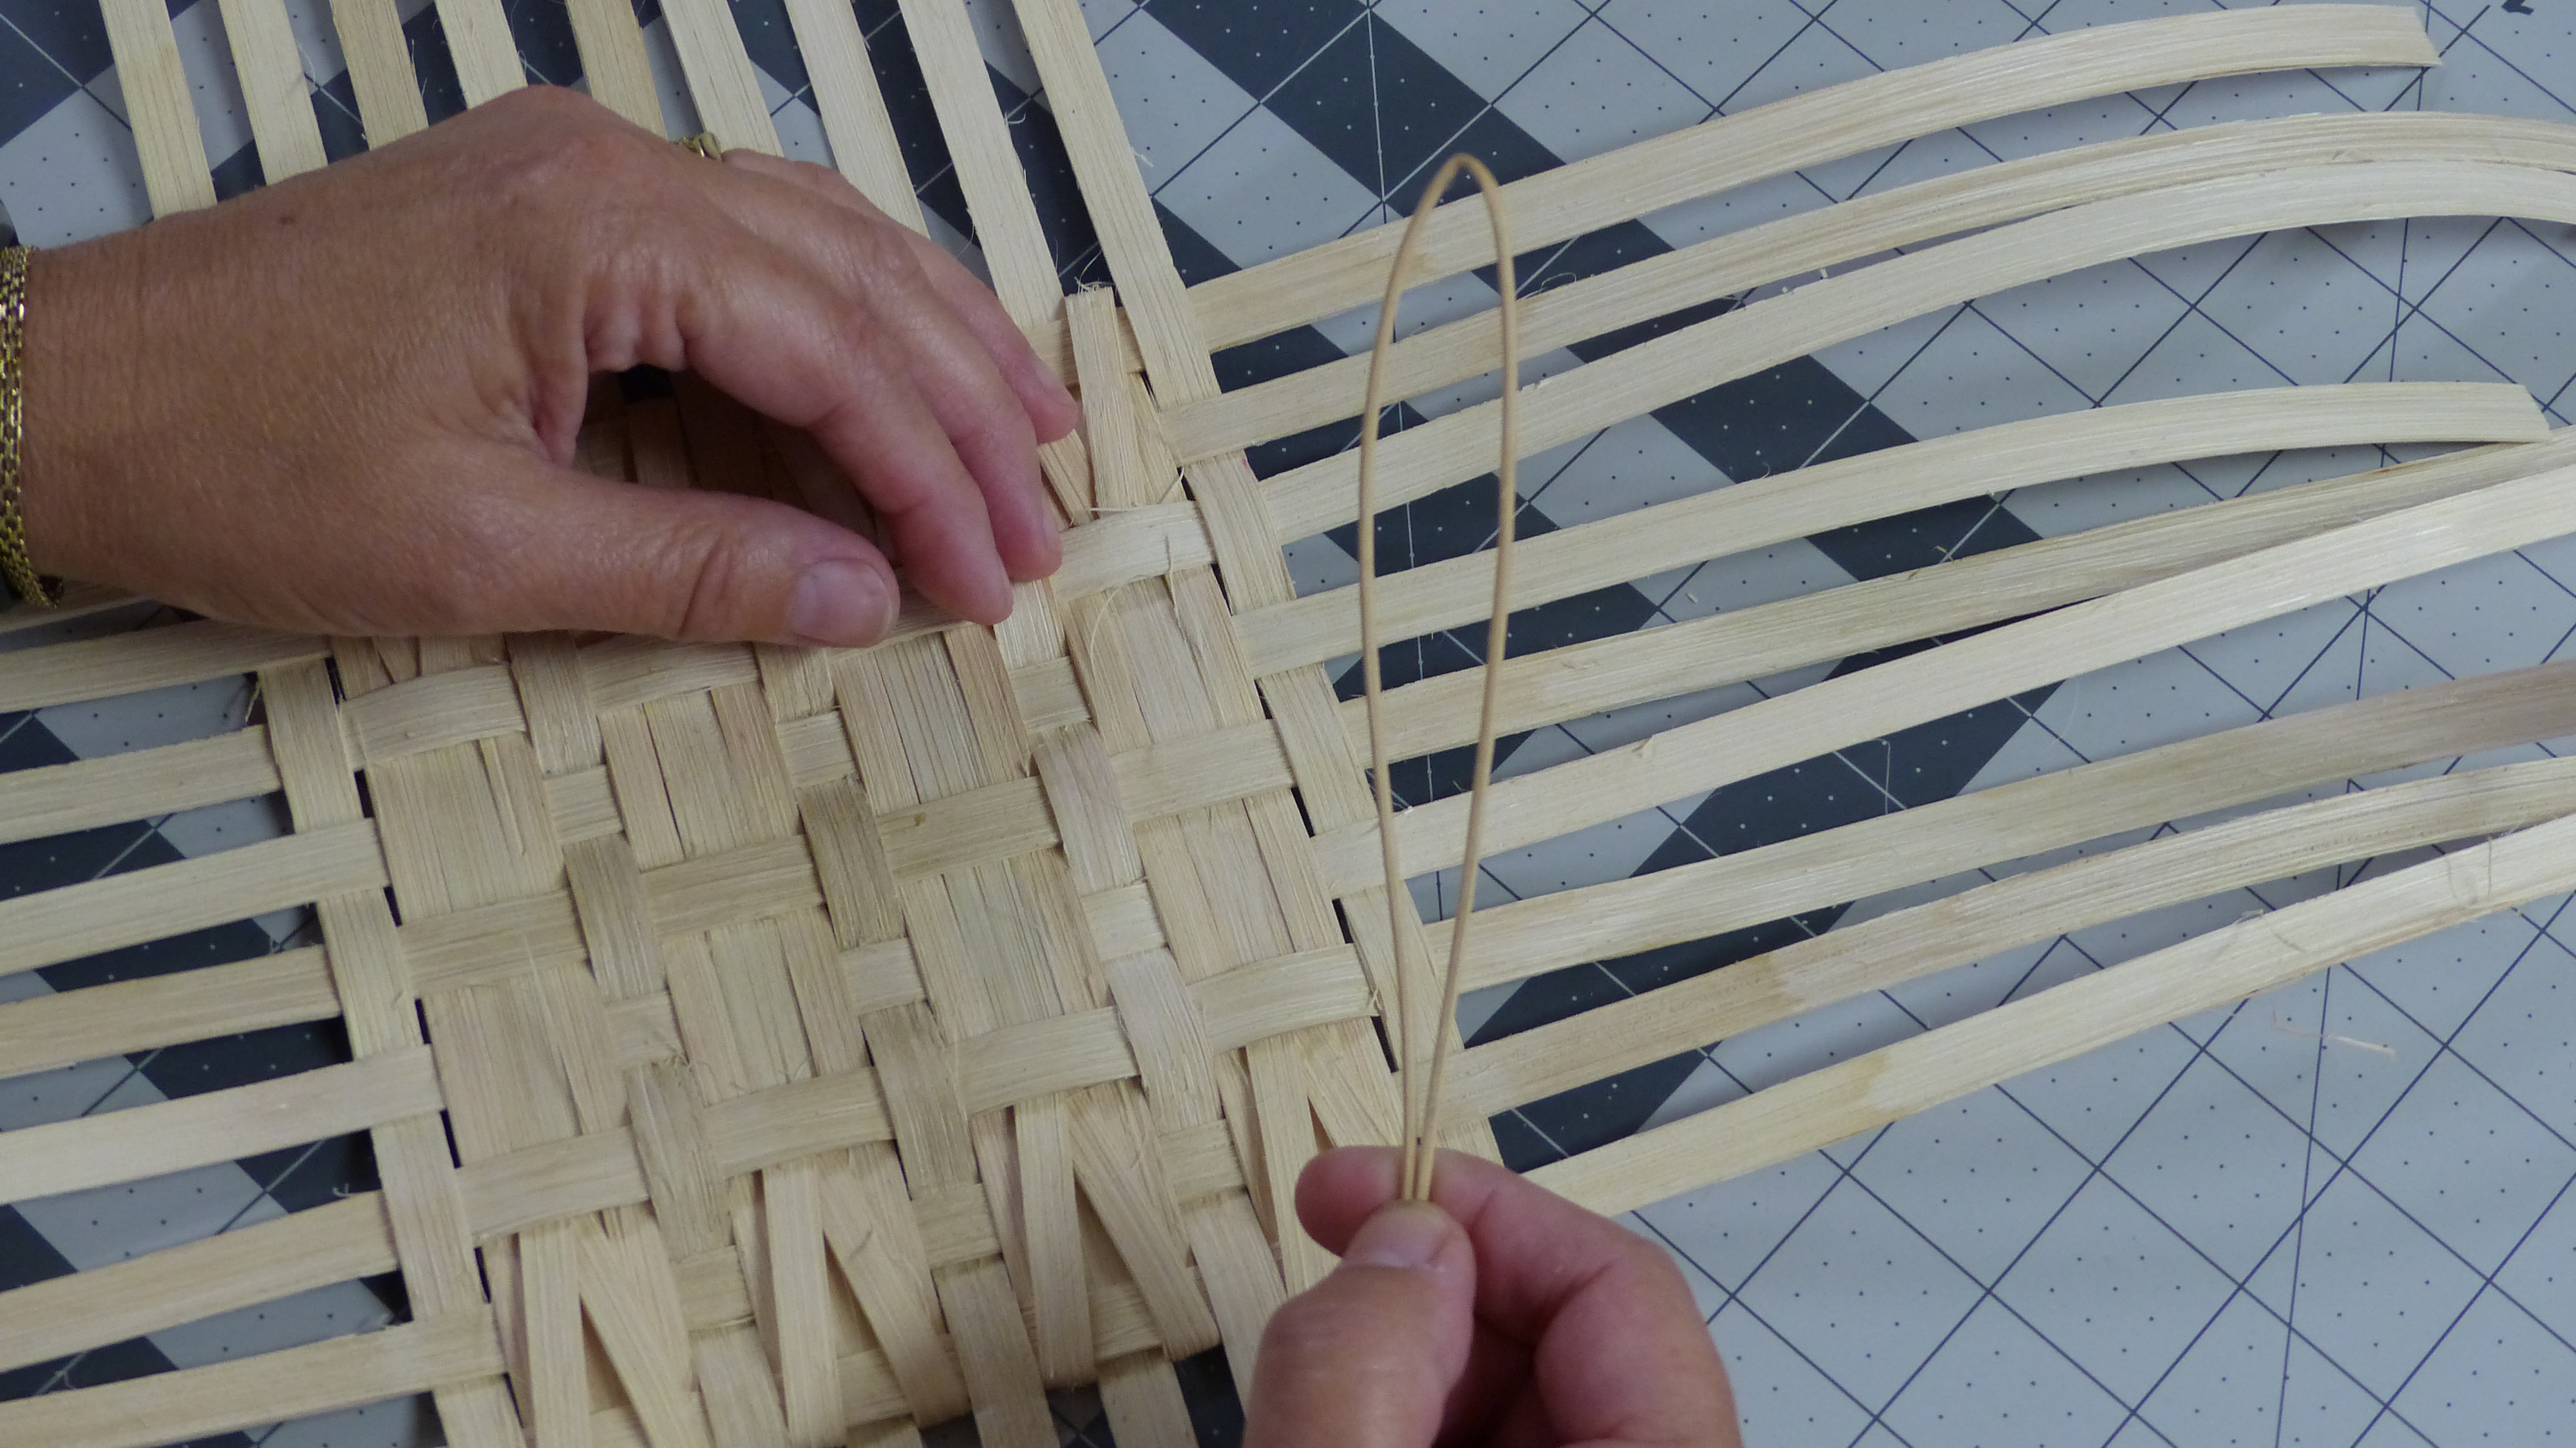
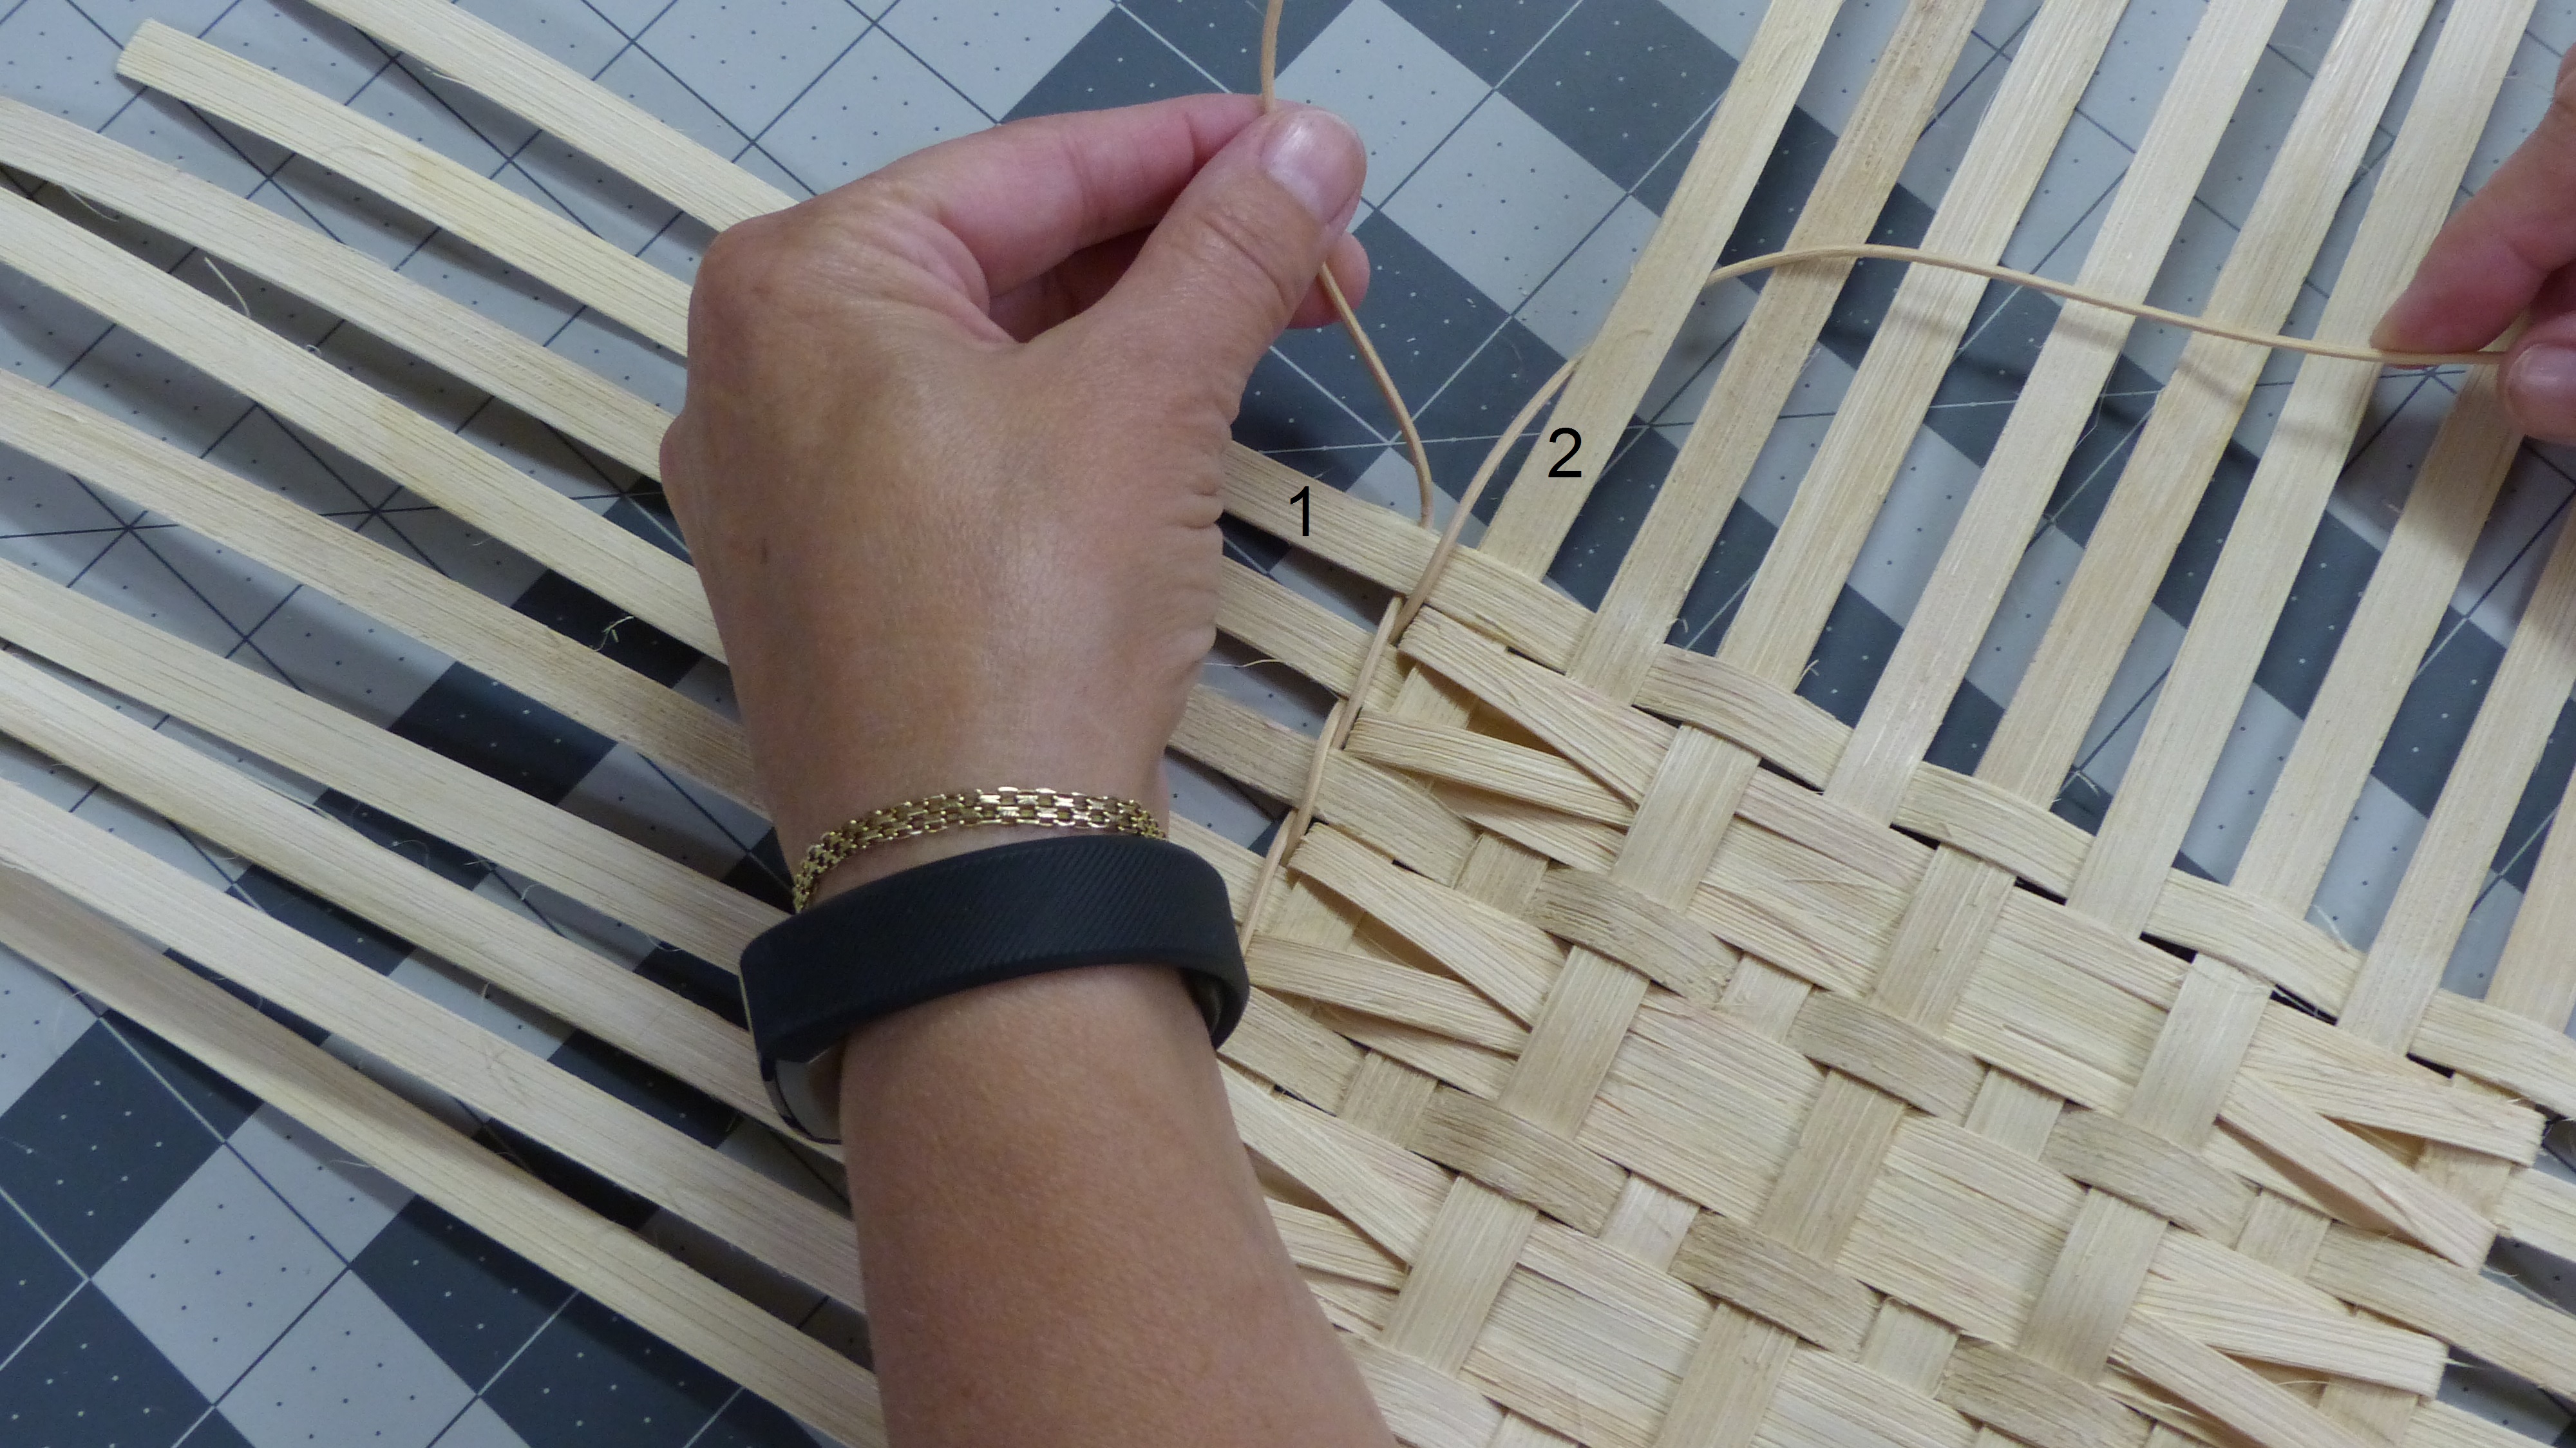
Take a length of round weaving material (I am using #2 round reed), fold it in half. Make sure it is damp and crimp or flatten the fold so it doesn’t break. (You can use a pair for needle nose pliers to do this.)
Loop it around a stake near the center of any side. Begin twining tight to the base. Always pack as you go.
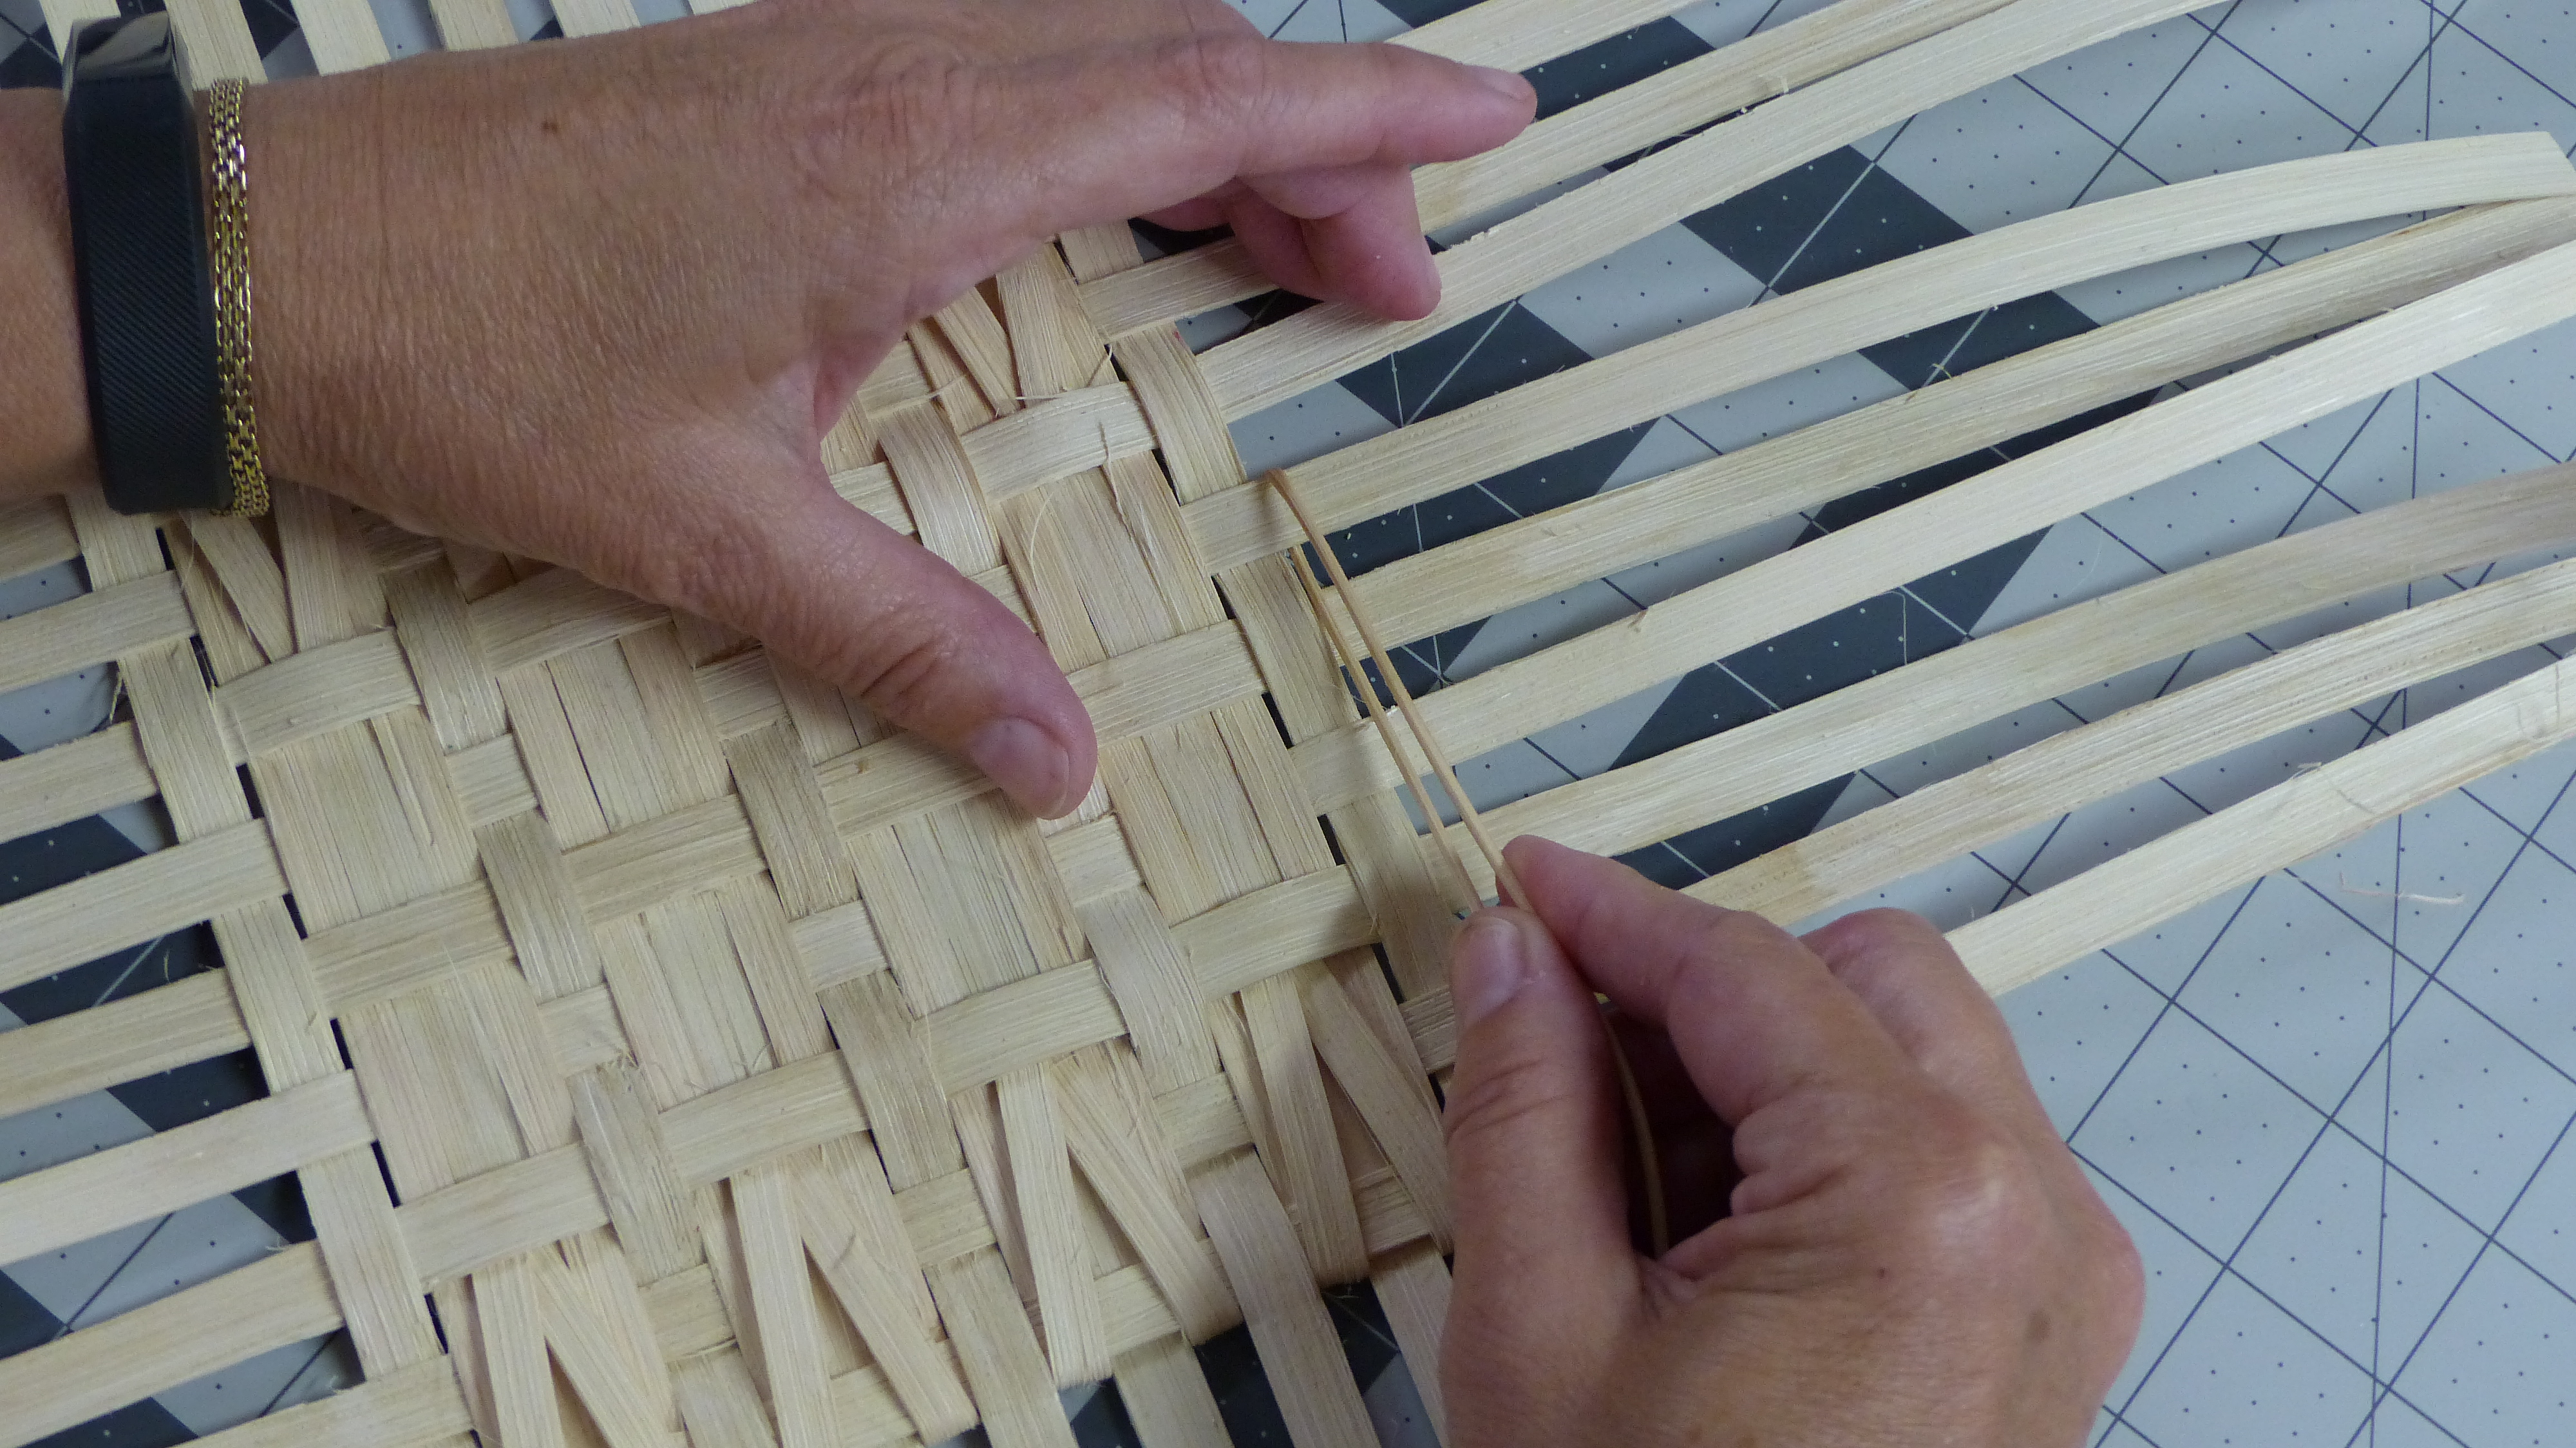
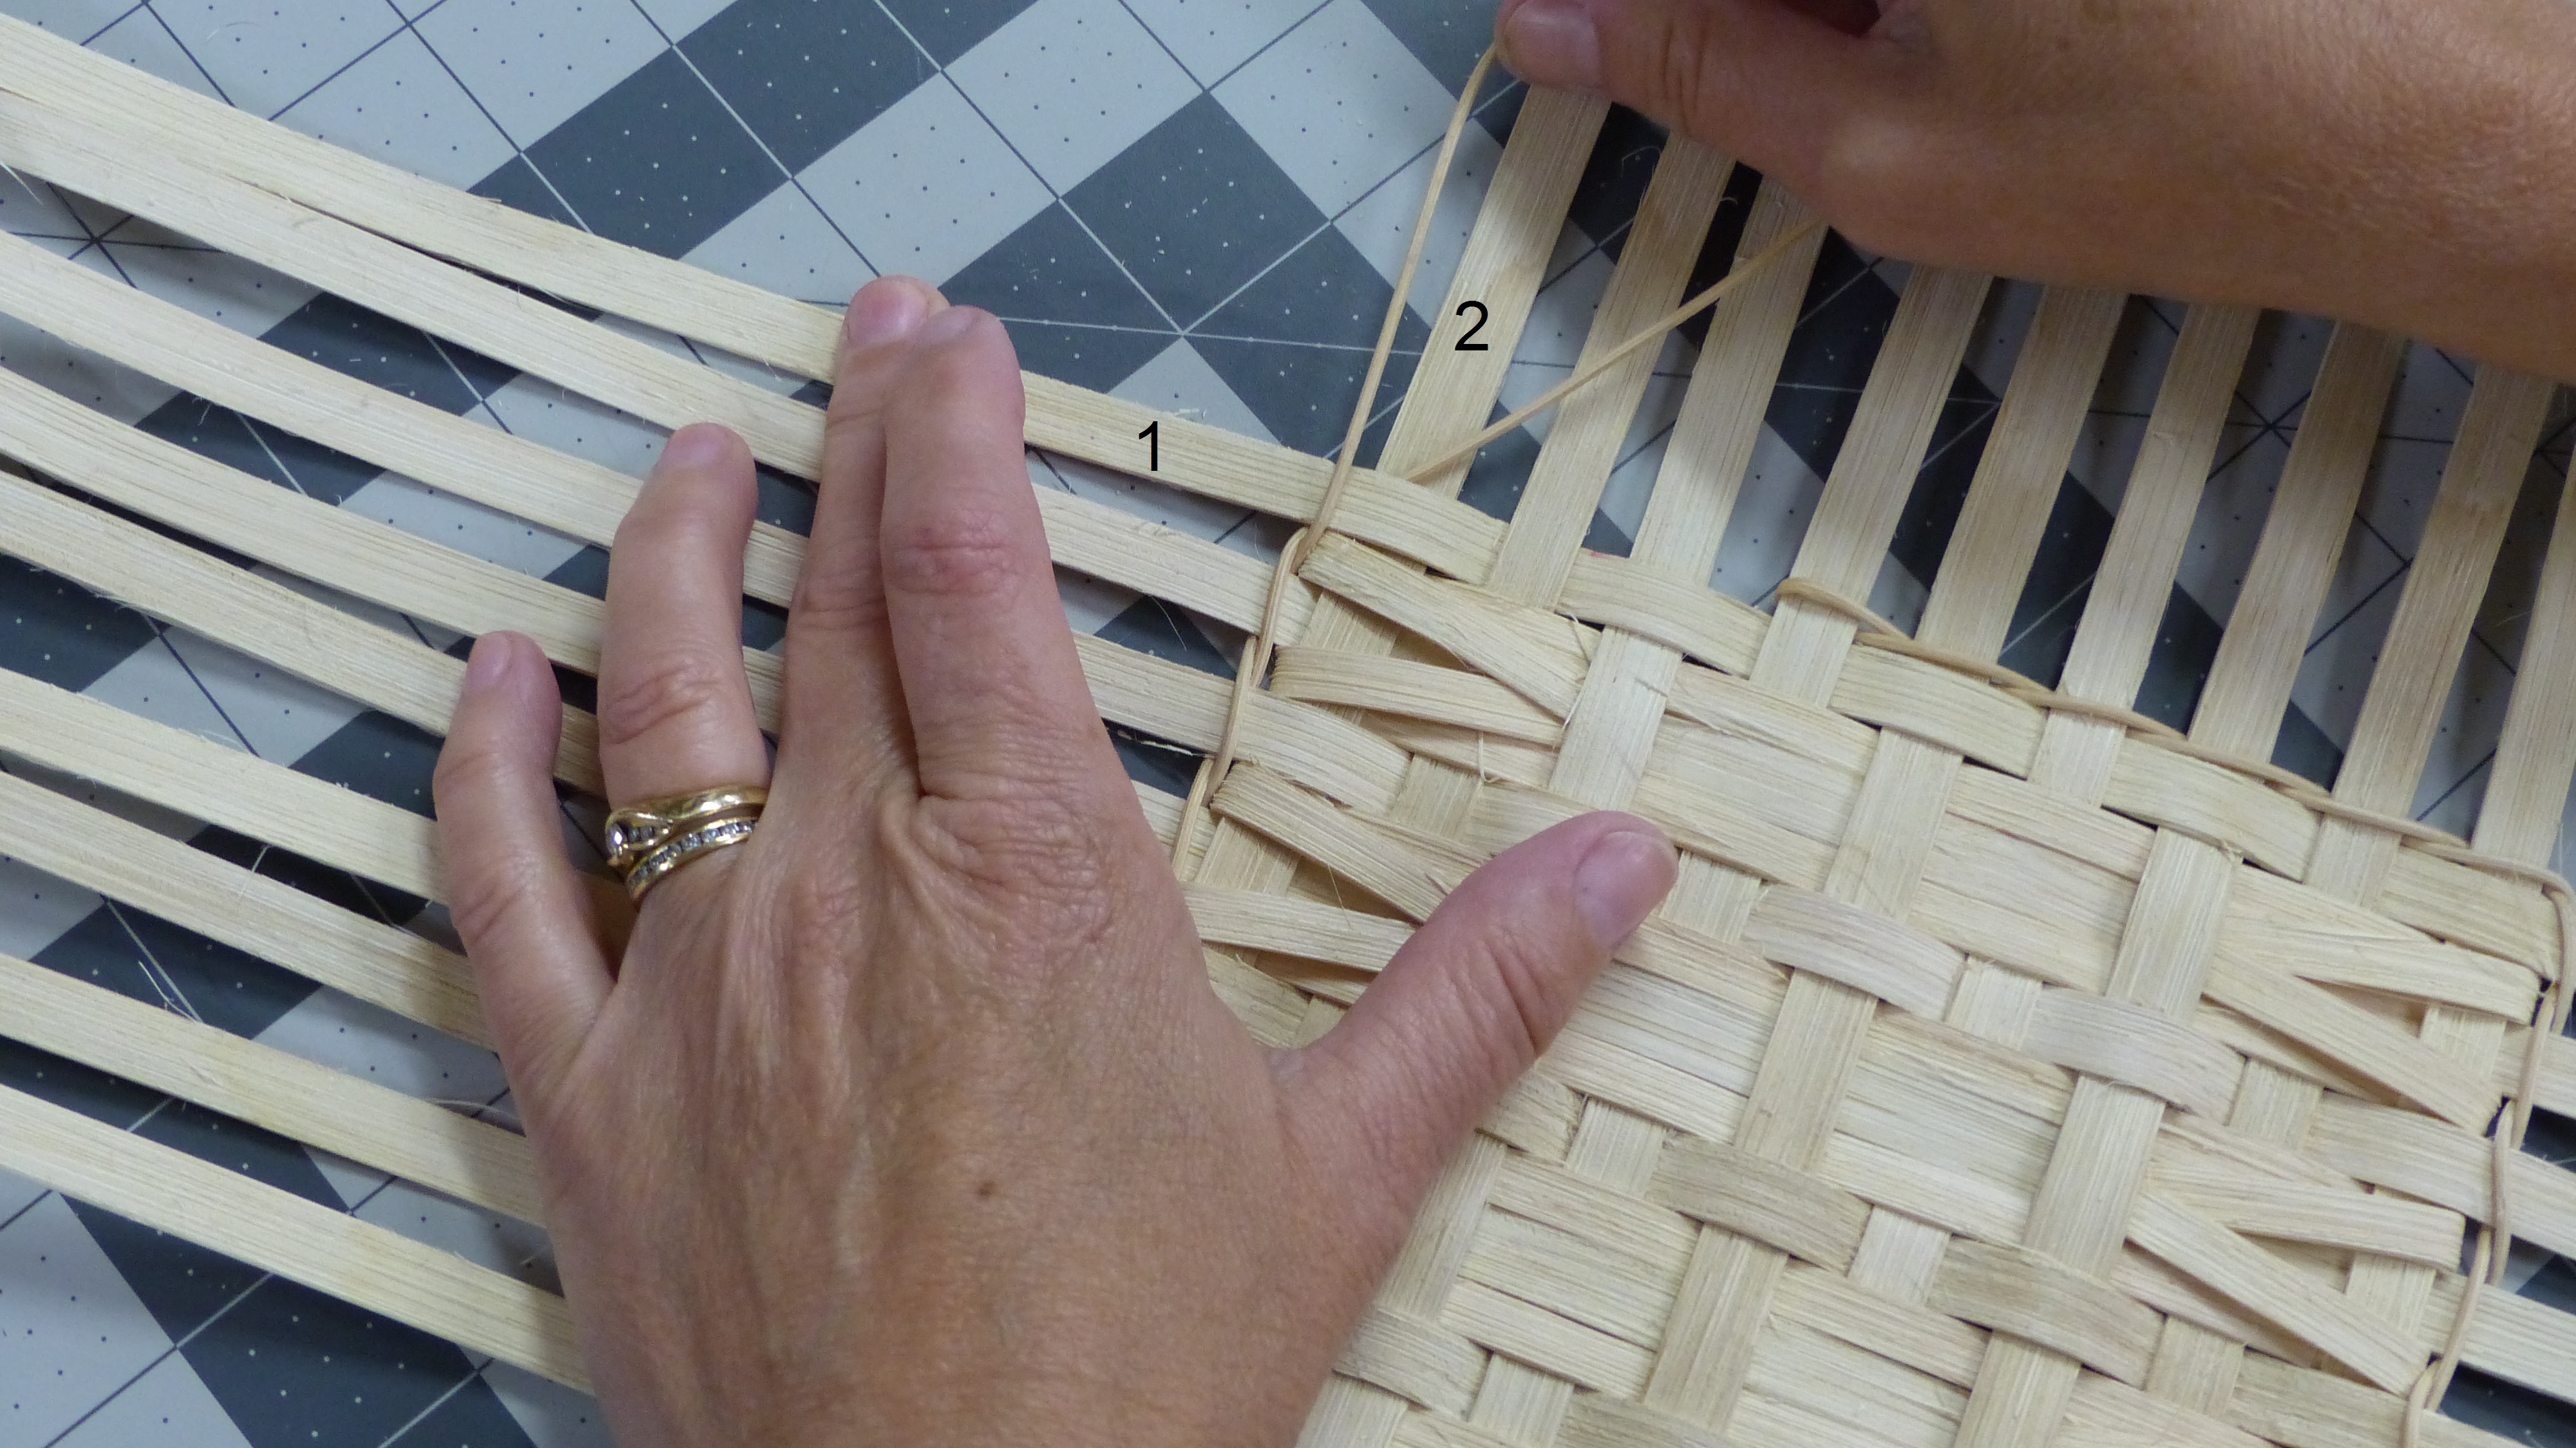
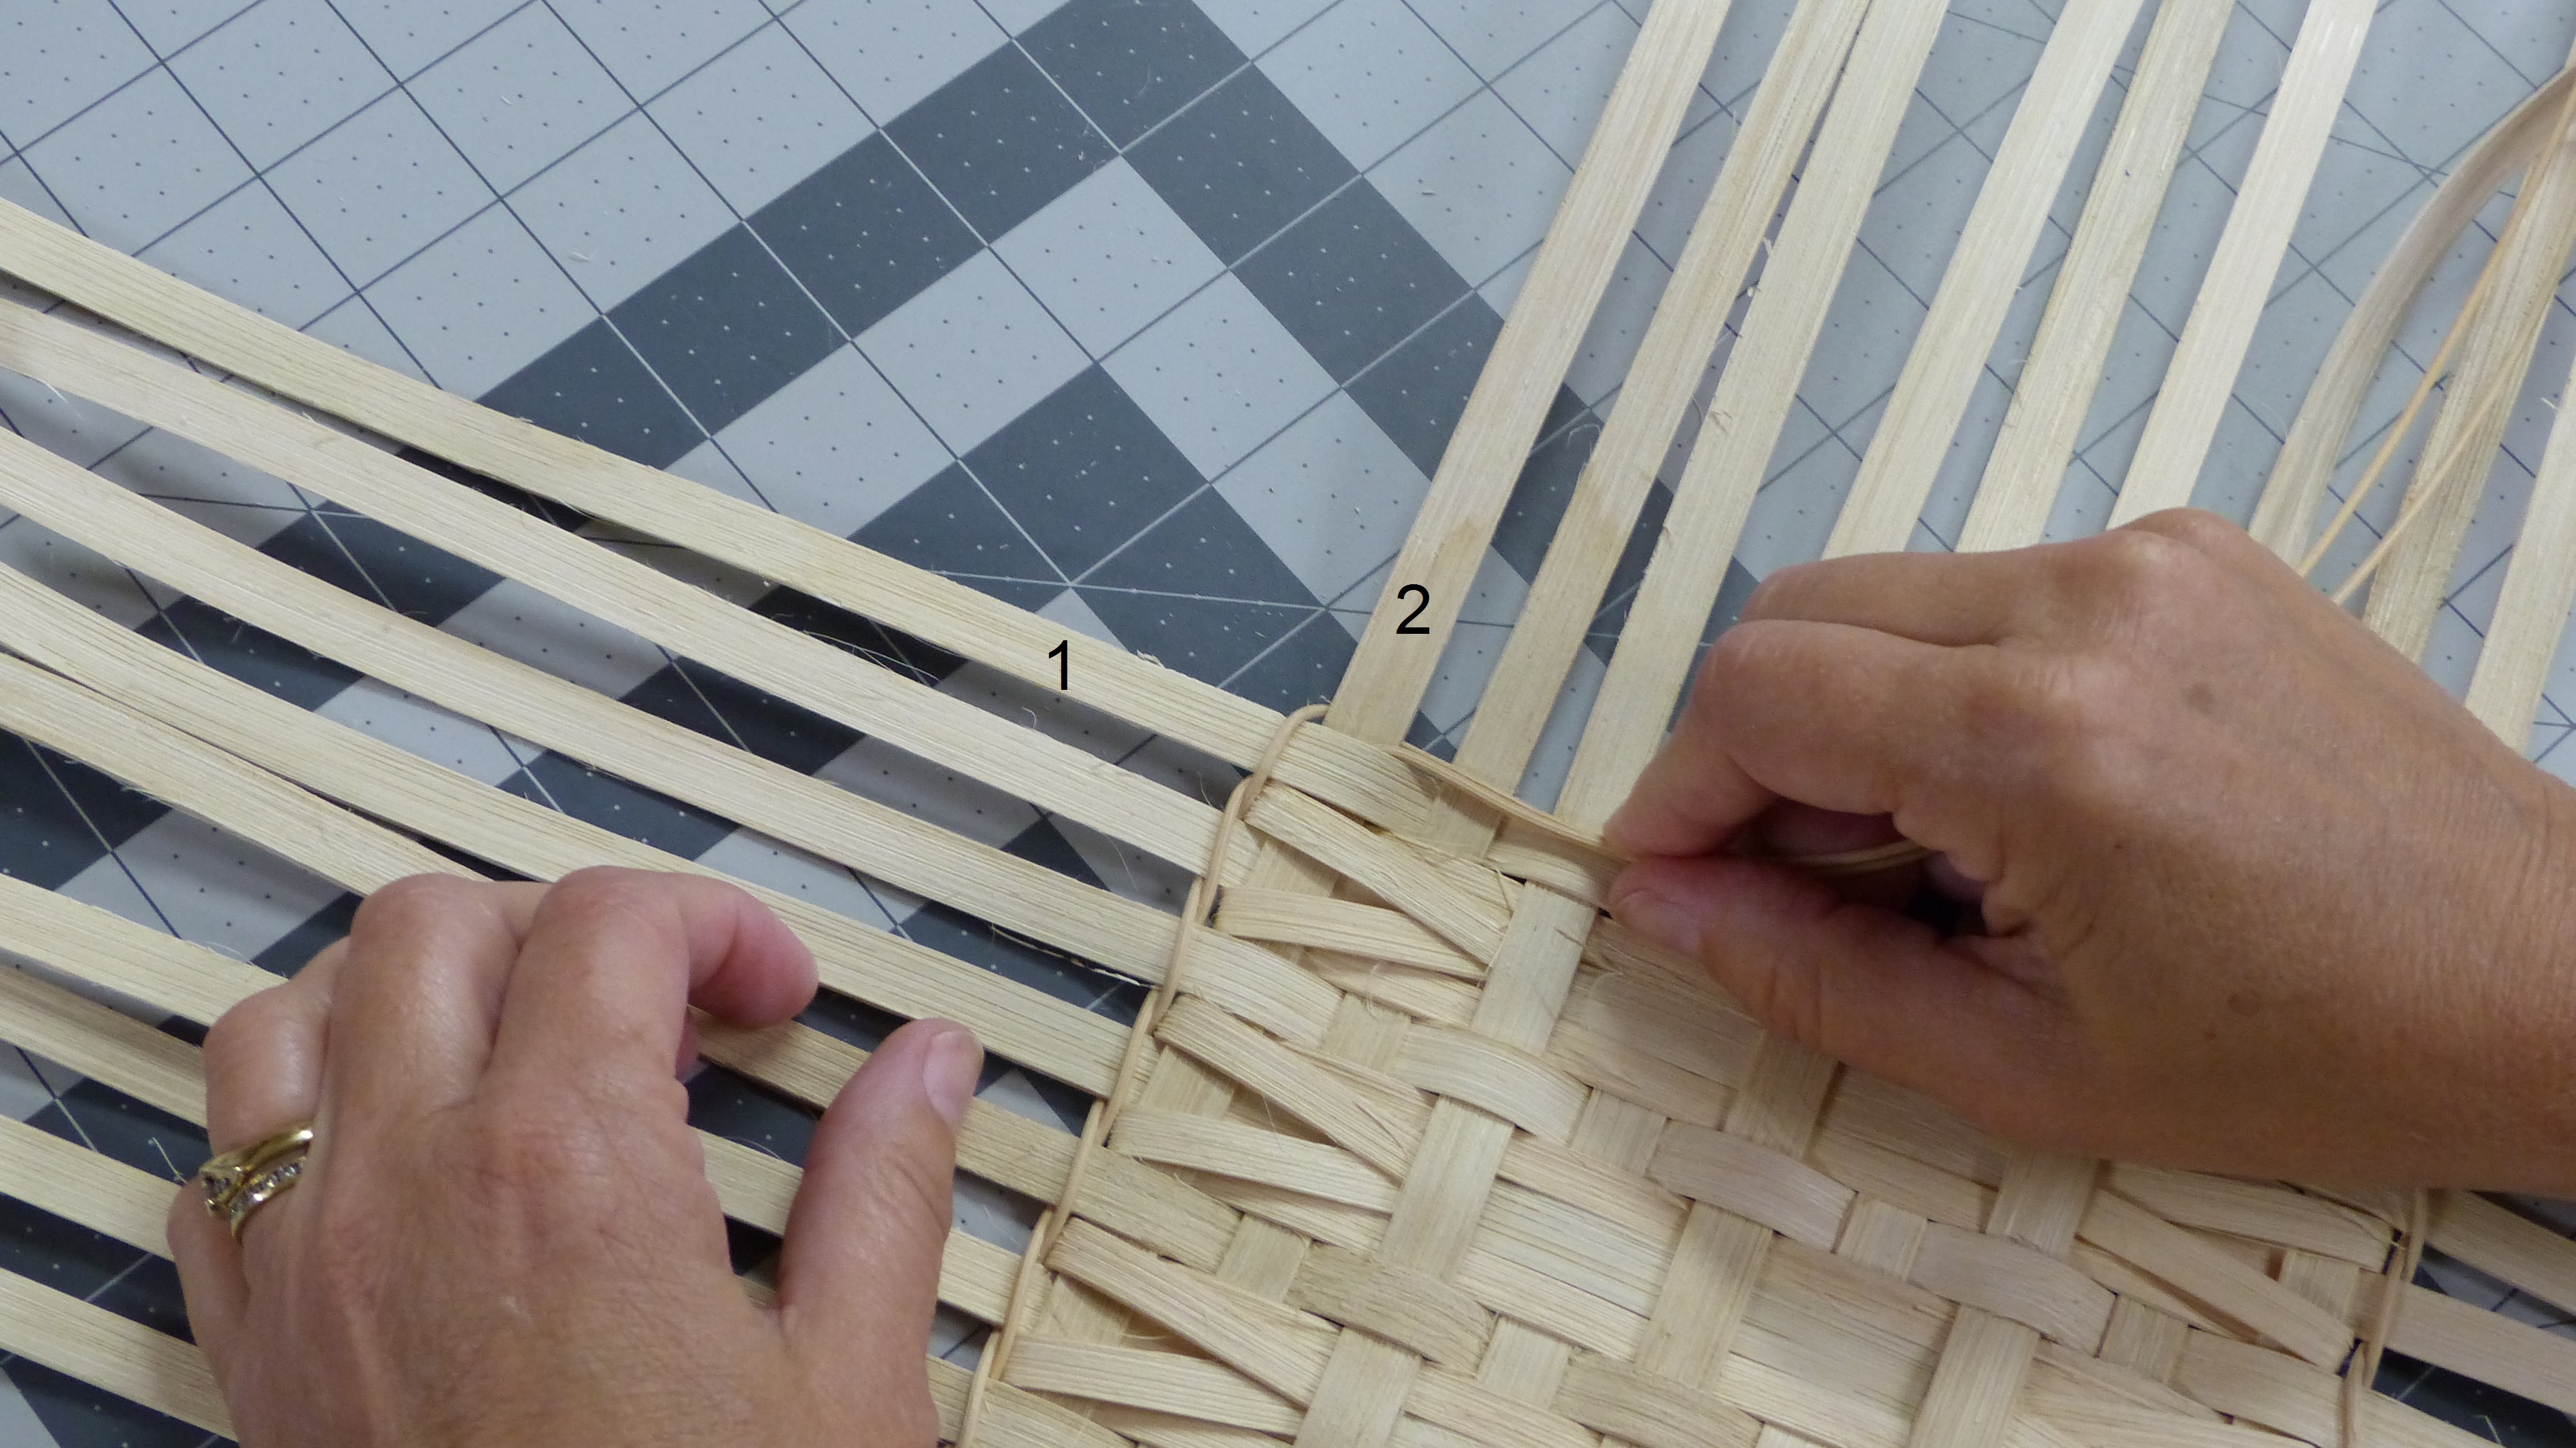
UNDER CORNERS: You will notice that on this type of corner, stake 1 lays under stake 2. Corners like this will need no adjustment to the twining
I start the corner by taking the weaver on the right and folding it around the corner and down, snug against the base.
Now bring the left weaver in front of STAKE 1, fold it around the corner and bring it behind STAKE 2 and out.
See how nice that looks.
Okay back to twining.

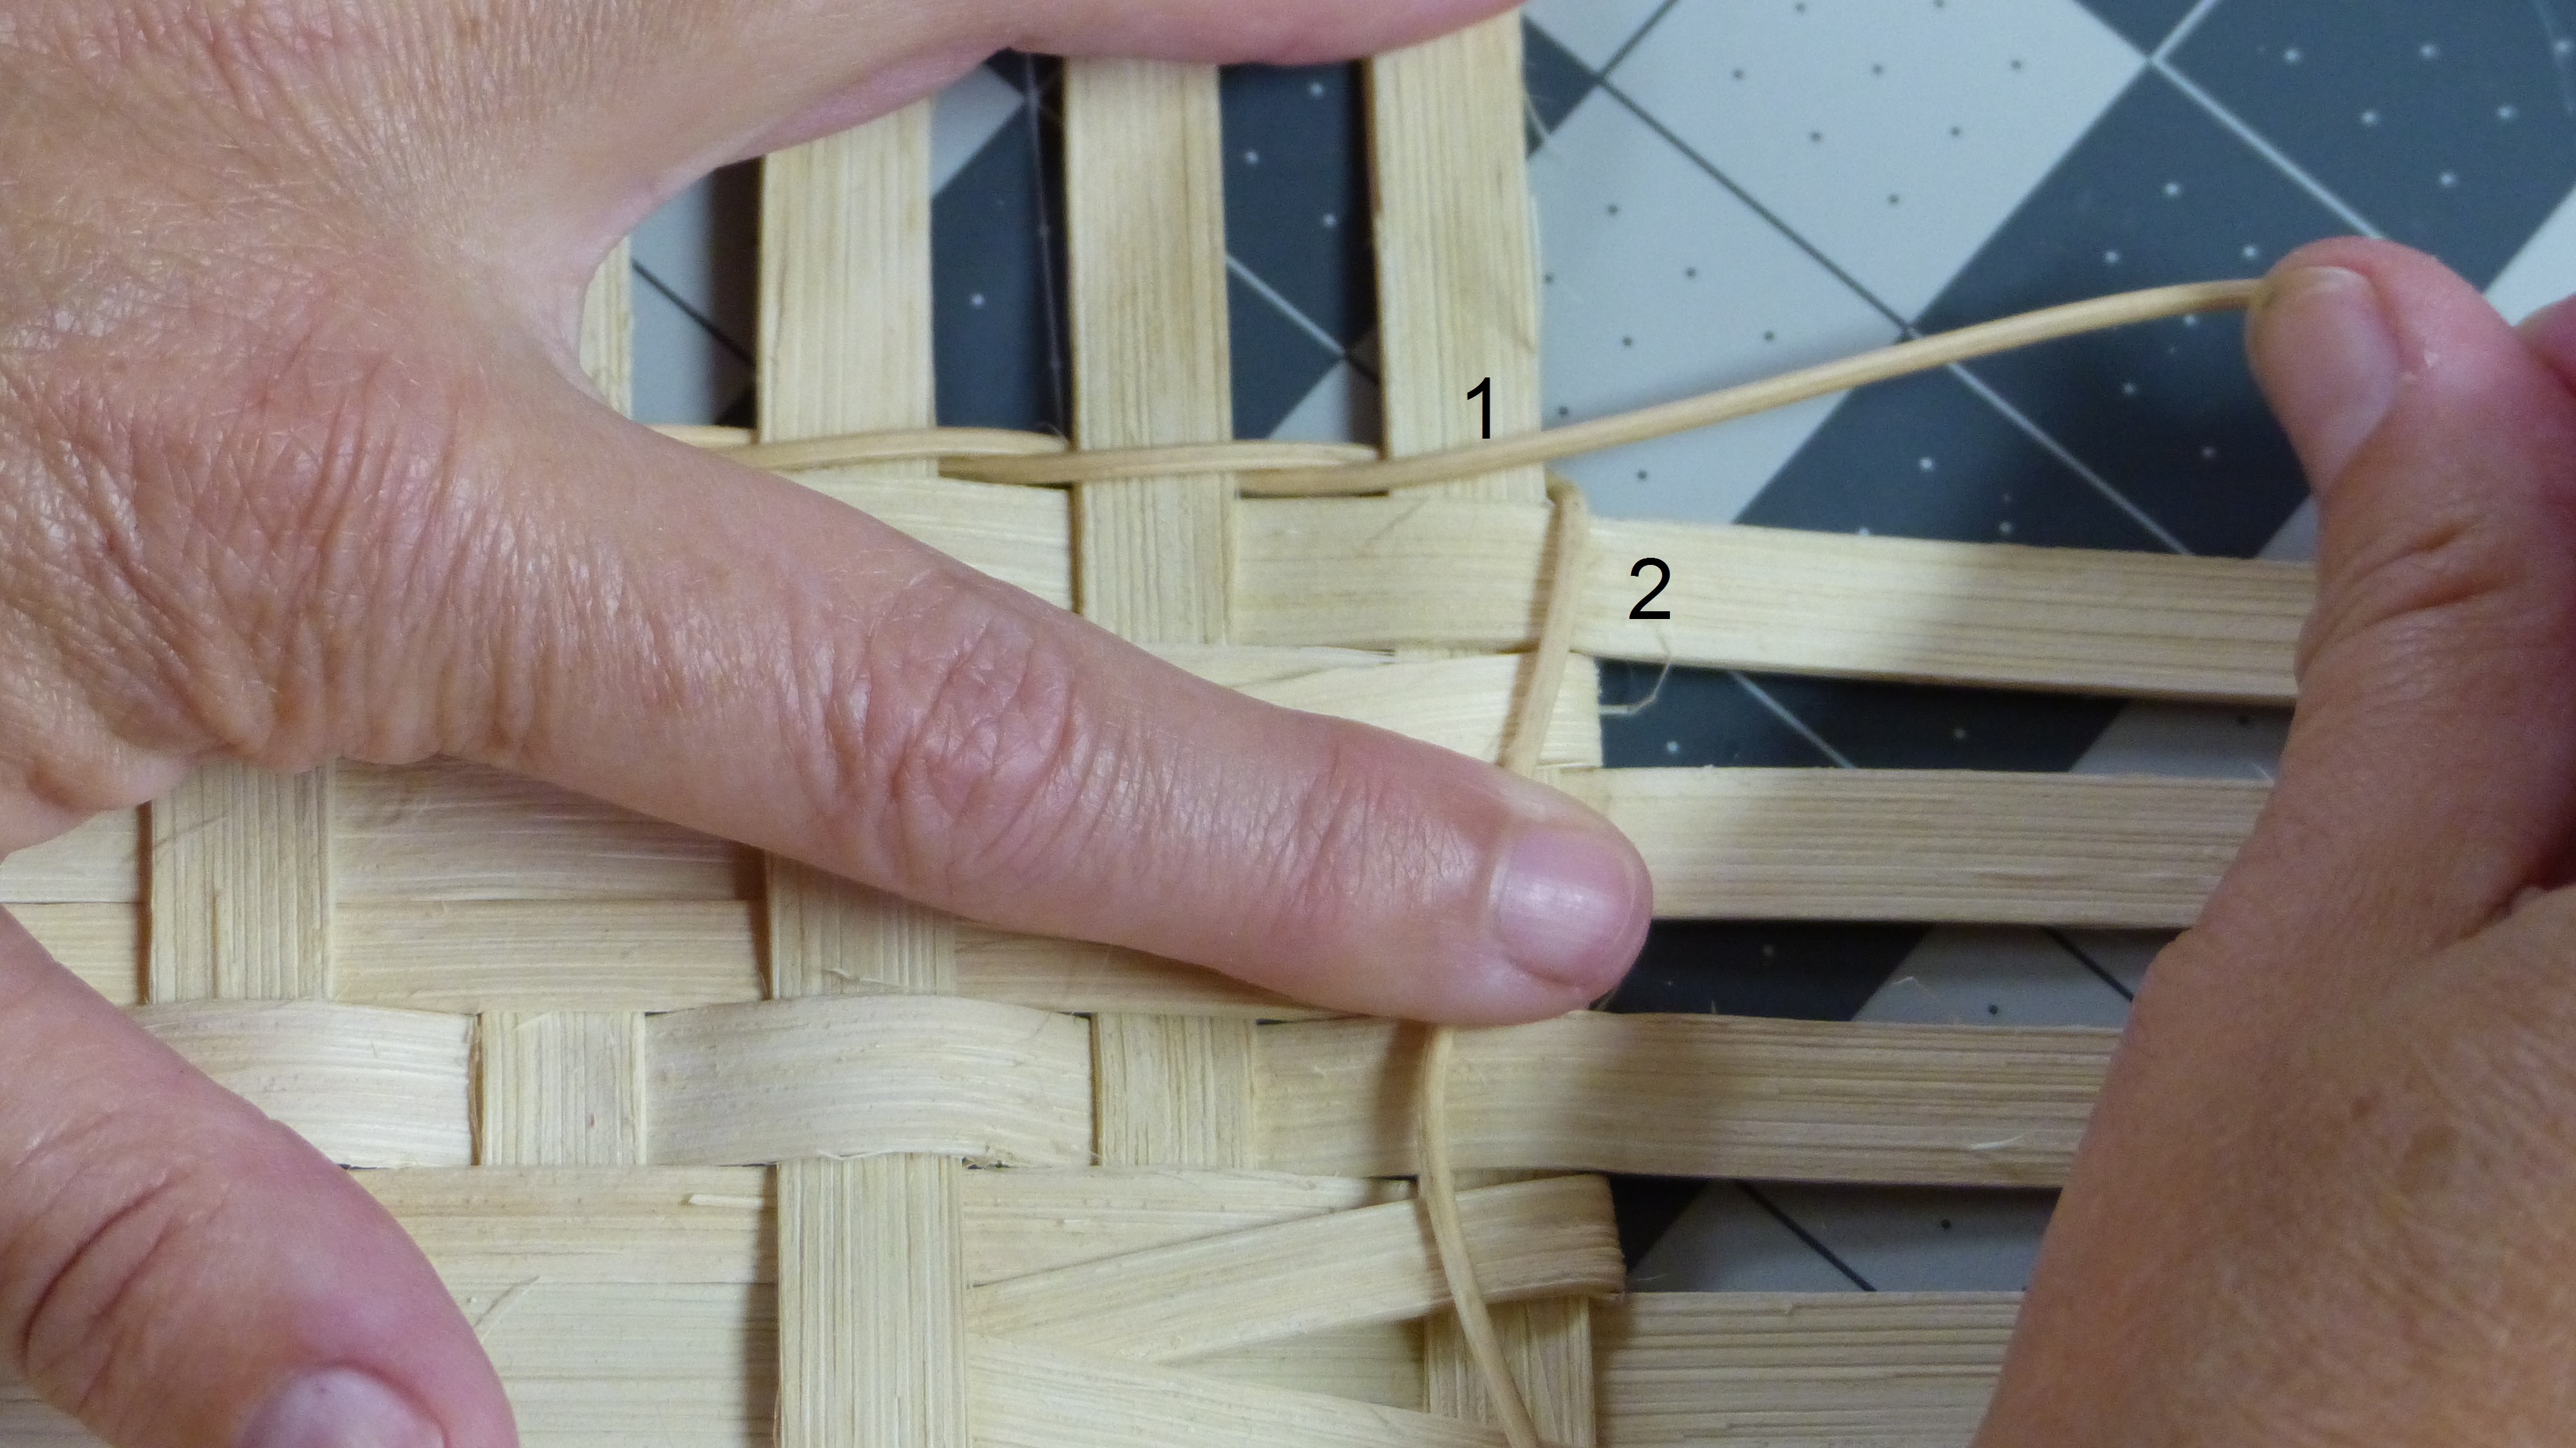
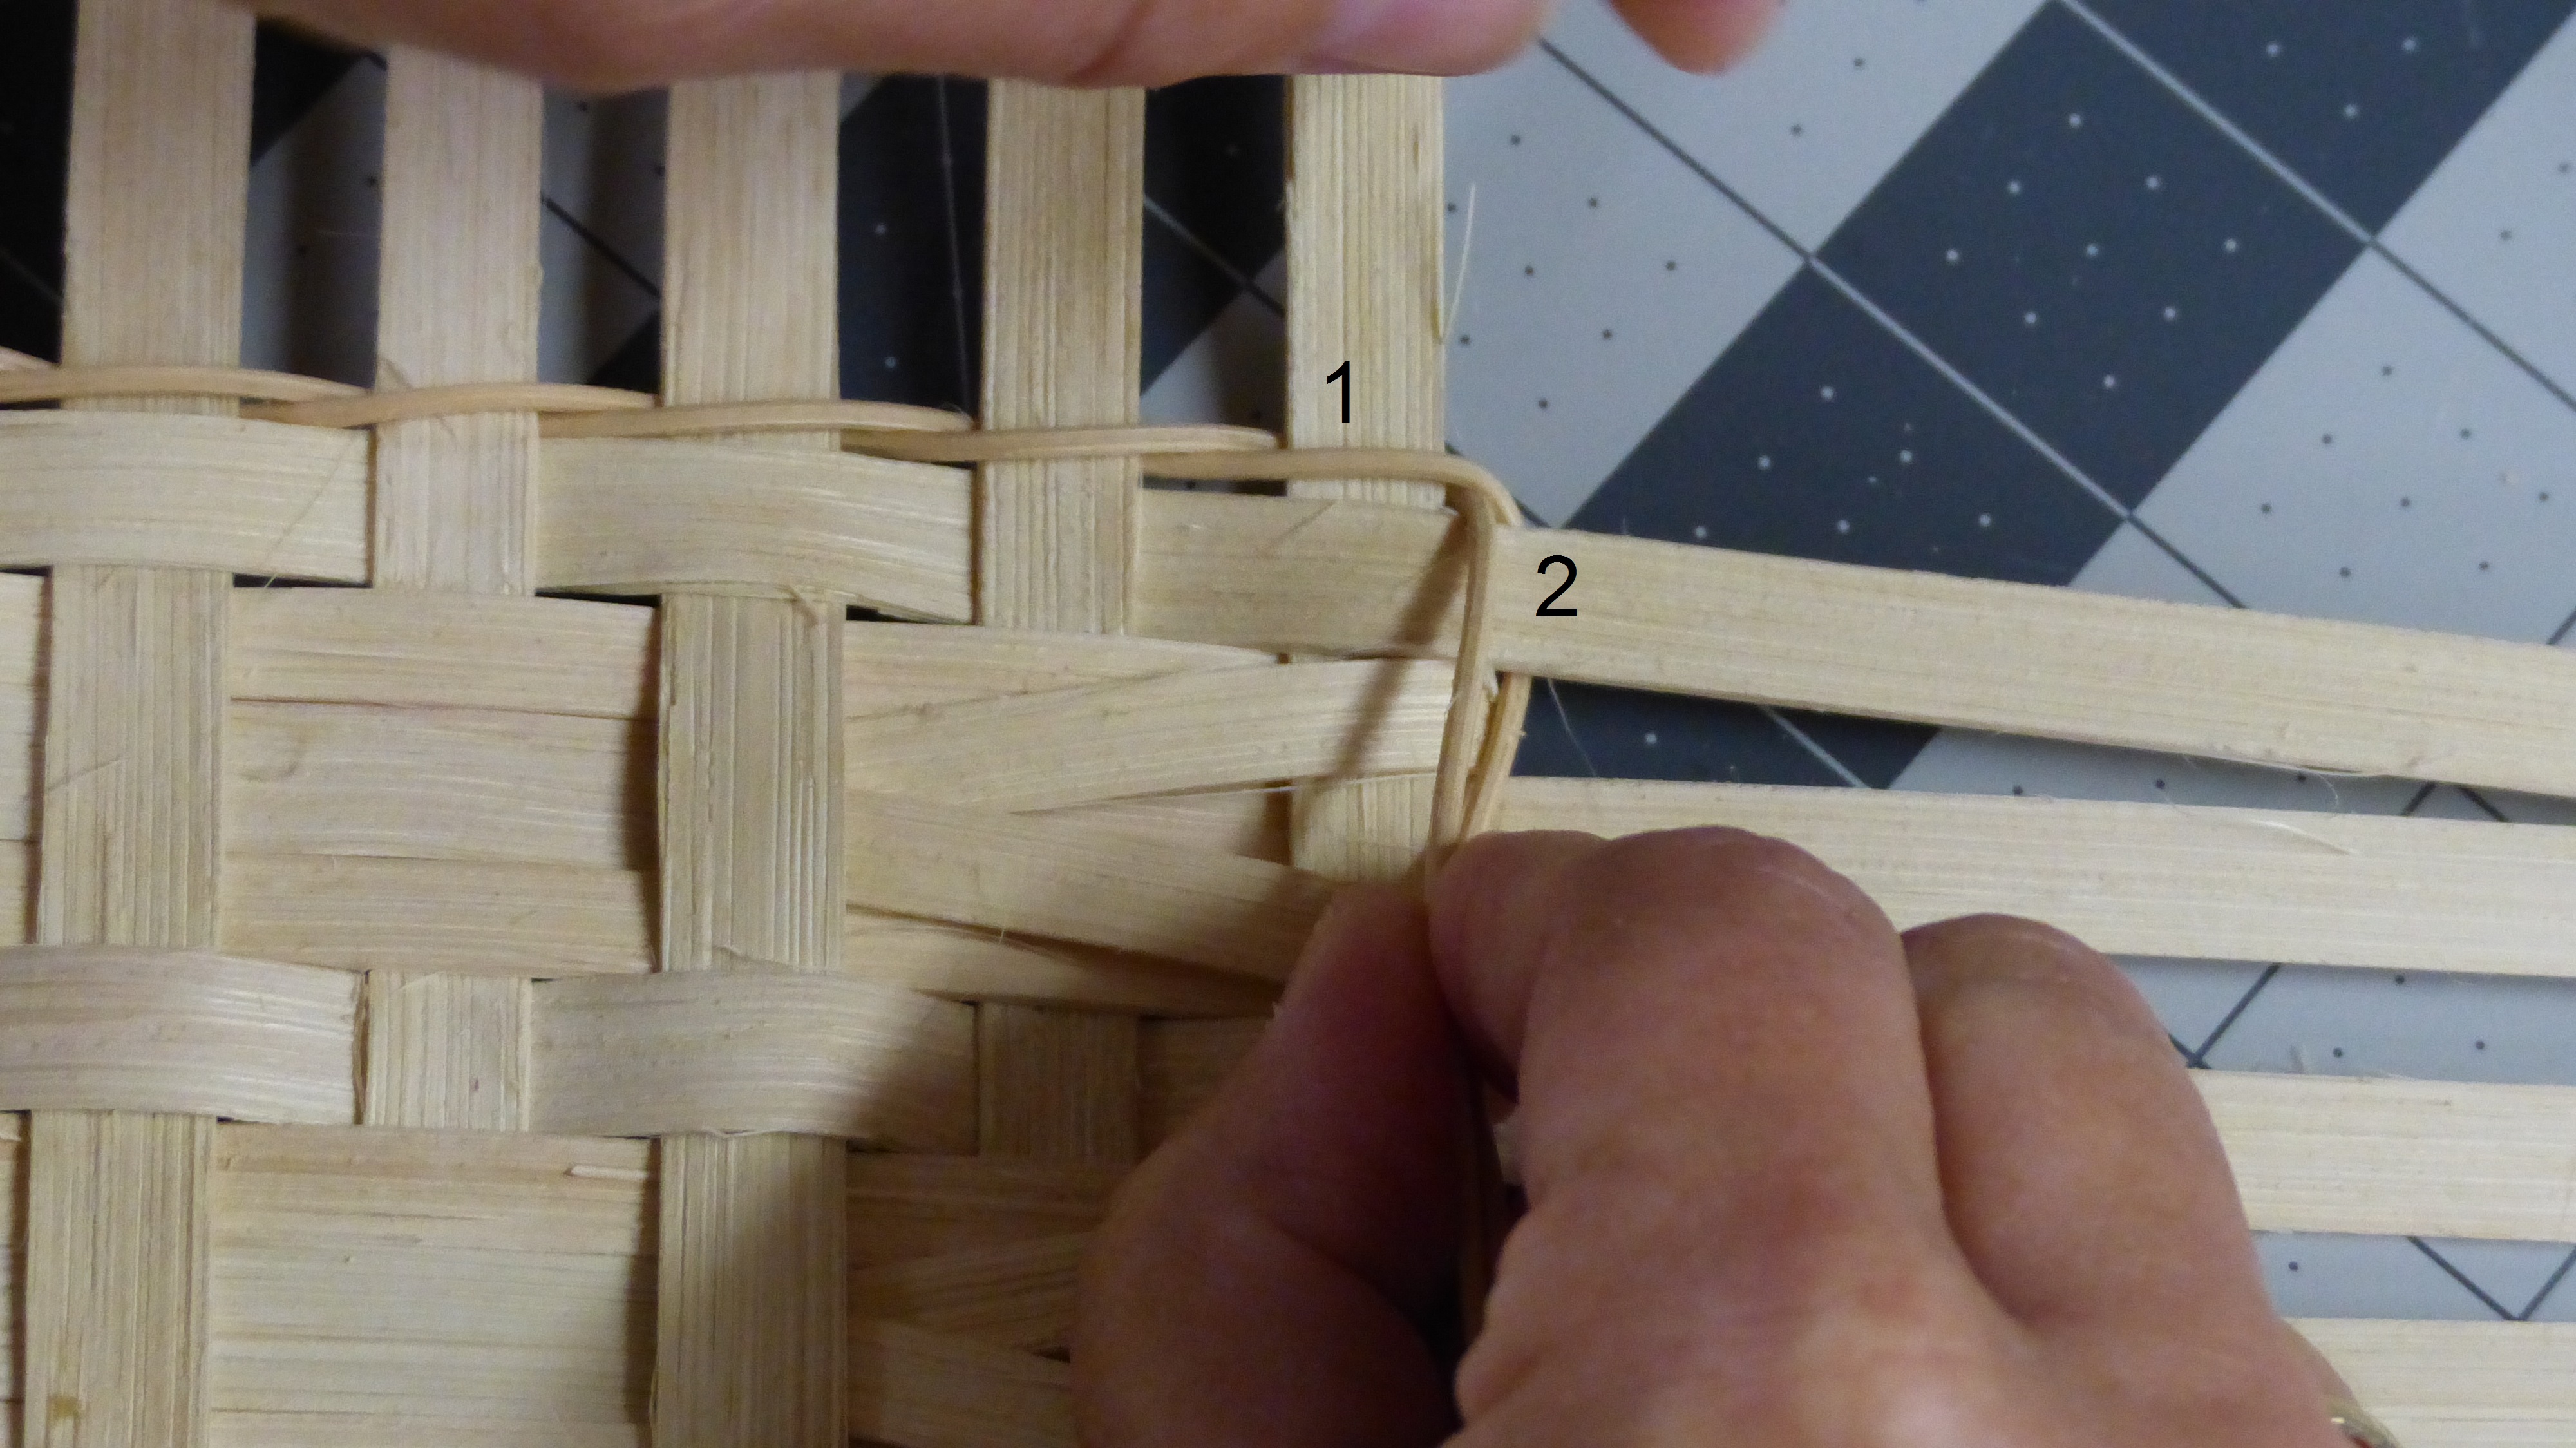
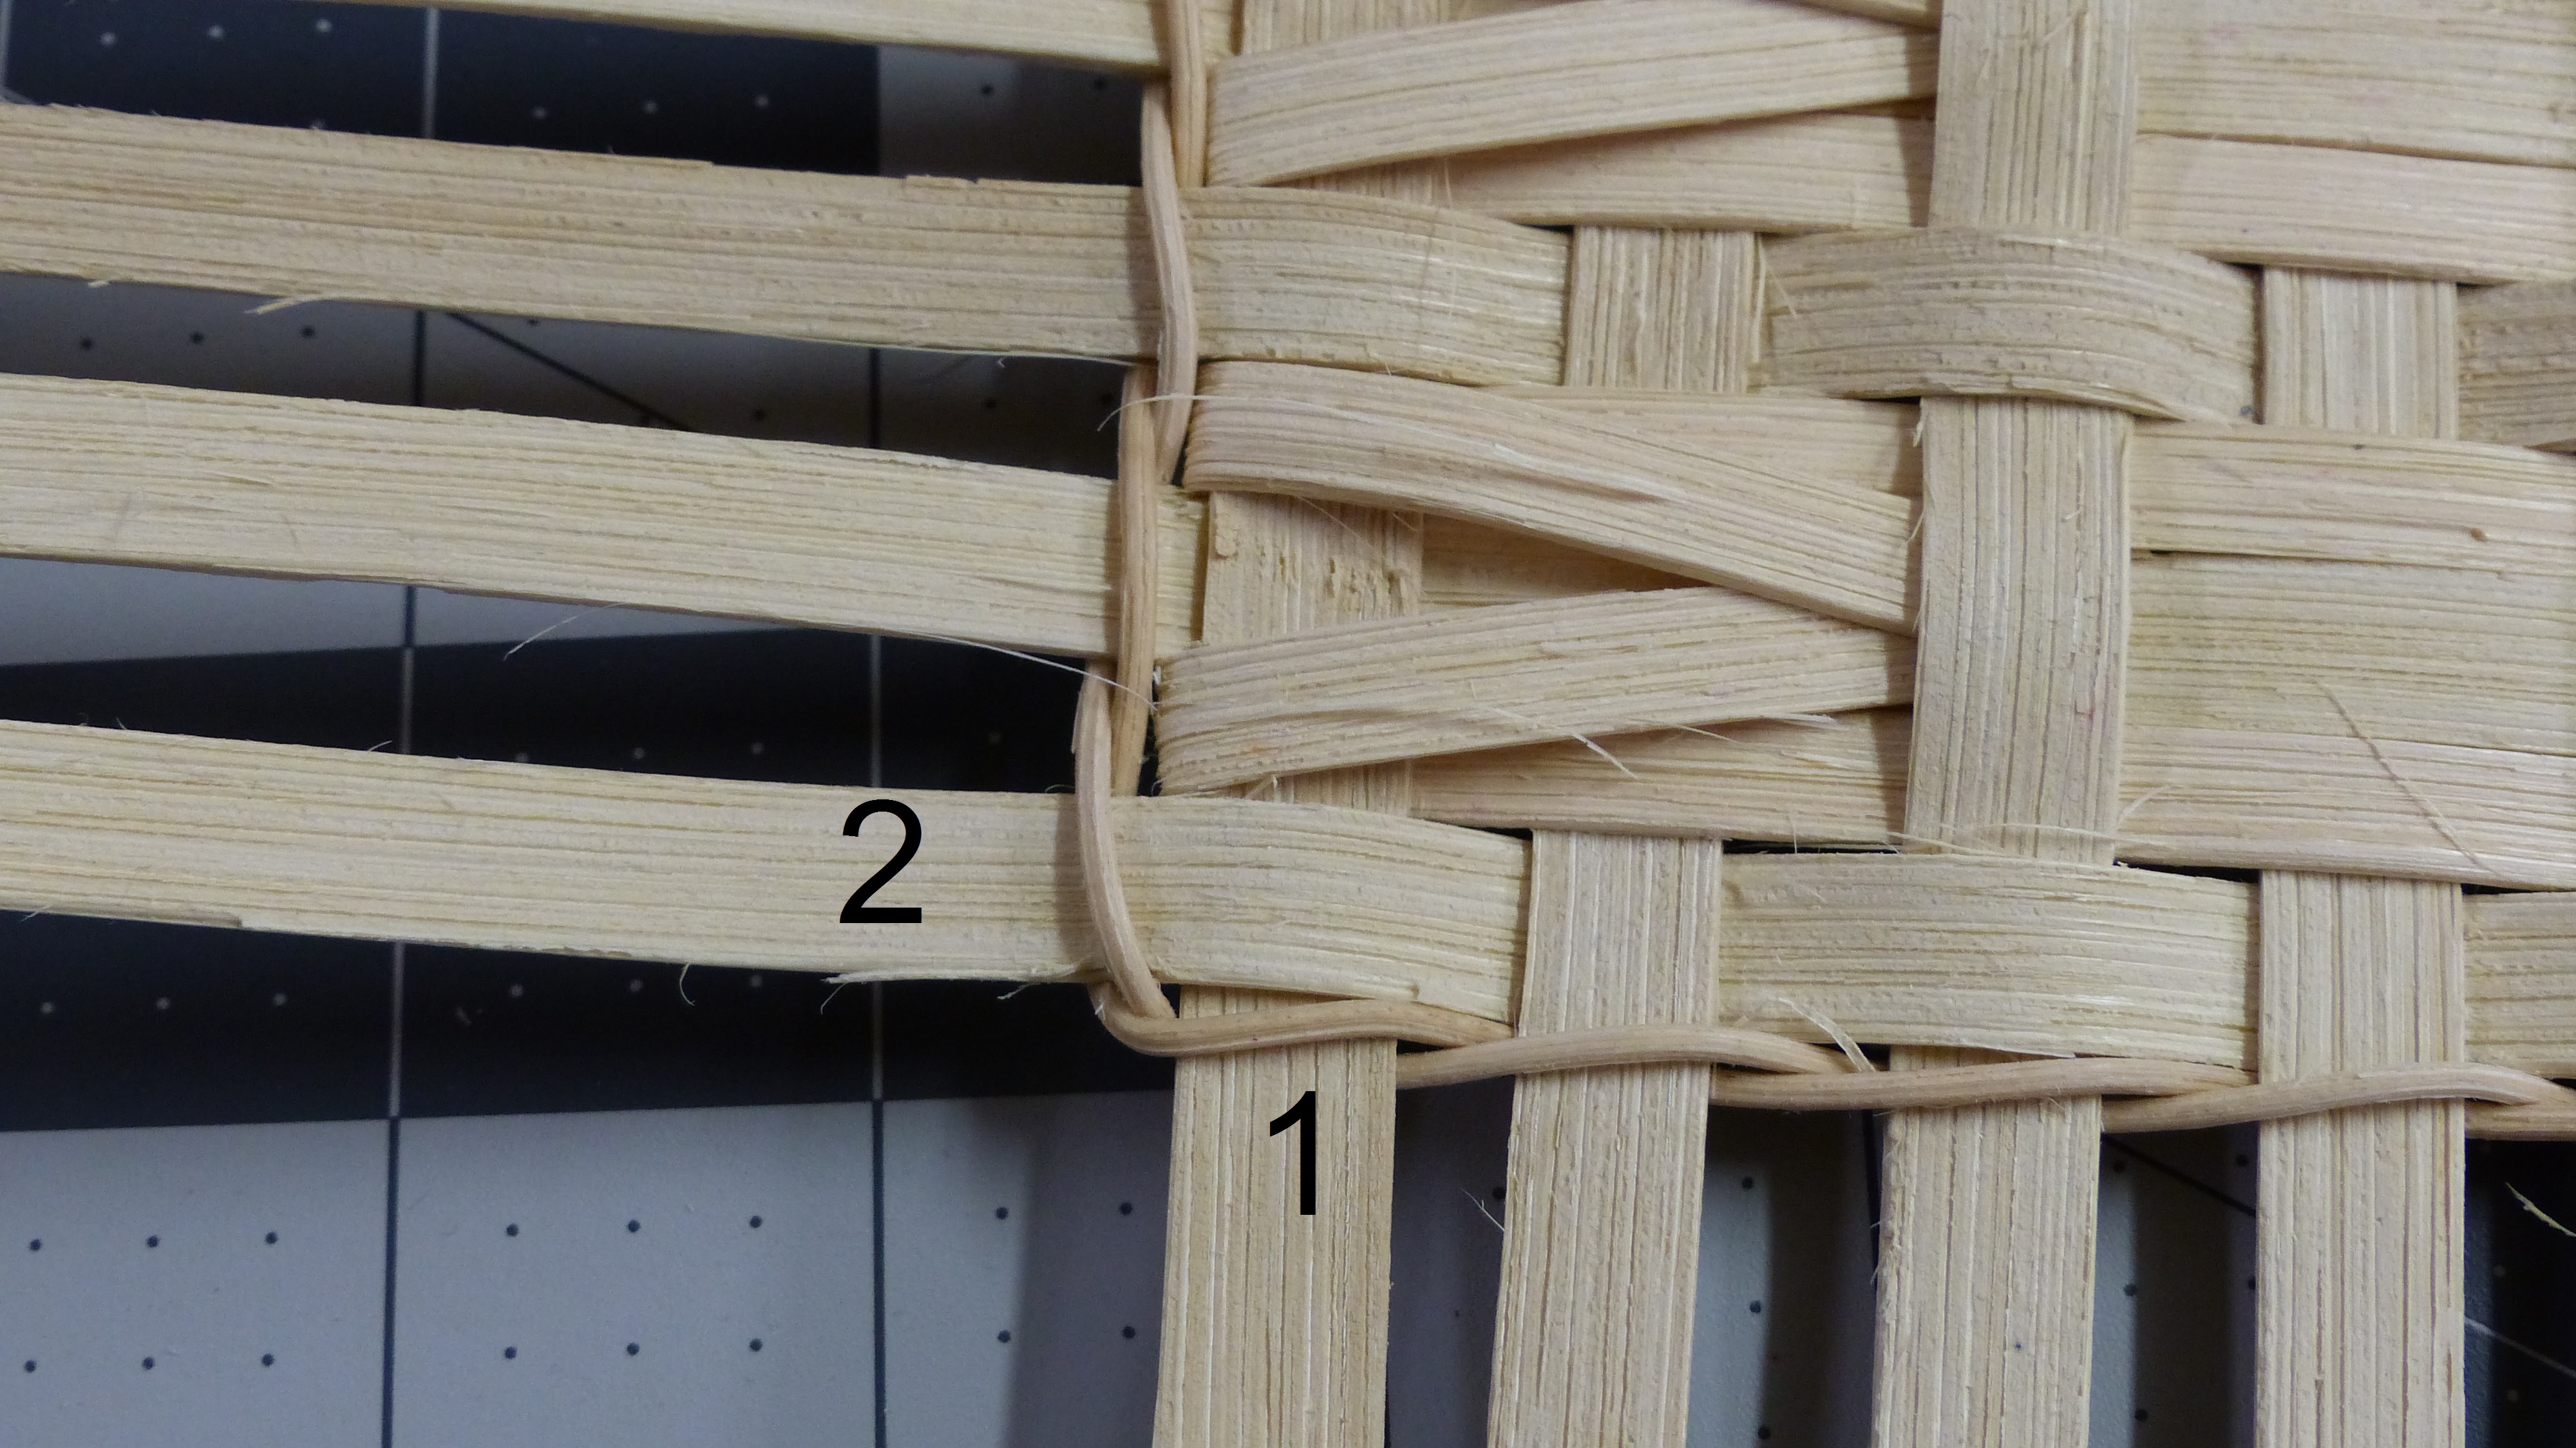
OVER CORNERS: You will notice that on this type of corner, stake 1 lays over stake 2. Corners like this will need an adjustment to the twining because if you don’t
the weaver will slide between the two stakes and your corner will not be crisp.
So, what you what you want to do is move the weaver on the right out of the way, THEN bring the left weaver in front of STAKE 1 (and below the weaver on the right), fold it around the corner and bring it behind STAKE 2 and out.
Now the weaver you picked up is on the left and fold it around the corner.

Yes, this is essentially making an intentional mistake in the twining. Since the point of twining a base is to lock the shape, having crisp square corners is the goal. On a rectangle basket, square corners is the first step to shaping. (Read the squaring your base tutorial here.)
An intentional adjustment in the twining beats the disappearing weaver look.
I used round reed for this tutorial, but use this technique when twining a base with any material. When using waxed linen to twine a base, this adjustment is almost invisible, but the disappearing weaver is an eye catcher.
SO a few last pictures to review:
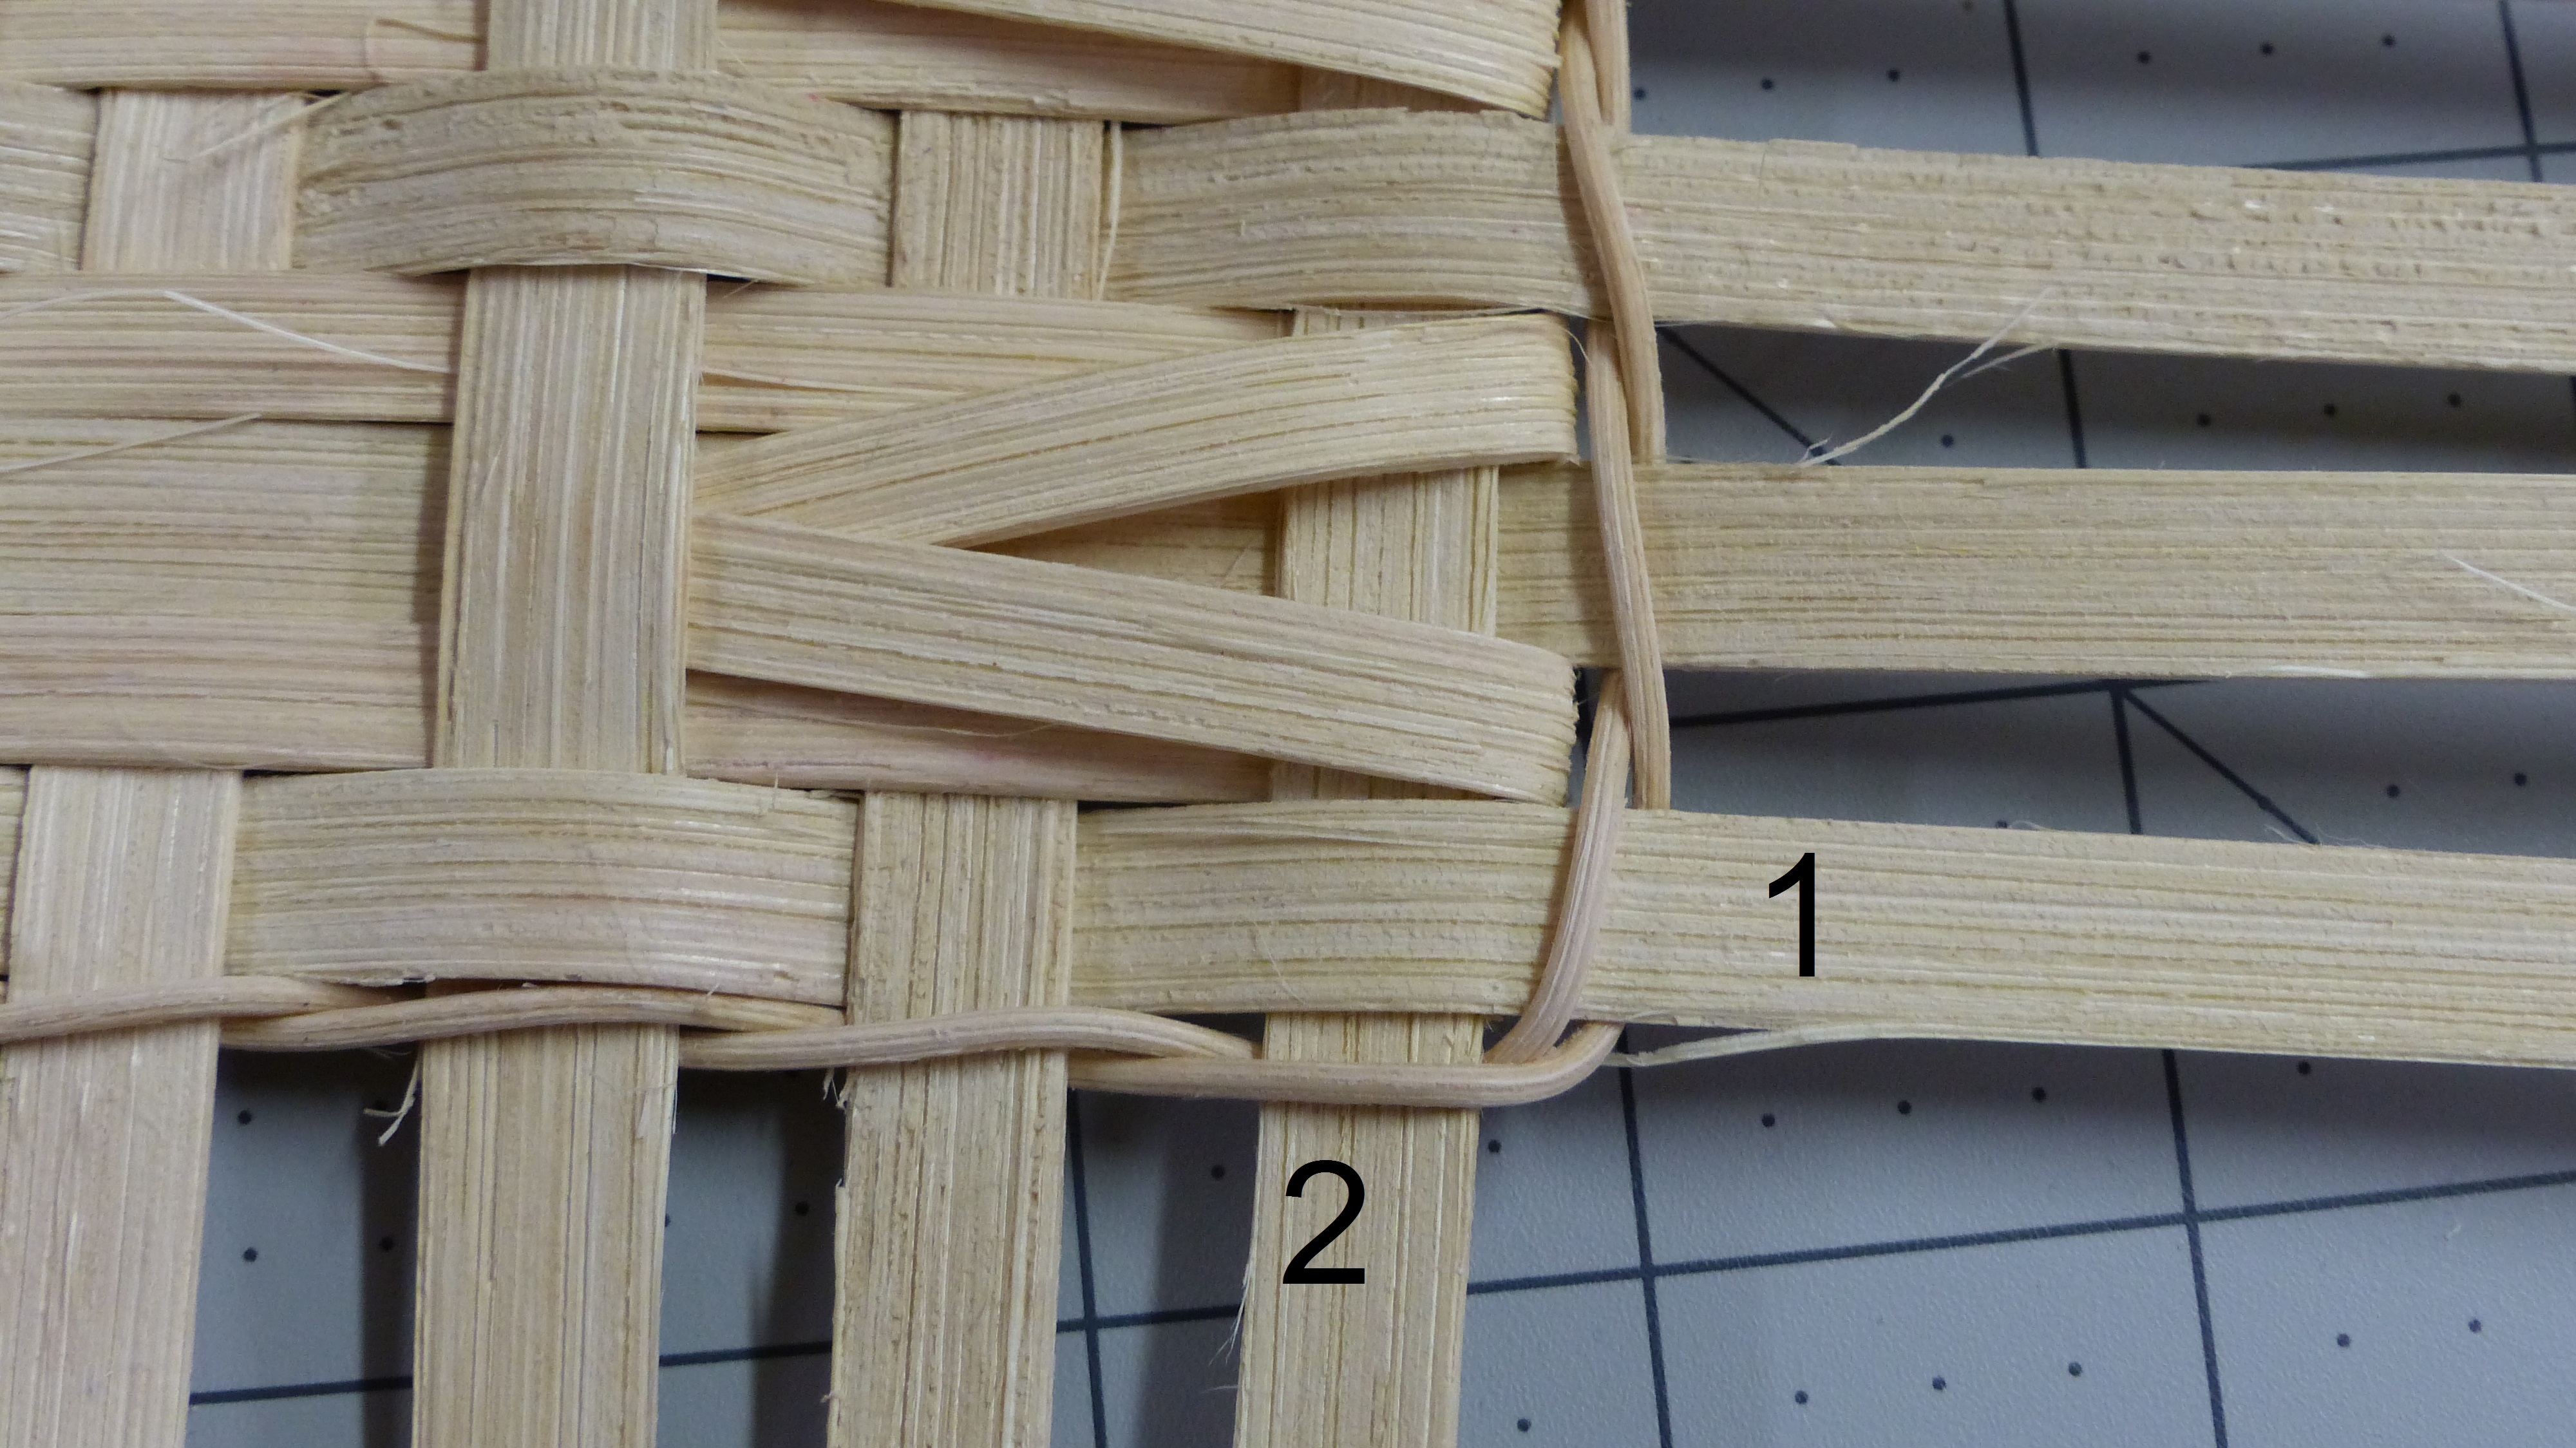
The OVER CORNER
The UNDER CORNER
And now back to packing – next up Heritage Weaver’s Fall Event in Dayton Ohio. See you there?

Nice tutorial…I’ve been weaving a pretty long time and never made this adjustment to my twining…go figure 😉 So now I know how to fix my corners to stay nice and square! Thanks, Annetta! You’re the best!
Great pictures and instructions. Thanks alot.