Locking the Base – Part II
Another way to weaving a locking row
I have two favorite locking rows: the sanity row and the locked locking row. You can read about the sanity row and other ways to lock your base here.
Today we’ll focus on what I call the ‘locked locking row‘- which is a locked four rod or three rod wale row. This is a technique often used in willow or round reed baskets, but it also works nicely in a basket that uses a variety of material. It’s one of my favorites for a few reasons:
- It adds a lot of stability to the foundation of your basket.
- It looks like a twist of round reed.
- It creates a foot for the basket to sit on, thereby protecting the base. While kinda tricky, this row can be replaced if worn out.
- When done correctly, it really is locked!
This post will mostly focus on using 2/2 four rod locked locking row, however you can also use a three rod locked locking row, which I will discuss briefly at the end of the article.
Weaving a 2/2 Four Rod Locking Row
Use round reed that is one size larger than the other side weavers. For example if you will be using #2 RR on the sides of the basket, use #3 RR for the locking row.
Start with four pieces of round reed, each one long enough to go around the basket once plus 12″.
Weaving with the right side up, start with the four ends tucked to the inside. The weavers will come out of four consecutive spaces. Leave each of the ends on the inside at least 3″ long. Refer to the photos below for placement.
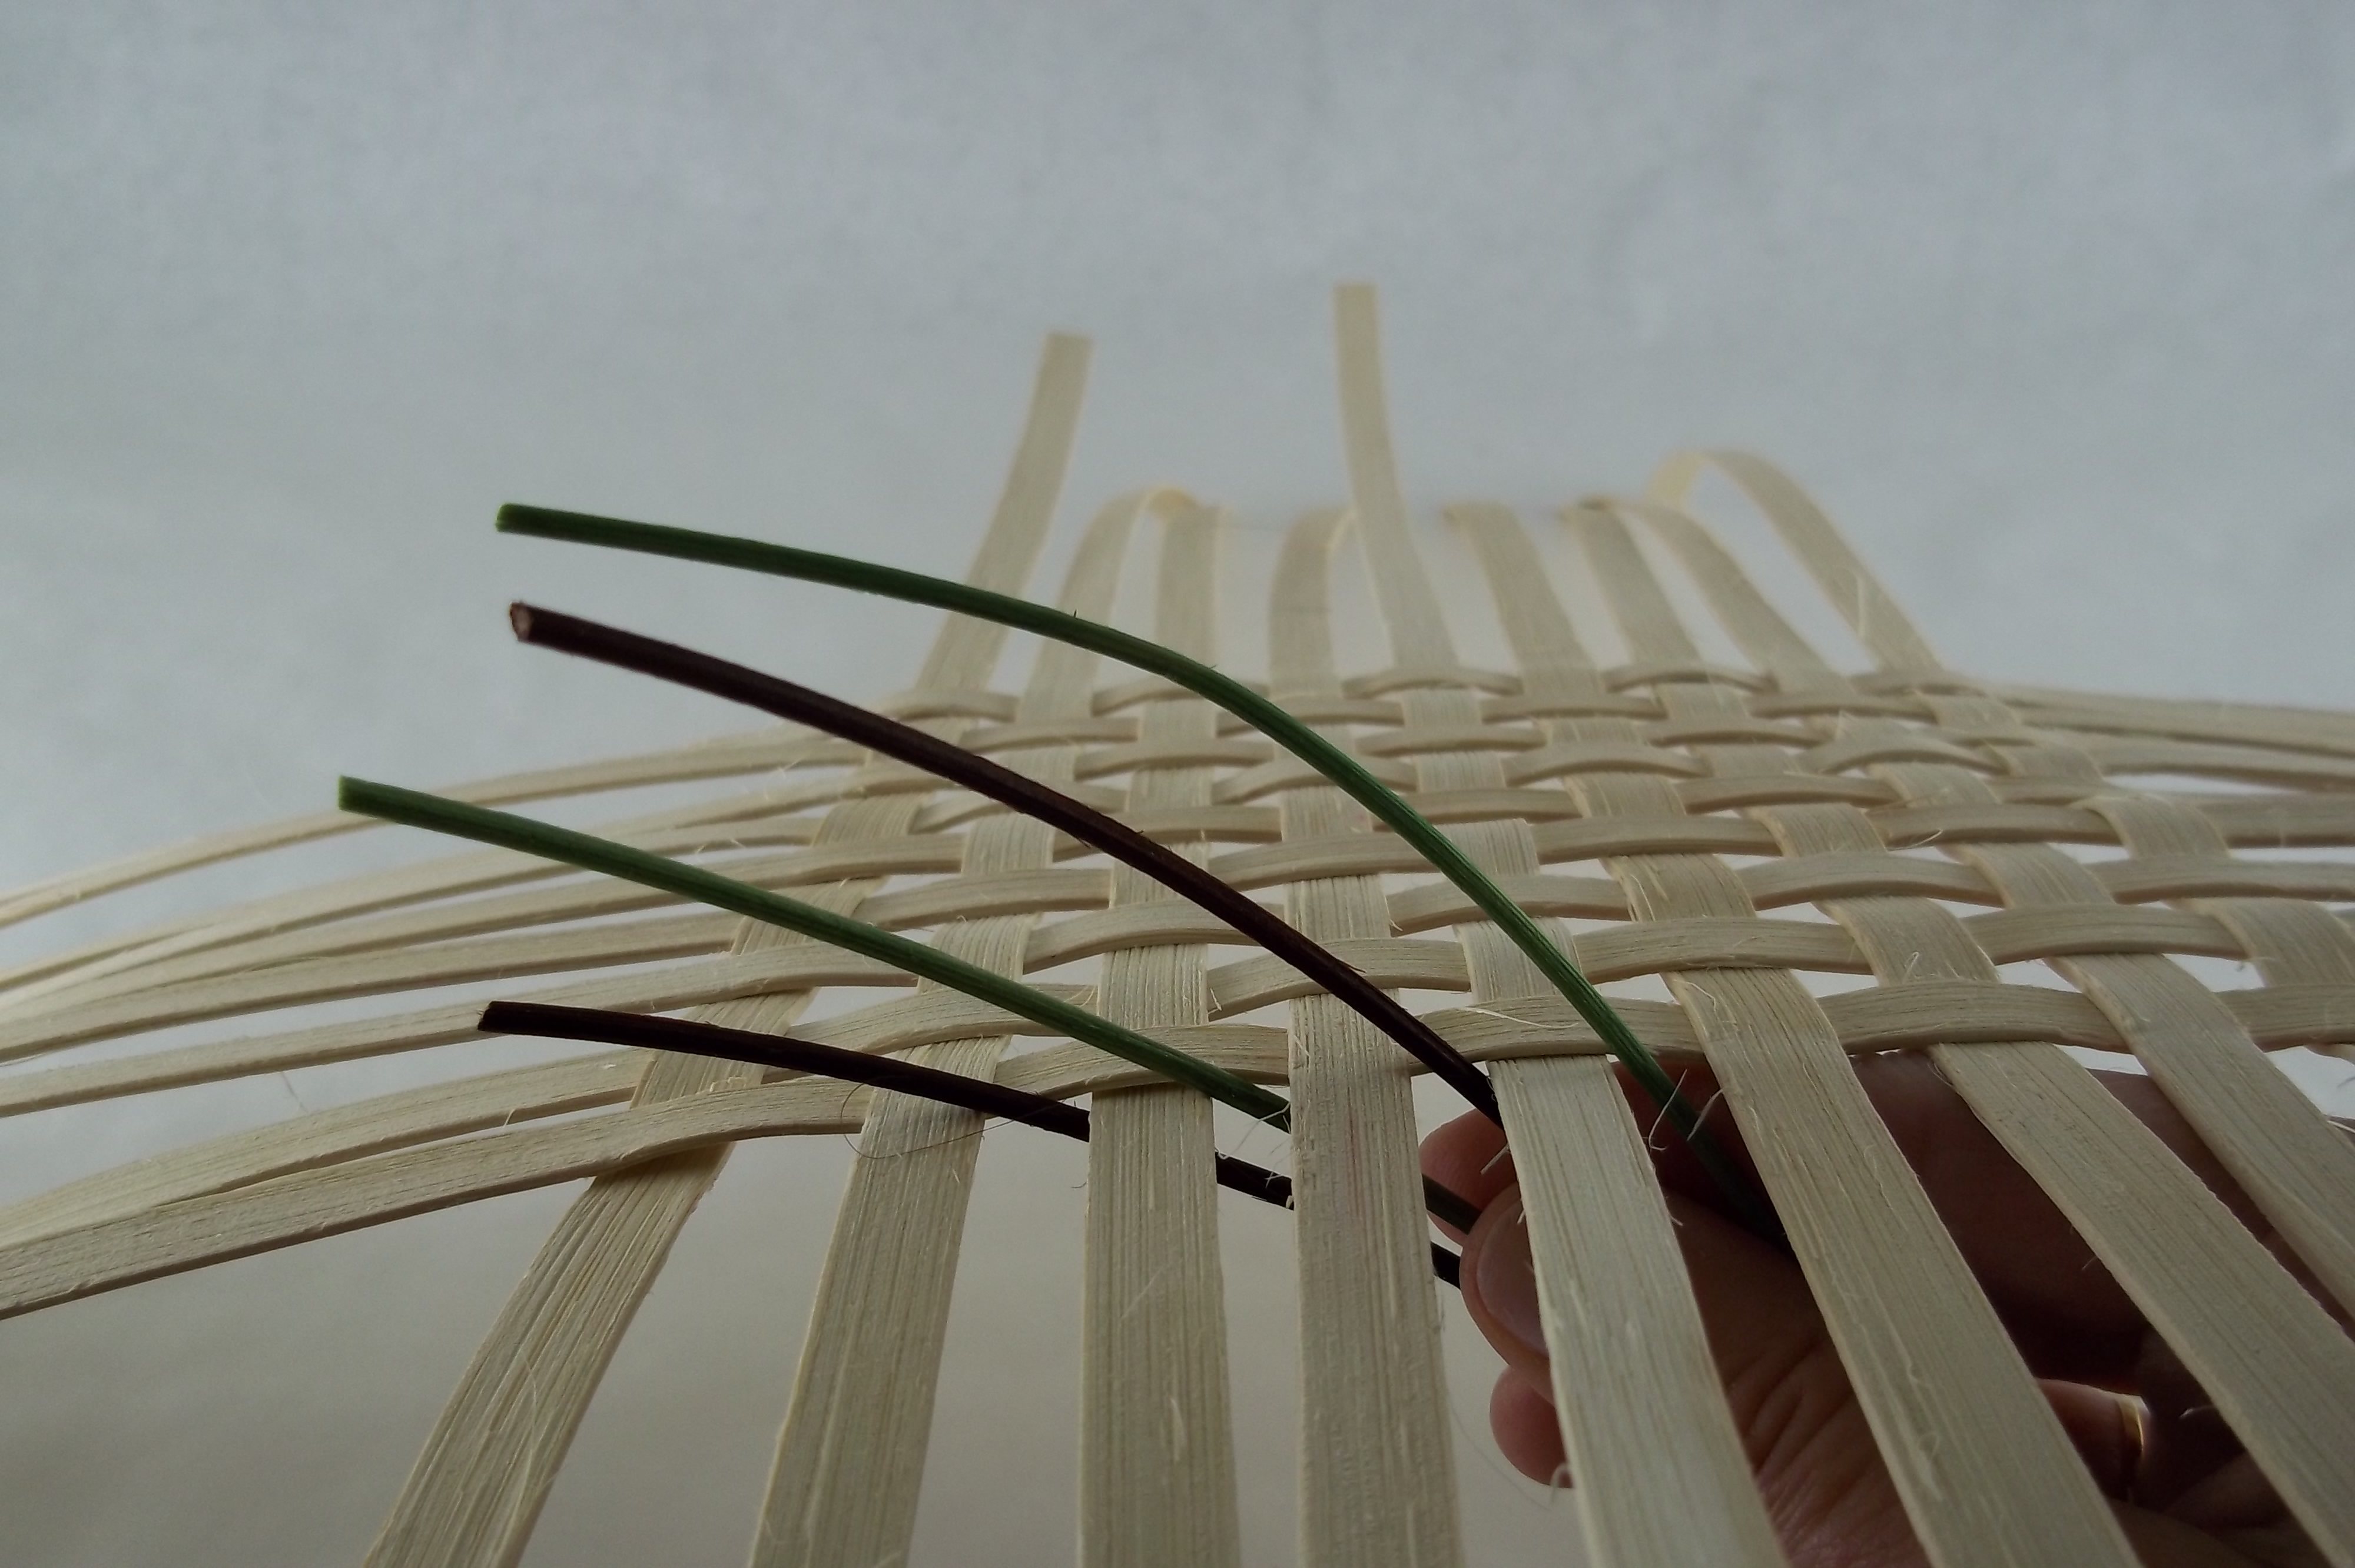
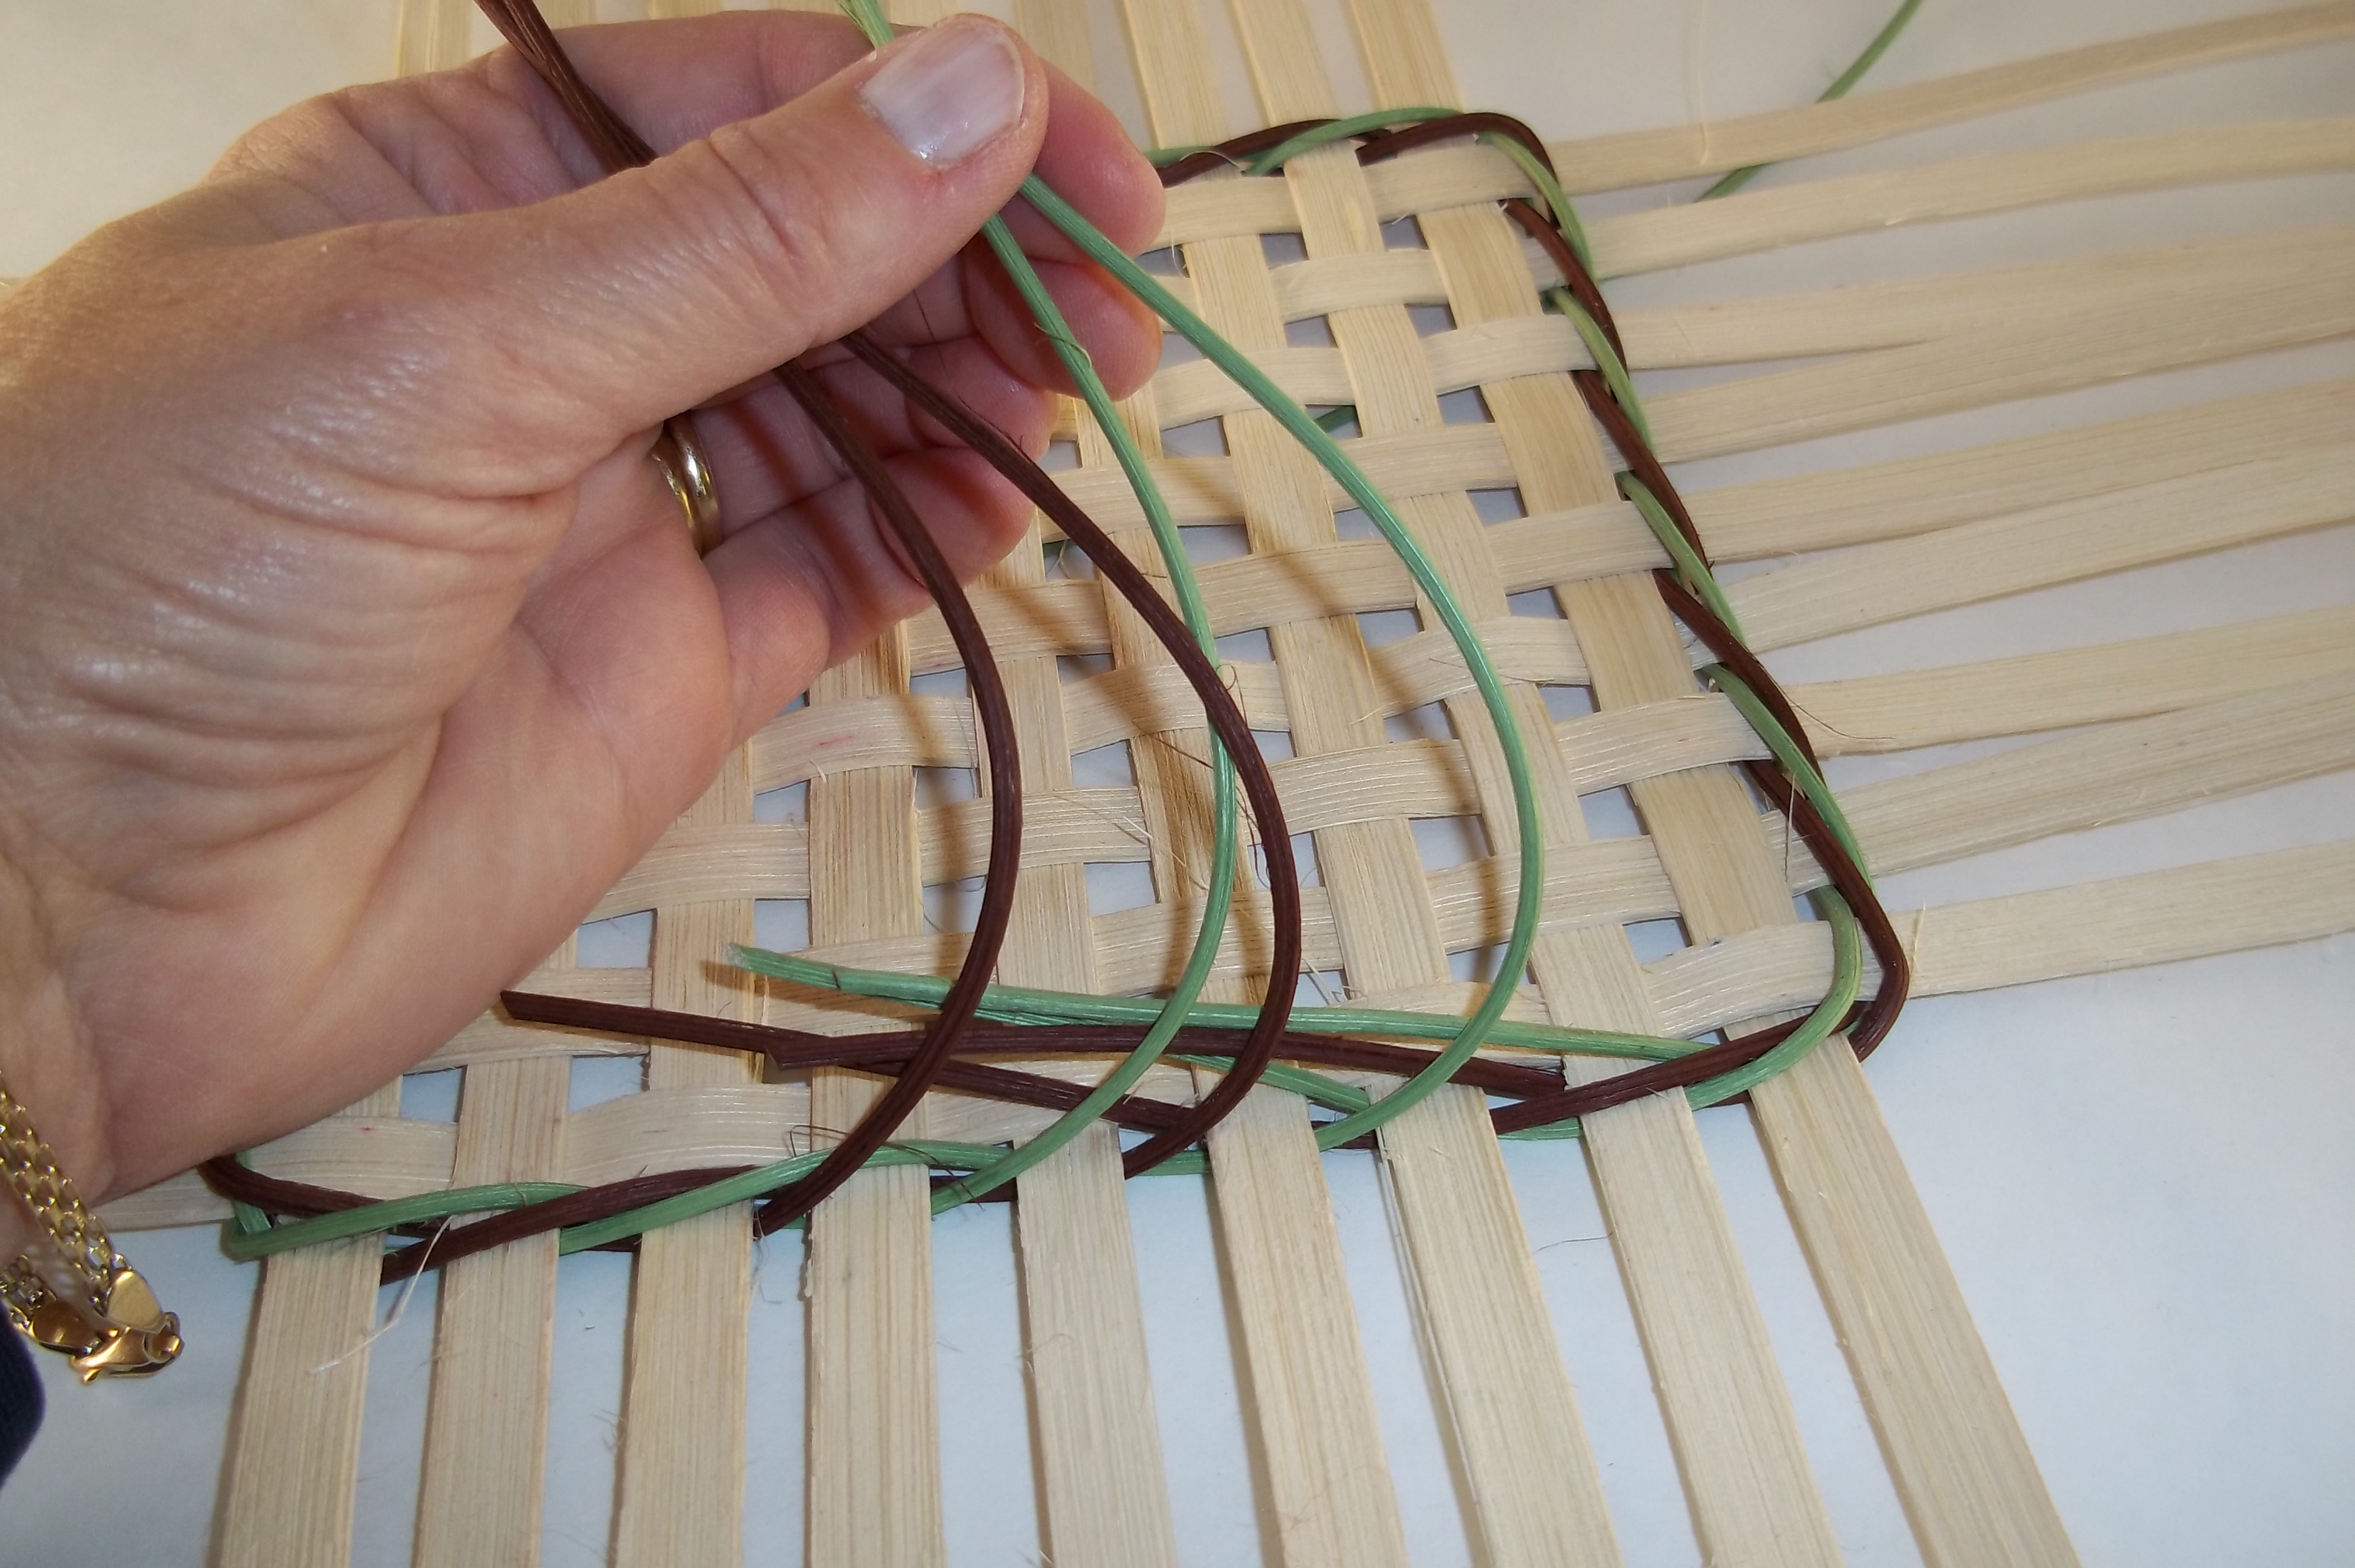
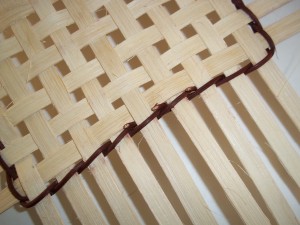
The photo above shows the inside, or wrong side, of the basket up.
This is the outside of the basket. Weave from the outside of the basket. The weavers come from the inside of the basket to the outside from out of four consecutive spaces. As you weave, there should never be an empty space between the weavers nor should there be two weavers coming out of the same space.
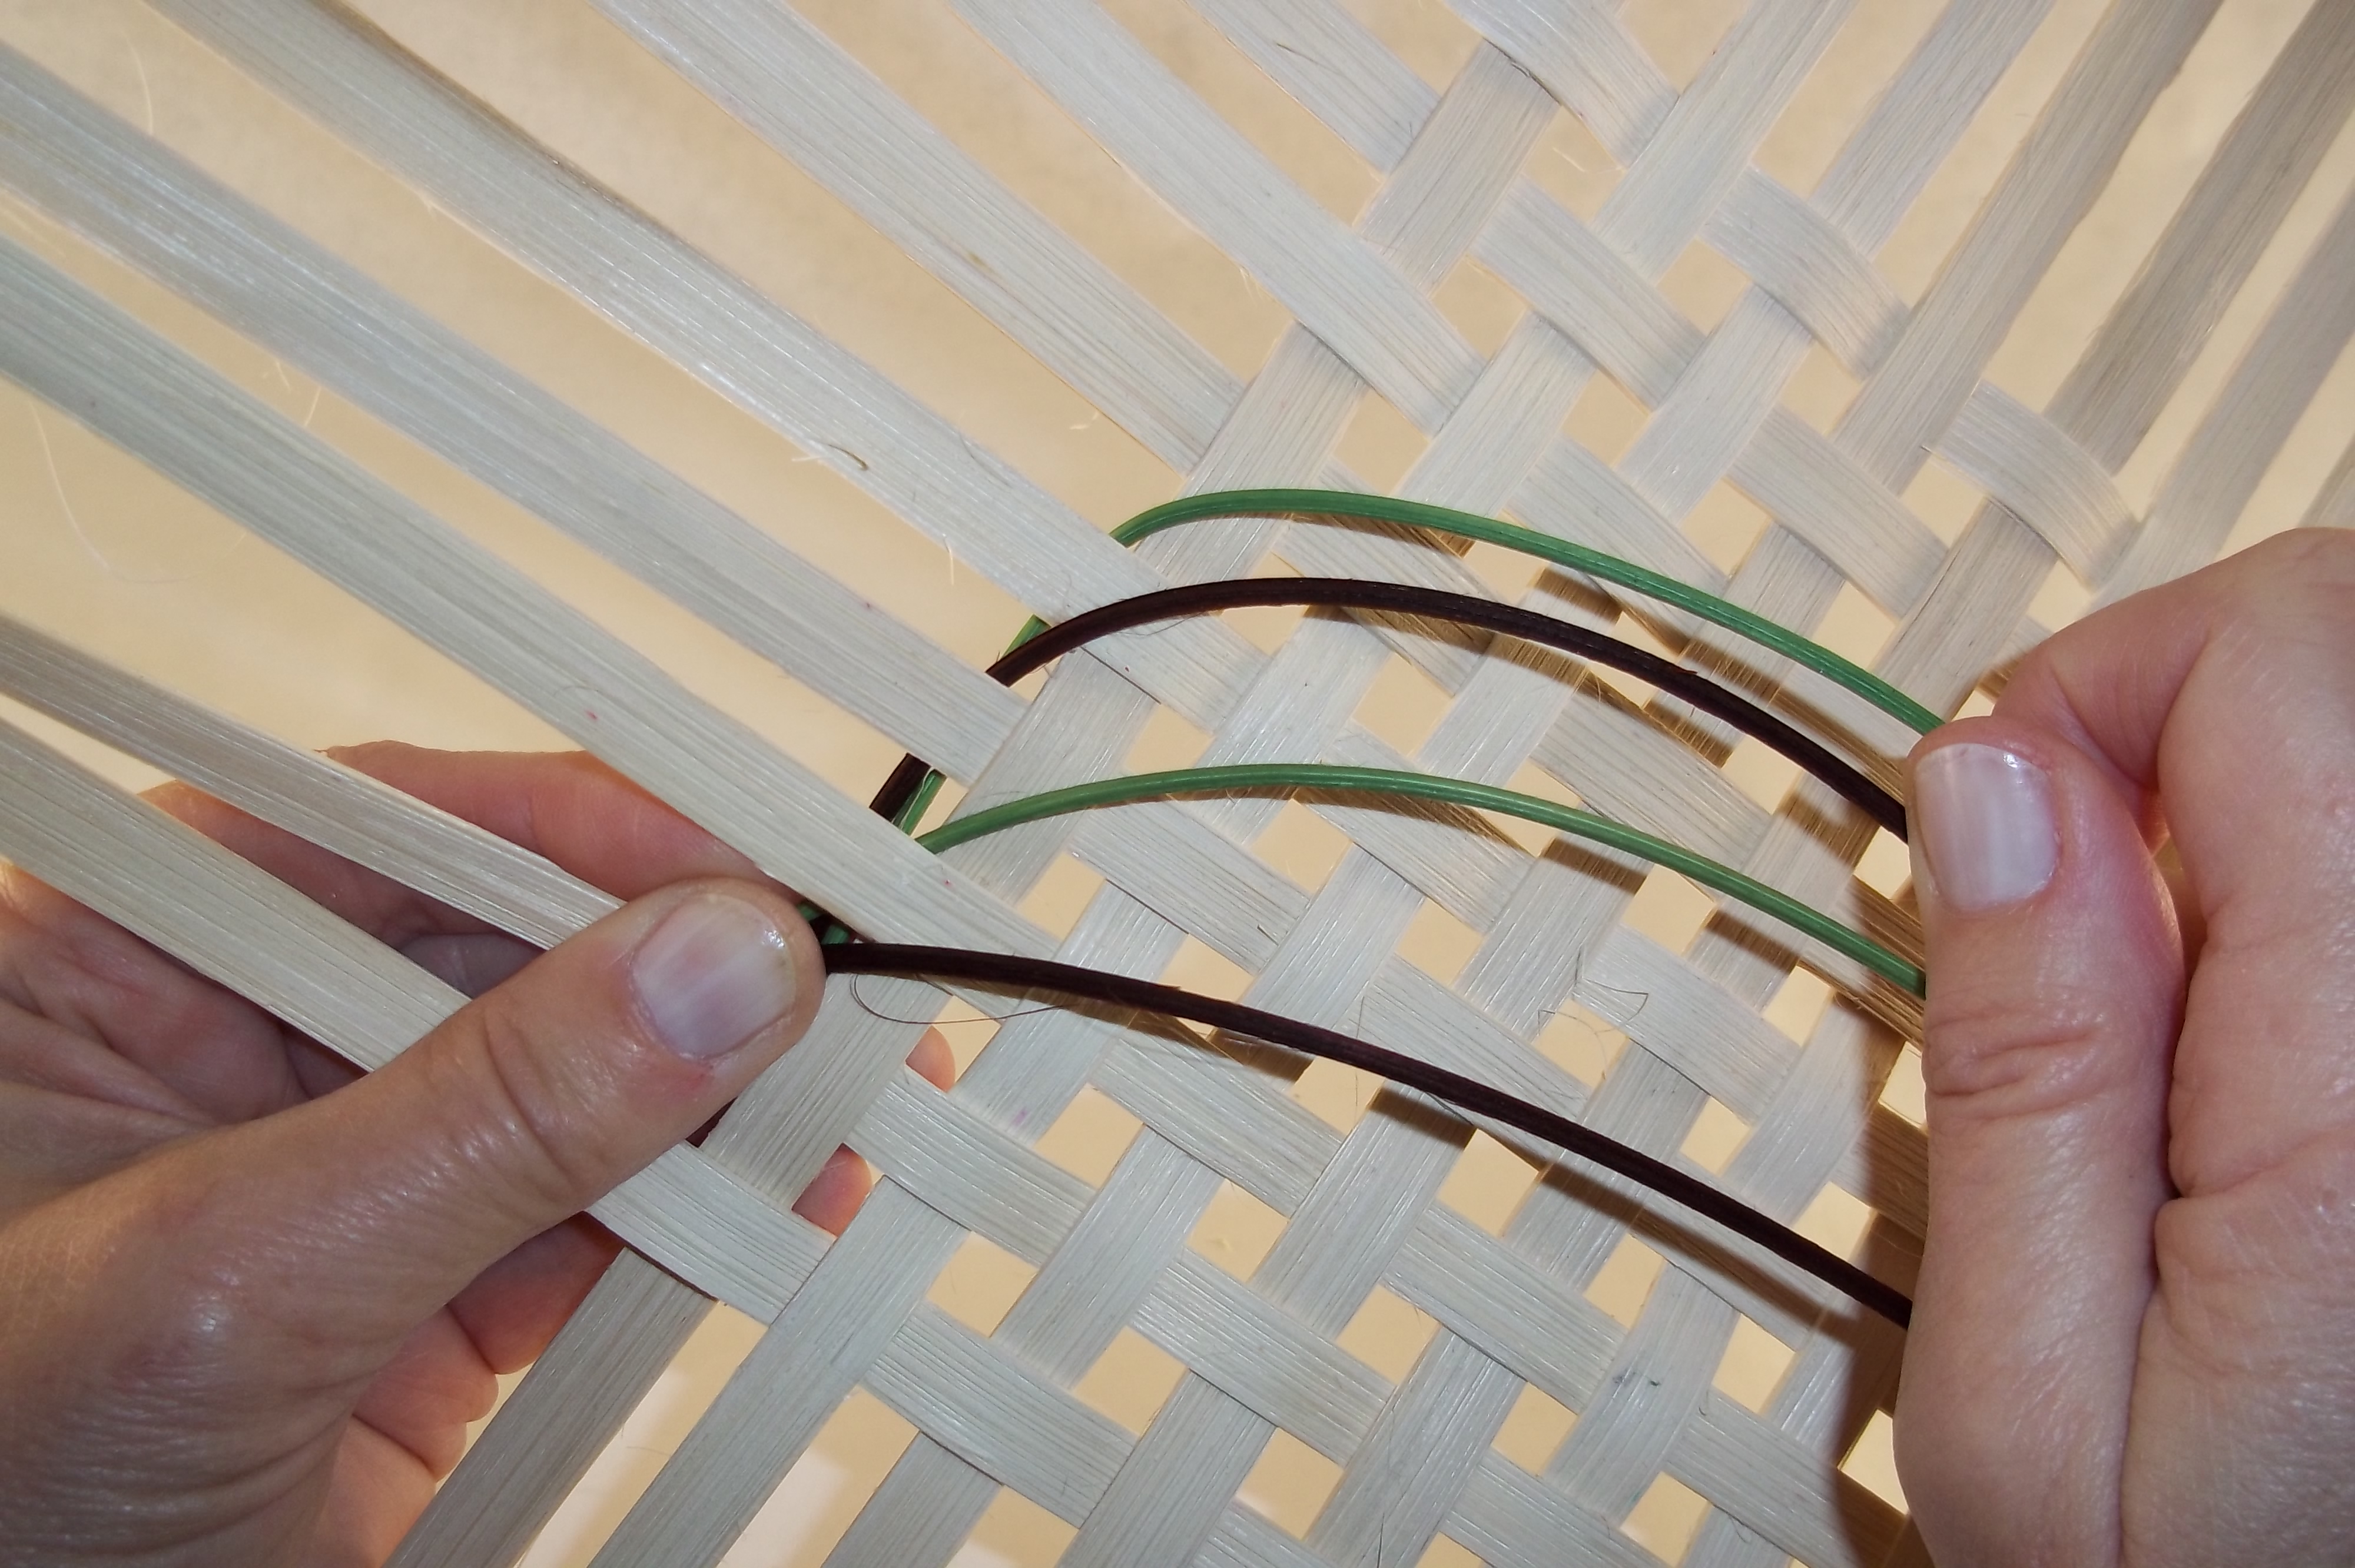
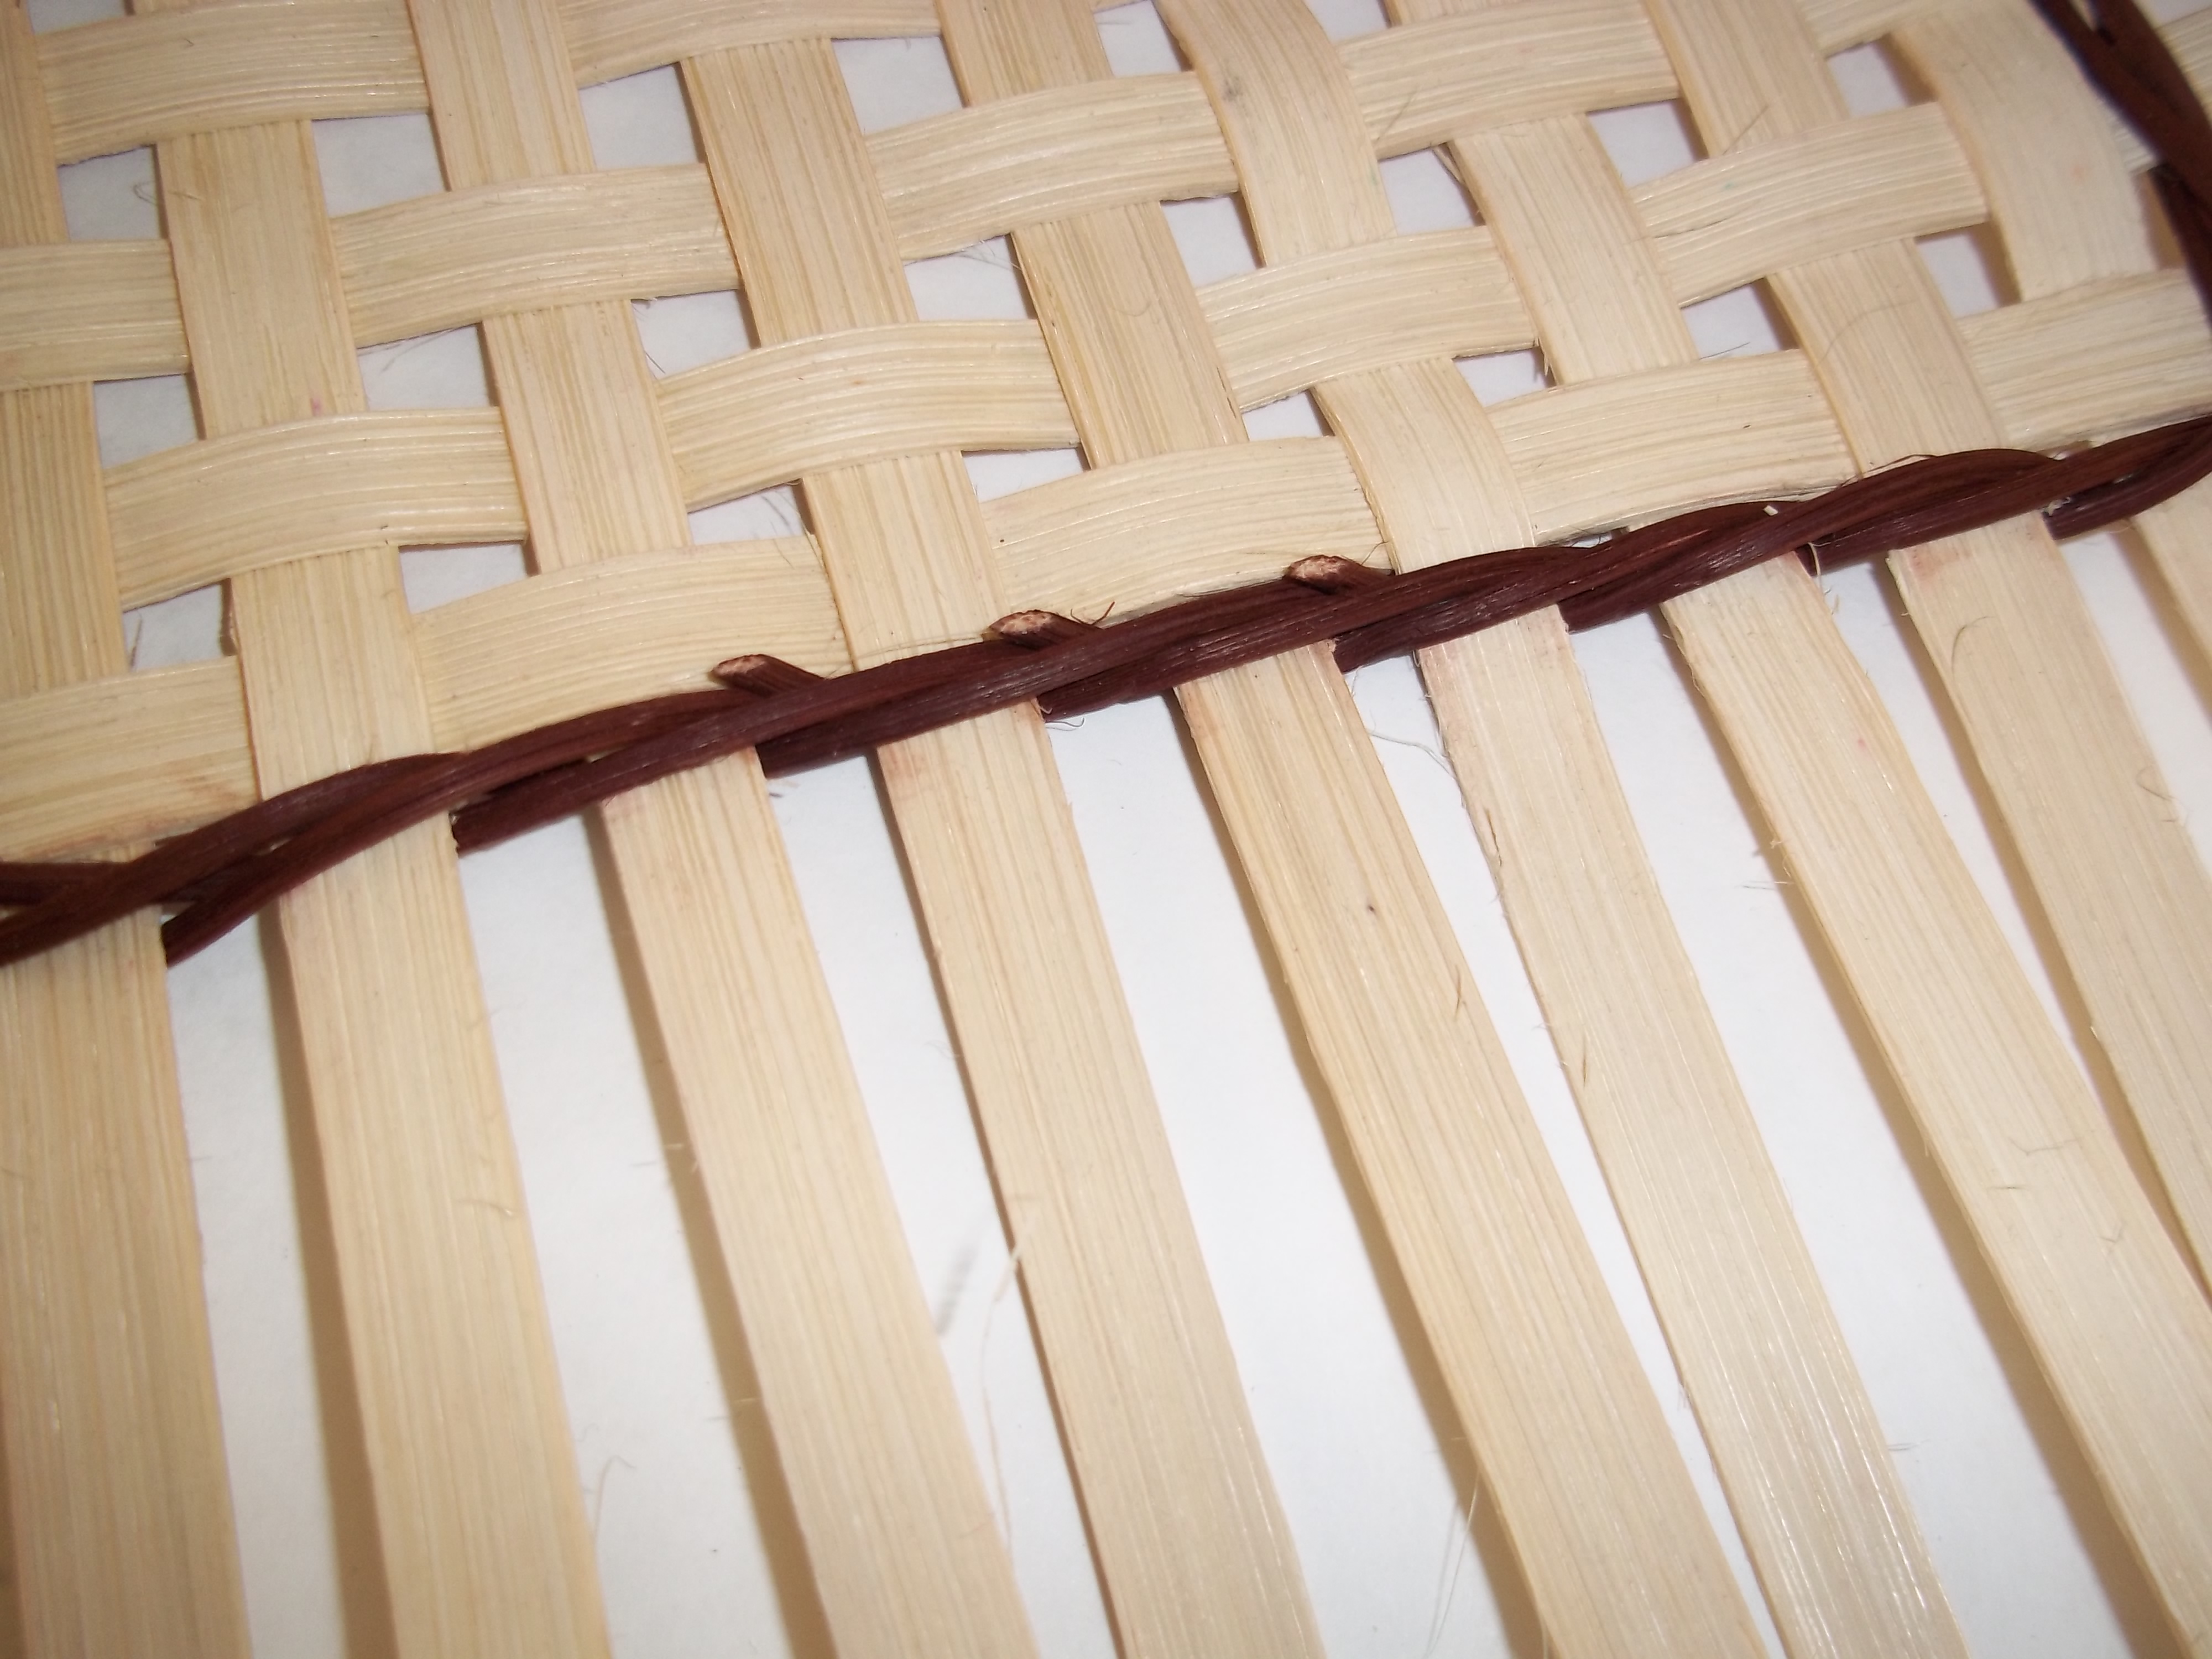
A 2/2 four rod wale is woven by taking the first weaver (the one
furthest left) and weaving it to the right over two stakes, behind two stakes and back to the outside.
I am using two colors in the sample.

Use a step up at the end of the row and leave the ends to the inside. The photo above shows the position your weavers should be in right before weaving the step up.
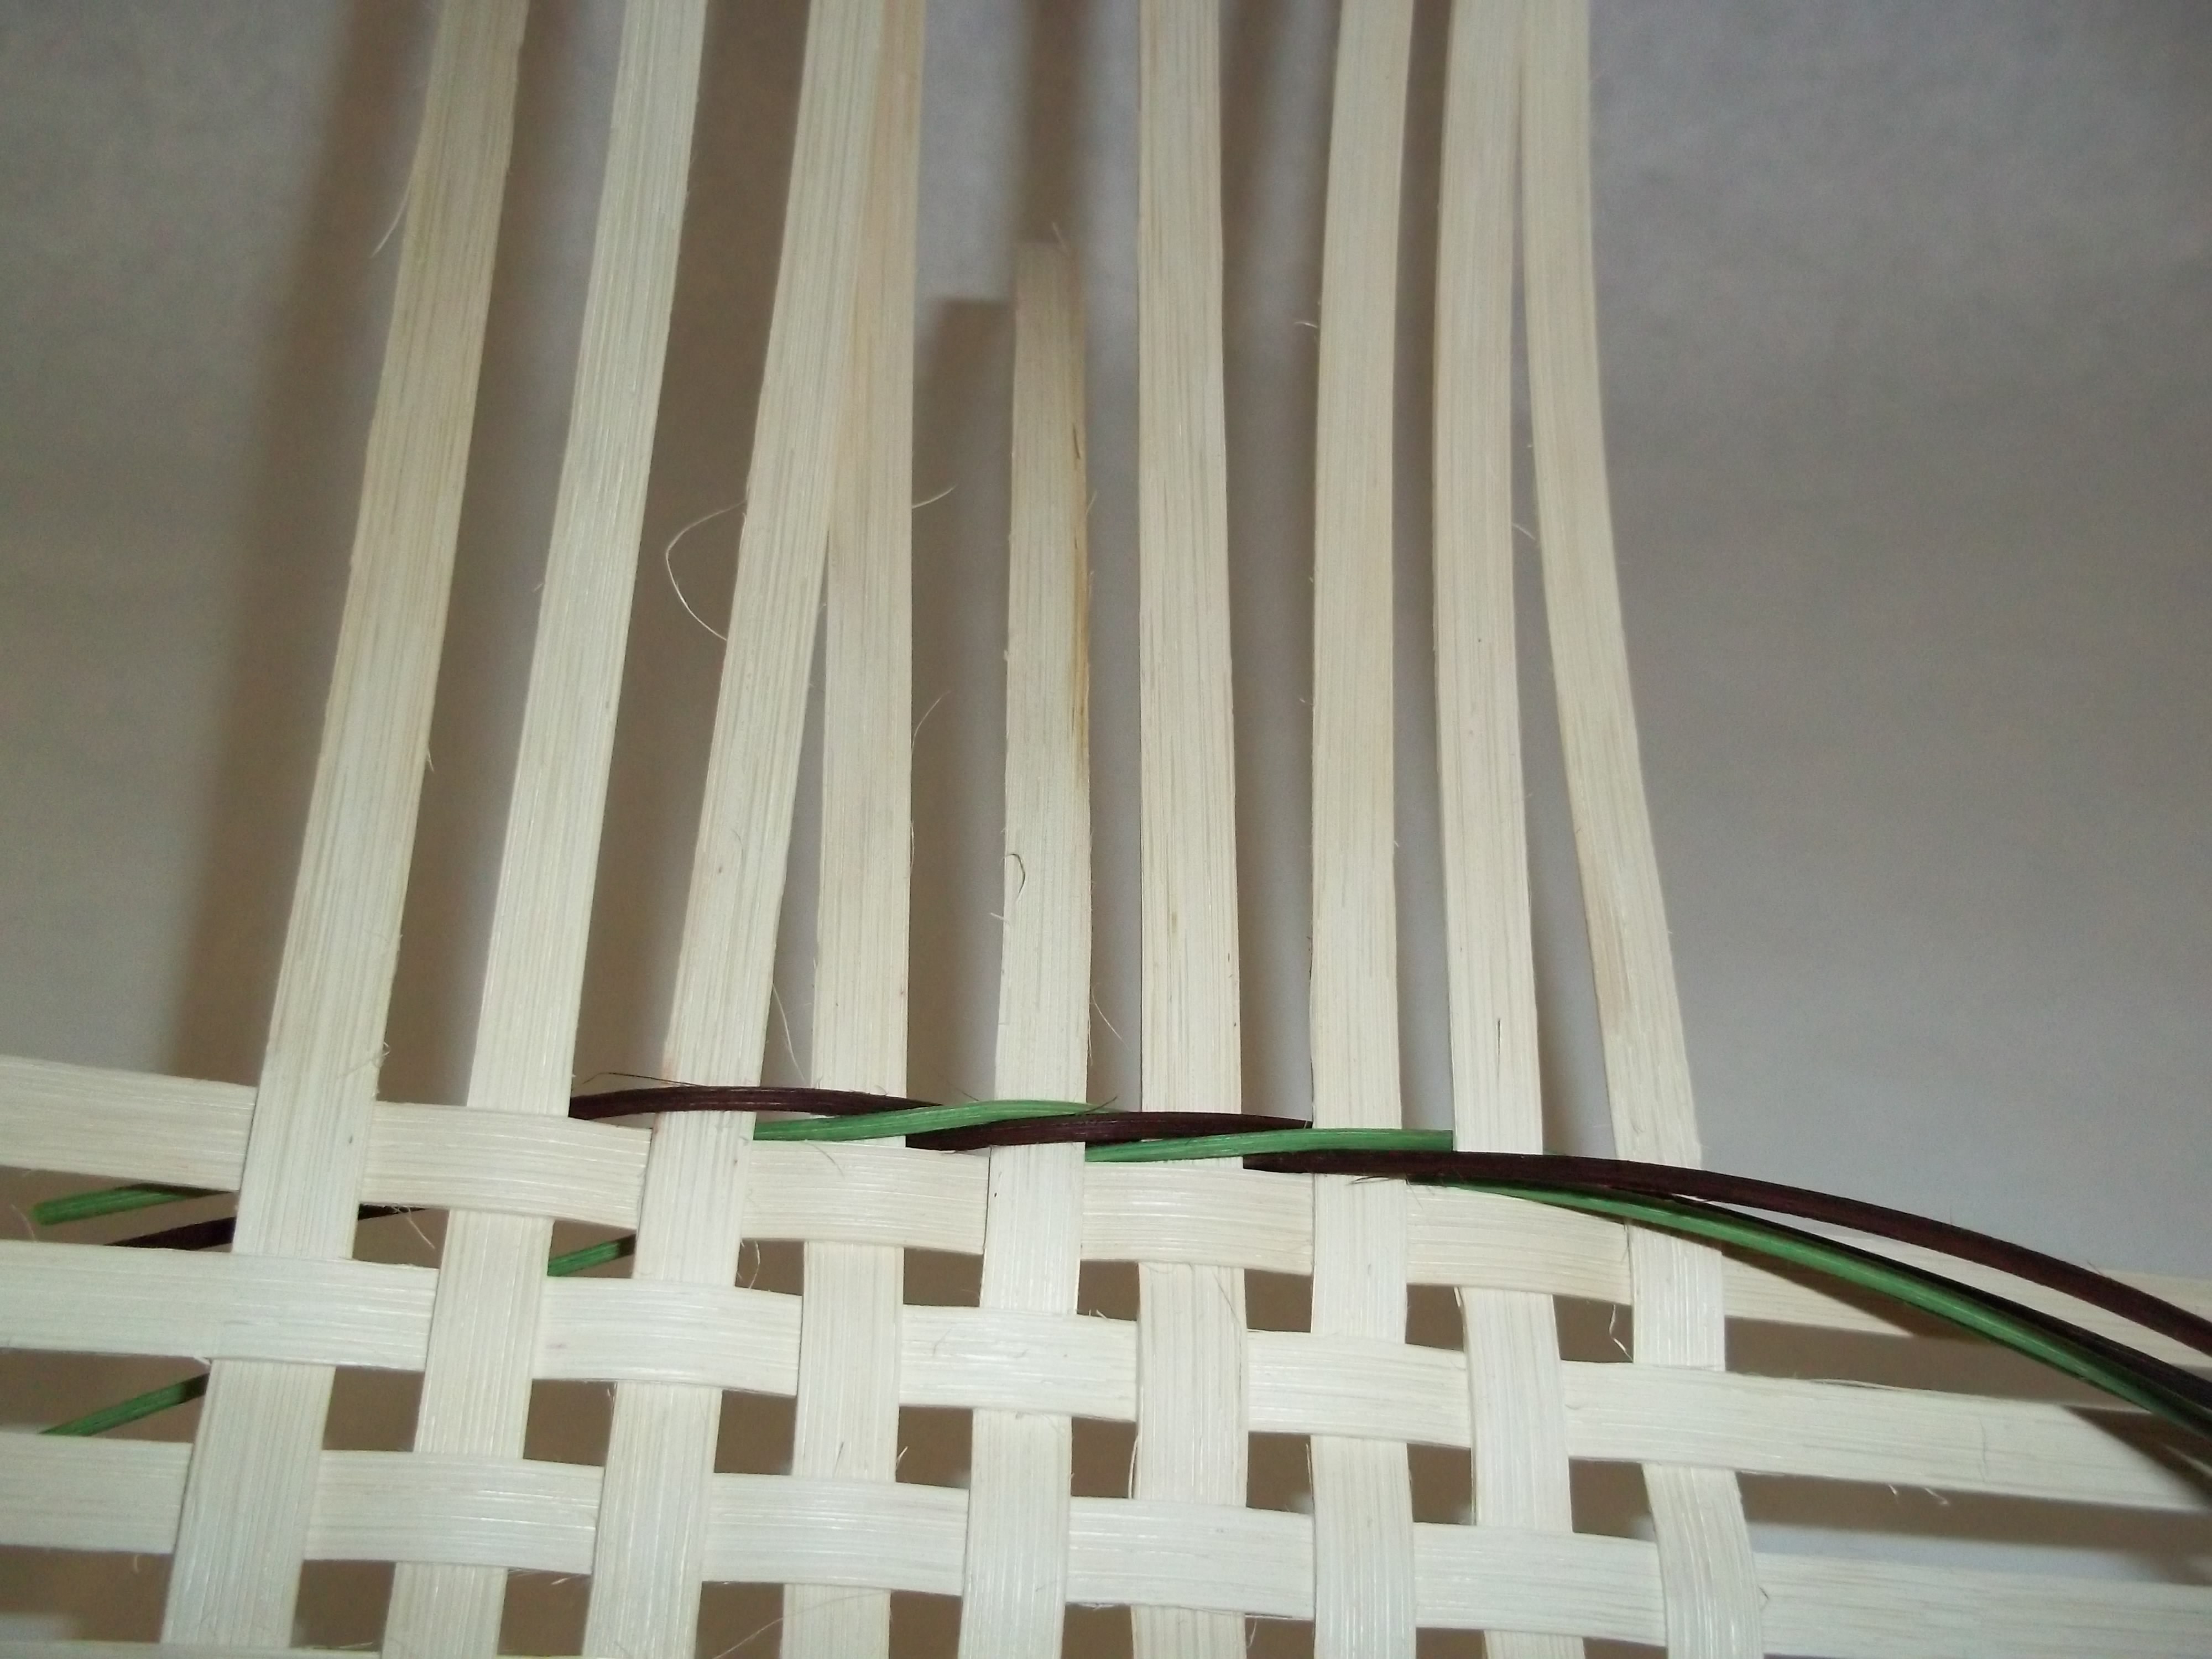
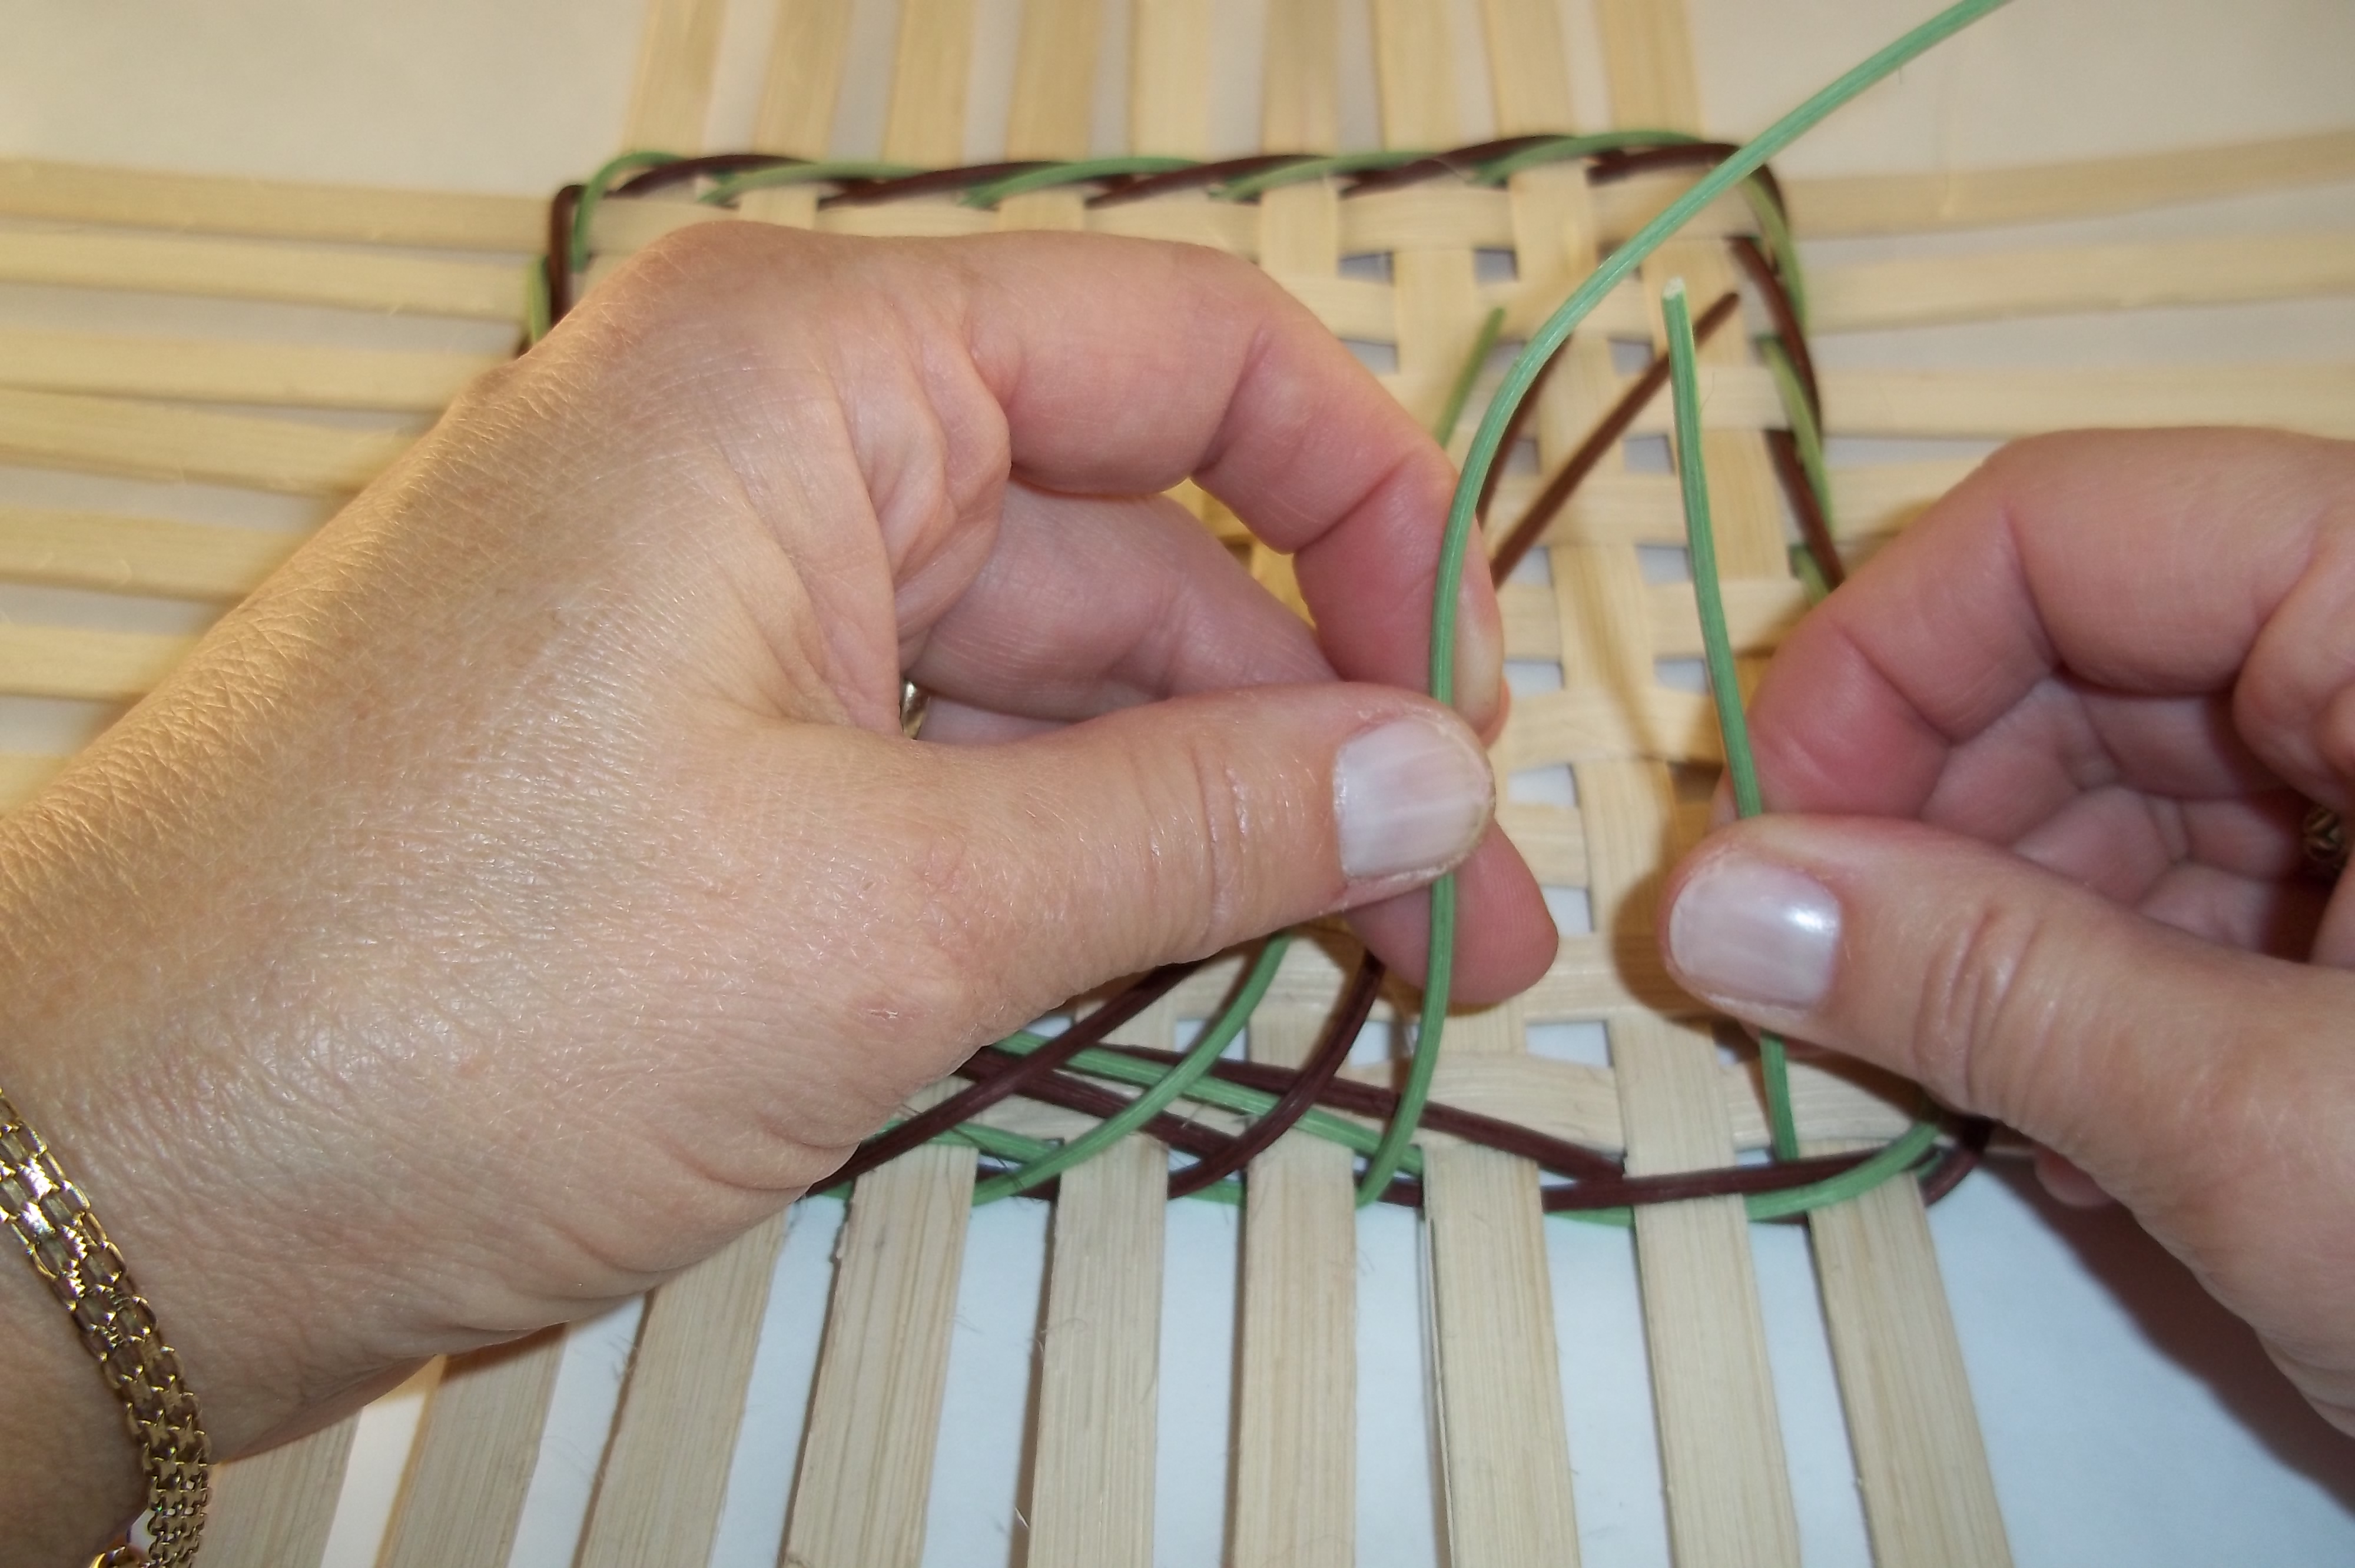
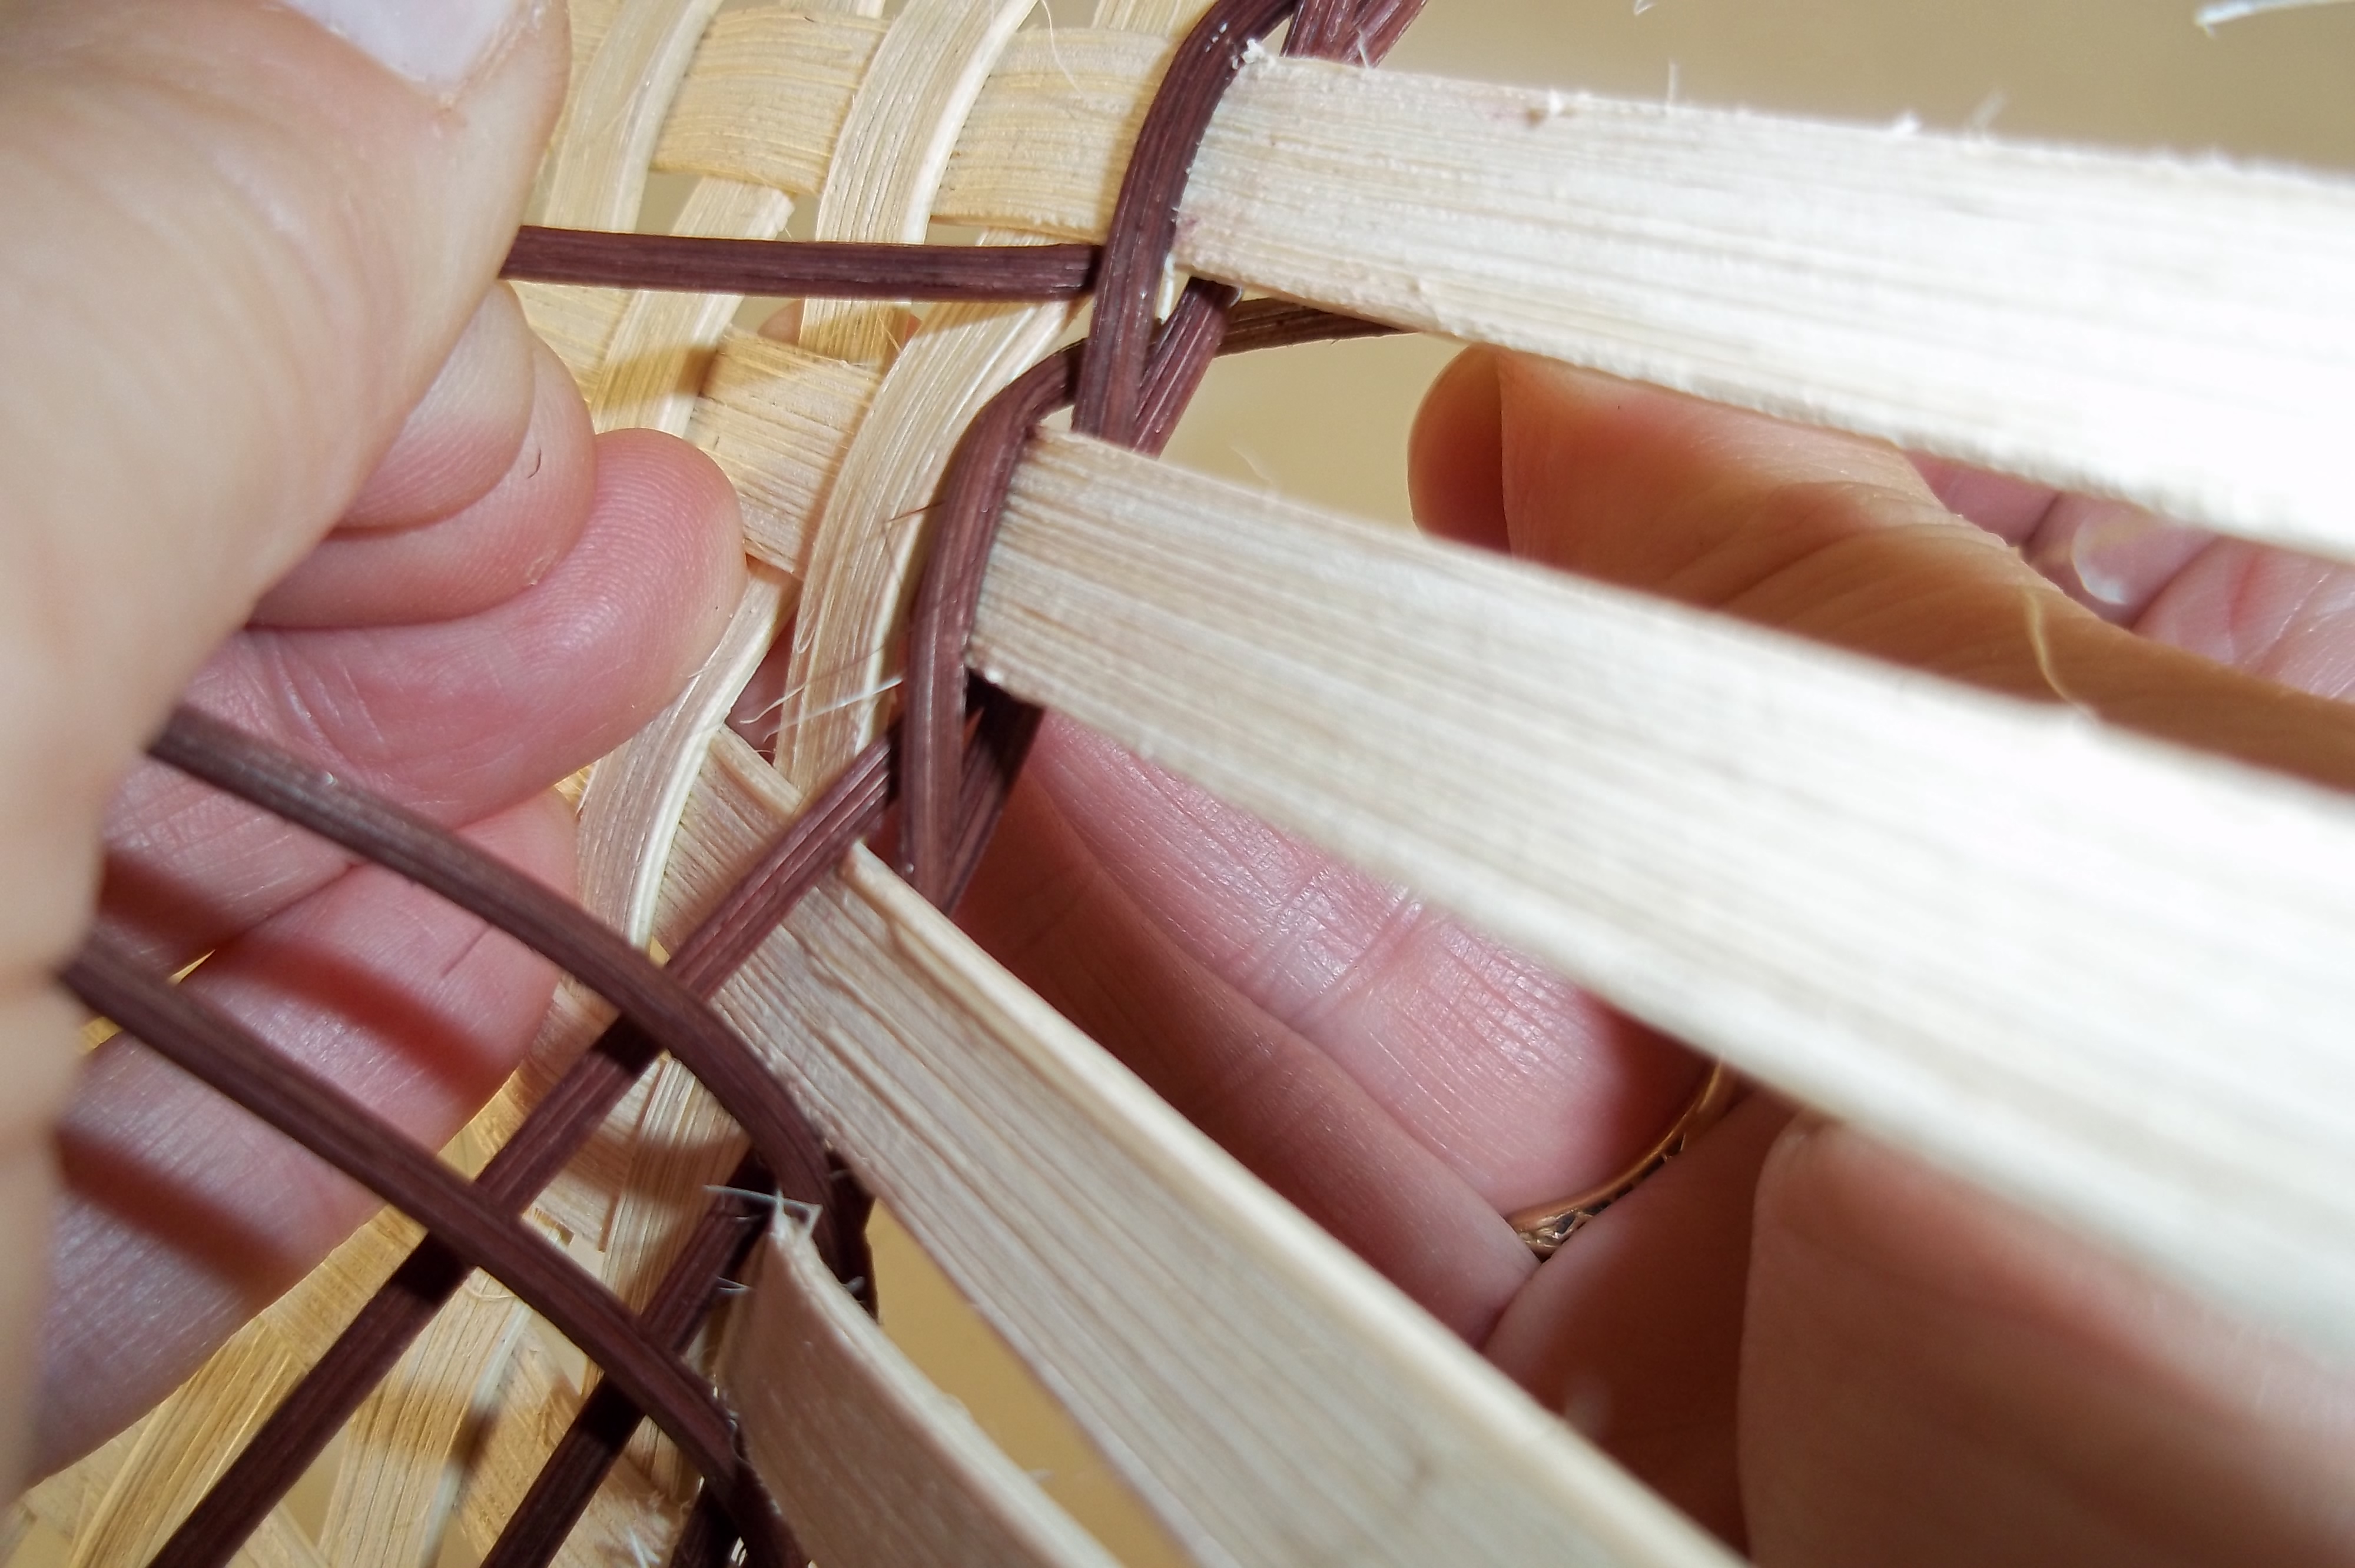
Now take the weaver furthest to the right and weave it over two and then to the inside of the basket. Leave it on the inside of the basket.
Now pick up the weaver that is now furthest to the right and weave it over two stakes and bring it to the inside as shown in the photo above.
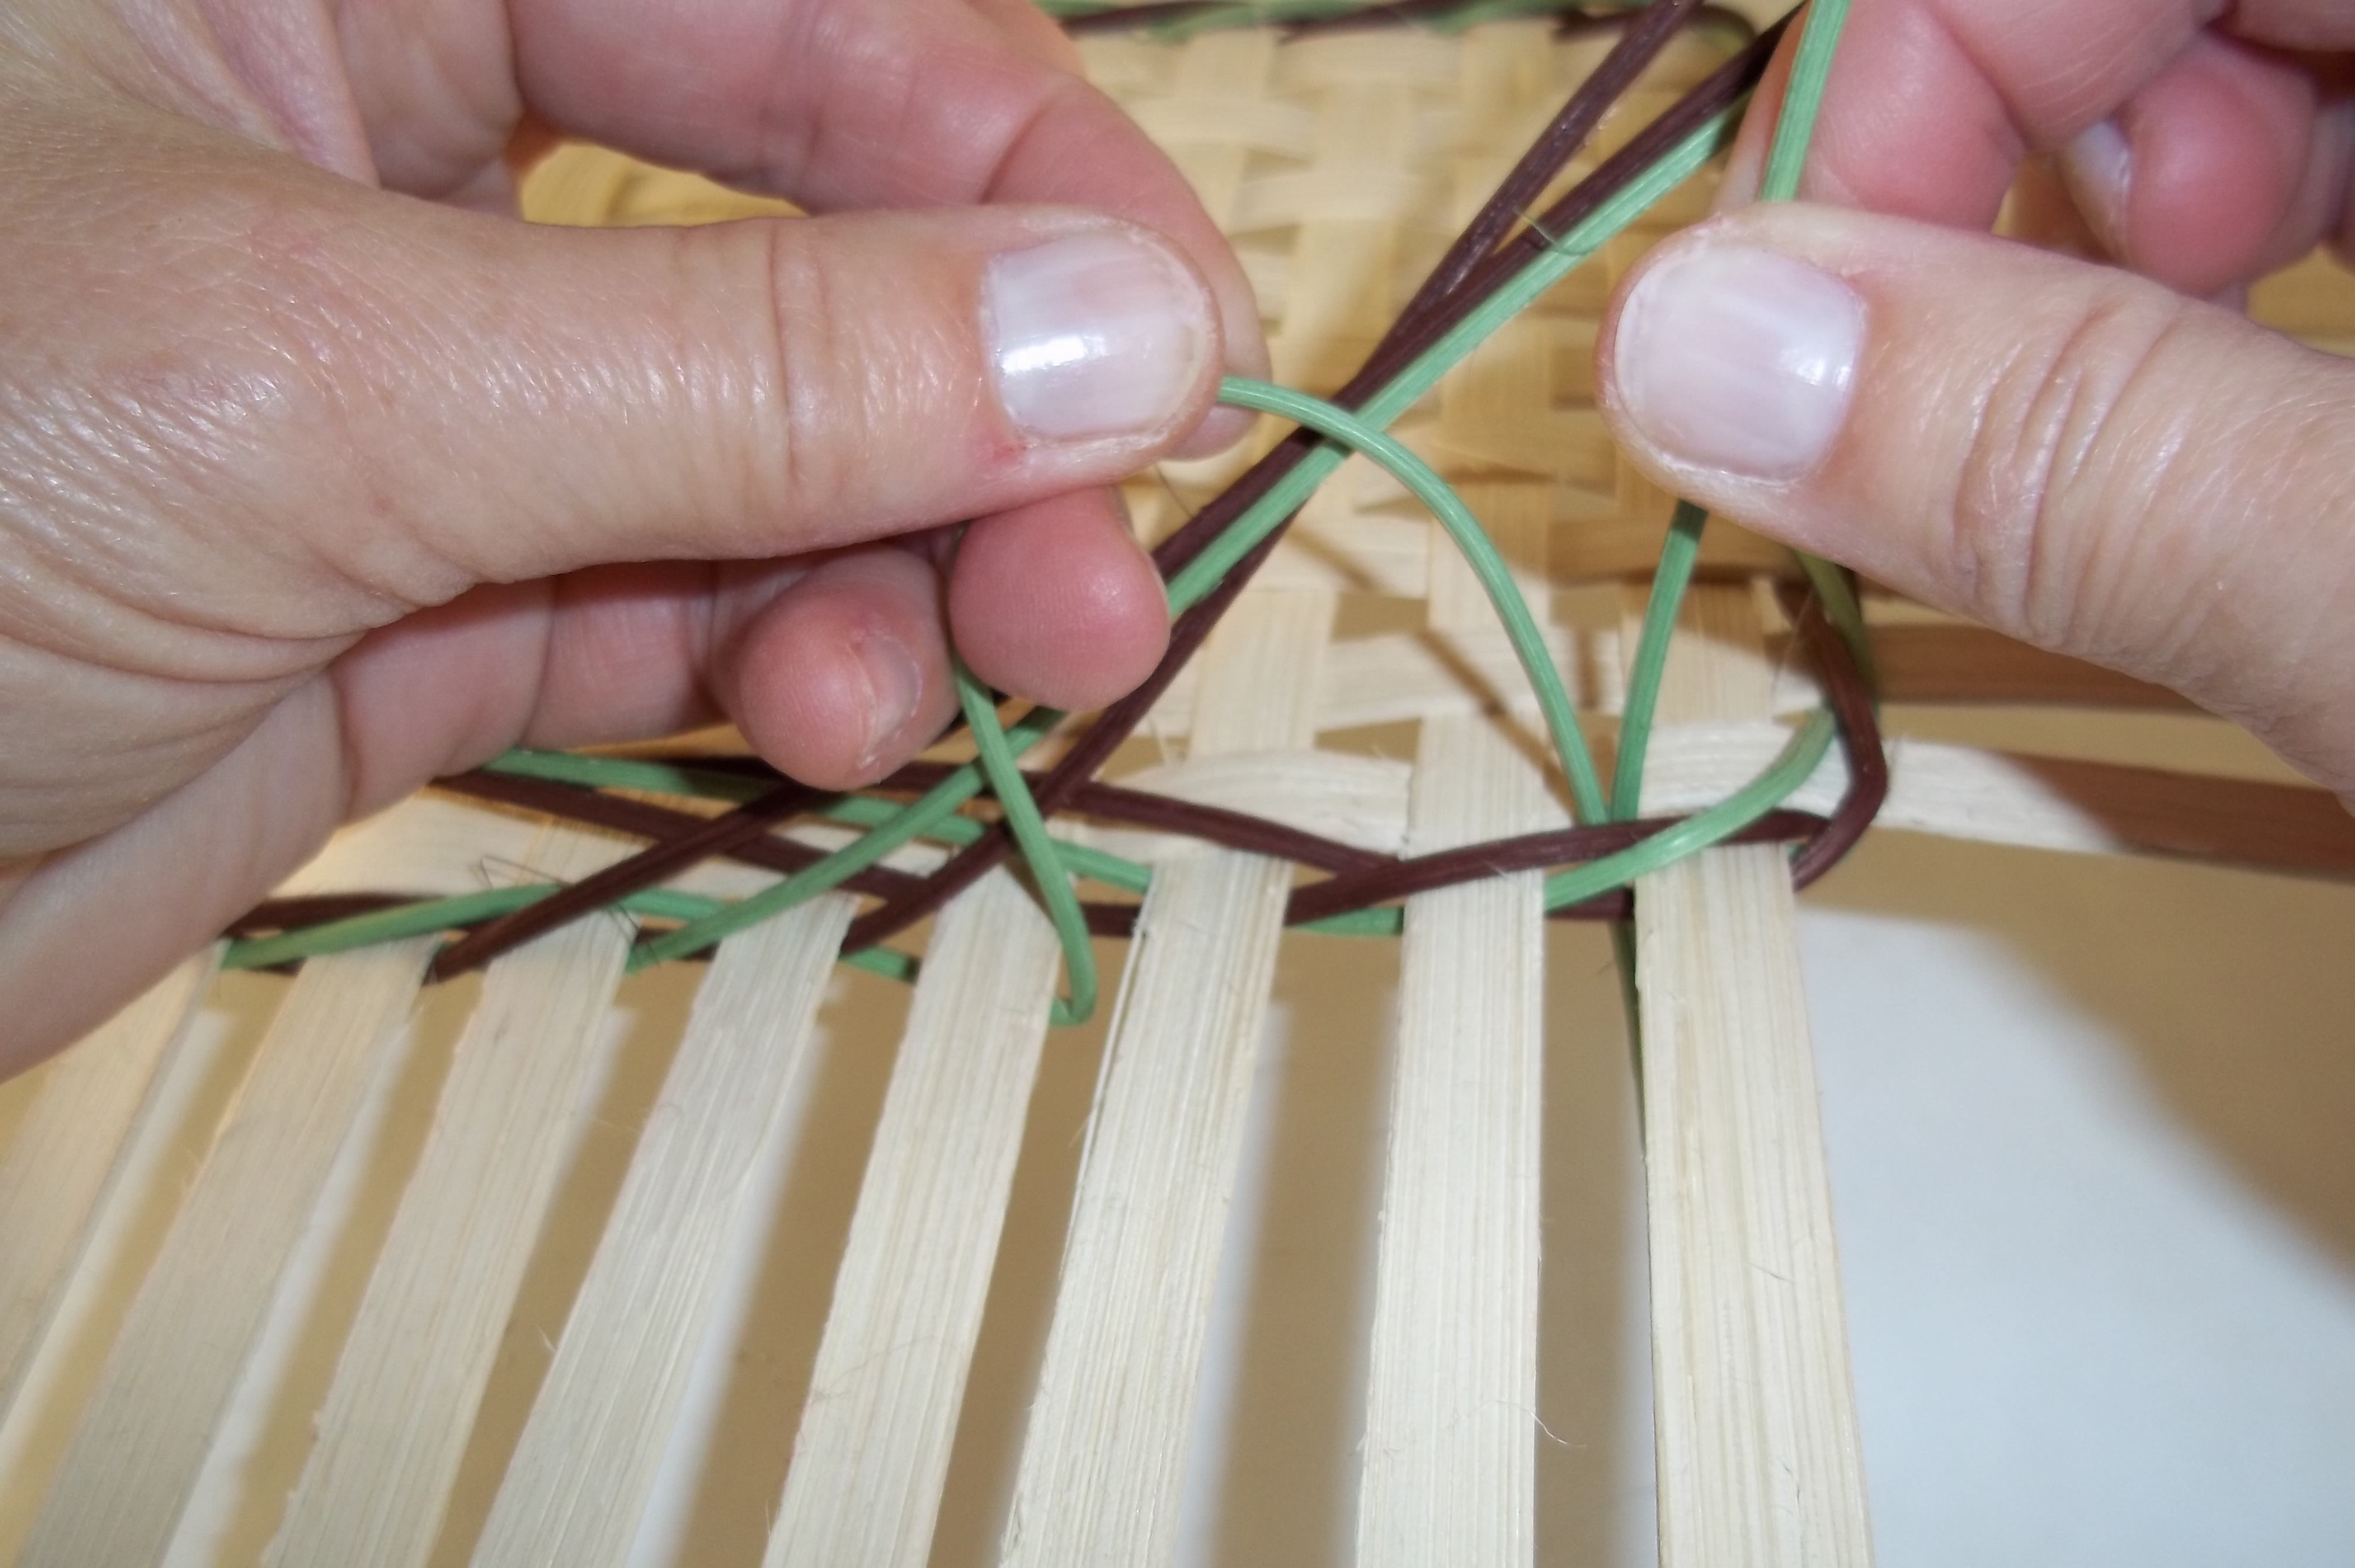
Do the same with the remaining weavers. When all the weavers are on the inside, turn the base over.
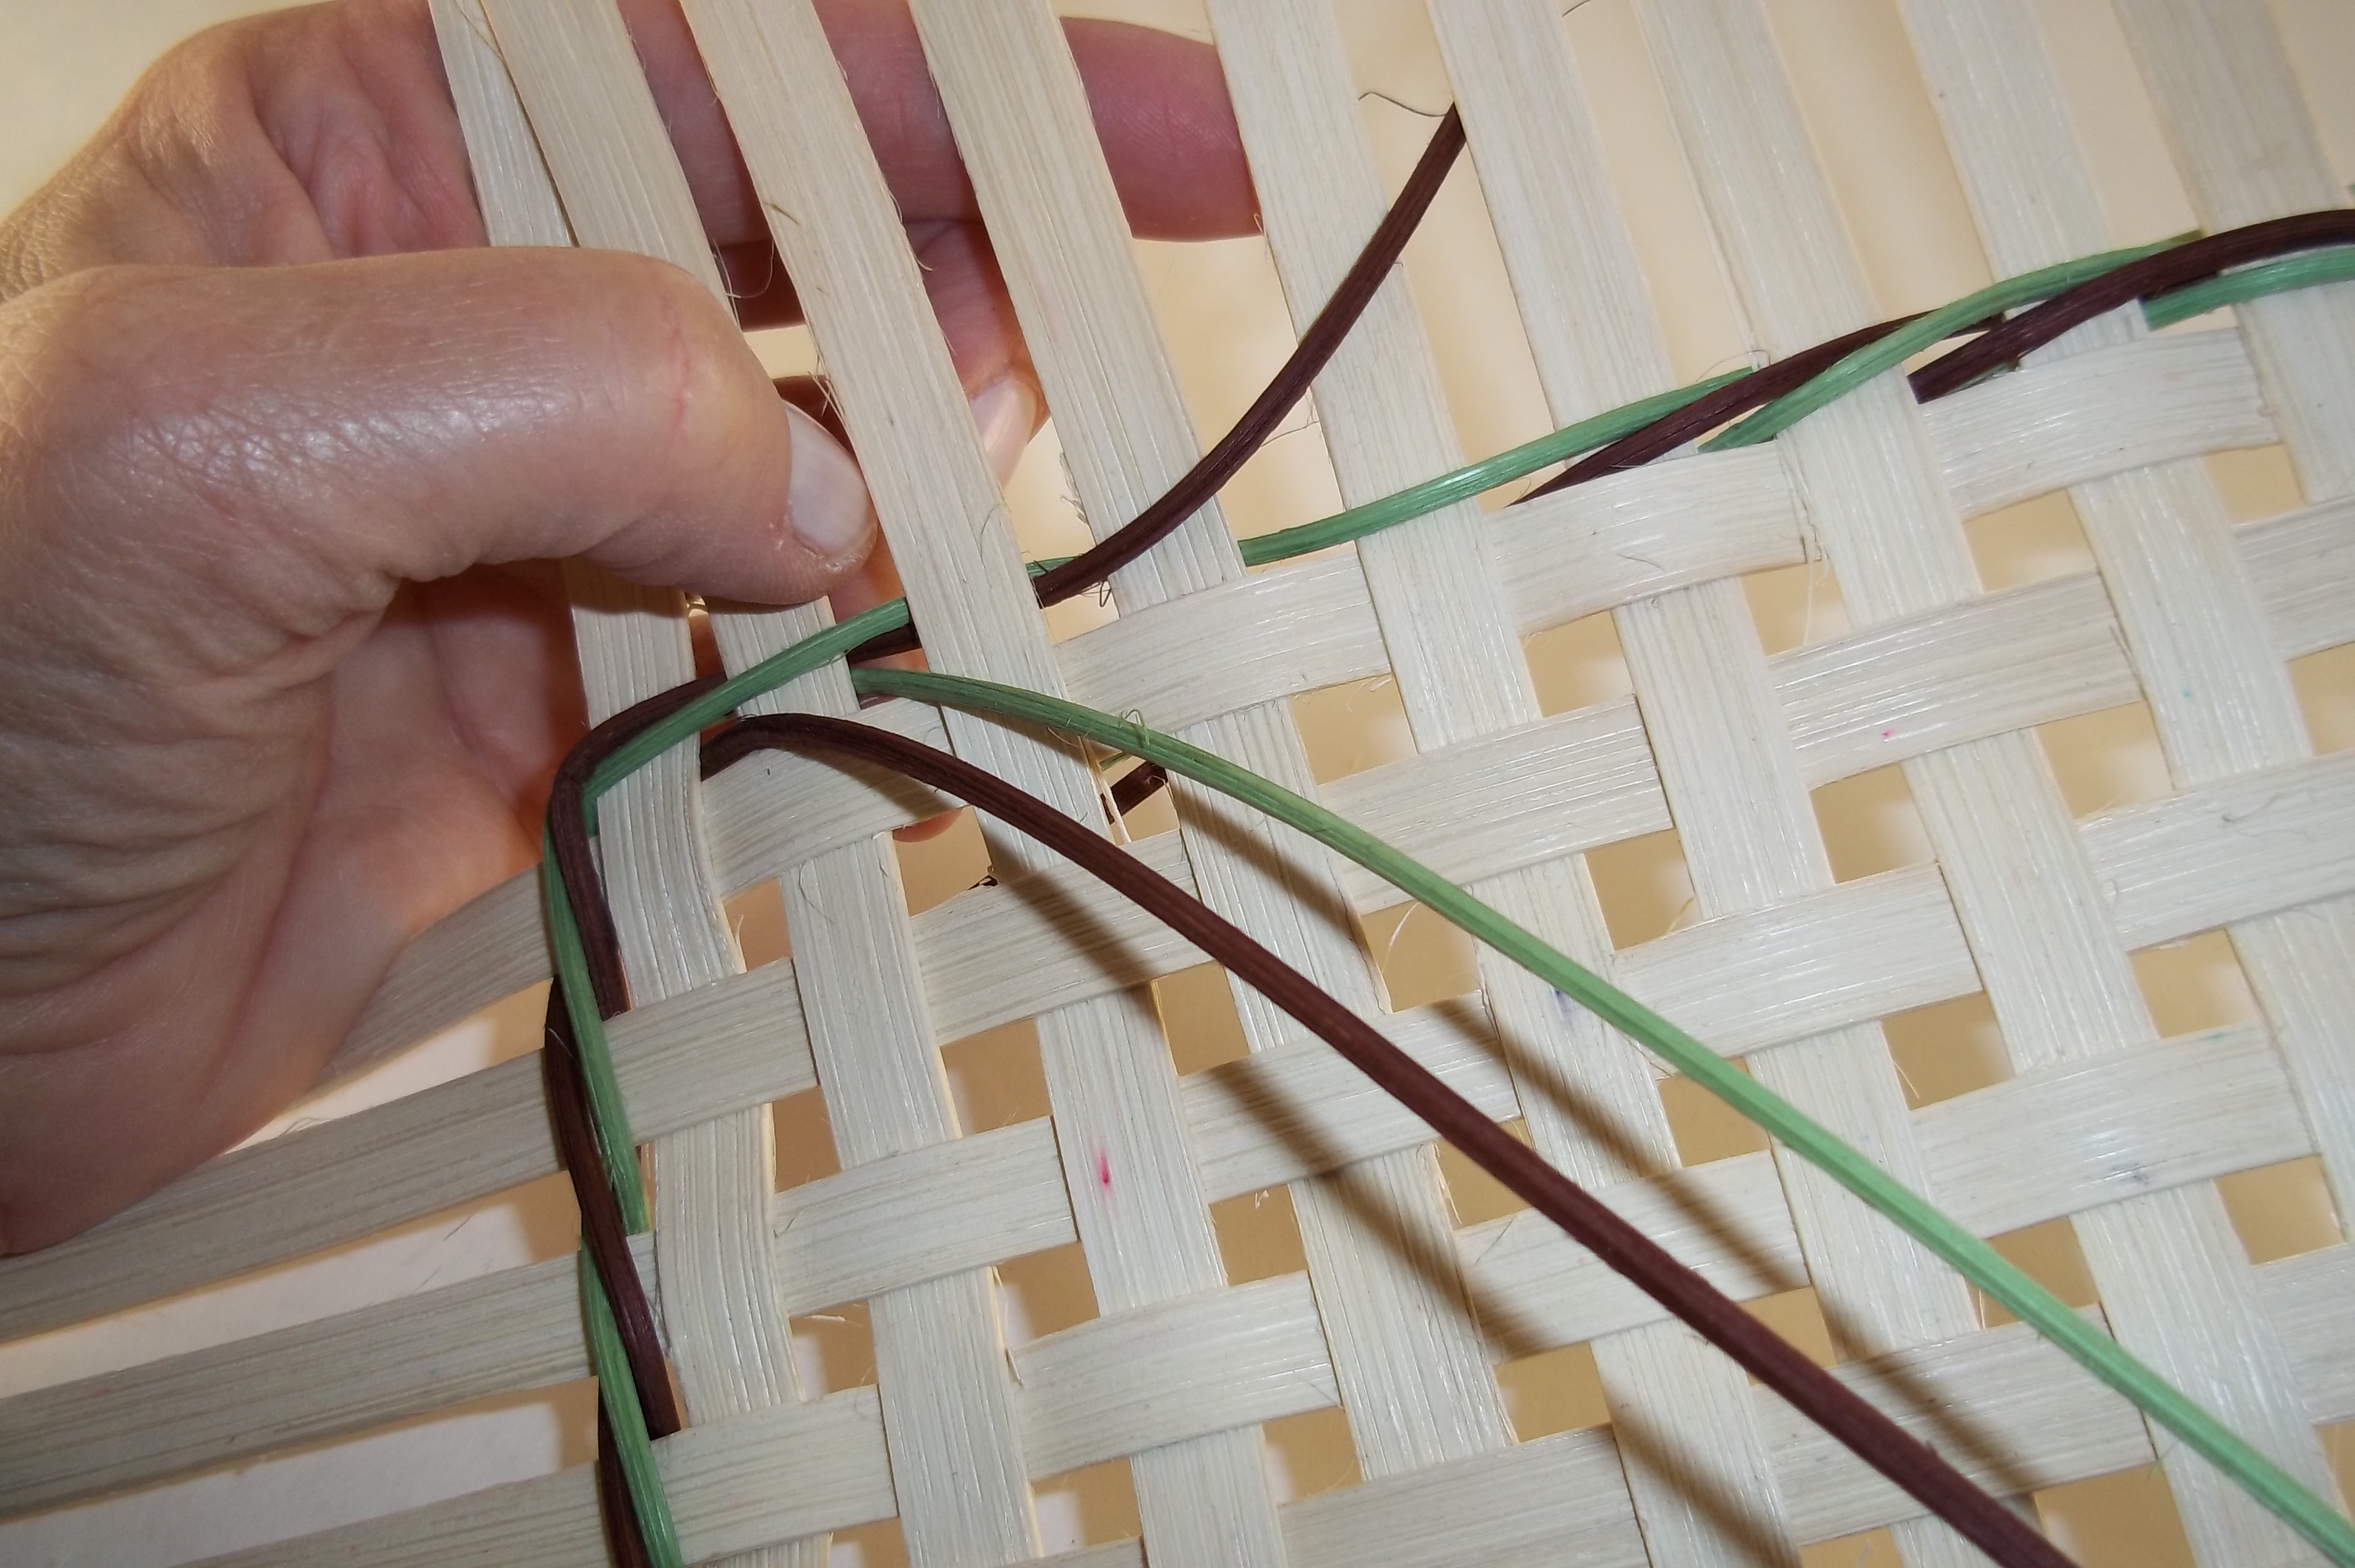
You will see two sets of four ends, the ends you started with and the ending ends.
Take the beginning end that is furthest to the right, lift it to create a little opening.
Insert the ending end that is furthest to the right into this opening and to the outside of the base.
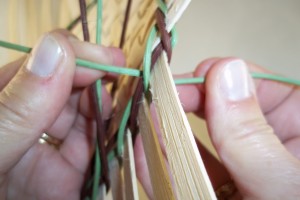
Tighten by holding both ends and pulling away from each other.
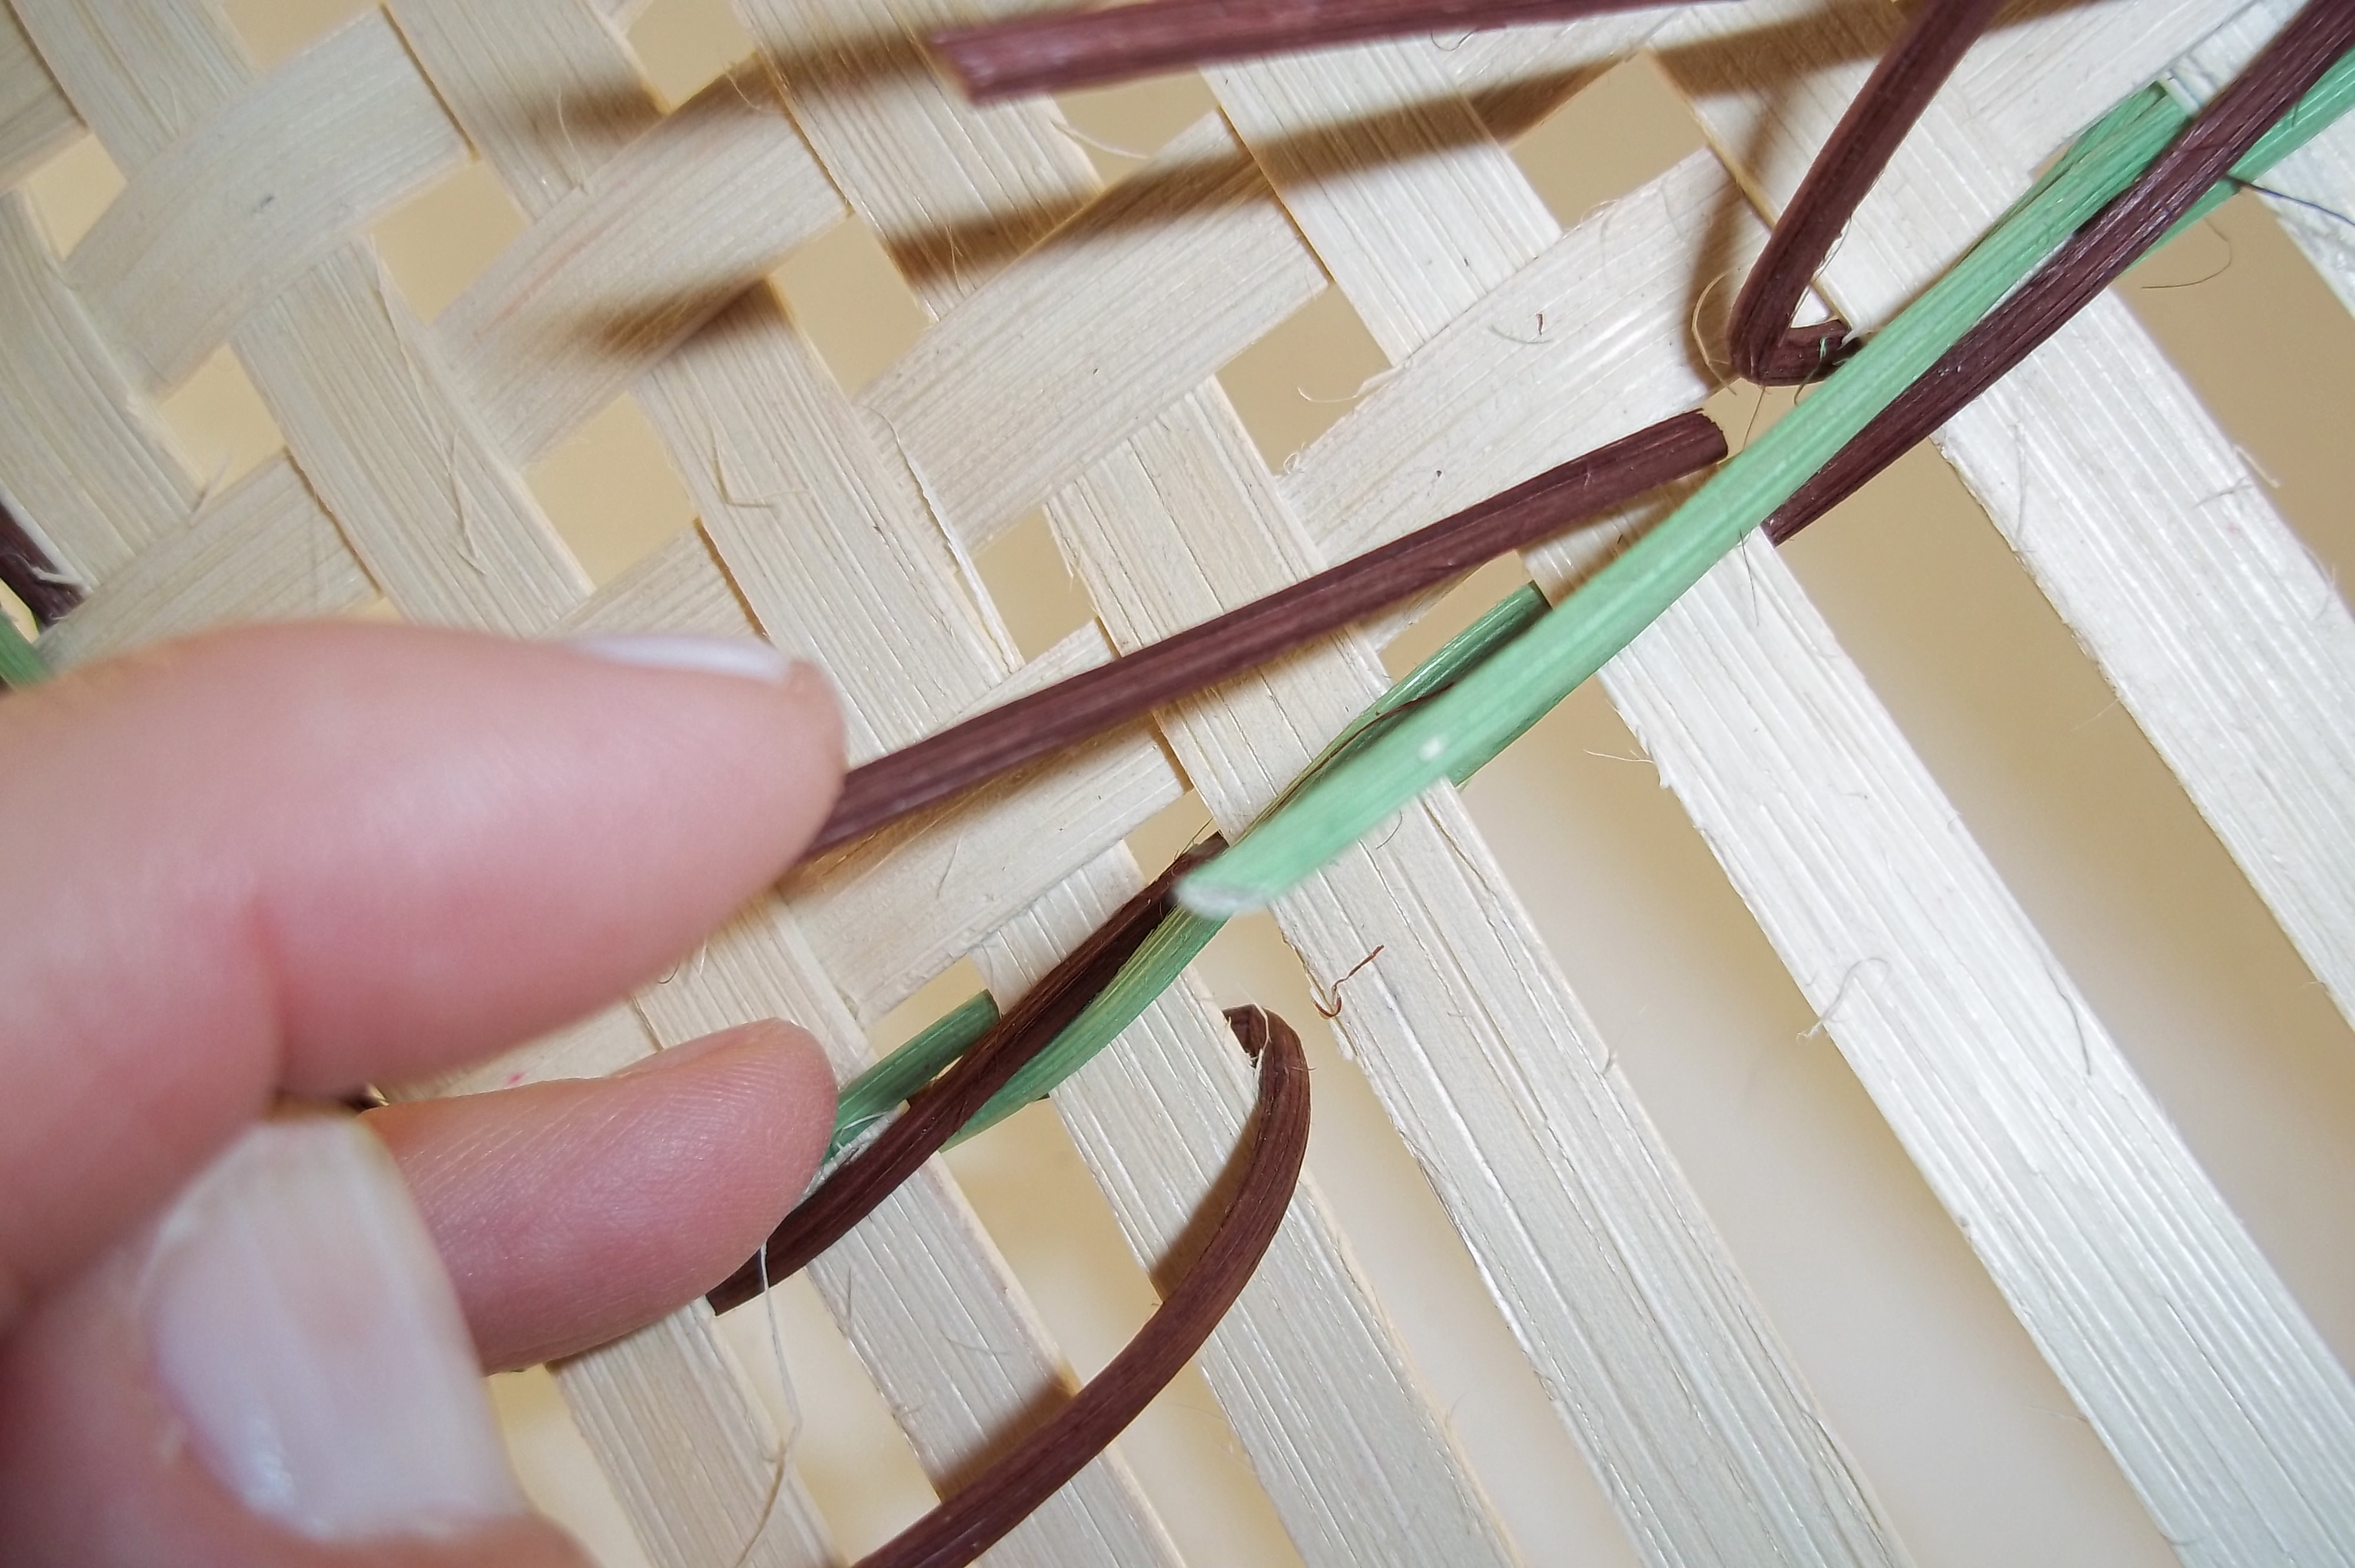
Now working right to left, do the same to all of the ends.
Tighten each set as your tuck and then be sure to tighten when complete.
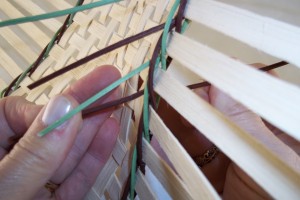
When you have four ends on the outside of the basket and four on the inside of the basket, as shown above,
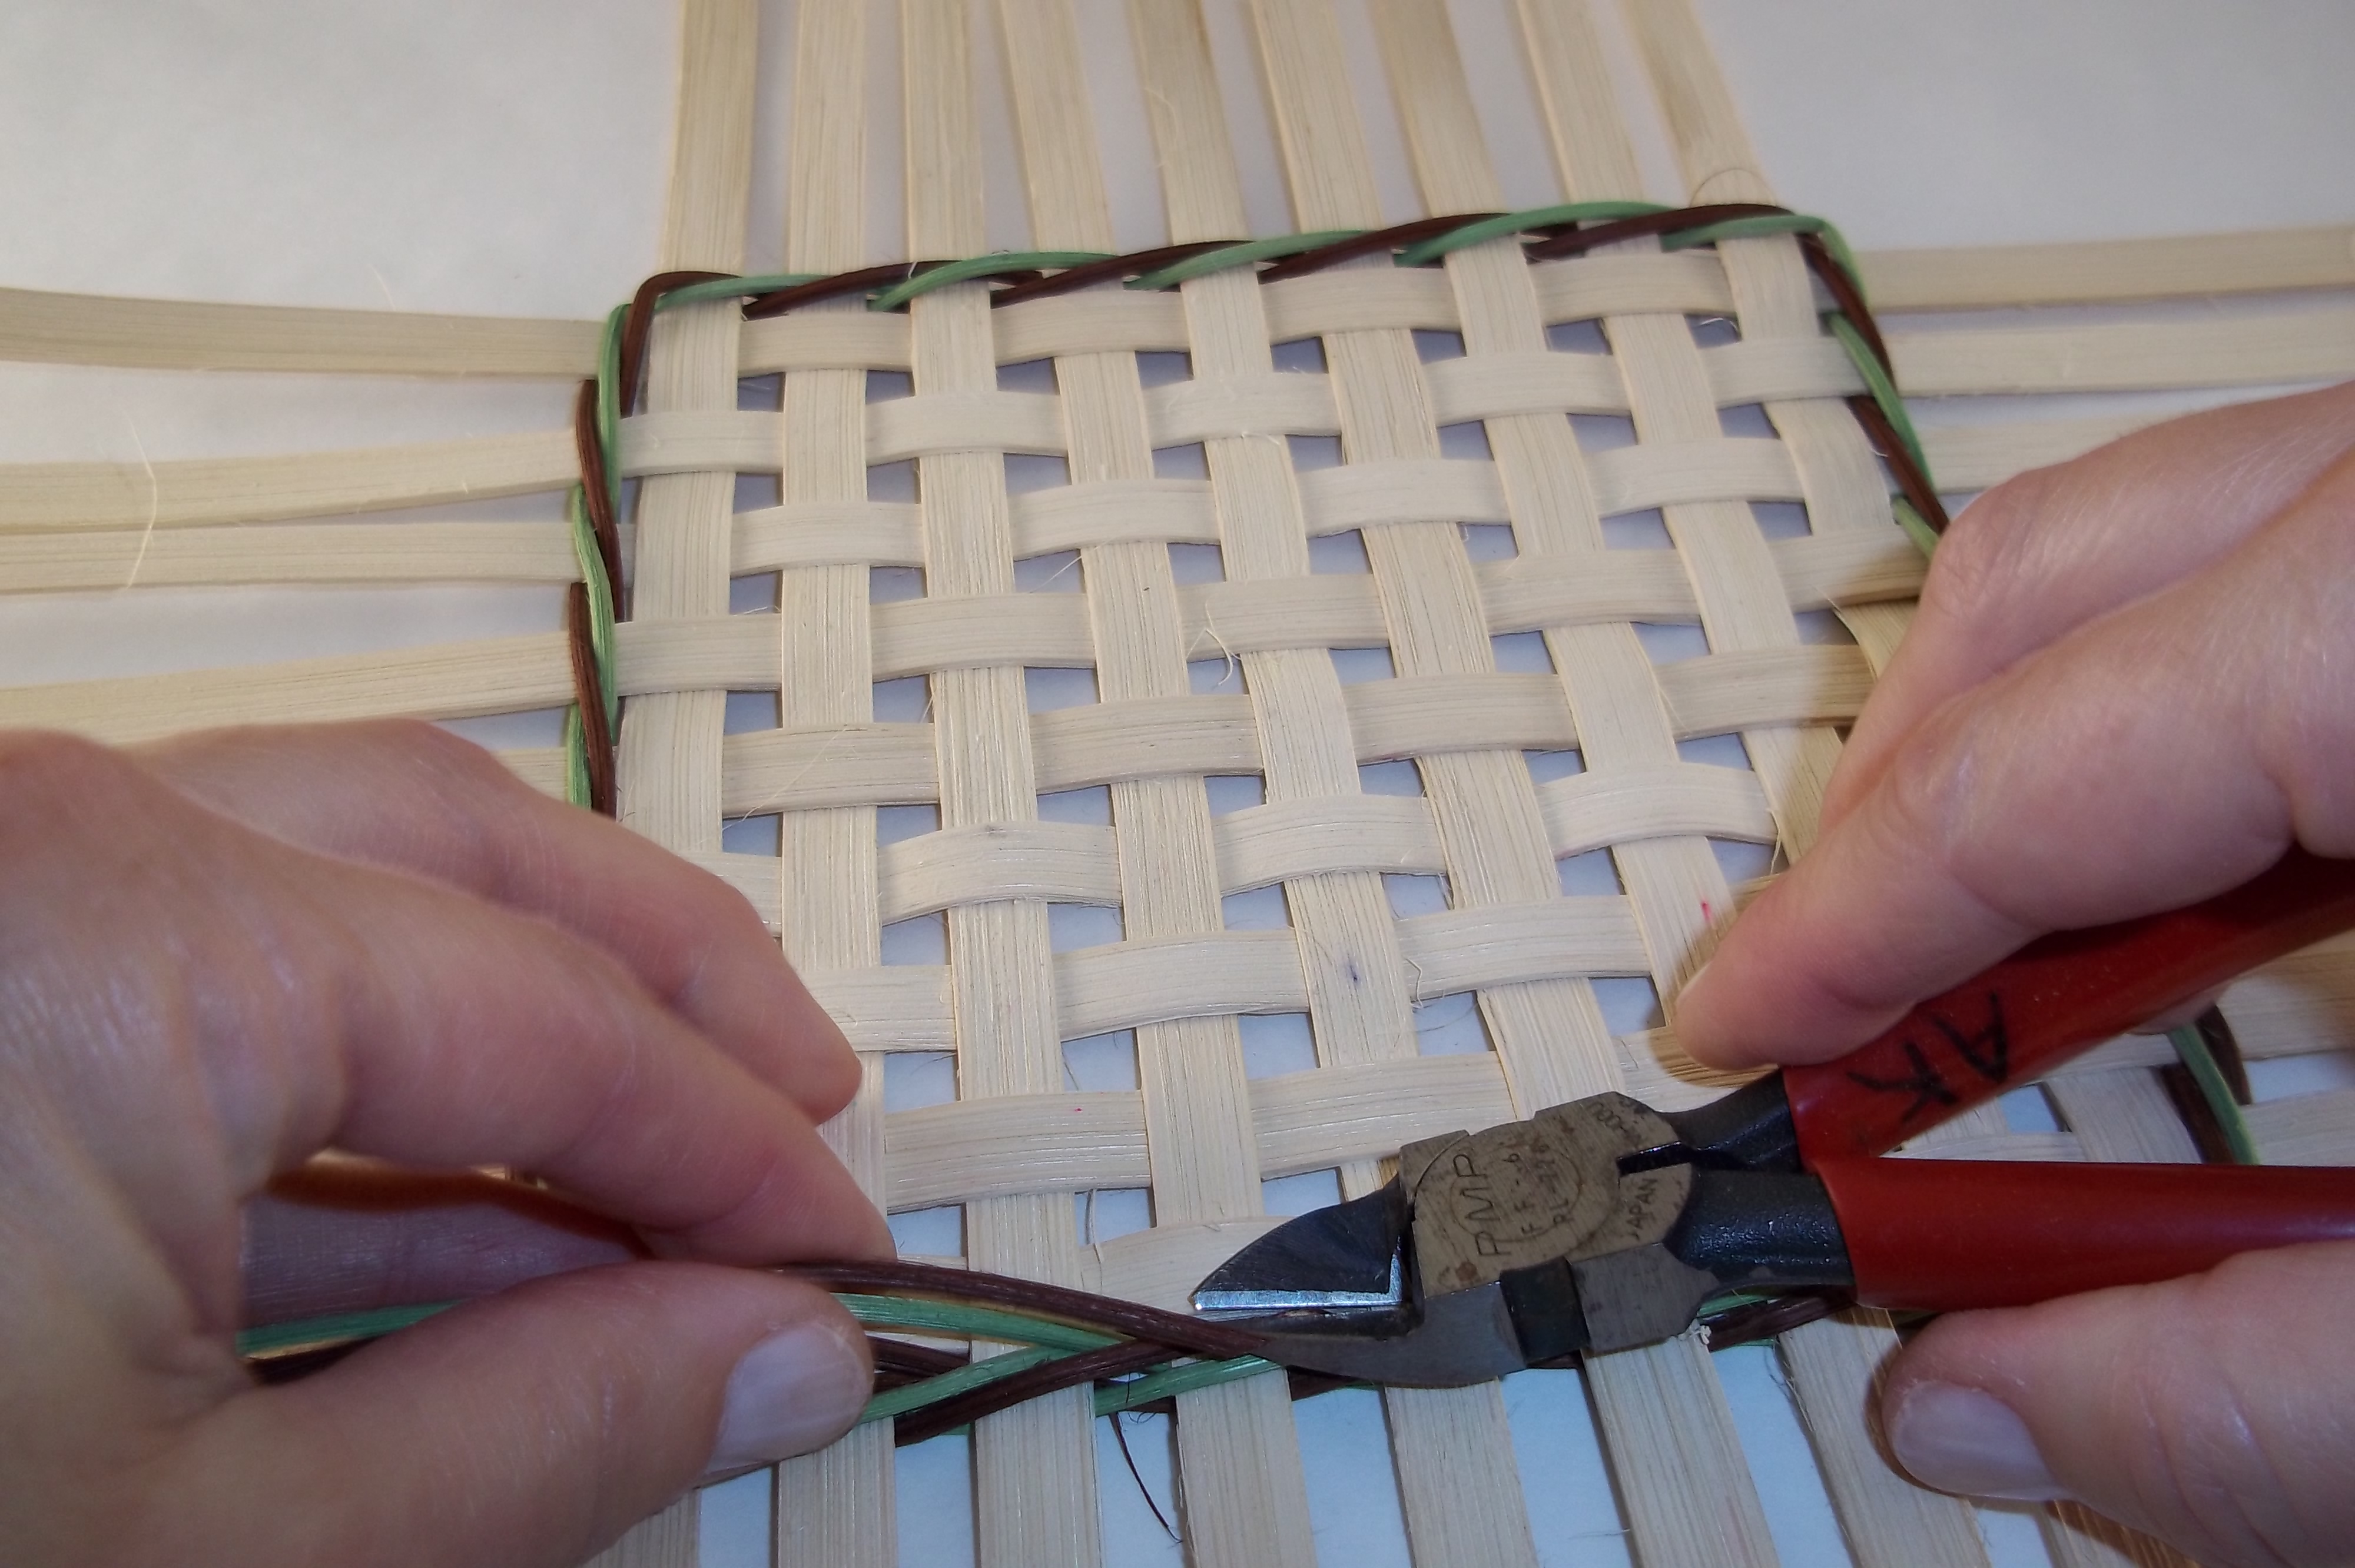
trim all ends flush with weaving.
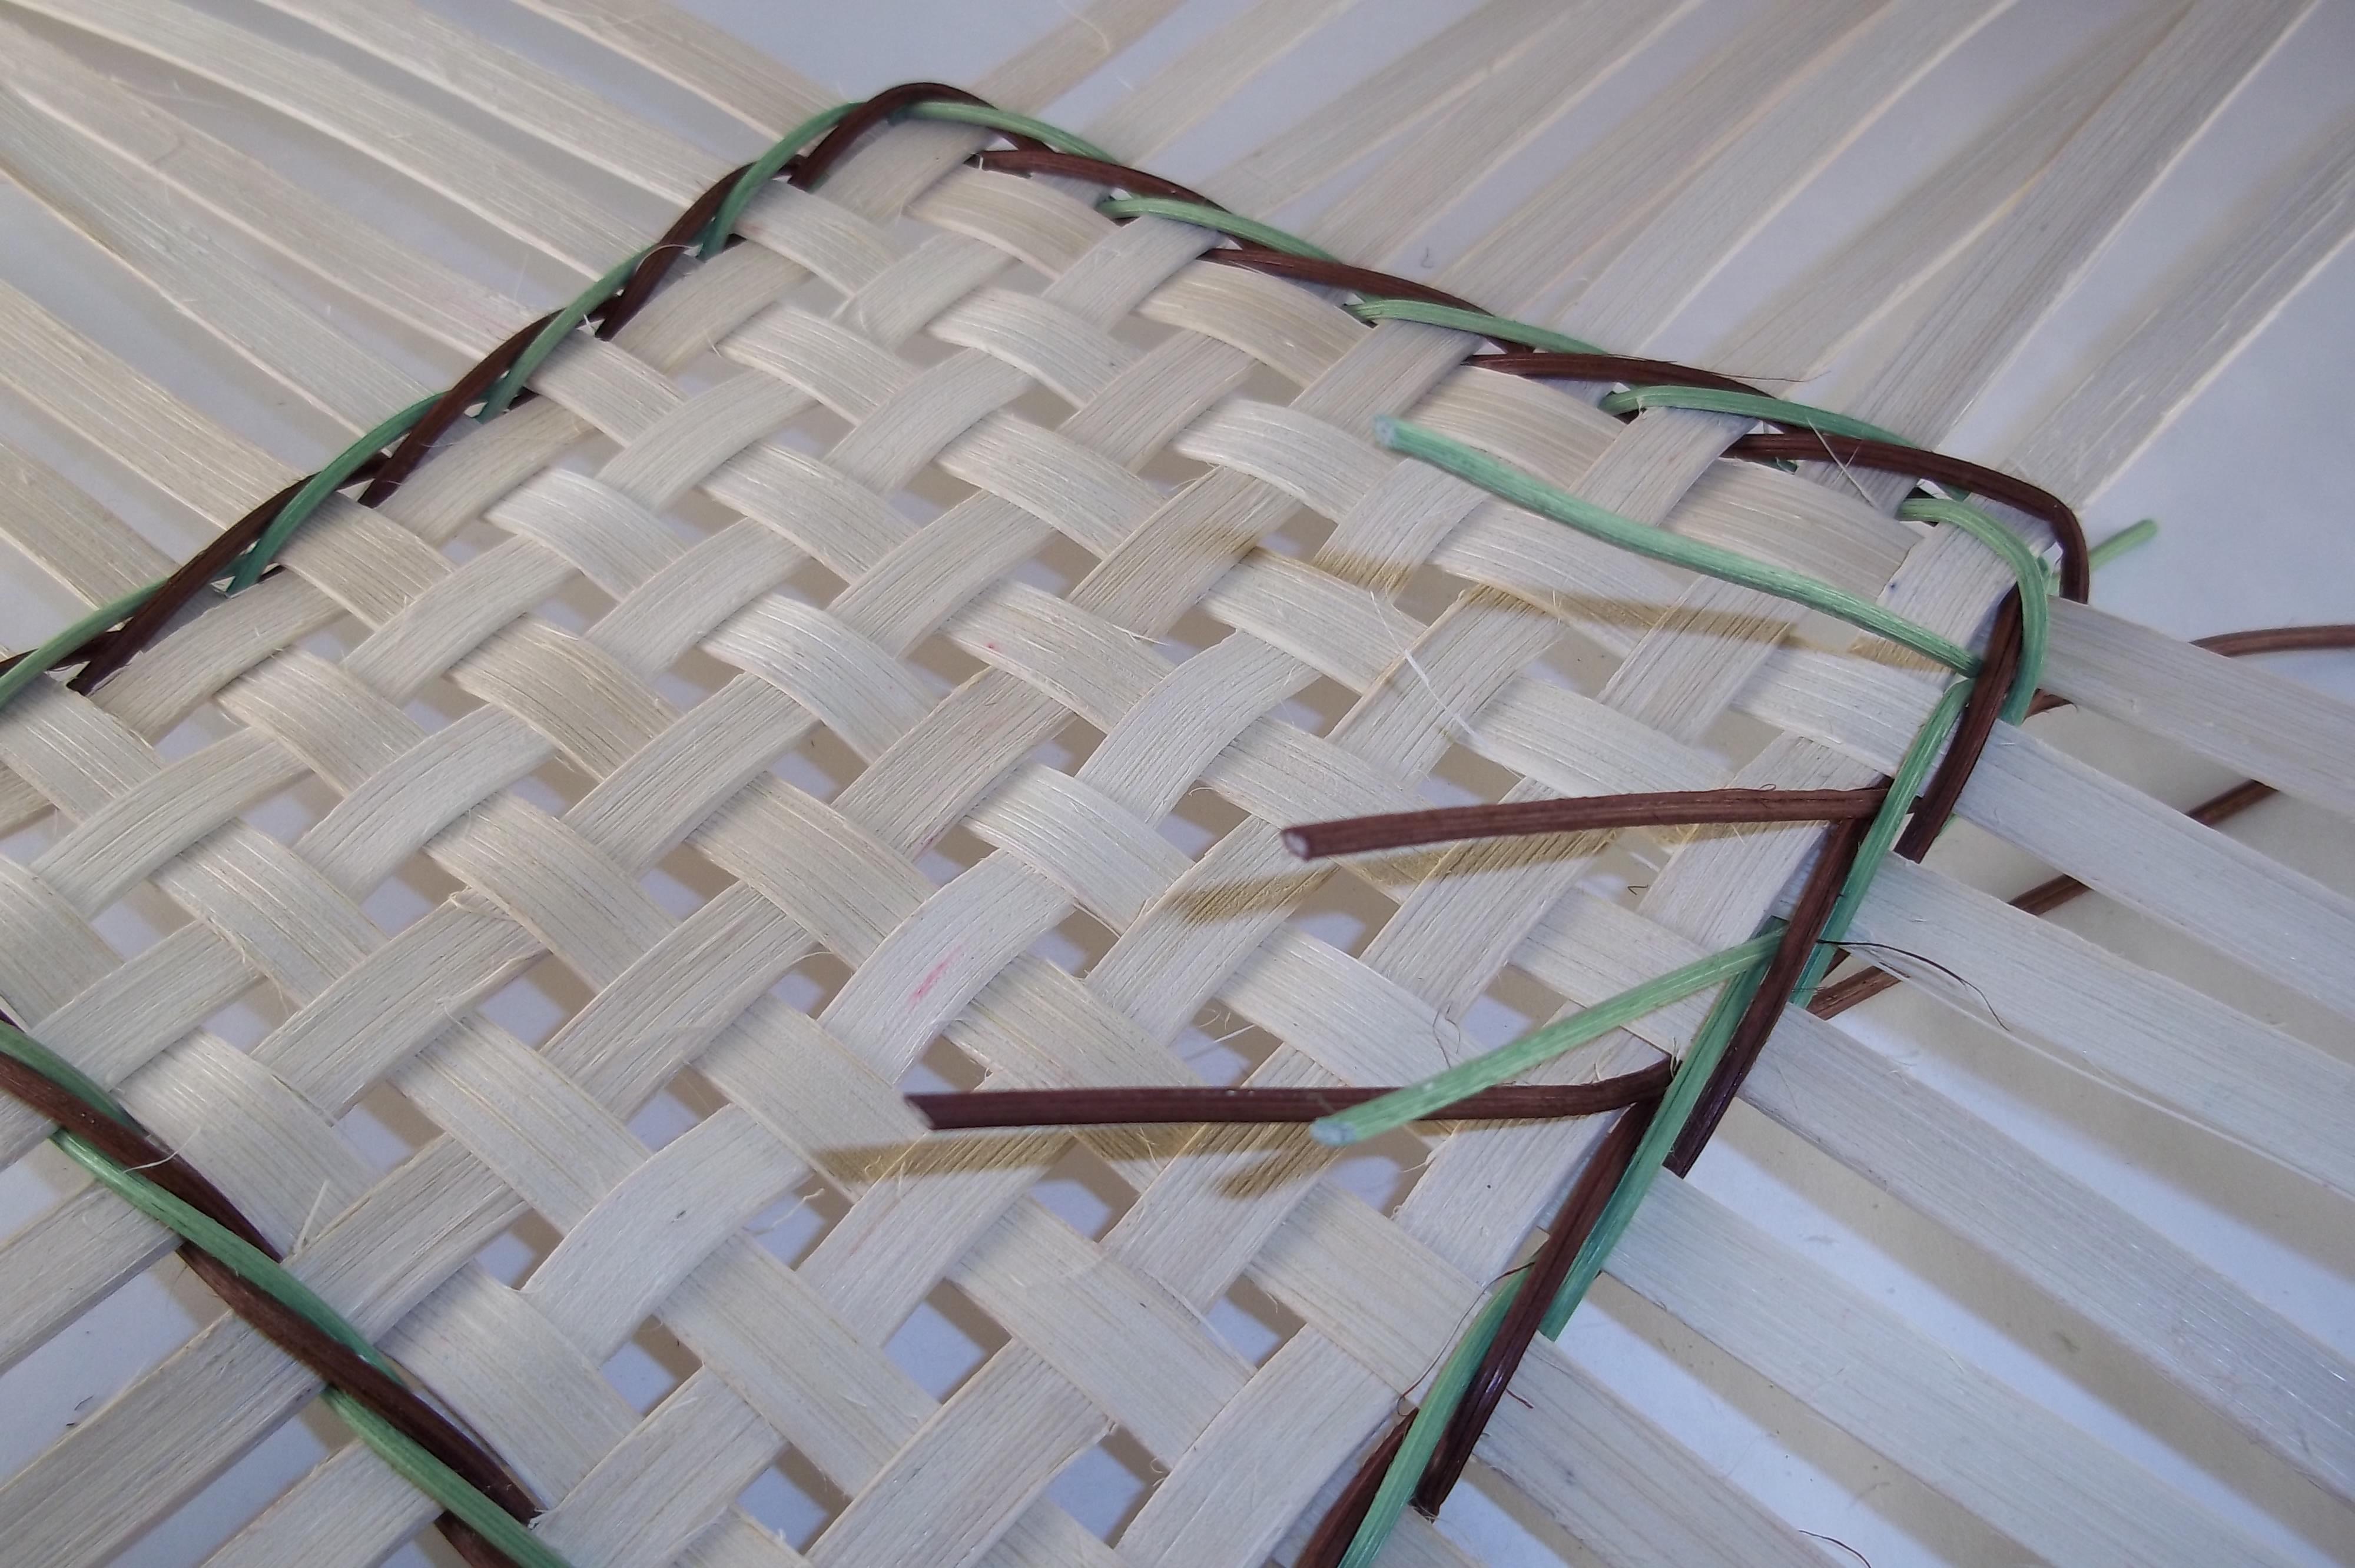
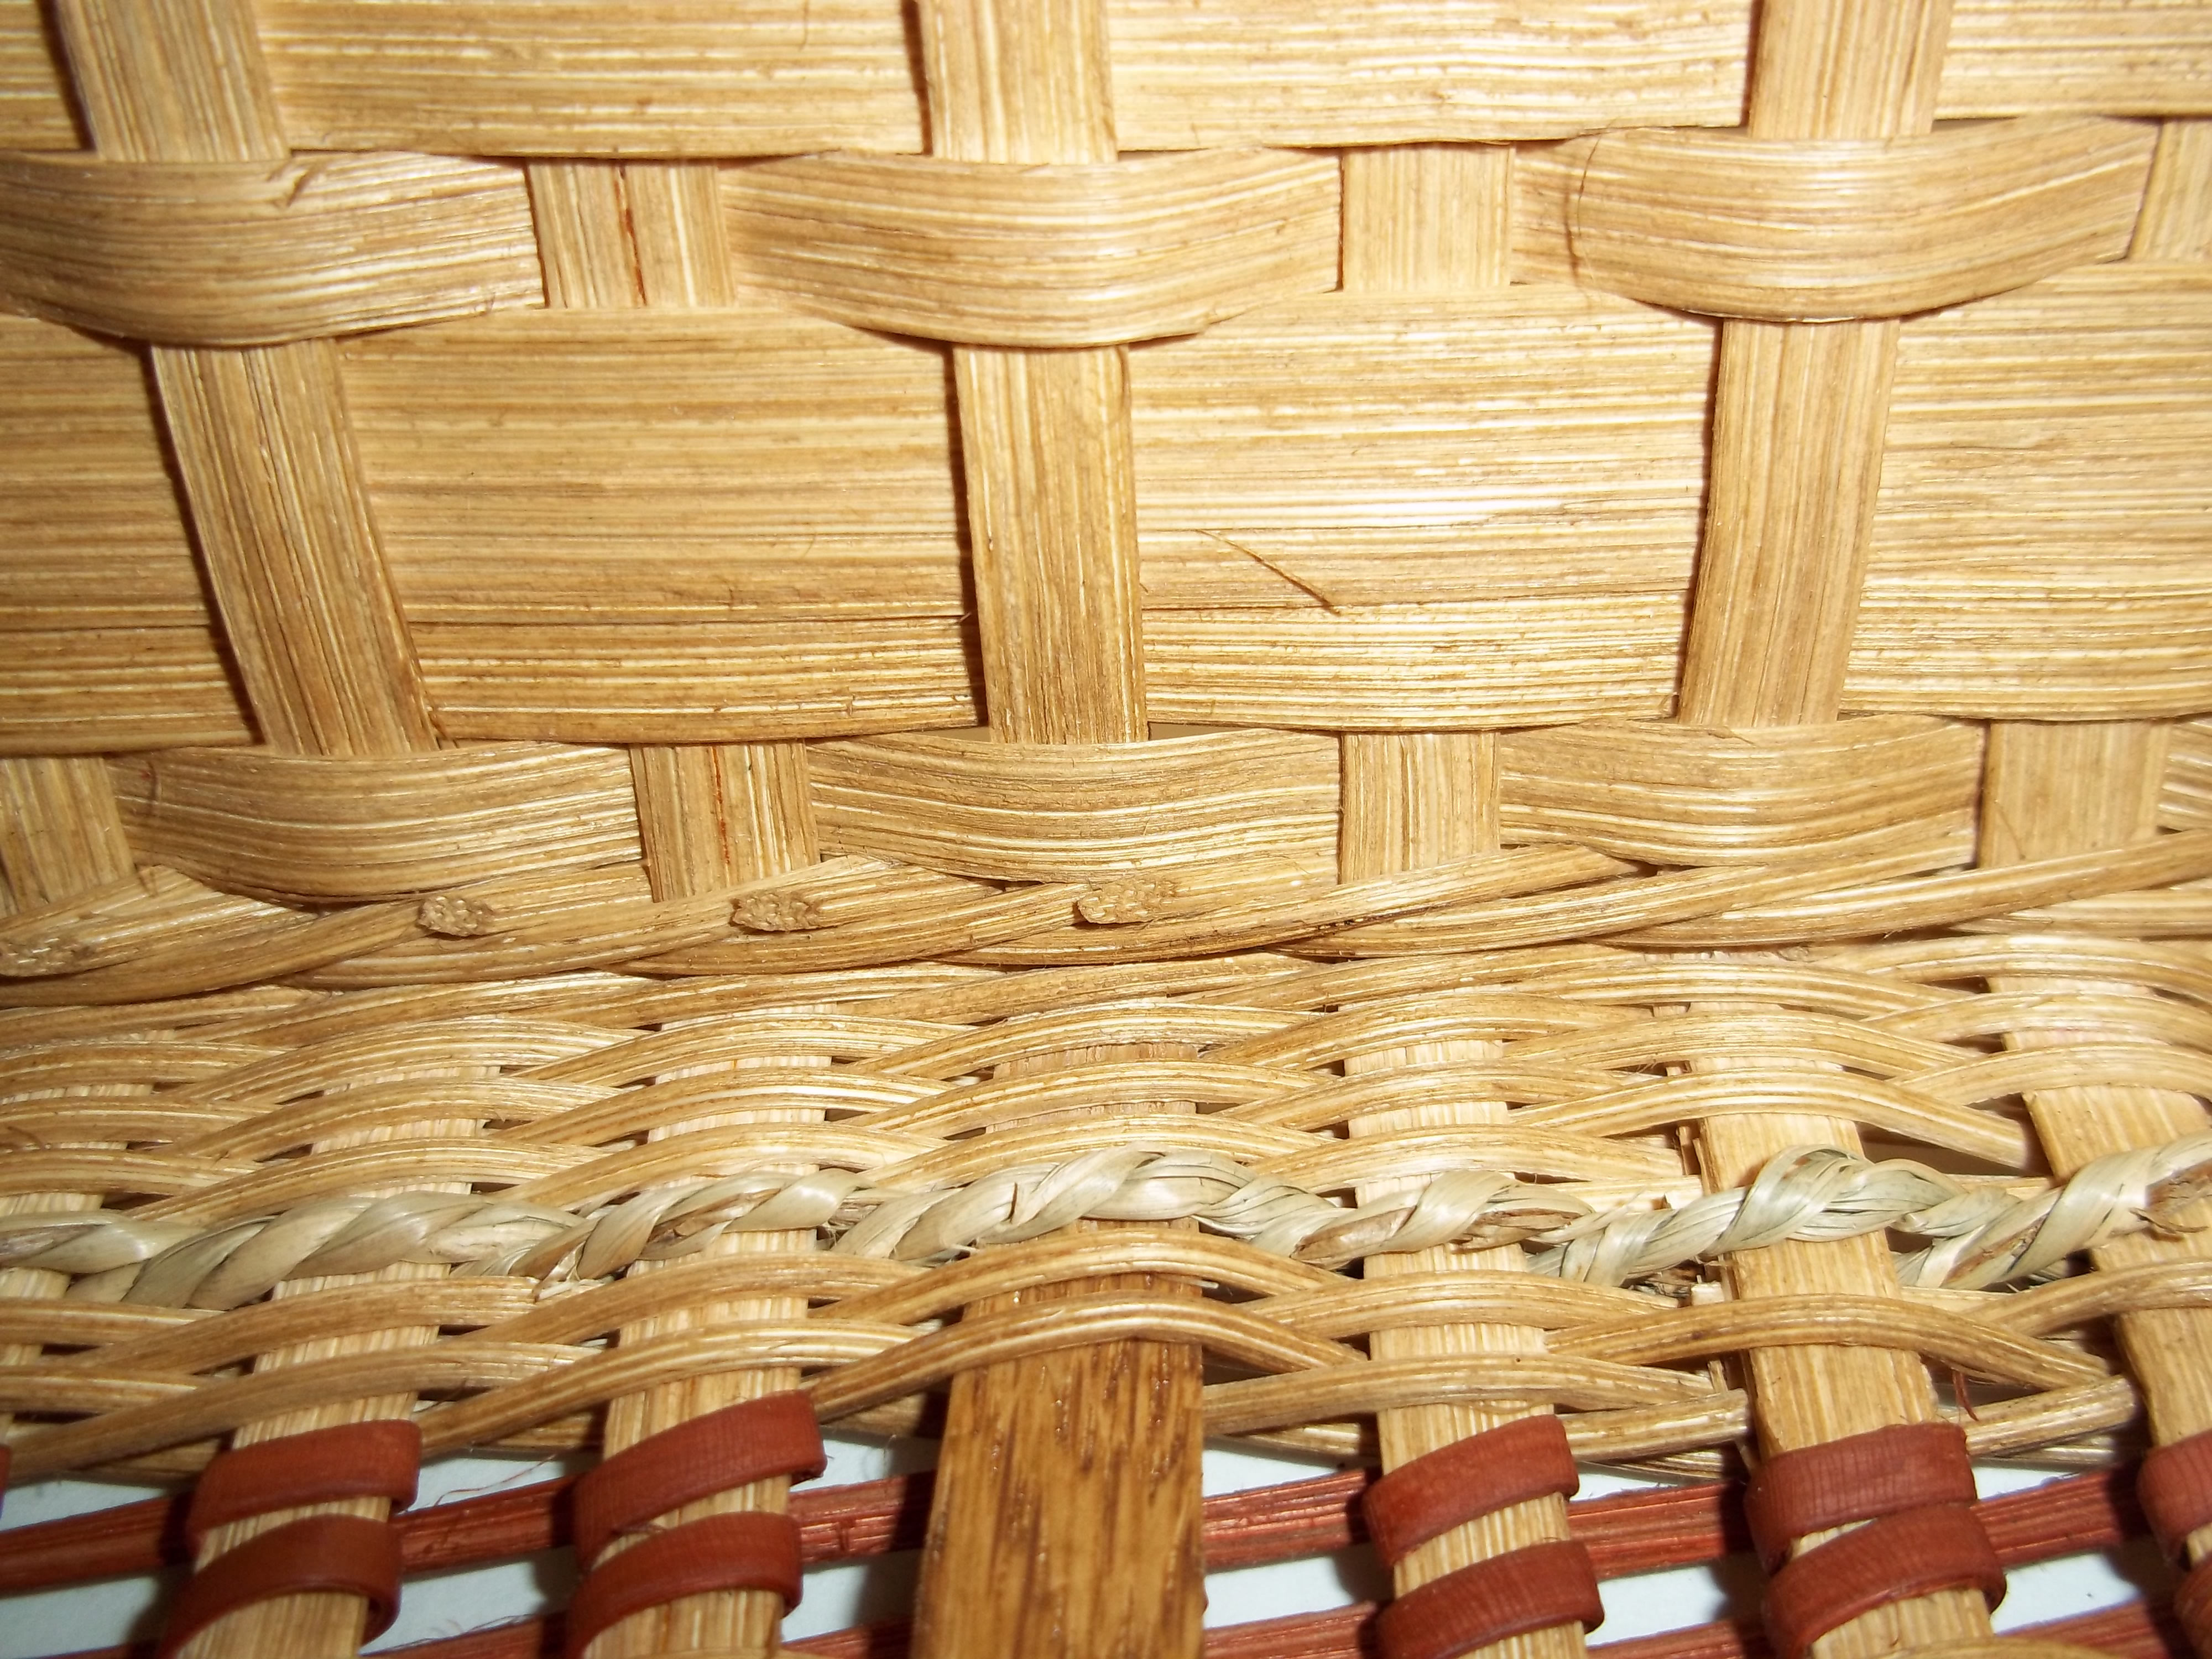
Below is a photo of the locking row inside of a basket:
 If you are working with three rod or triple twining, you will do exactly the same thing, only with three weavers instead of four, so you will be weaving over two and under one and to the outside.
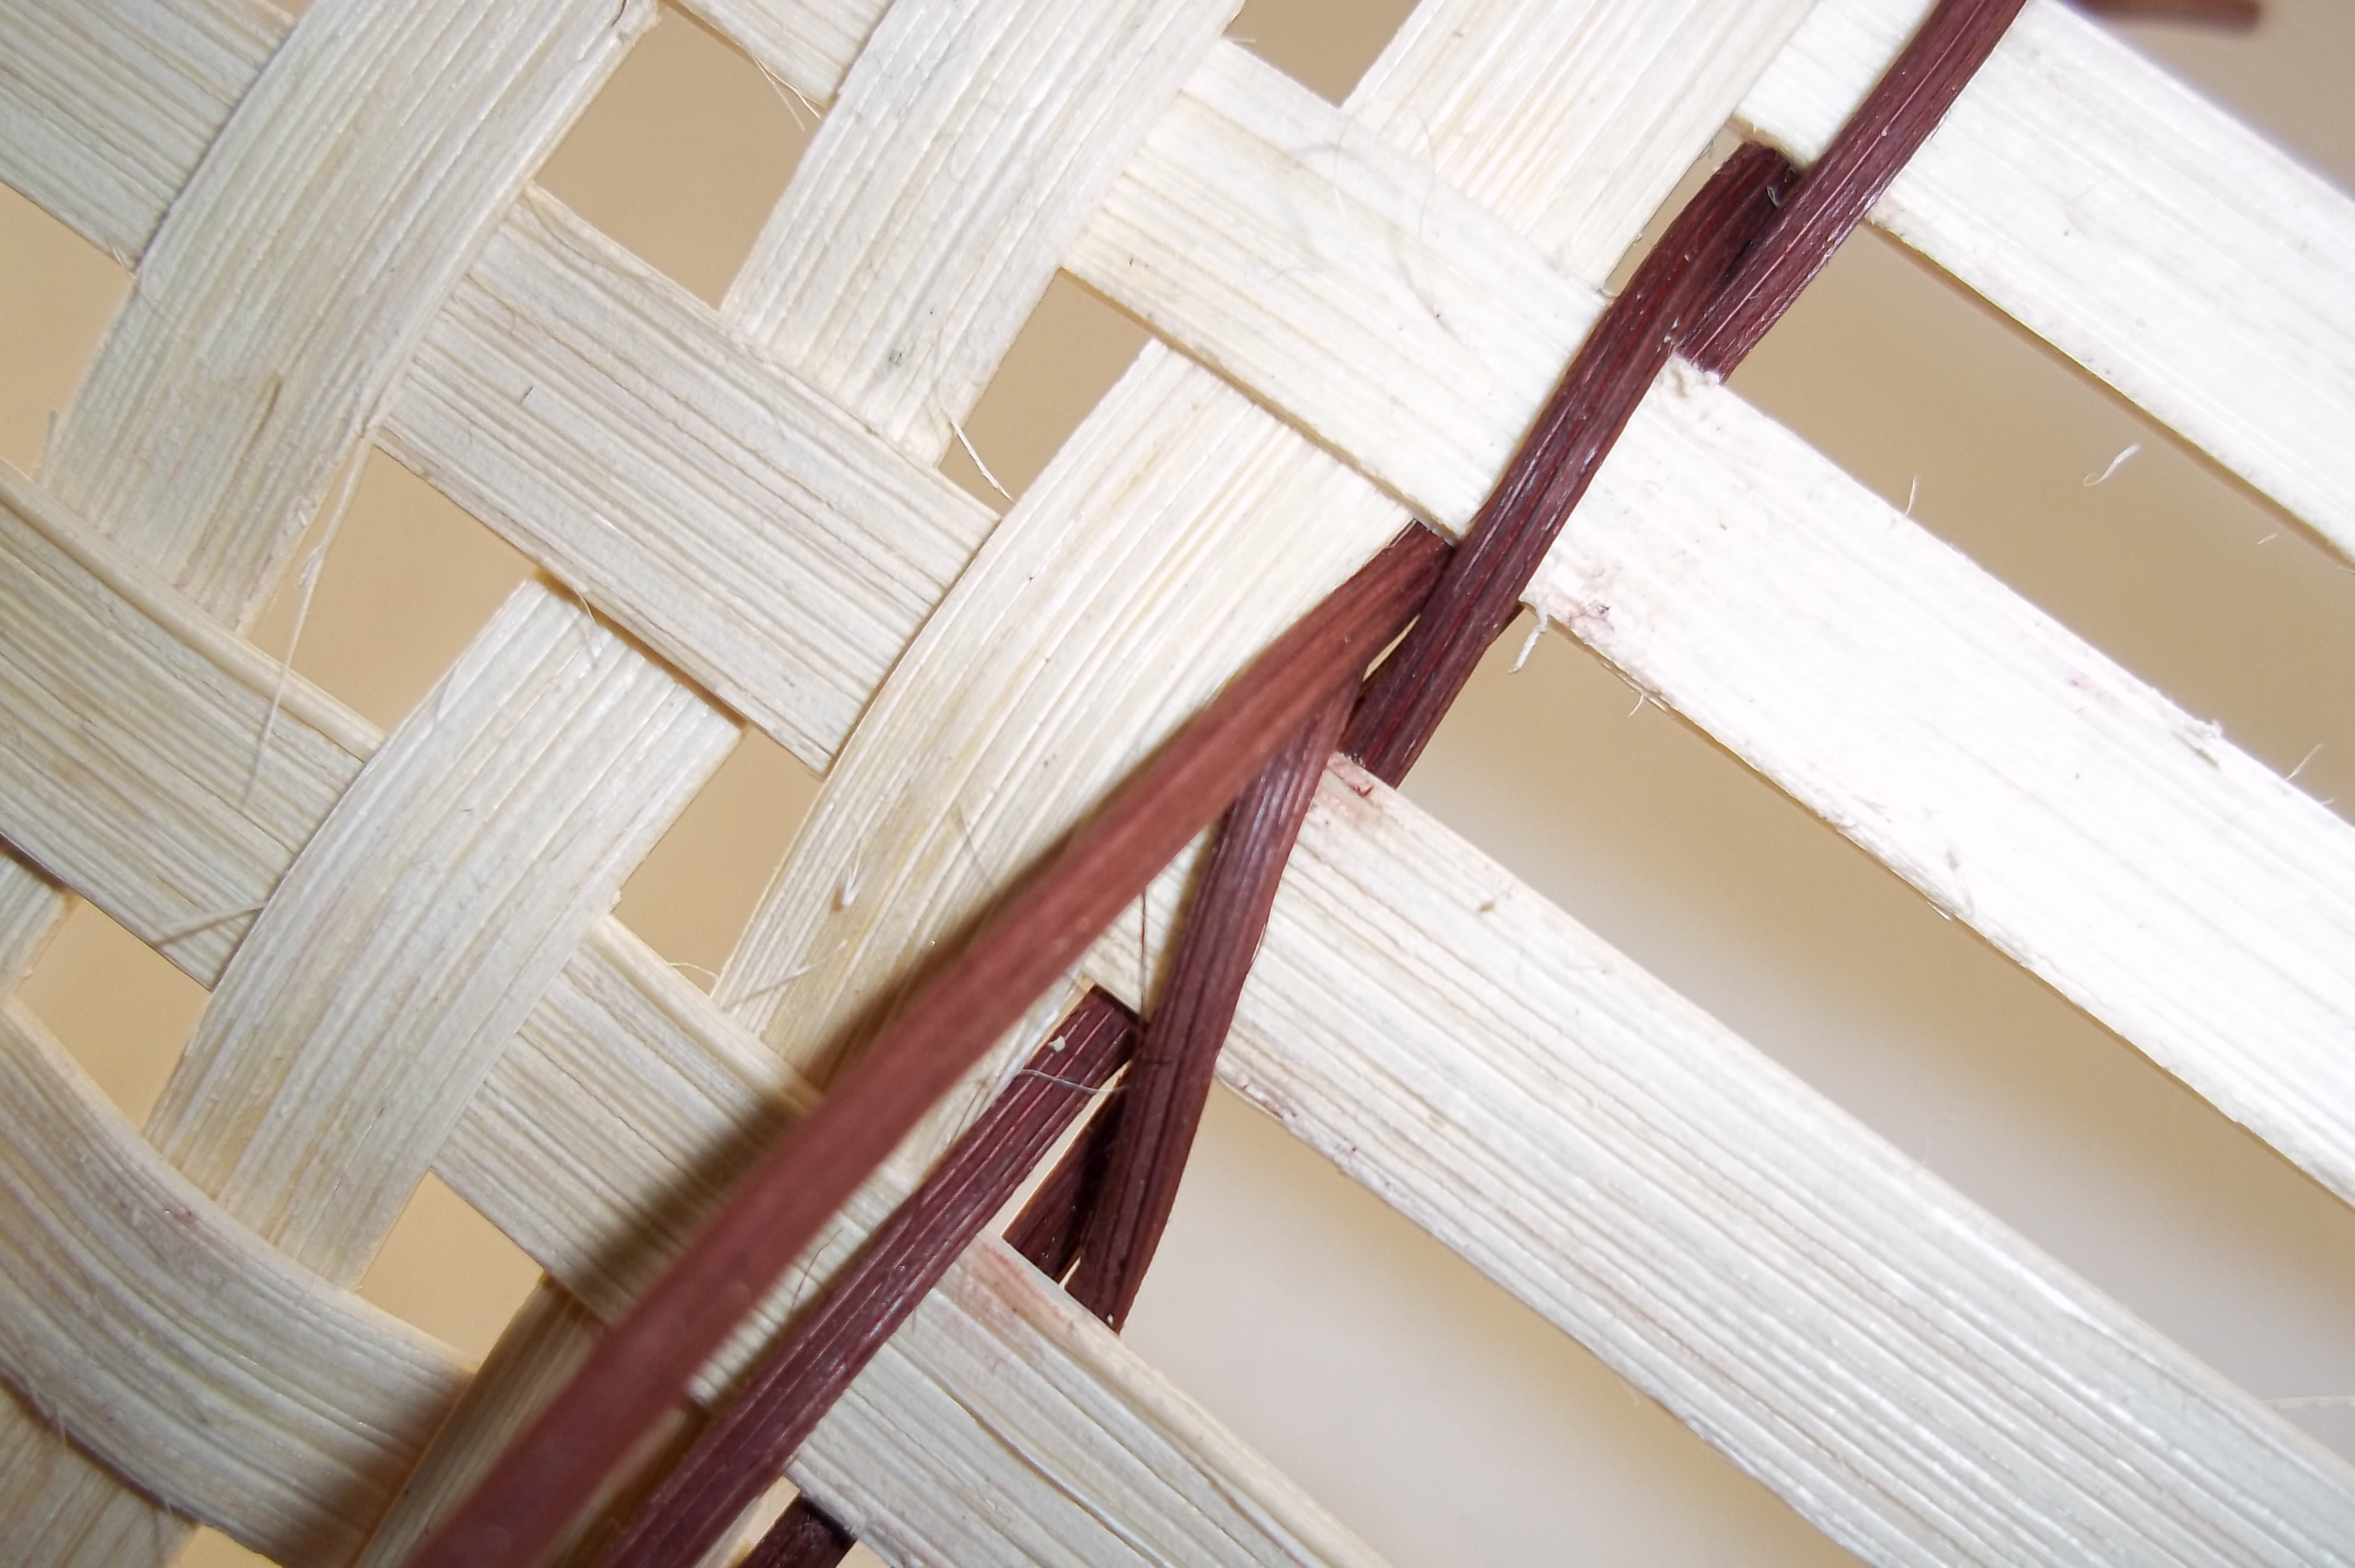
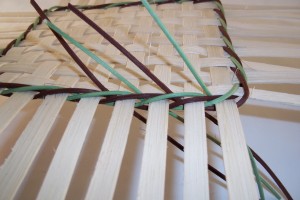
When complete, the inside of the basket will look like this:
But the outside will look like the outside of the four rod wale locked locking row:
I hope you have found this helpful!

Next week is Thanksgiving, I won’t be writing much, but I will have my first 24 hour pattern sale – Friday, November 27. So check back next Friday to get your sale code.
Loving your ideas, Annetta!
This was extremely helpful! Thanks.
🙂