The Step Up
The step up is a round reed technique used when you come to the end of a 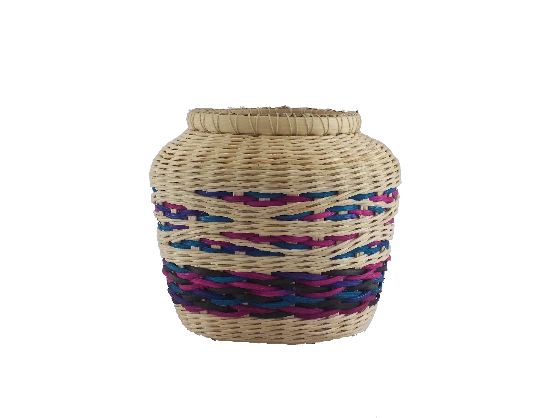 twined row. It is most often used when triple twining (three-rod wale), but it can be utilized with any type of twining: regular (with two weavers), triple twining (with three weavers), four-rod wale (with four weavers) and even if you twine with more weavers. In most baskets a step up is optional. If a step up is not done, the twining section will spiral up the basket and will have a definite starting spot and a definite ending spot. If a step up is done, each row will be continuous, like a ring it will look like it has no start or stop.
This technique can be a little confusing, but the more you utilize it, the easier it gets both to understand and to master. I like to think of the step up as a doing two things, completing the row and stepping up to start the next row. Here is a quick STEP UP tutorial using three rod wale or triple twining:
**If you are left handed and weave right to left, exchange all of the lefts with right and the rights with left.
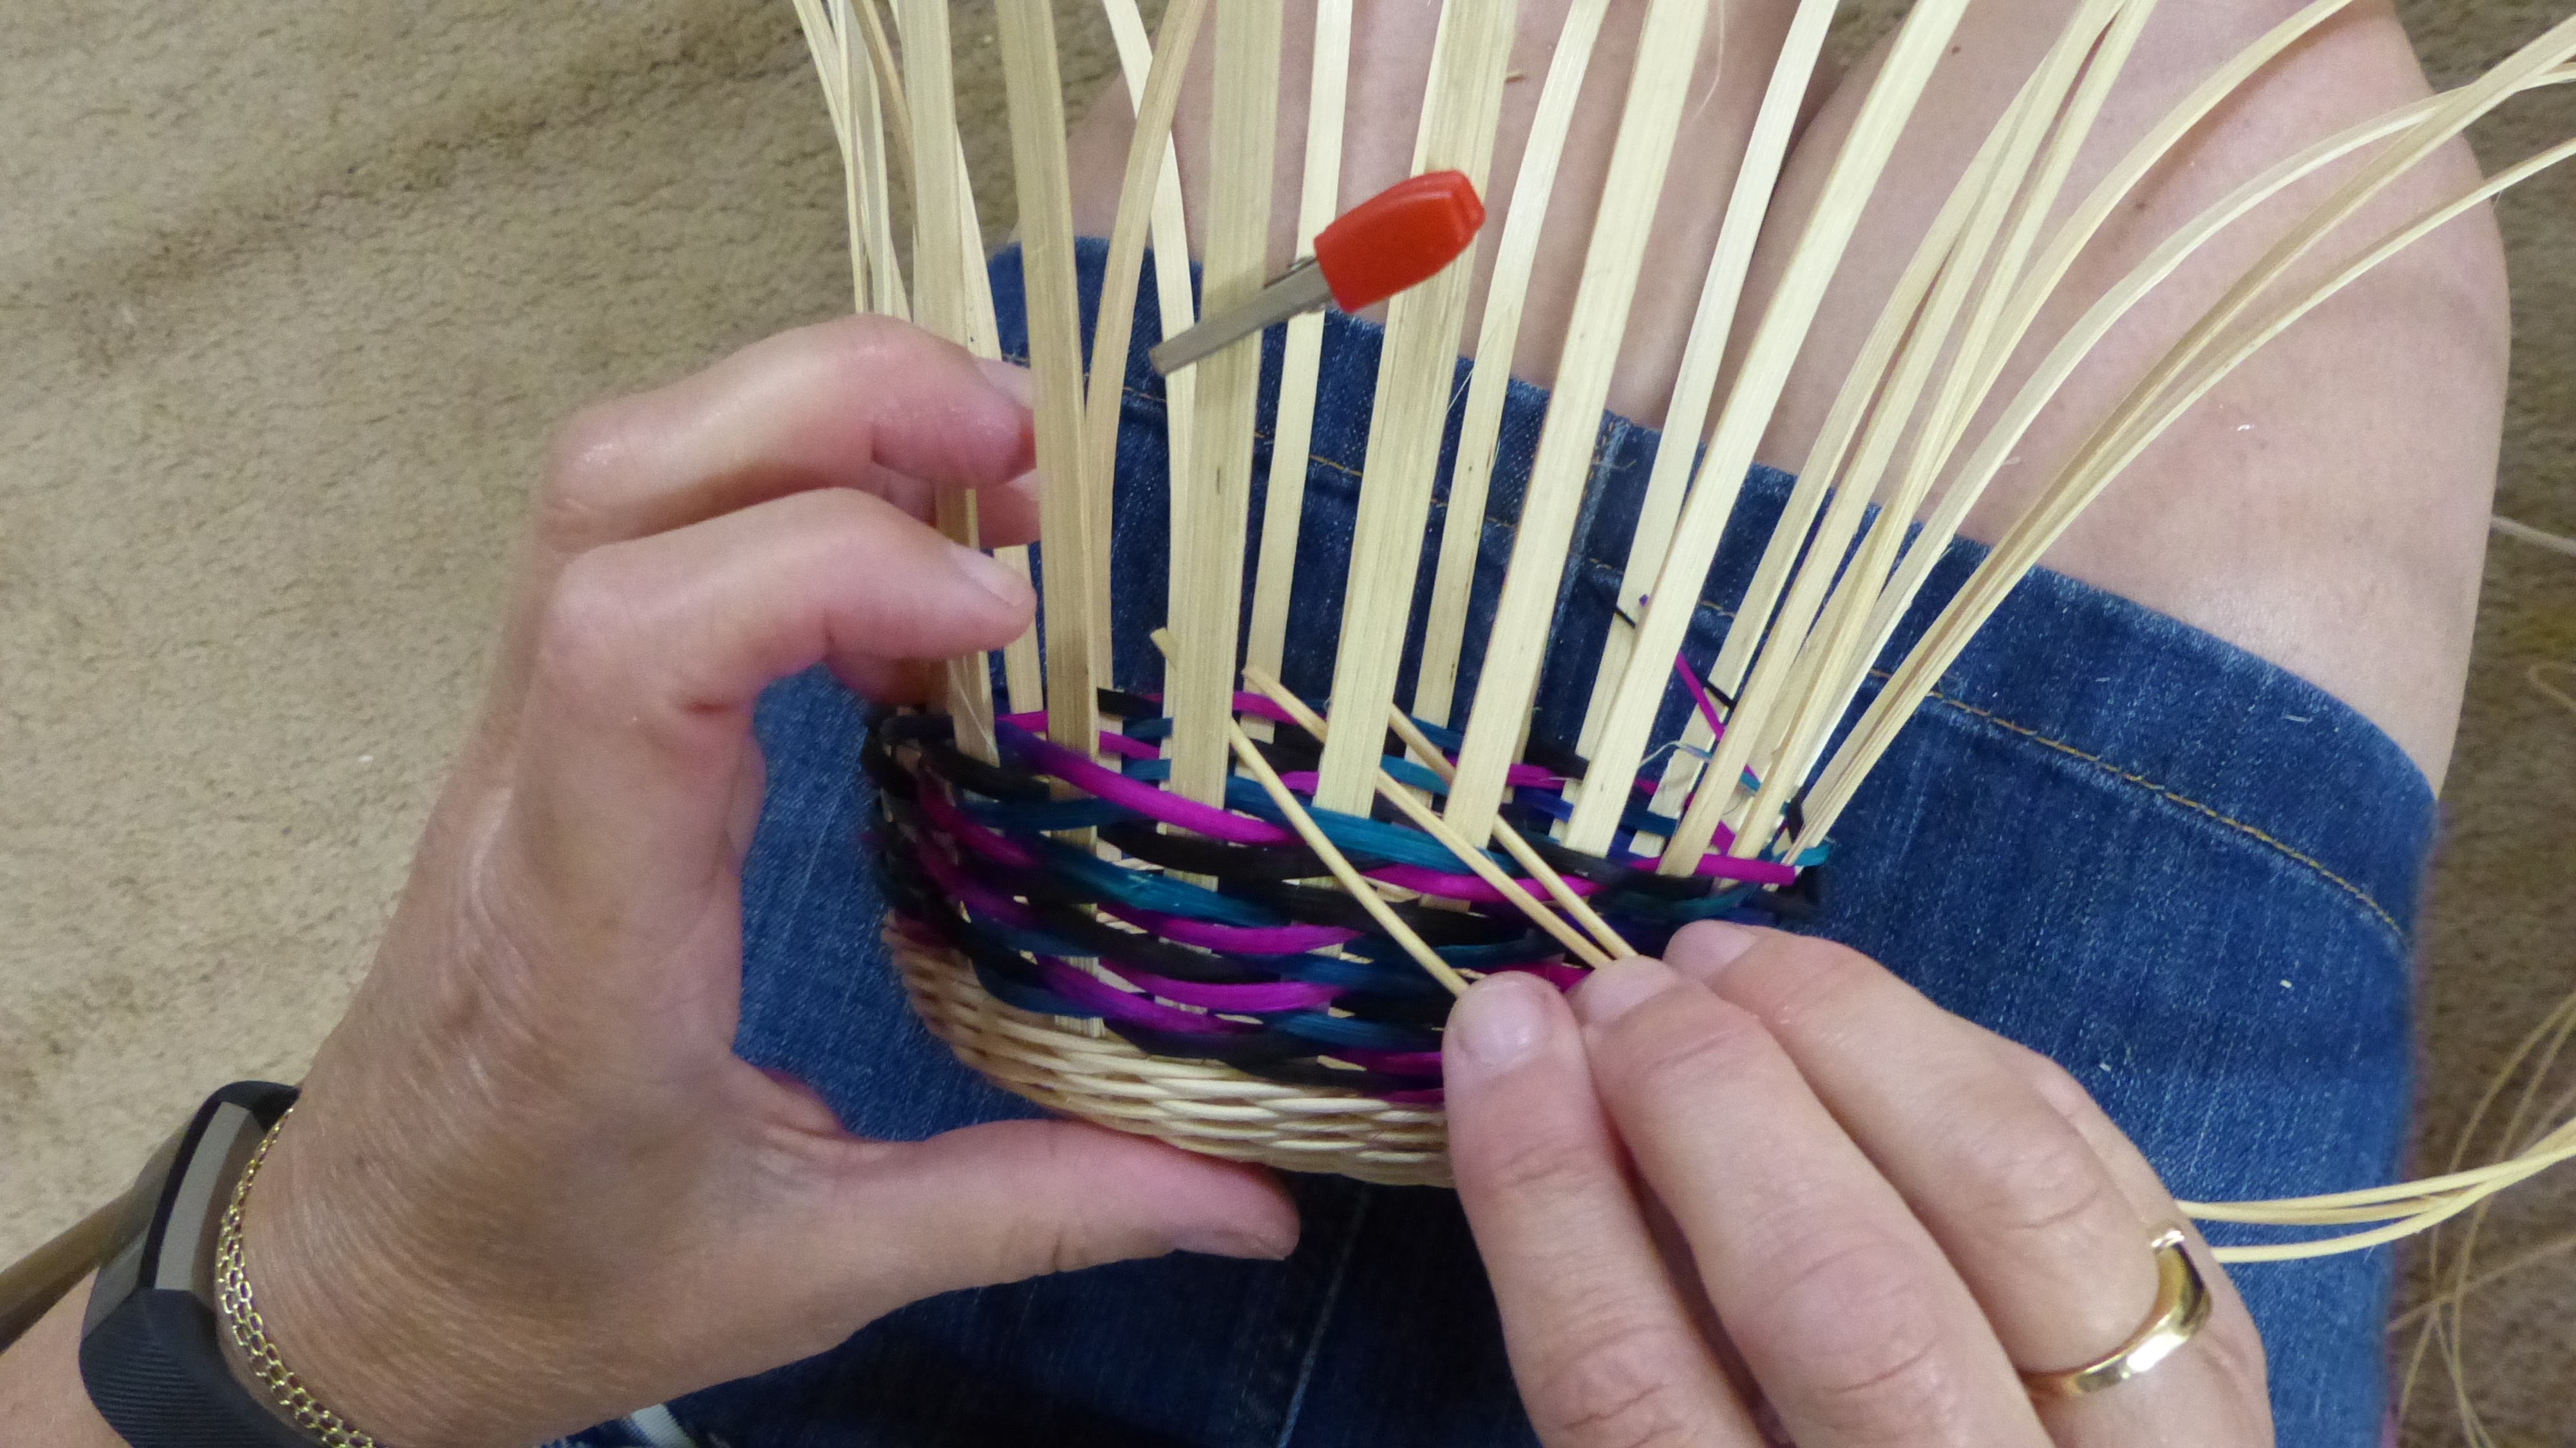
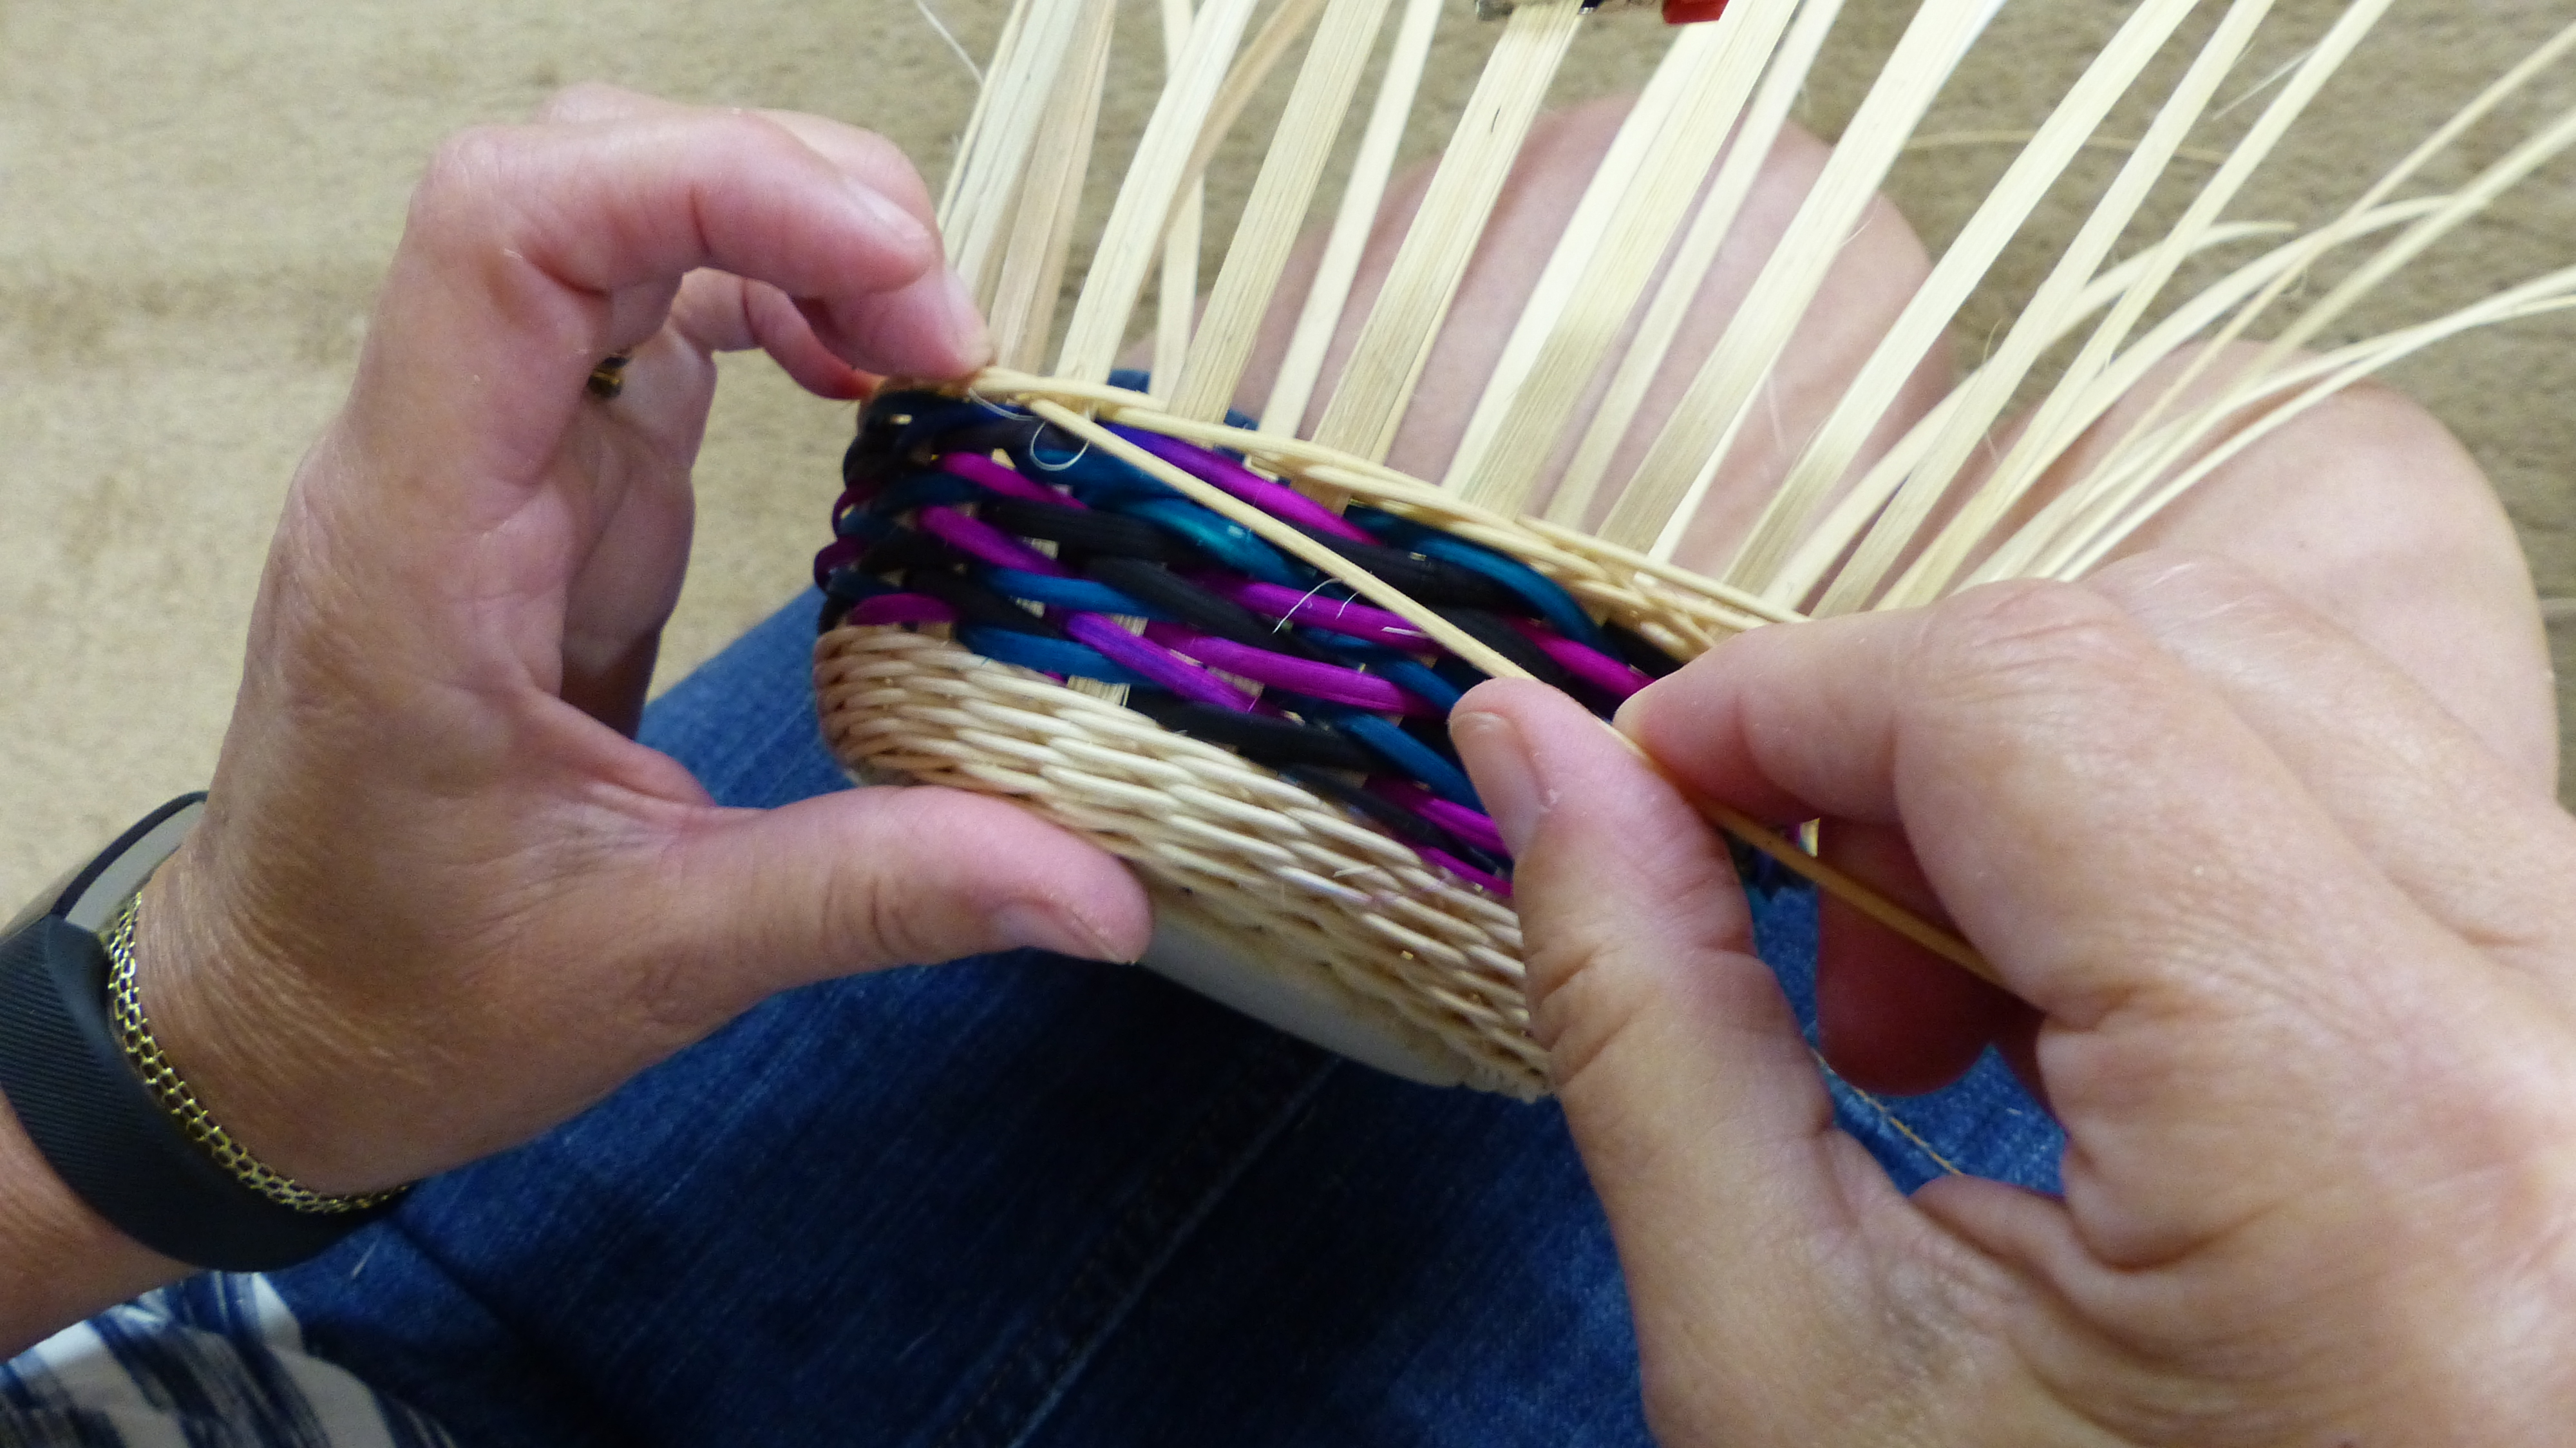
Start the weavers by tucking them into three consecutive spaces and behind the spokes to the left of their space. Mark the spoke that the furthest left weaver (Weaver #1) started behind. I have marked mine with a small red clip. Now pick up the weaver on the left and weave it over (or in front of) two spokes, behind one and then back to the outside. Repeat, always weaving with the weaver on the left of the set. The weavers will always be coming out of consecutive spaces.

Weave all the away around the basket, stopping at the stake you marked. You will always know where to stop if you think of it this way: “Weave TO the spoke you started behind NOT passed it”. 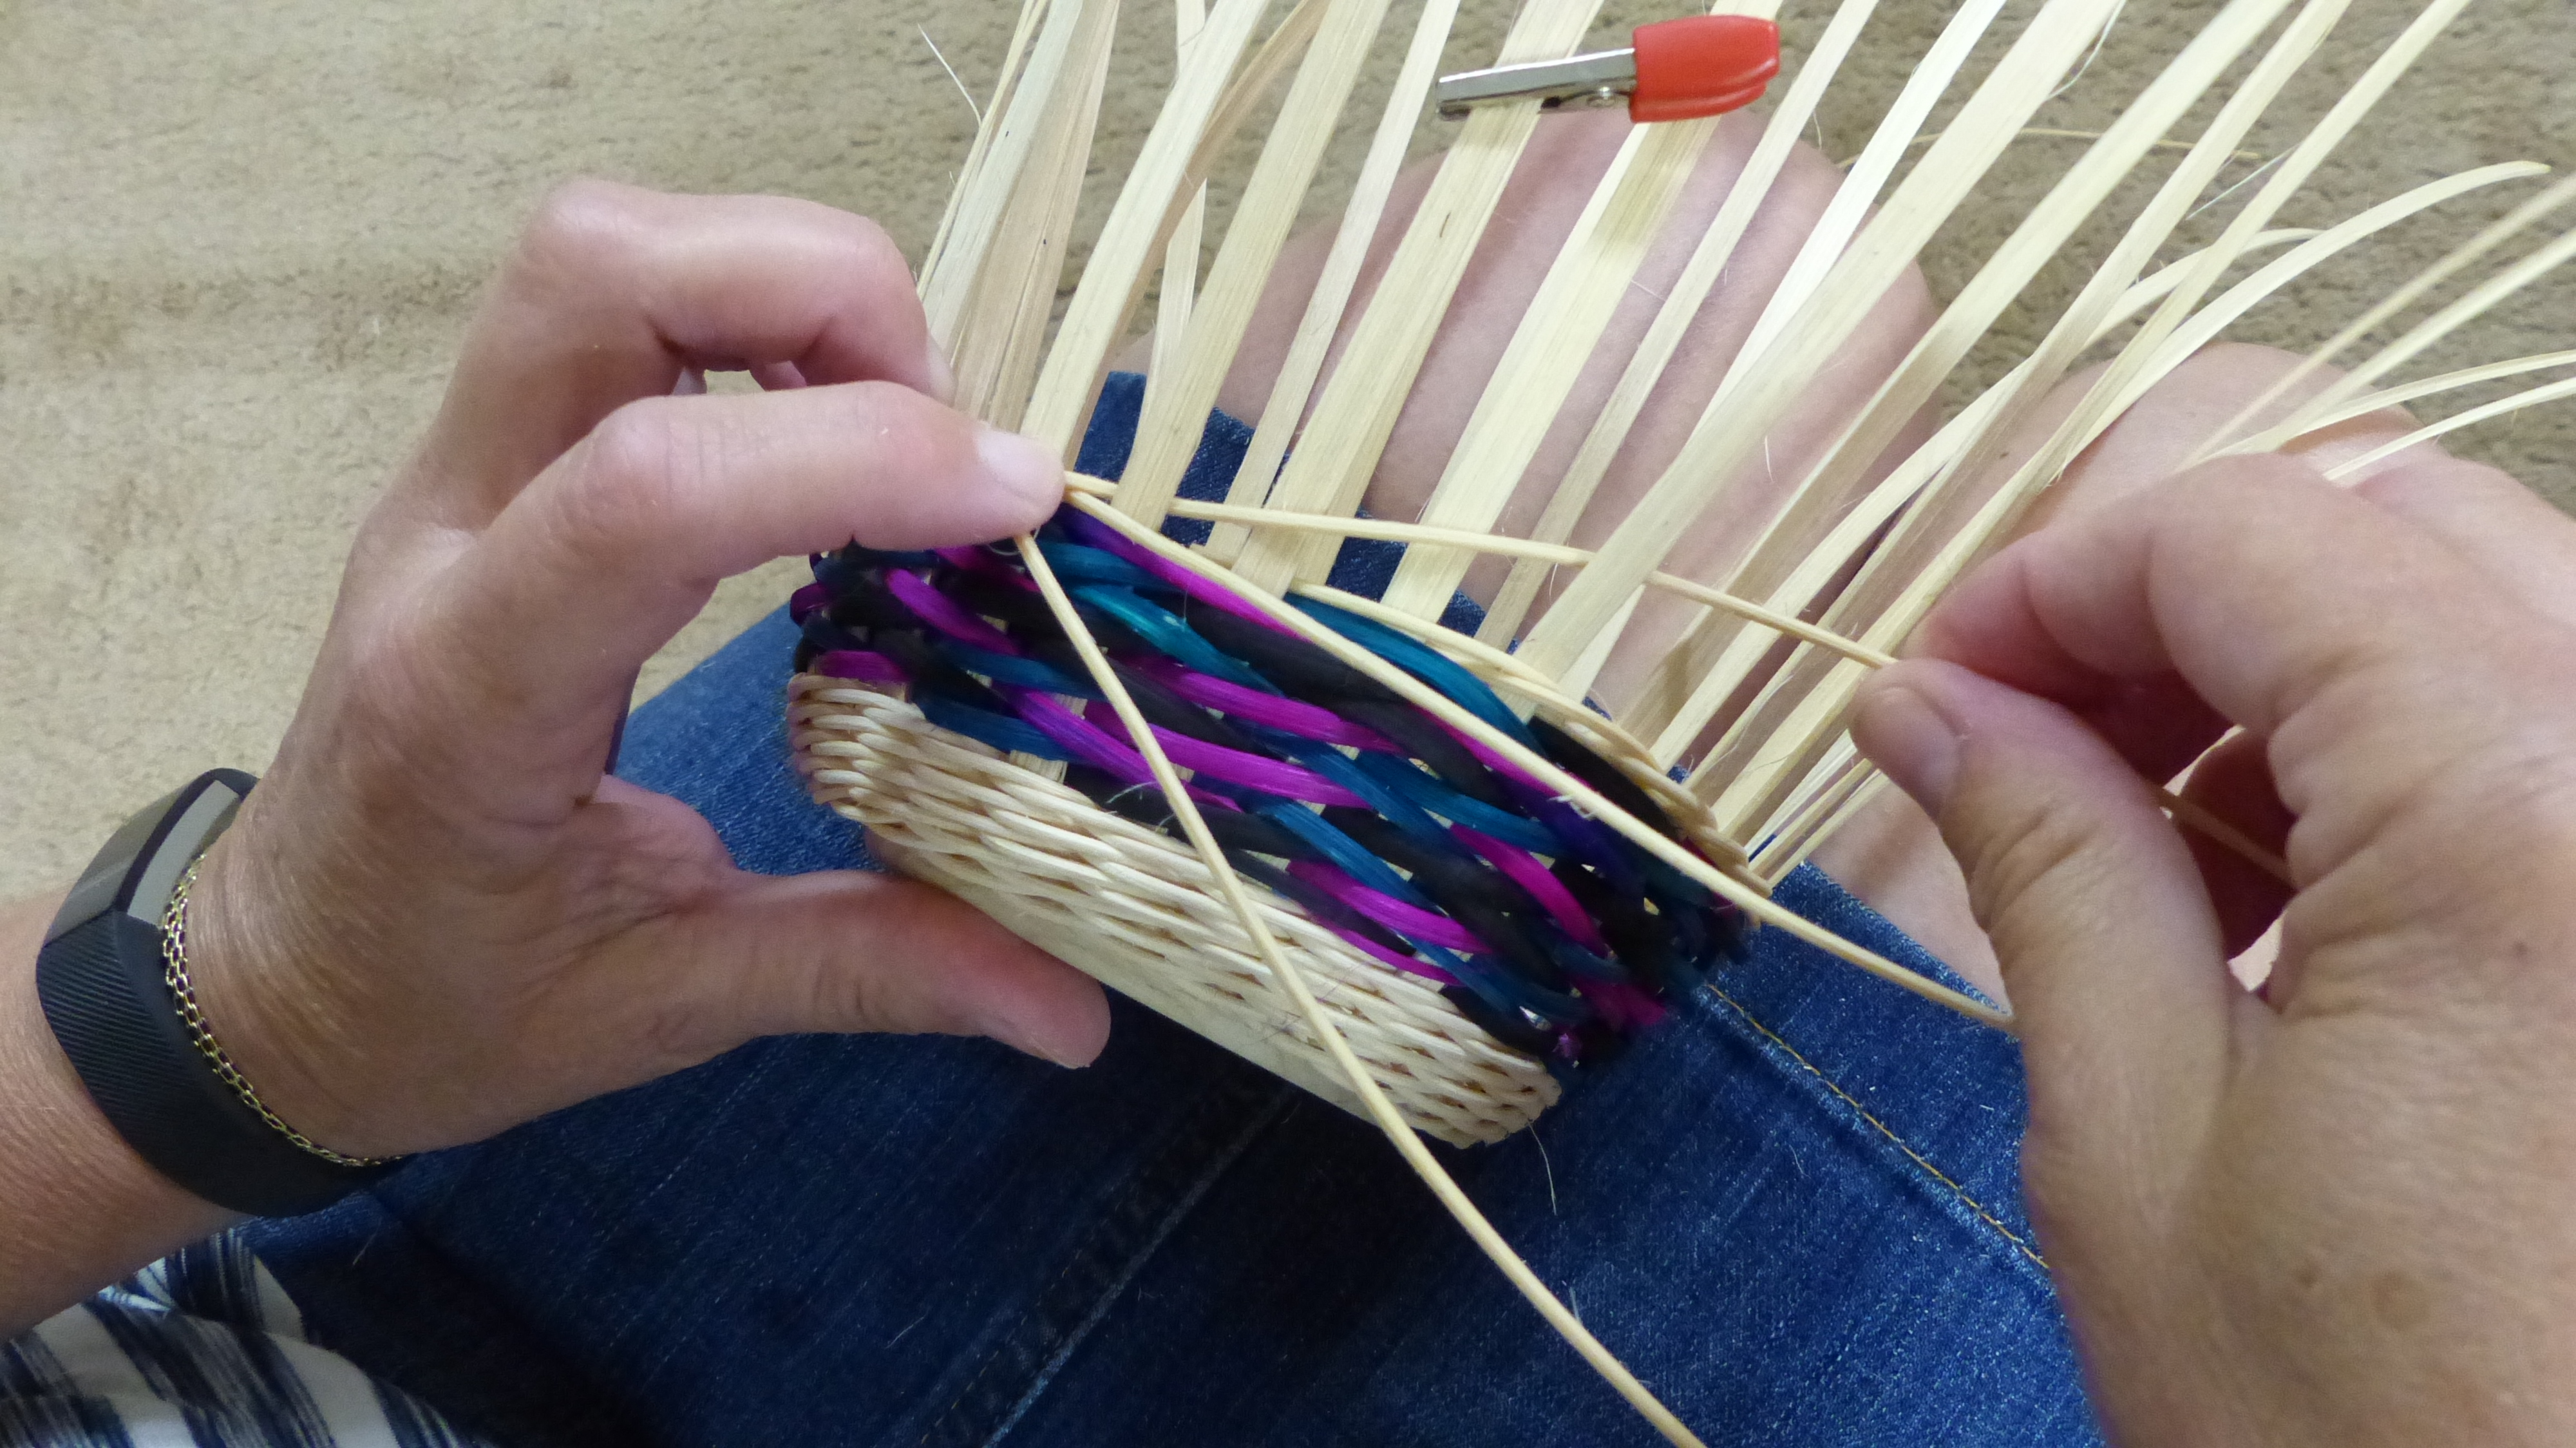
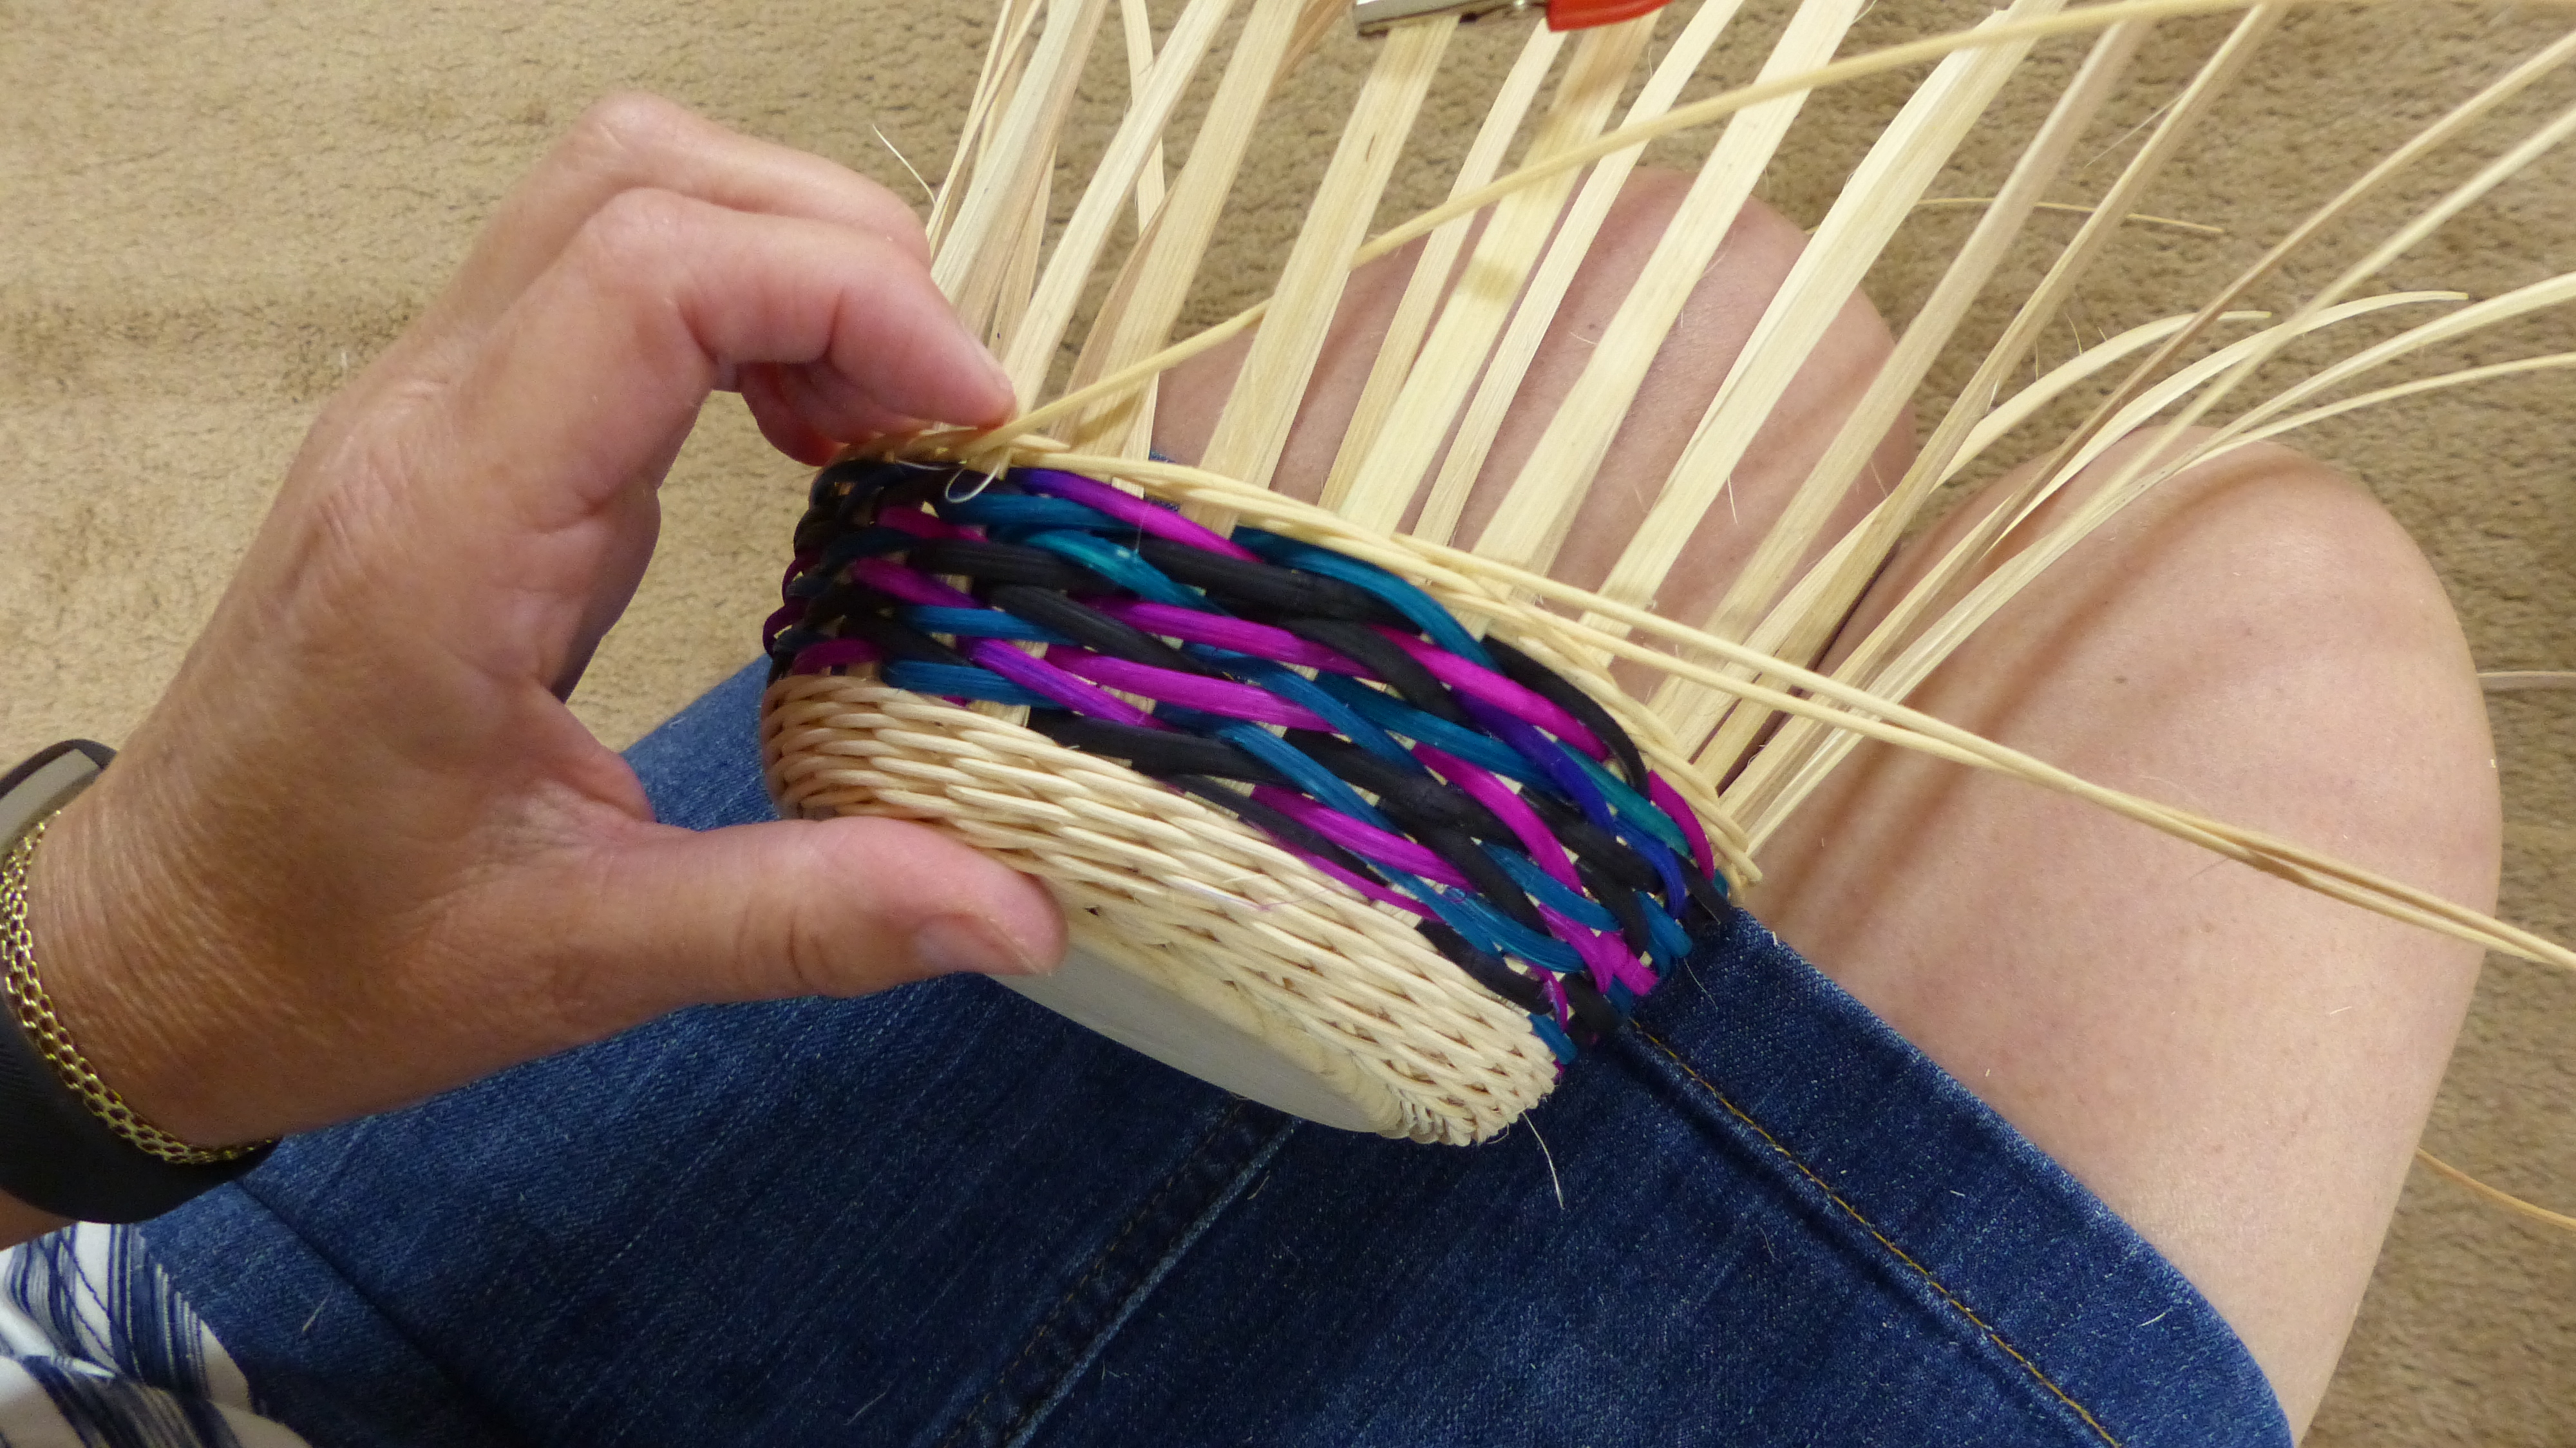
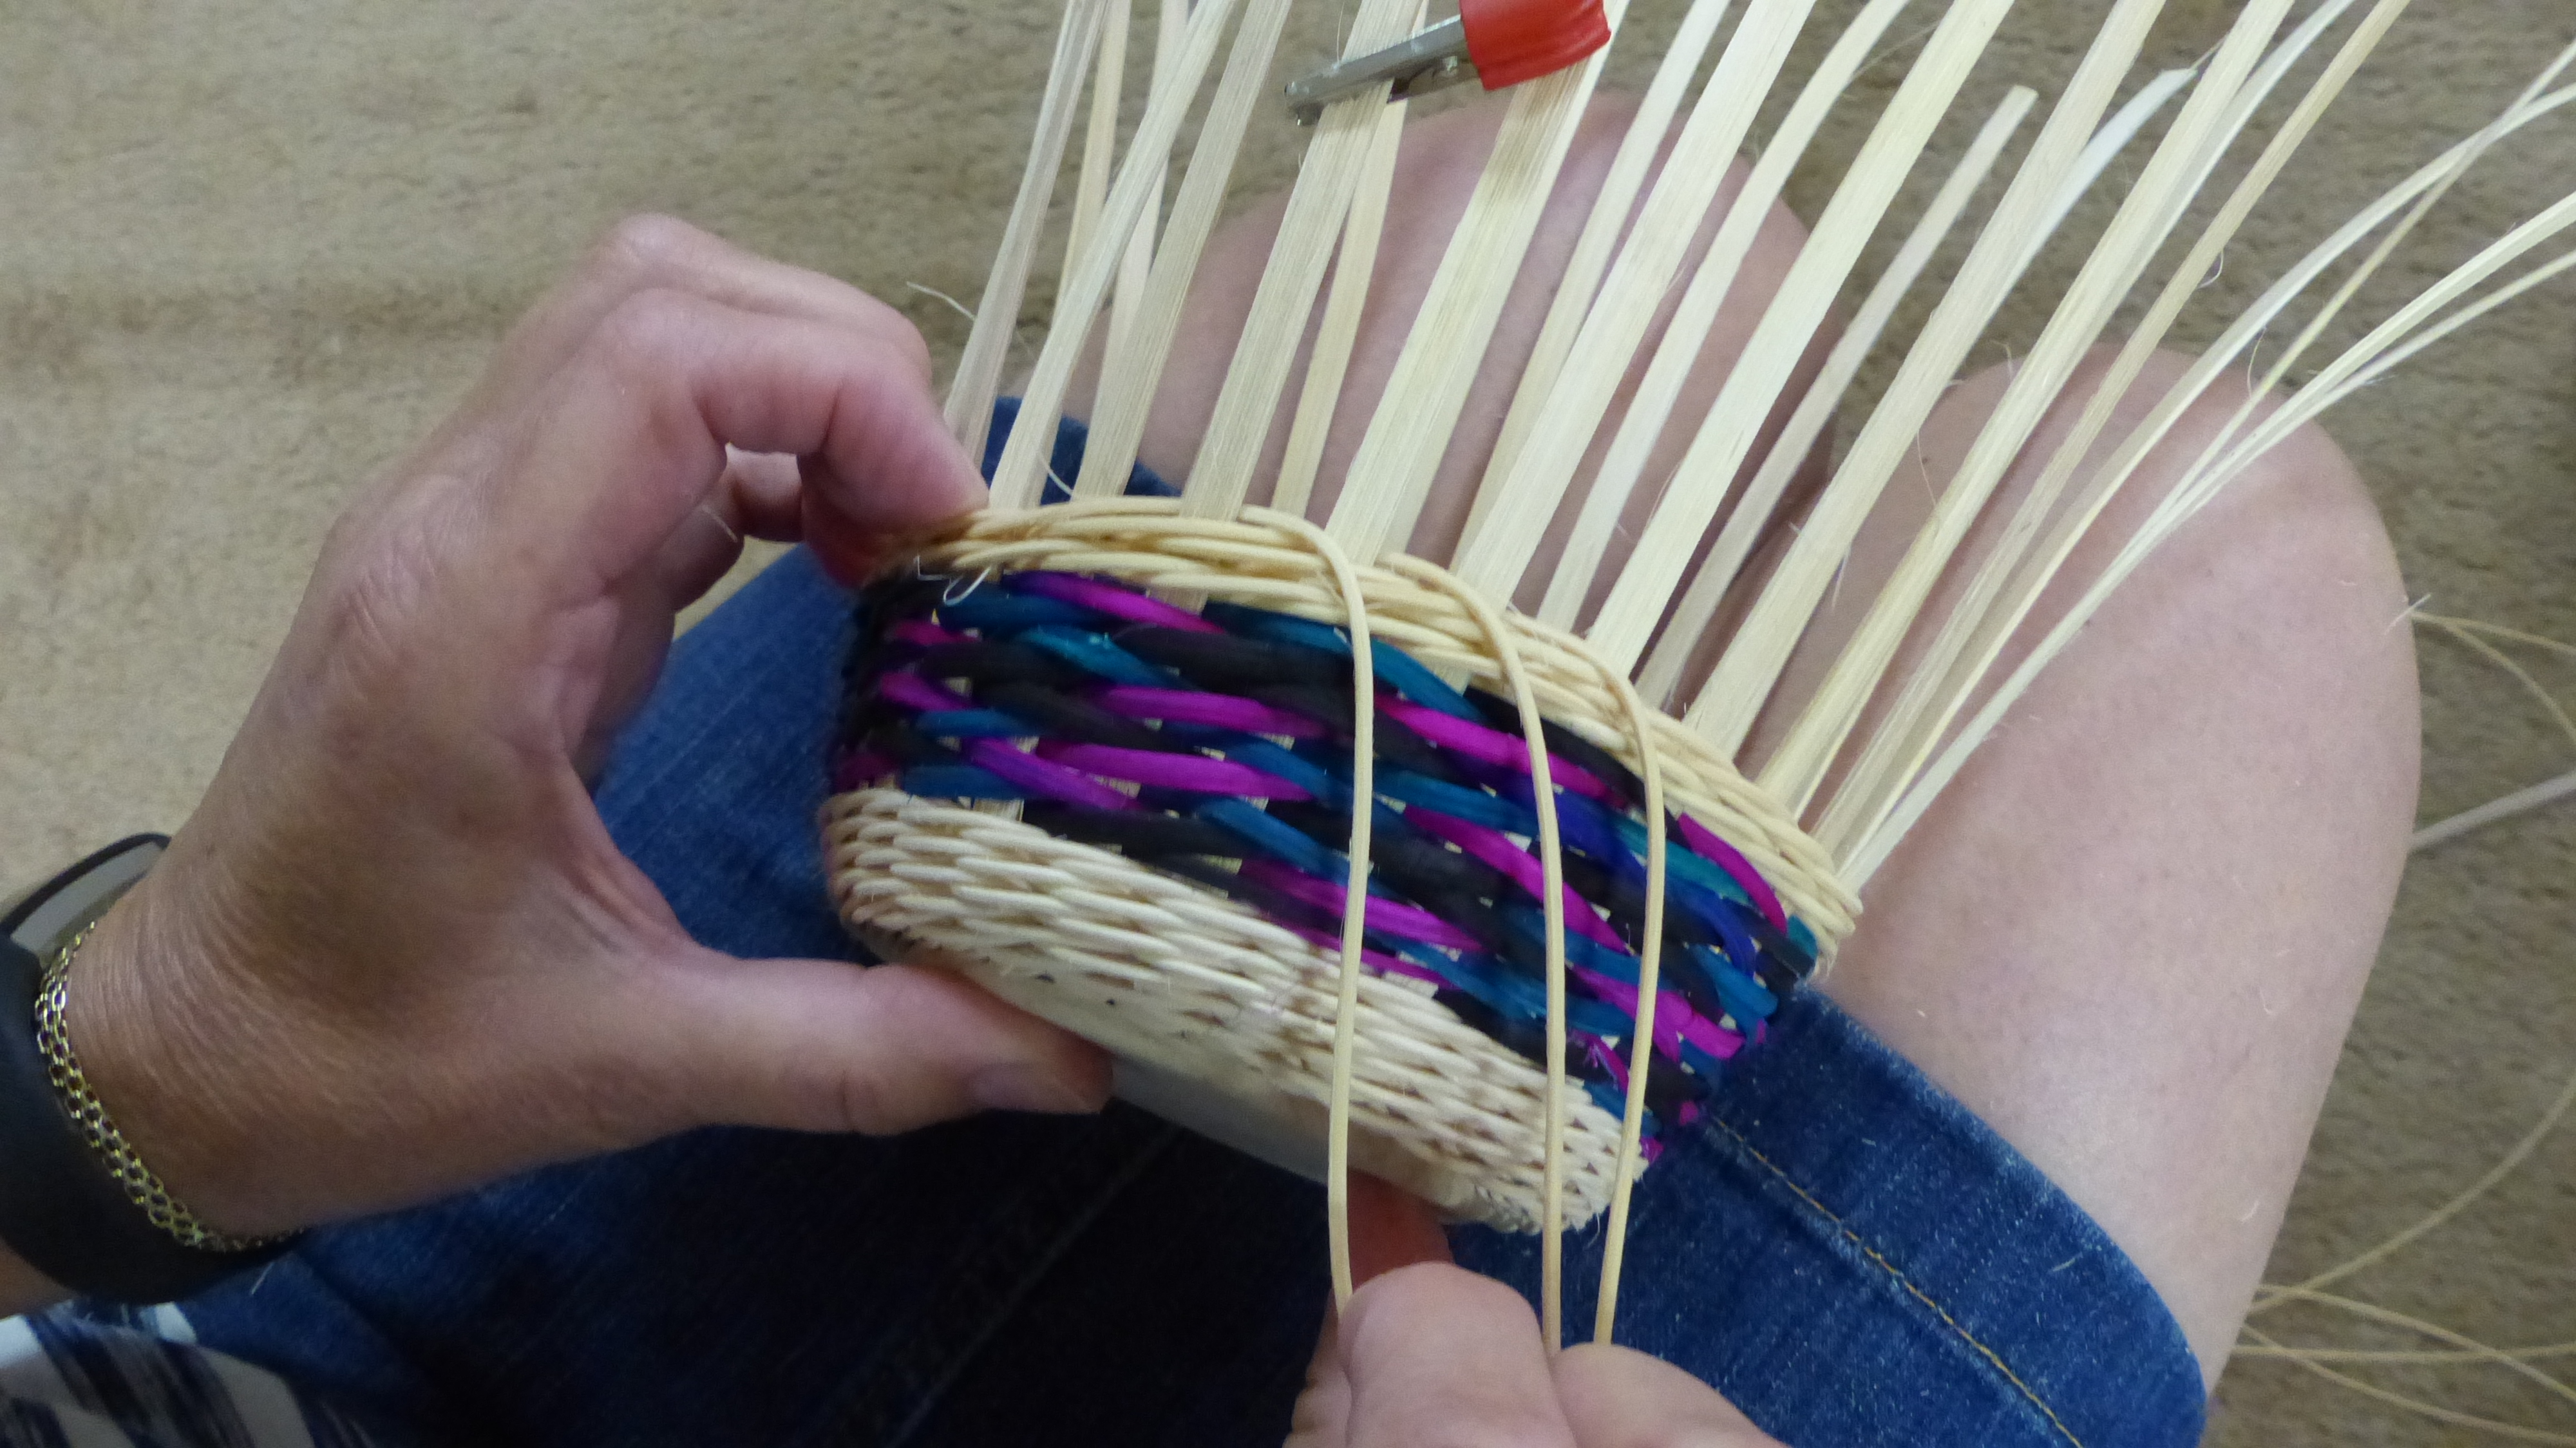
Now pick up weaver that is furthest to the right and weave it over (or in front of ) two spokes, behind one spoke and back to the front. Notice the weave did not change, just which weaver is used.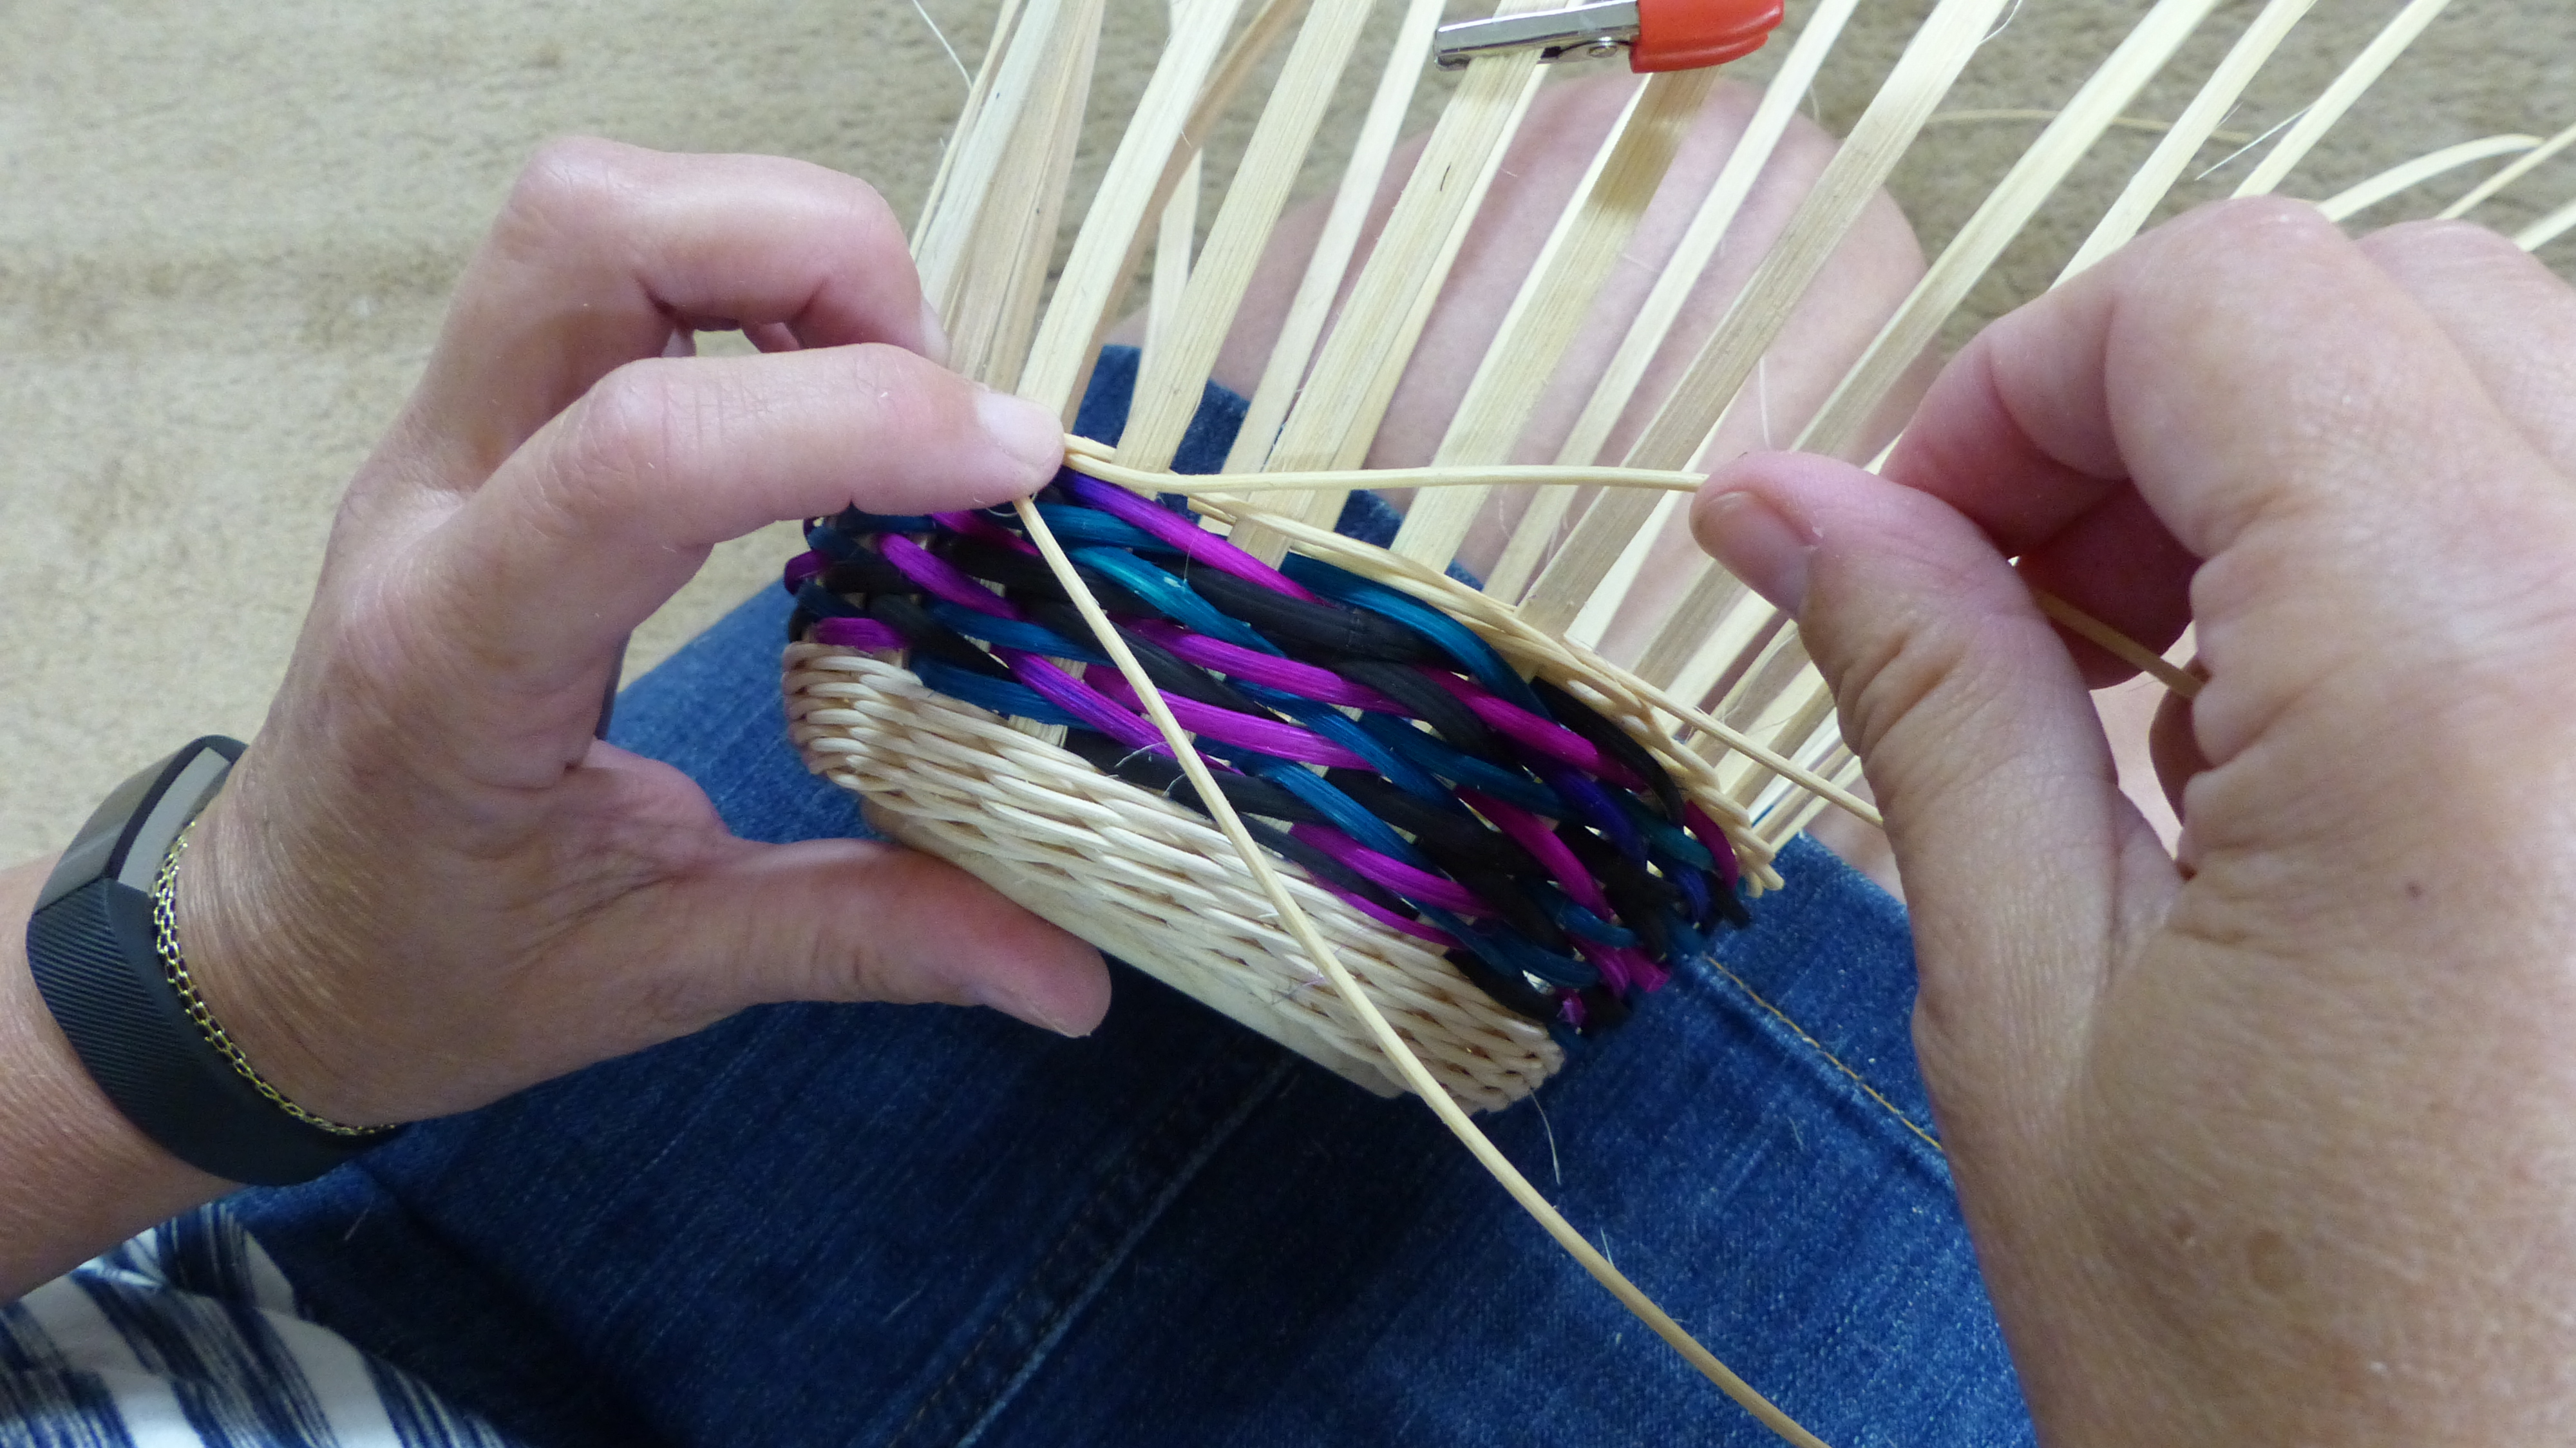
Now there are spaces between the weavers – so we need to catch the remaining weavers up. Pick up the next weaver (the middle weaver) and weave it in (over two and behind one).
One weaver left –
weave it in – over two behind one.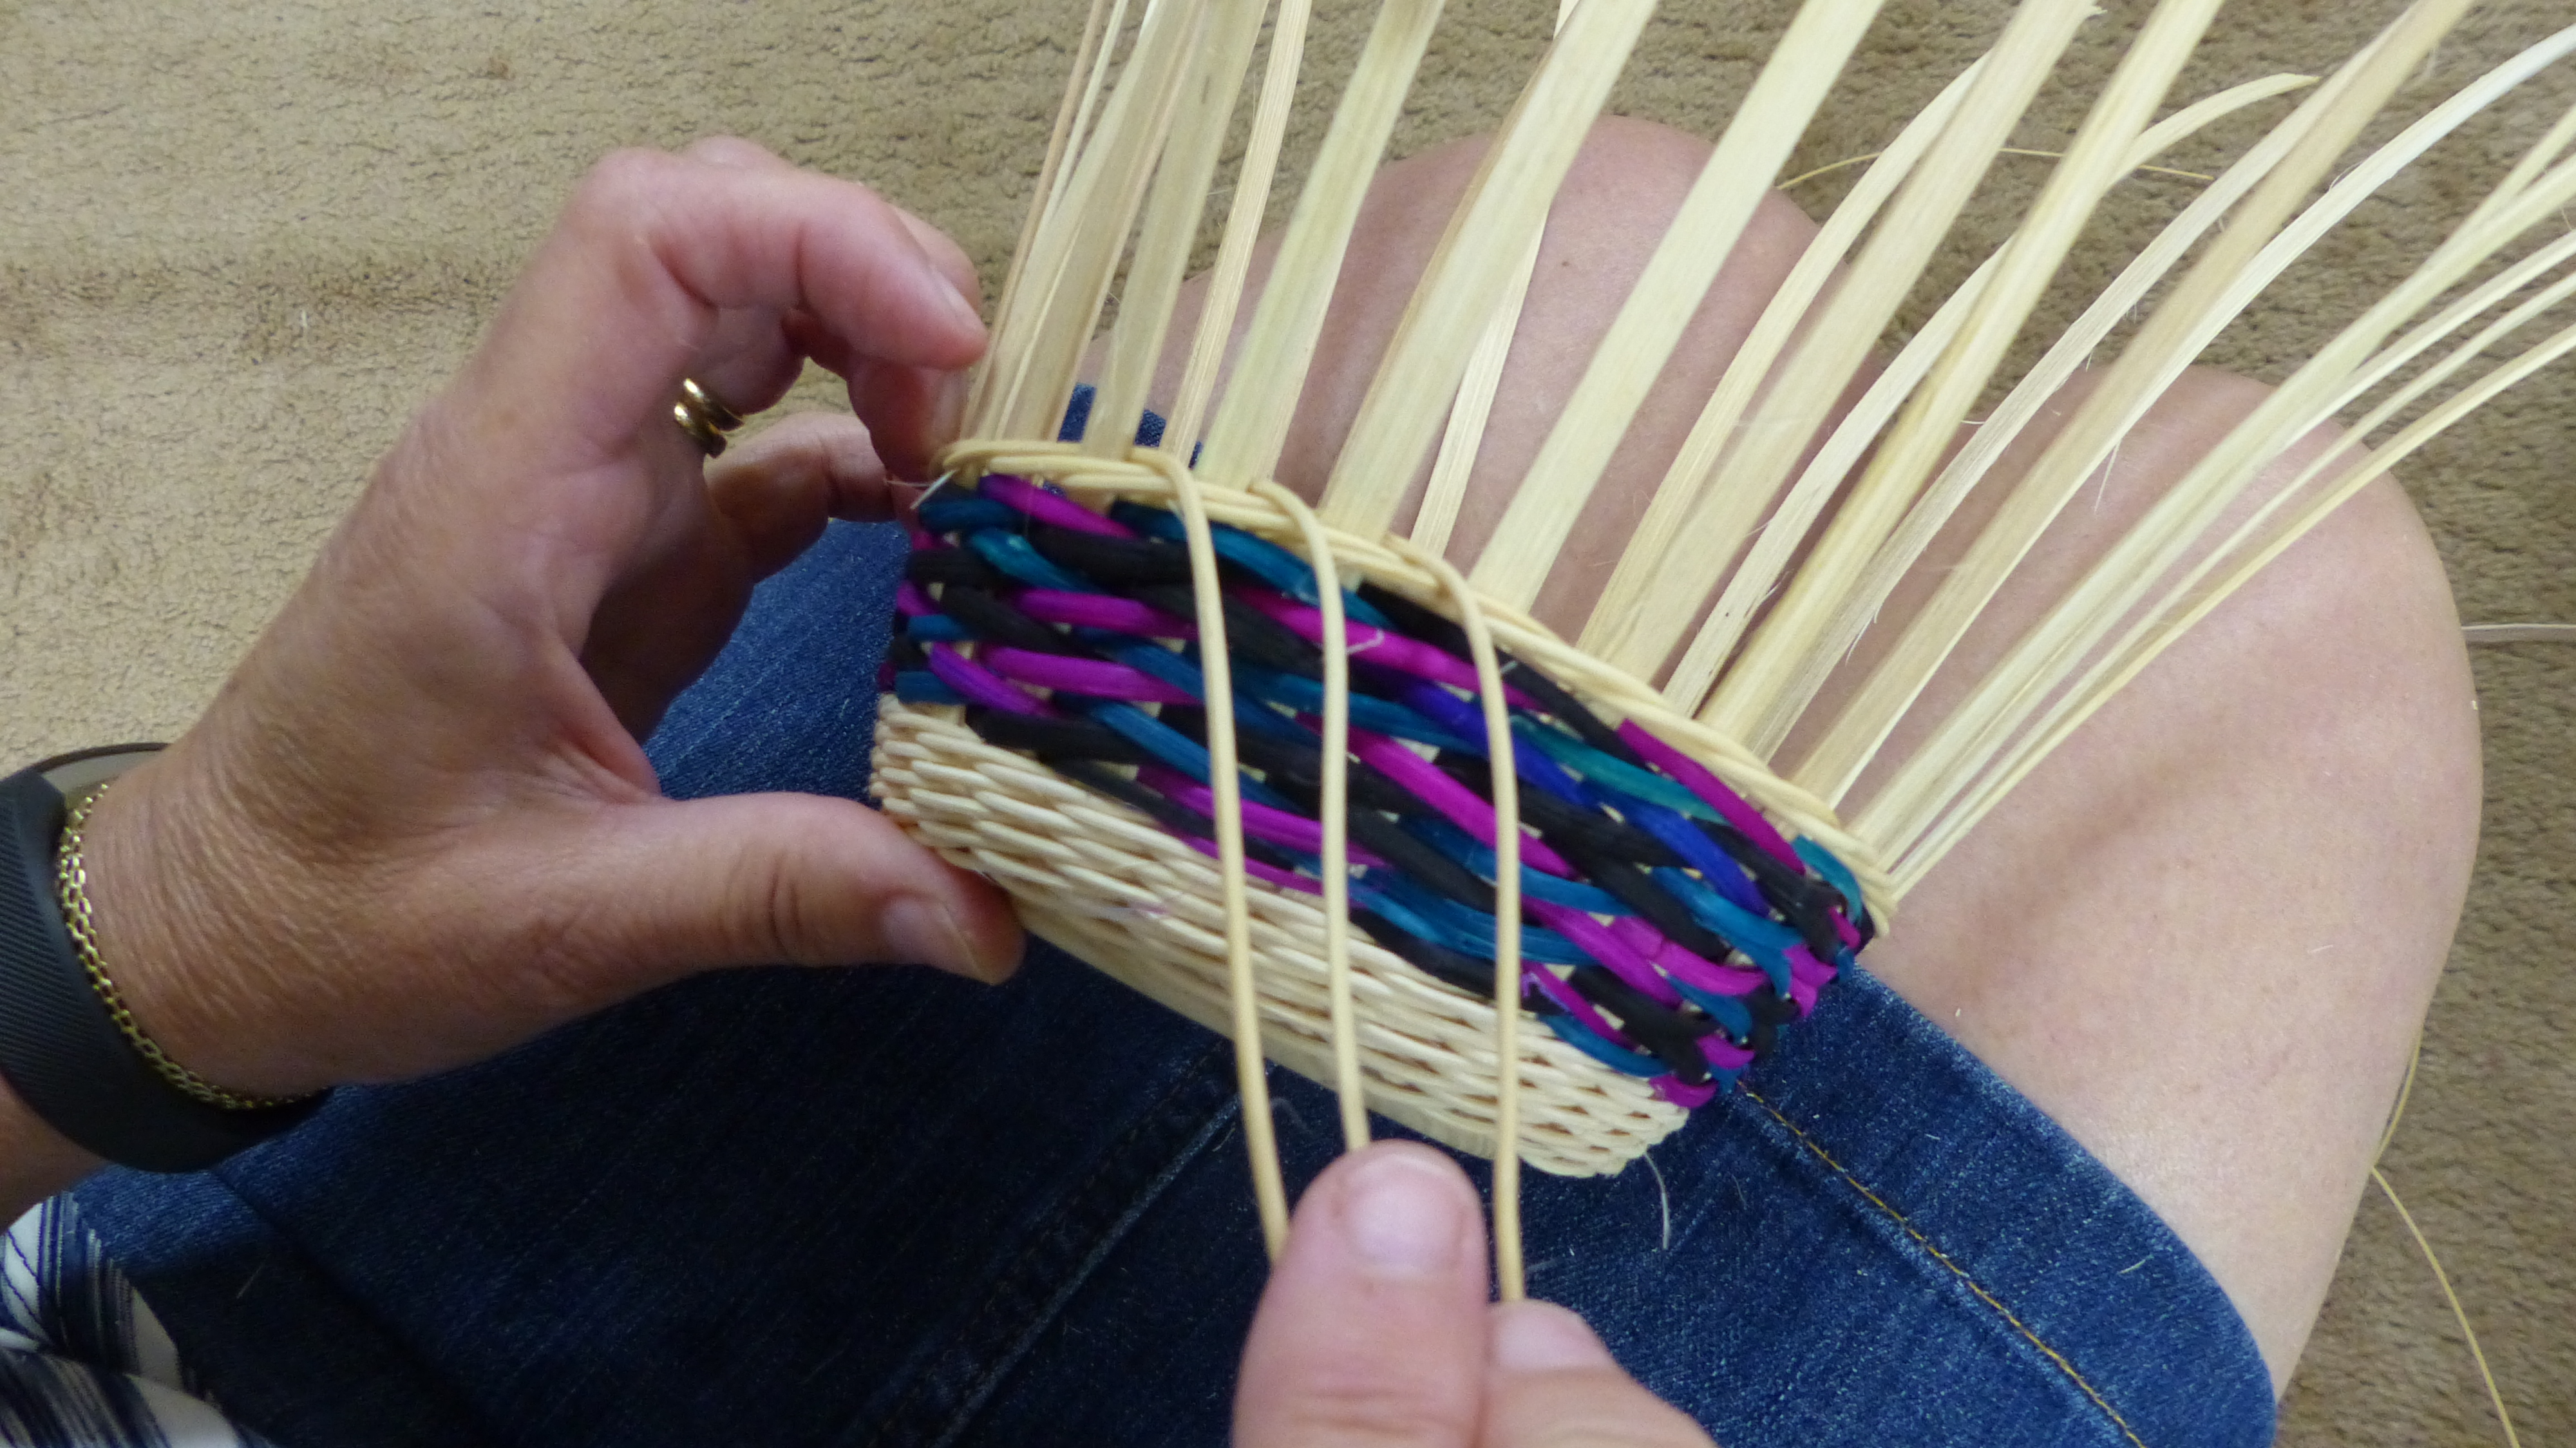
A completed row with step up with all of the weavers coming out of consecutive spaces again.
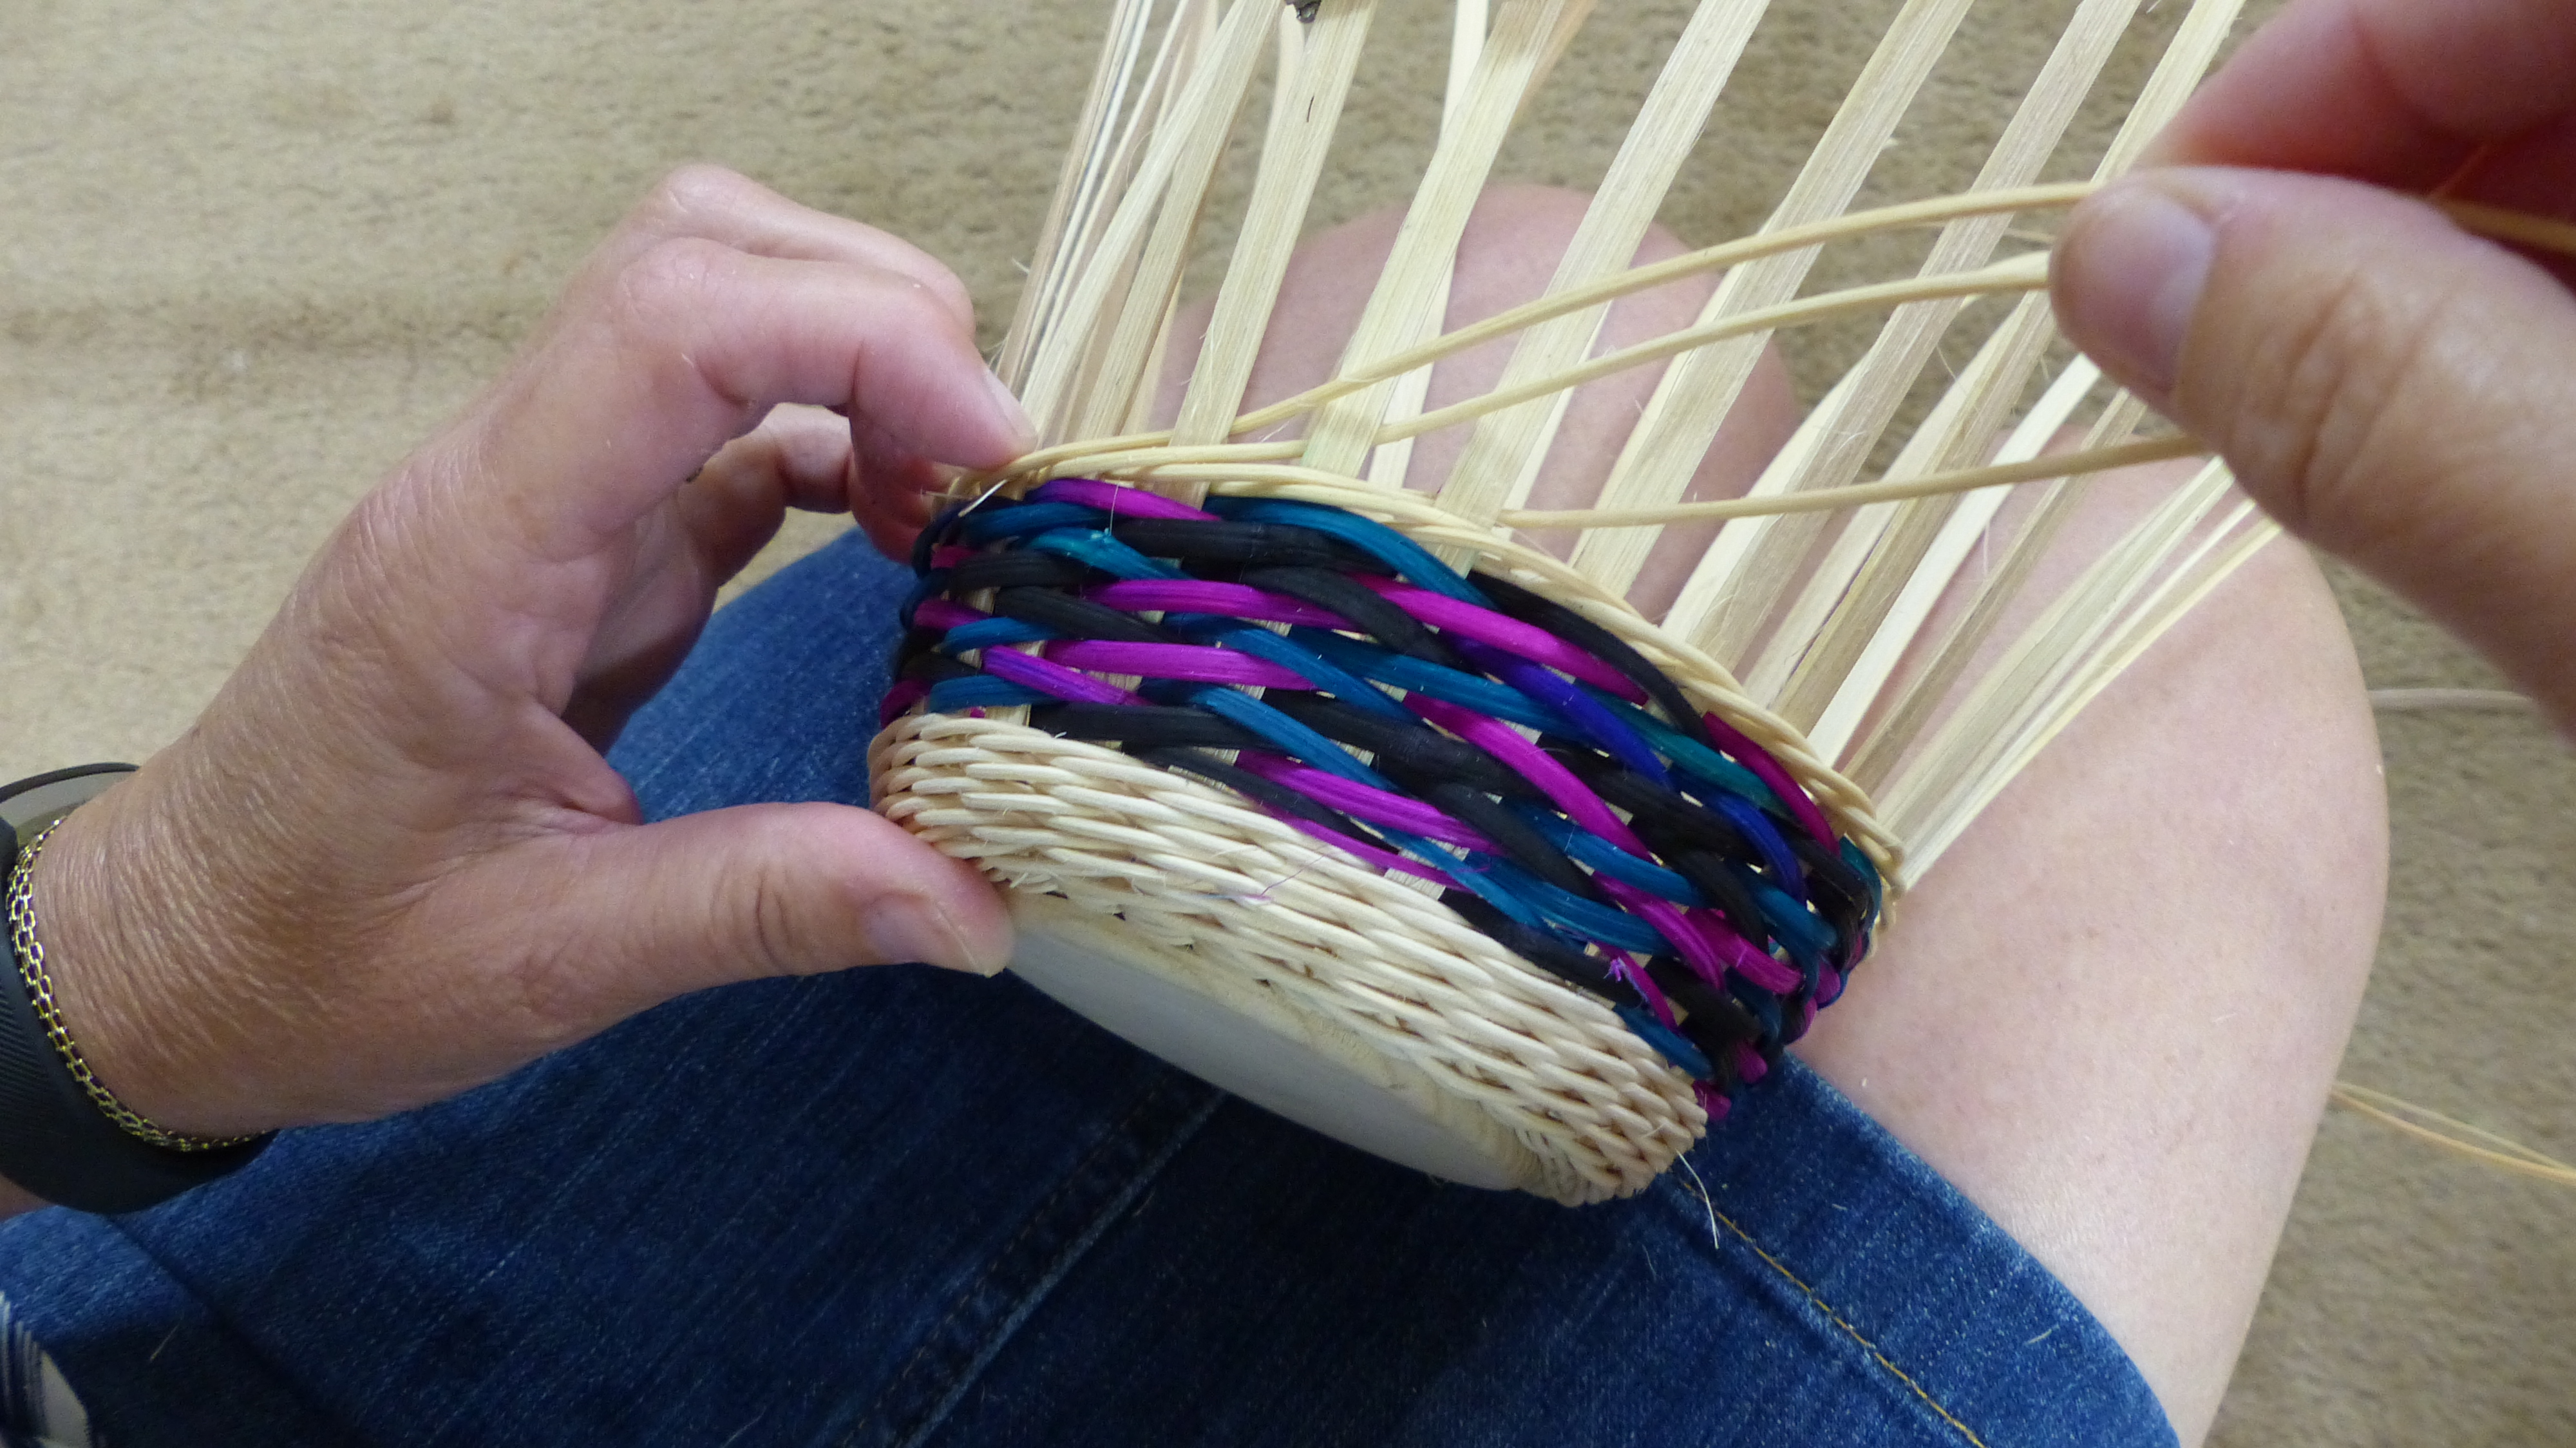
I think of it as finishing a row and stepping up to the next row. SO weave another row and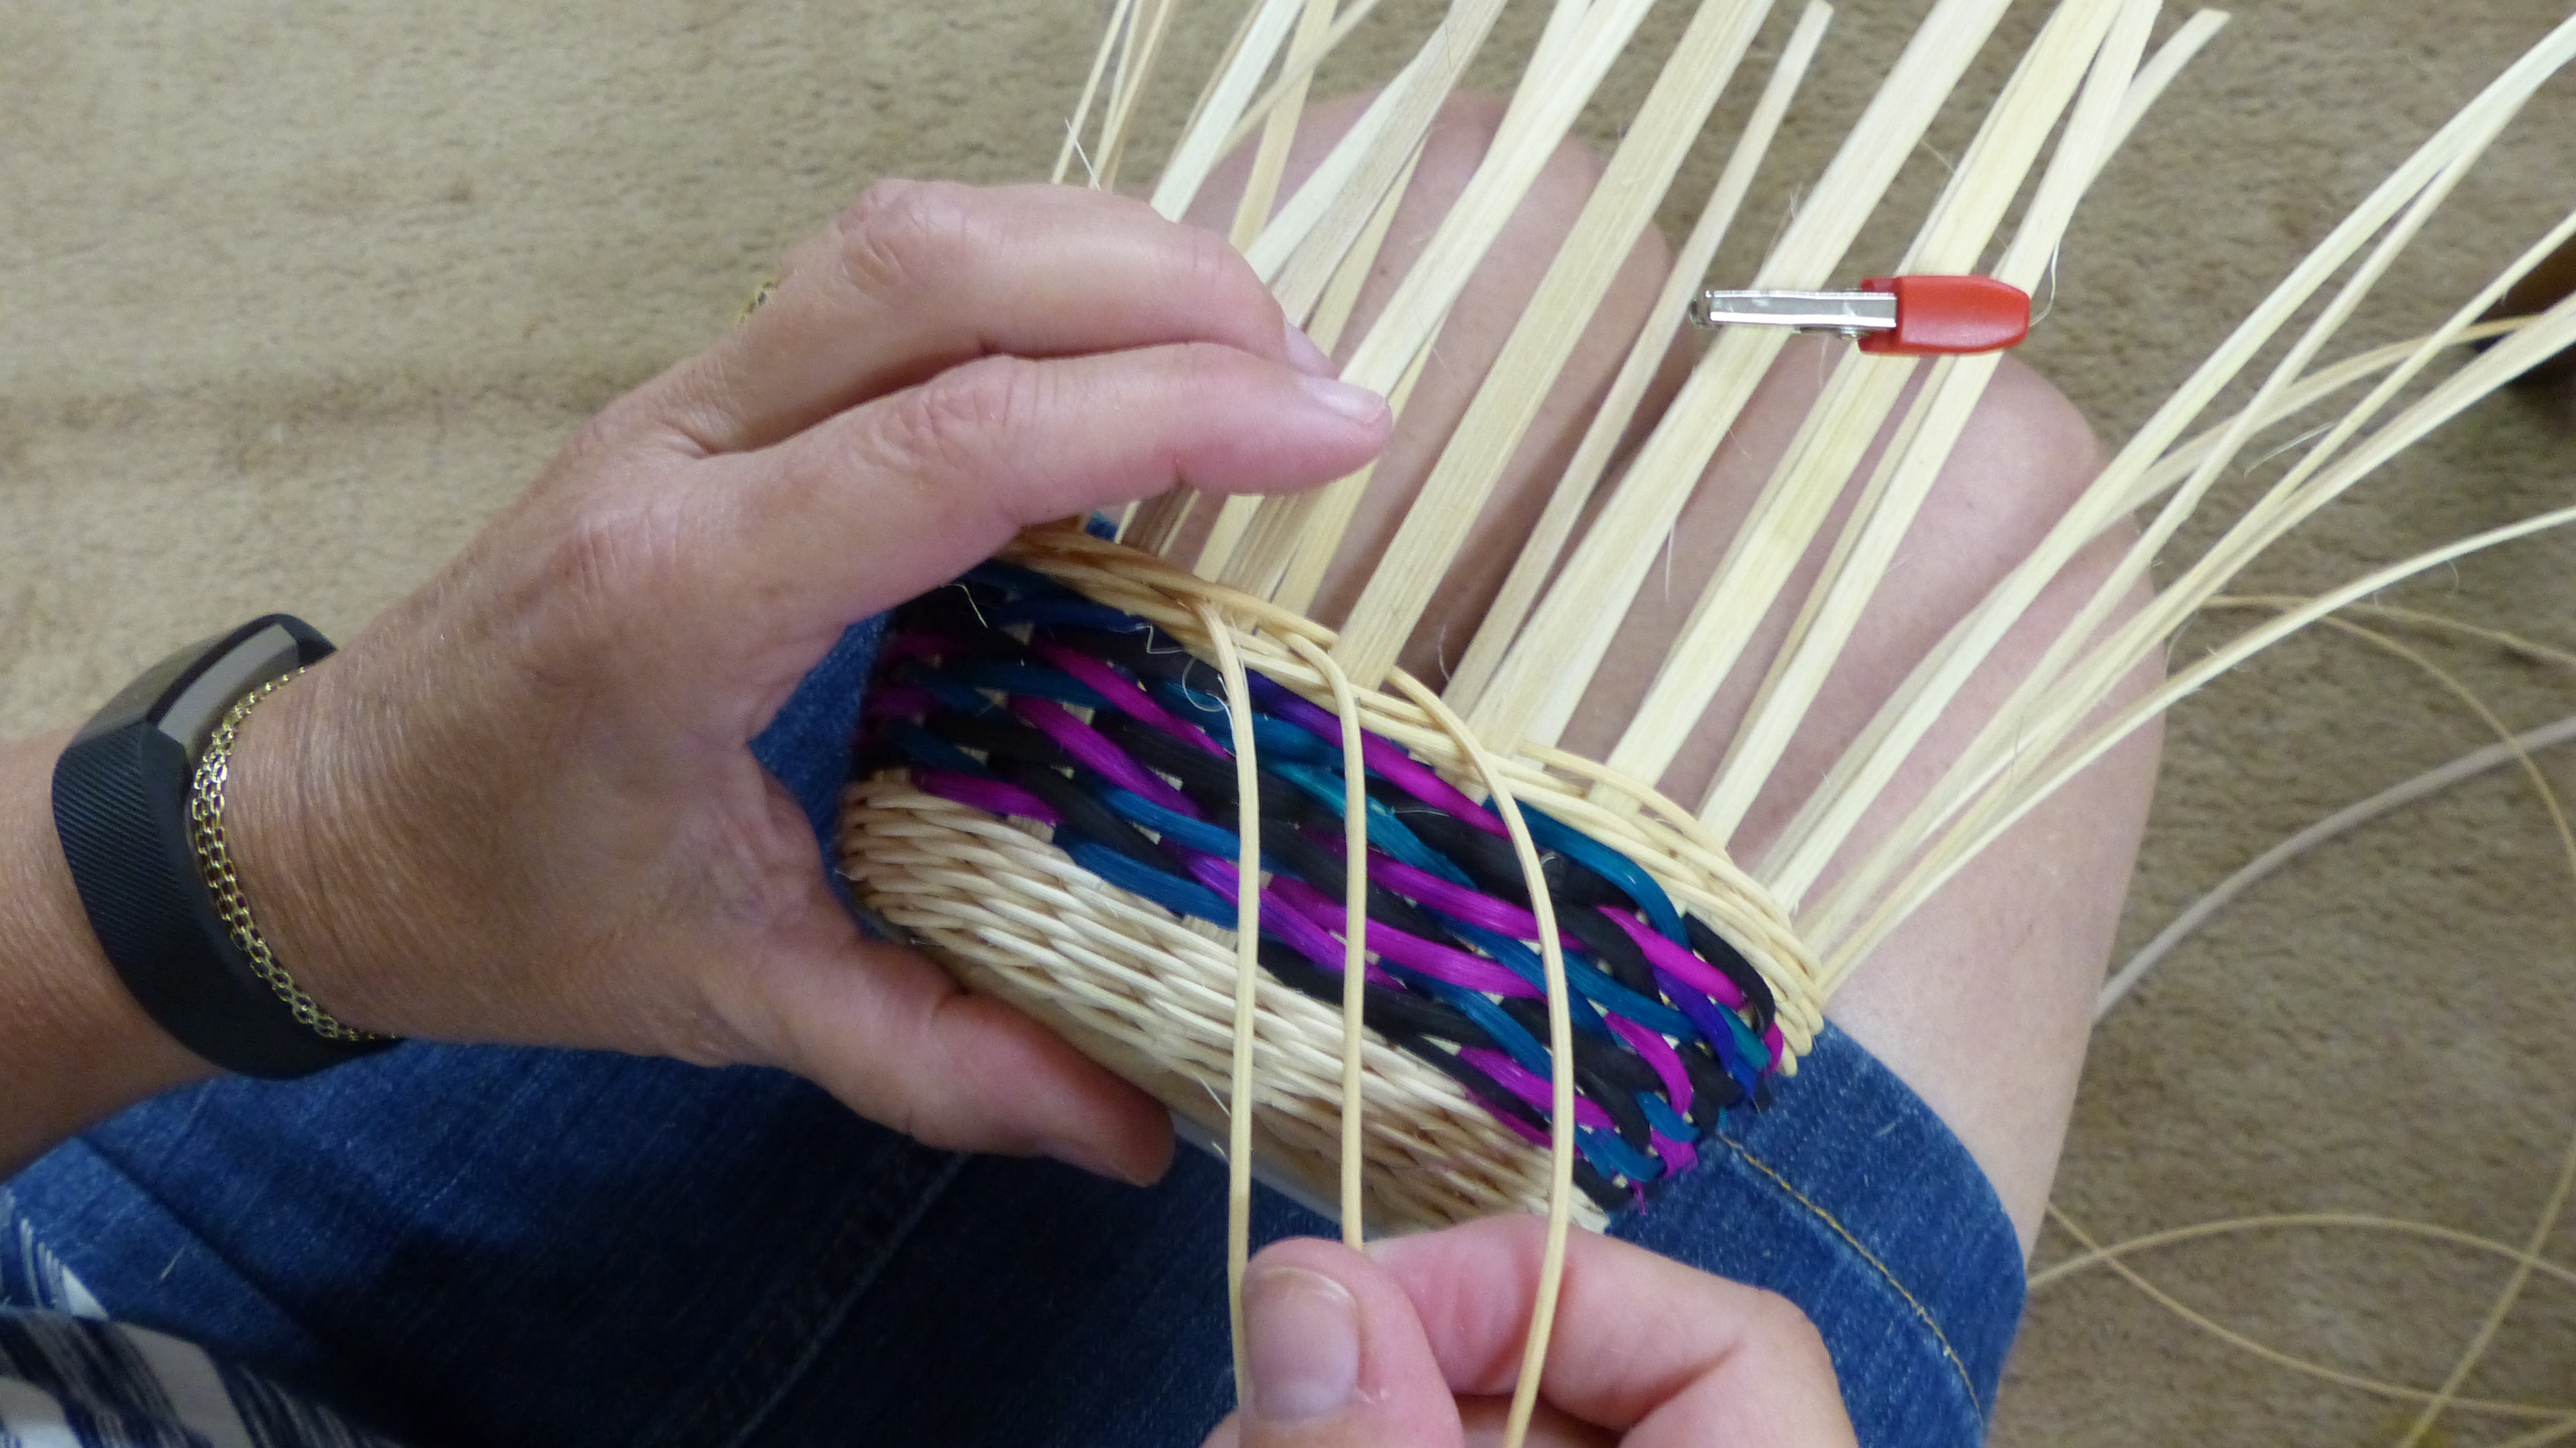
Stopping when you get TO the spoke you started behind (not passed it)
Do the step up and you’re ready for the next row.
If you plan to end a section of twining, leave the weavers inside when doing the step up (weave each weaver over two and behind one – but leave each weaver inside the basket.)
This tutorial focused on doing a step up when triple twining (three-rod wale), however the step up is done the same way regardless of how many weavers you are using.
Starting anywhere on the basket, insert your weavers into consecutive spaces, tucking them behind the spokes to the left of the space. Mark the spoke that your farthest left weaver is behind. Twine until you get to the spoke you stared behind. Remember to go ‘to it, but not passed it”. Then pick up the weaver on the right and weave it to the right (following the same pattern of weaving you had been using before you started the step up). Then weave in the remaining weavers until you have the furthest left one woven in and all of the weavers are coming out of consecutive spaces again – now weave another row.
I hope this was helpful!

The basket I am working on is called Whispers
Thank you, this is indeed helpful. Kind of you to share.
Great pictures. Helps alot.
Thank you for all the instructions! Very helpful, glad I found you, i am enjoying all the patterns I ordered from you!!
Thank you!
Thanks, very helpful.
🙂