Over the years I have met weavers who love lashing a basket and weavers who hate lashing a basket. I used to dislike lashing. For a while I tried finishing a basket anyway I could without lashing a rim, but I always went back to the lashed rim. I love the classic look. Over time I’ve grown to enjoy lashing – mostly because finishing a basket gives me sense of accomplishment, but also because I have acquired a lot of practice and some great lashing tools. So I am going to review my favorite lashing tools and talk about starting and ending the lasher. (There are so many lashing techniques I’ll leave those for future posts.)
The best way to start and end a lasher is to hairpin it over the side of the basket – under the rim and the rim filler.
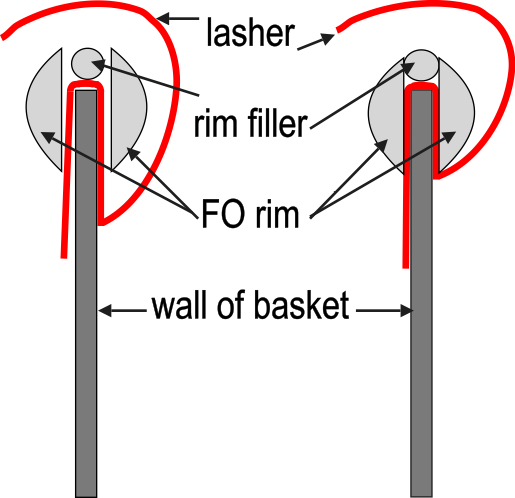
This gives a secure anchor for the lashing. When this technique is repeated at the end of the lashing, it gives the rim a seamless appearance – no beginning, no ending. Looks great. It can be a little tricky to hairpin it over the wall, especially when you are finishing up the rim, however, using a packer or an awl helps to open up a space to slide the lashing in place.
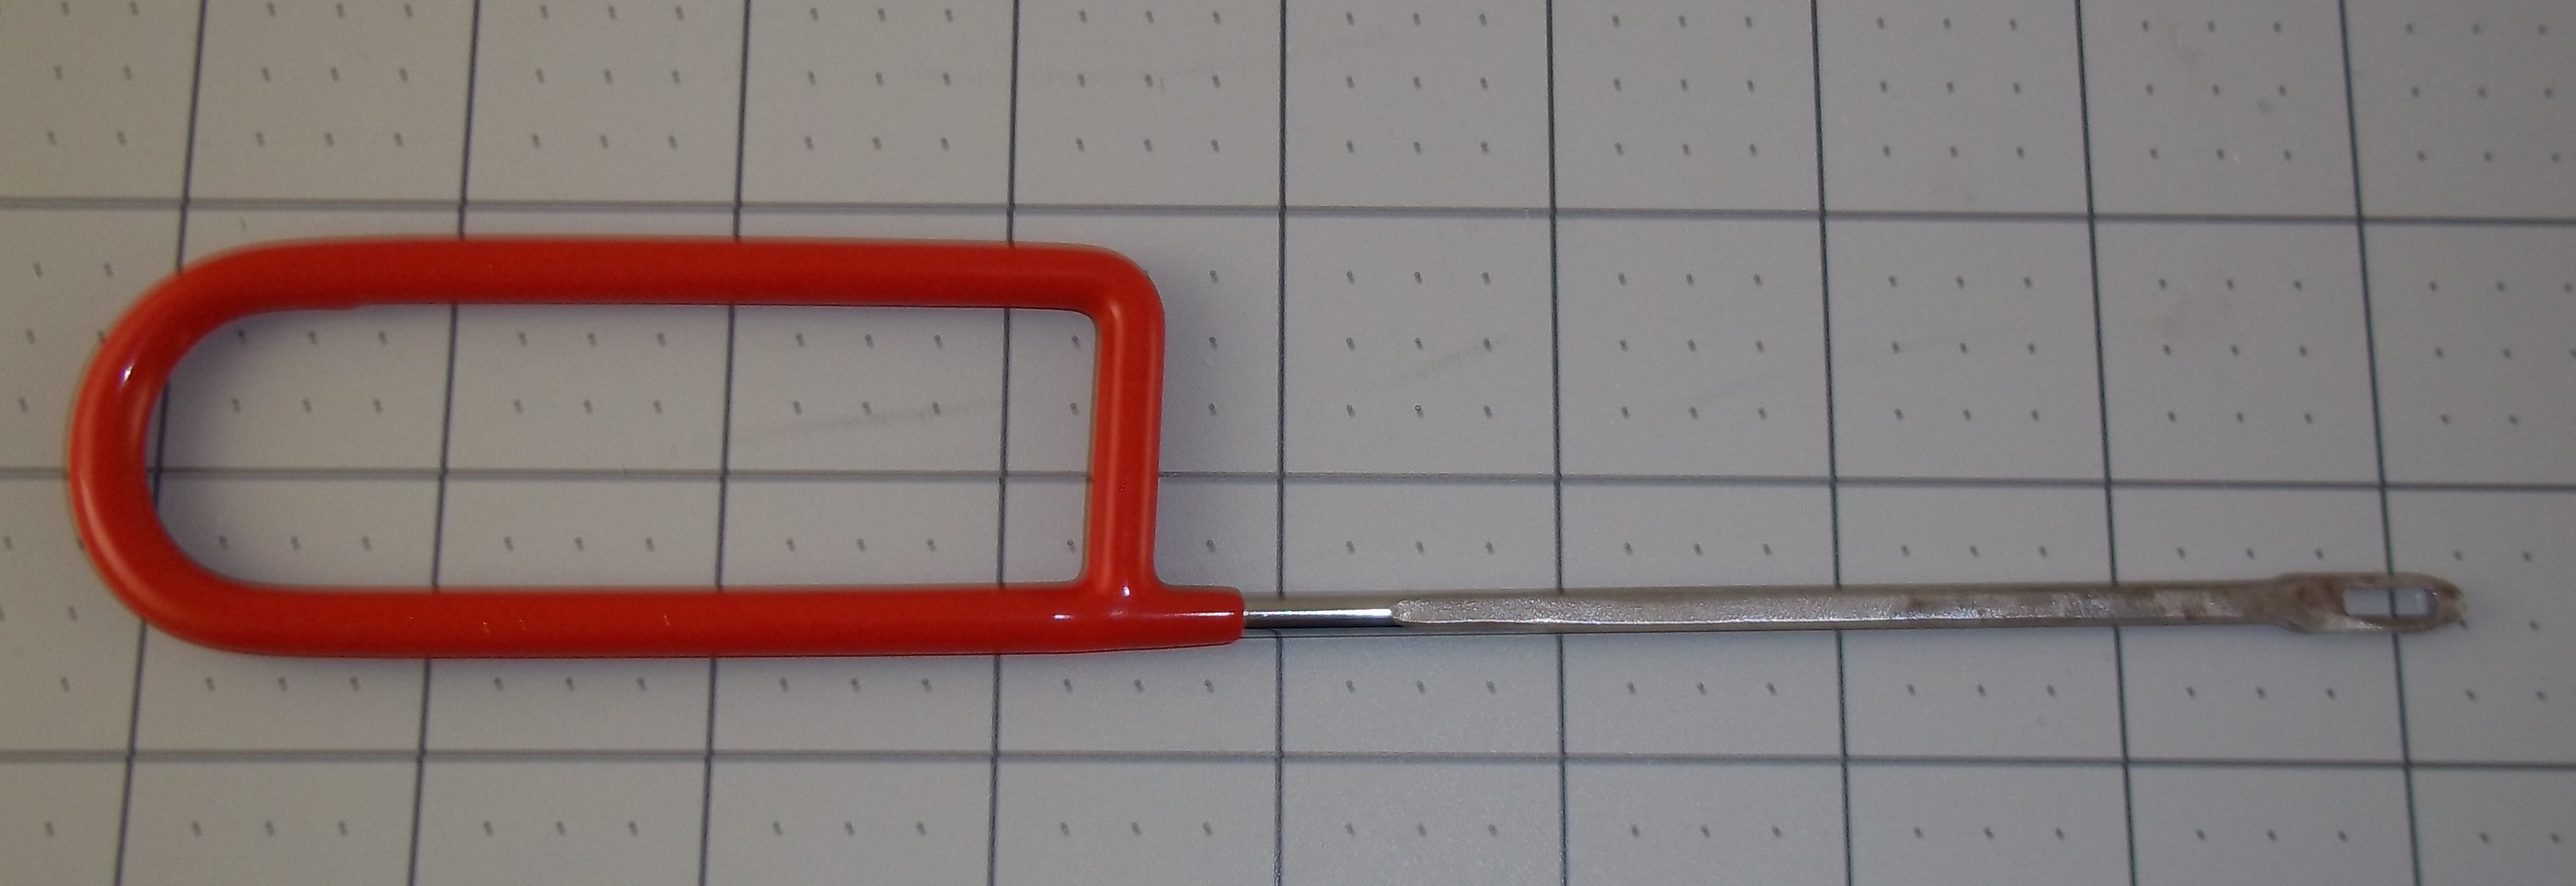 I use my Lash Ender to start and end the lasher. It’s a simple tool, the tool end is a flat piece of metal with a hole, or an eye. It’s thin, so it slides into that tight space without damaging the rim and the eye holds the lasher while it is pulled into place.
To securely anchor the lasher before lashing, insert the Lash Ender between the rims and to the inside of the basket. Notice that the Lash Ender is on the outside of the rim filler (twisted seagrass in this basket). When the Lash Ender is in place, thread the lasher through the eye.


Then pull the lasher up so that the end is sticking straight up out of the rim. Un-thread the Lash Ender and, working from the outside of the basket, slide it straight up under the outside rim and flat against the wall of the basket. Re-thread the Lash Ender and pull it straight down. Now the lasher is hair pinned over the basket wall and under the rim with the tail on the outside of the basket. The basket is ready to be lashed.


Anchoring the lasher can be accomplished using an awl to open up the spaces, but you can see how this tool simplifies the process.
Now you are ready to lash the basket. There are lots of lashing techniques, but basically lashing is wrapping the rim securely against the rim row. This is done by inserting the lasher into the space between two stakes (and between the rim row and top row of weaving), pull the lasher taut, up and over the rim while bringing it over one stake to the left or right. Now insert it into that next space. It is easiest to lash from the outside to the inside of the basket.
An awl or a packer can be used to open up any tight spots. There are also a couple of tools available to help with this. I like to use the EZ Lasher to lash basket.
The E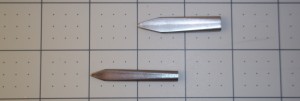 Z Lasher is a metal, needle-like tool: one end is pointed, much like a packer, and the other end is a cavity – the end of the lasher is tucked into this cavity. No need for an awl or a packer to open up a slot; the EZ Lasher works like a needle opening up the space and pulling the lasher along behind it. Just tuck the end of the lasher into the EZ Lasher and start lashing.
This is probably my favorite basketry tool!


When you get all the way around the basket, the lasher should be on the inside of the basket.
The lasher is ended by hair pinning it over the basket wall, under the rim – just like you did at the beginning. But as you can see its a little trickier now because the rim is firmly in place and its difficult to maneuver the lasher under the rim. You can use an straight packer or and awl to open the space and thread the lasher along the awl and into place. However, this is where the Lash Ender is really worth its price tag.
Remove the EZ Lasher and, using the Lash Ender, repeat what you did when you anchored the lasher. With the Lash Ender on the outside of the rim filler, insert it between the rims and to the inside of the basket. When it is in place, thread the lasher through the eye. Pull the Lash Ender up so that the lasher’s end is sticking straight up out of the rim.


Un-thread the Lash Ender and, working from the outside of the basket, slide the Lash Ender straight up under the outside rim and flat against the wall of the basket. Re-thread the Lash Ender and pull it straight down. Now the lasher is hair pinned over the basket wall and under the rim and you are ready to trim your two ends.


Another lashing tool that I have and use on occassion is the Lash Saver or Lash Buddy. I won’t write a tutorial on how to use it because East Troy Basketry already has one, just click here to read it.
These aren’t the only lashing tools out there, they are just my favorites. What do you use?
Where to find these tools:
The Lash Ender is available for $8 from Mary and Jimmy Earl McKinzie at MJE2WEAVE. You can reach them at mje2weave@gmail.com.
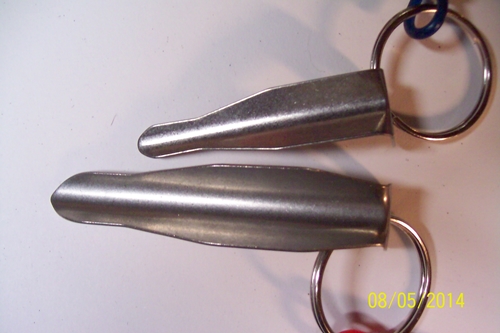
The EZ Lasher is available from Pam and Dan Feix from Feix Family Baskets, find them at www.feixbaskets-crafts.com. The EZ Lasher comes in two sizes: the Original for up to 1/4″ lashers and the Mini is for up to 11/64″. The price is $6.75 each or $12.75 a pair (any two).
The same tool with two different names – the Lash Saver can be purchased at East Troy Basketry and the Lash Buddy can be purchased at Basketpatterns.com
If you buy one, please tell them where you heard about these tools. No, I’m not getting a commission, its just nice for them to know.

*The basket being lashed in this blog is called ‘Wrapped Up’, it uses a lashing technique called V lashing. In a nutshell, V lashing is going into each space twice before moving on to the next space. The pattern will be out soon.
I am a polymer clay artist. I’m learning basket weaving so that I can attach weaving to polymer clay components (eg, polymer clay base with weaving attached; Woven base with polymer clay strip in center of weaving; polymer clay wide rim attached to woven basket, but not over-lashed). Can you please guide me as to attachment technique(s).
I would suggest finding a local basket teacher to collaborate with.
I am looking for the patterns you offered for what looks like “arrows ” done in 3 different patterns.
Thank you in advance.
I think you might be referring to the Braid Obsession and Braided Muffin basket patterns.